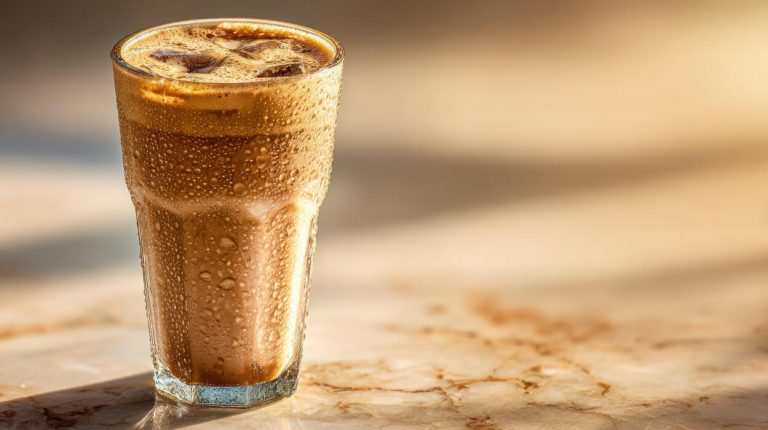
How To Make Good Cold Brew
Tired of bitter, watered-down iced coffee? Learning how to make good cold brew at home is surprisingly simple and saves you a fortune. The secret lies in the right coffee-to-water ratio and a bit of patience. Whether you use a French press or a simple jar, you will find the quick answers you need to brew like a pro.
What is cold brew coffee?
The difference between cold brew and iced coffee
To make good cold brew, you must understand that it is a unique brewing method rather than just chilled coffee. While iced coffee is brewed hot and poured over ice, cold brew relies on time instead of heat to extract flavor.
This involves steeping coarsely ground beans in room temperature or cold water for 12 to 24 hours. The result is a concentrated coffee syrup that provides a much smoother, heavier mouthfeel compared to the diluted nature of traditional iced coffee.
Because heat is never applied, the volatile oils do not oxidize in the same way, preventing the bitter, watery aftertaste often found in iced drip coffee. For the best results at home, always use a coarse grind size similar to sea salt to ensure a clean filtration process.
This method allows the natural sweetness of the bean to shine through without the harshness associated with rapid temperature changes, making it the ideal base for creamy specialty drinks.
Why cold brew tastes less acidic
The secret to a mellow, stomach-friendly cup lies in the chemistry of cold extraction. High temperatures used in traditional brewing release specific acidic compounds and oils that can taste sharp or sour.
By using cold water, you significantly reduce the solubility of these acidic elements, resulting in a brew that is roughly 60 to 70 percent less acidic than hot coffee. This makes cold brew an excellent solution for coffee lovers with sensitive stomachs or acid reflux.
To maximize this benefit, focus on using dark roast beans, which naturally contain fewer acidic precursors than light roasts. The extended steeping time allows for a slow, gentle extraction of chocolatey and nutty notes while leaving the harsh, tannic acids behind in the grounds.
By mastering this low-acid technique, you create a naturally sweet profile that requires less sugar or dairy to be palatable, highlighting the inherent quality of the coffee beans themselves for a truly refined and smooth drinking experience every time.
Caffeine content in cold brew vs drip coffee
A common misconception is that cold brew is always weaker because it is served cold, but the reality is quite the opposite. Because cold brew uses a higher coffee-to-water ratio—often 1:4 or 1:8 compared to the 1:16 used in drip coffee—the resulting concentrate is exceptionally potent.
While the cold water extracts caffeine more slowly, the extended contact time between the water and the grounds ensures a high caffeine yield. When you drink a standard serving of cold brew, you are often consuming more caffeine per ounce than you would in a standard cup of drip coffee.
To manage your intake effectively, it is crucial to dilute the concentrate with water, milk, or ice according to your personal preference. This control over strength is what makes cold brew so versatile for home baristas.
Always remember that the total brewing duration and bean variety will impact the final kick, so experiment with steeping times to find your perfect balance of energy and flavor profile.
Essential equipment for making cold brew at home

Best jars and containers to use
To make high-quality cold brew at home, the vessel you choose plays a critical role in maintaining flavor purity. Glass Mason jars are the gold standard because they are non-reactive, easy to clean, and do not retain odors from previous batches.
If you are brewing larger quantities, a dedicated cold brew carafe with a built-in spout can simplify the process, but any airtight container will work as long as it prevents oxygen from staling the beans during the long 12 to 24-hour steep time.
Avoid using plastic containers if possible, as they can sometimes leach chemicals or subtle flavors into the concentrate over long periods. Ensure your chosen container has a wide mouth to make adding coarse grounds and pouring water effortless.
Using a transparent container also allows you to monitor the color and sediment levels easily. By selecting a sturdy, airtight glass vessel, you create the perfect environment for a smooth, low-acid extraction that highlights the unique tasting notes of your coffee beans.
Filtering tools: paper vs metal vs cloth
The filtration method you select defines the final texture and clarity of your cold brew. Paper filters are excellent for producing a crisp, clean cup because they trap fine particles and absorb most of the coffee oils, resulting in a lighter body.
If you prefer a rich, full-bodied concentrate, a metal mesh filter is the better choice; it allows natural oils and microscopic fines to pass through, creating a silky mouthfeel.
For those seeking a balance between the two, cloth filters or nut milk bags offer a traditional approach that removes sediment while allowing some oils to remain for a complex profile.
Regardless of the material, the key is to ensure a thorough double-strain if you notice too much sludge at the bottom of your jar. Experimenting with these tools allows you to customize the viscosity and brightness of the brew.
High-quality filtration ensures that your homemade concentrate remains fresh in the refrigerator for up to two weeks without becoming bitter or gritty.
Why a burr grinder is necessary
Achieving the perfect cold brew requires an exceptionally consistent coarse grind, which only a burr grinder can reliably provide. Unlike blade grinders that hack beans into uneven shards and fine dust, a burr grinder uses two revolving surfaces to crush beans into uniform pieces resembling kosher salt or sea salt.
This uniformity is vital because the long steeping process will over-extract fine particles, leading to an unpleasant, bitter aftertaste. By using a burr mill, you ensure that the water saturates every grain evenly, resulting in a balanced and sweet extraction.
Investing in a manual or electric burr grinder gives you total control over the particle size, which is the most important variable in home brewing. If your grounds are too fine, the filter will clog; if they are too coarse, the flavor will be weak and watery.
Maintaining a precise grind size is the secret step that separates professional-grade cold brew from a mediocre batch, ensuring every sip is smooth, chocolatey, and completely free of bitterness.
Choosing the best coffee beans for cold brew

Why dark roasts work best for cold extraction
Selecting the right roast profile is the foundation of a successful batch. For cold brew, dark roasts are generally preferred because the long steeping process excels at extracting deep, chocolatey, and nutty notes without the harsh bitterness often found in hot brewing.
Darker beans have a more porous structure due to the extended roasting time, which allows the cold water to penetrate and dissolve solubles more effectively over twelve to twenty-four hours.
While light roasts are prized for their delicate acidity and floral complexity, these nuances often get lost or turn unpleasantly sour during cold extraction. By sticking with a medium-to-dark roast, you ensure a rich, syrupy body and a naturally sweet profile that pairs perfectly with milk or cream.
Look for flavor descriptions like caramel, cocoa, or toasted nuts on the packaging to guarantee a bold flavor that stands up to dilution from ice. This specific selection process transforms a simple beverage into a cafe-quality experience at home.
The importance of a coarse grind size
The mechanical texture of your coffee is just as vital as the bean itself. To achieve a clean, sediment-free cup, you must use a consistent coarse grind, similar in texture to sea salt or peppercorns.
Using a fine grind will lead to over-extraction, resulting in a muddy, excessively bitter concentrate that is difficult to filter. A coarse grind allows the water to flow freely around the particles, ensuring a slow and gentle extraction of flavors.
This prevents the extraction of astringent tannins that can ruin the smooth finish of your drink. If you have a burr grinder at home, set it to the highest setting to maintain uniformity; if buying pre-ground, ensure it is specifically labeled for French press or cold brew.
Using the correct surface area ensures that the natural oils are released gradually, maintaining the integrity of the bean’s profile. Proper filtration becomes much easier with larger grounds, leaving you with a crystal-clear liquid that highlights the high-quality beans you have carefully selected for your recipe.
Freshness and storage tips for your beans
Even the best beans will produce a lackluster drink if they have gone stale. To maximize flavor, always prioritize freshly roasted whole beans and grind them immediately before you begin the steeping process.
Exposure to oxygen is the primary enemy of coffee flavor, leading to oxidation that strips away the aromatic compounds responsible for that signature smell and taste.
Store your beans in an airtight, opaque container kept in a cool, dark place like a pantry rather than the refrigerator or freezer, which can introduce moisture and unwanted odors.
Check the ‘roasted on’ date on the bag; ideally, you should use the beans within two to four weeks of that date for peak vibrancy. Since cold brew uses a high ratio of coffee to water, any stale or off-flavors will be significantly magnified in the final concentrate.
By maintaining strict storage habits and using fresh ingredients, you ensure that every glass of cold brew is packed with the intense, smooth flavors that make this brewing method so popular among enthusiasts.
The perfect cold brew ratio and timing
Standard coffee-to-water ratios for concentrate
To achieve a professional-grade cold brew, the most reliable starting point is a 1:4 coffee-to-water ratio by weight. This measurement creates a heavy concentrate that allows for maximum versatility, as it can be diluted later with water, milk, or ice according to your personal preference.
For those using volume measurements, this roughly translates to one cup of coarsely ground coffee for every four cups of filtered water. Using a scale is highly recommended to ensure consistency between batches, as the density of different coffee beans can vary significantly.
If you prefer a ready-to-drink brew that does not require further dilution, you can adjust the ratio to 1:8 or 1:10, but most enthusiasts stick to the concentrate method to save space in the refrigerator and preserve the bold, chocolatey notes characteristic of a long soak.
Always use coarse grounds resembling sea salt to prevent over-extraction and ensure a clean, sediment-free finish after the final filtration process.
How long to steep for maximum flavor
Timing is the most critical variable when extracting the delicate flavors of the bean without the bitterness associated with hot brewing. For a standard coarse grind, the ideal steeping window is between 12 and 18 hours.
Shorter durations, such as 8 to 10 hours, often result in a weak, underdeveloped profile that lacks the signature body of cold brew.
Conversely, pushing the extraction beyond 24 hours can lead to unpleasant woody or metallic flavors as the water begins to pull out tannins and bitter compounds that are usually avoided in cold extraction.
If you are using a slightly finer grind, you should aim for the lower end of the spectrum, around 12 to 14 hours, to prevent over-extraction.
The key is to taste the brew periodically once you hit the 12-hour mark; when the coffee tastes rich and smooth with a natural sweetness, it is time to strain the grounds immediately to stop the brewing process and lock in the flavor.
Steeping on the counter vs in the fridge
Where you choose to store your brewing vessel significantly impacts the extraction speed and the final taste profile of your coffee.
Steeping at room temperature on the counter is generally more efficient, as the warmer environment accelerates the chemical breakdown of the grounds, usually reaching peak flavor in about 12 to 15 hours. This method often yields a brighter, more aromatic profile.
However, if you choose to steep inside the refrigerator, the cold environment slows down the extraction process considerably, requiring a longer duration of 18 to 24 hours to reach the same strength.
Refrigerated brewing is often preferred for its ability to produce an incredibly smooth, low-acid finish, and it keeps the beverage chilled and ready for immediate consumption. Regardless of the location, ensure the container is tightly sealed to prevent the coffee from absorbing odors from other foods.
Most experts recommend the counter for speed and the fridge for a mellow, foolproof result that is less likely to over-extract.
Step-by-step guide to making cold brew

Mixing your grounds and water
To achieve a smooth and balanced profile, start with a coarse grind consistency similar to sea salt, which prevents over-extraction and bitterness during the long soaking period. Use a 1:4 coffee-to-water ratio for a concentrated brew that can be diluted later, or a 1:8 ratio for a ready-to-drink version.
Place your grounds into a clean glass jar or specialized cold brew carafe, then pour filtered room-temperature water slowly over the top. It is vital to ensure all grounds are fully saturated; use a long spoon to gently stir the mixture, breaking up any dry clumps without over-agitating the sediment.
Once mixed, cover the container tightly to prevent any refrigerator odors from seeping into the liquid. Allow the mixture to steep in a cool, dark place or the fridge for 12 to 18 hours.
This slow process extracts the deep chocolate and nutty notes while leaving behind the harsh acidity found in hot coffee methods, resulting in a naturally sweet and incredibly bold base.
The best way to filter out sediment
Achieving a crystal-clear cup requires a dual-filtration approach to remove fine particulates that cause cloudiness and a sandy mouthfeel. Begin by pouring the steeped concentrate through a fine-mesh metal sieve to catch the large spent grounds.
To remove the remaining silty residue, perform a second pass by lining a funnel with a rinsed paper coffee filter or a clean flour sack towel. This step is crucial because leftover fines will continue to extract, eventually making your brew taste muddy and bitter.
Let gravity do the work; avoid the temptation to squeeze the filter, as this forces bitter oils and fine dust into your final product.
If you find the process too slow, you can use a French Press to plunge the grounds first, but a secondary paper filter is still recommended for the cleanest possible finish.
Taking the time to filter properly ensures that your cold brew remains vibrant and light on the palate, showcasing the complex flavor profile of your chosen beans without any distracting grit.
Storing your finished brew for freshness
Once your cold brew is perfectly filtered, transfer the liquid into an airtight glass container like a Mason jar or a swing-top bottle. Glass is the superior choice for storage because it does not leach flavors or retain odors from previous uses, ensuring your coffee tastes pure.
Keep the container in the back of the refrigerator, where the temperature is most consistent, rather than in the door.
If you brewed a concentrate, it will stay fresh and flavorful for up to two weeks, while a diluted version should be consumed within three to five days for peak quality.
To maintain maximum freshness, minimize the amount of headspace in the bottle to reduce oxidation, which can lead to a stale or sour taste over time. When you are ready to serve, pour your desired amount and immediately seal the bottle.
If you find you have too much, consider freezing the excess into coffee ice cubes; this prevents dilution when you enjoy your drink on a hot day, keeping your beverage strong and delicious until the very last drop.
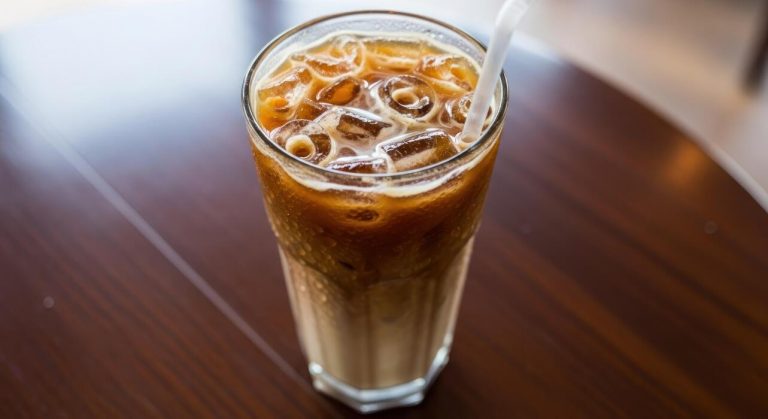
How to serve and dilute your cold brew concentrate
Mixing with water or milk
Since the cold brew process creates a potent concentrate, finding your ideal dilution ratio is the most critical step in crafting a high-quality beverage. For a standard cup, start with a one-to-one ratio of concentrate to filtered water or milk.
If you prefer a lighter, more refreshing drink that highlights the subtle floral notes of the bean, increase the water portion to two parts for every one part of coffee.
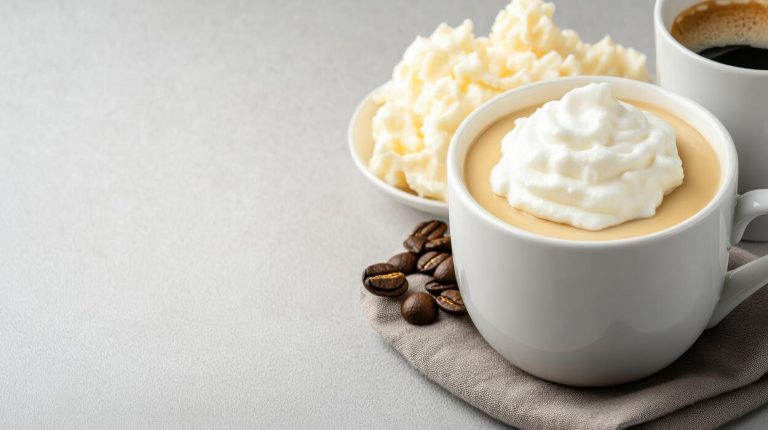
For those who enjoy a creamy, latte-style experience, substituting water with whole milk or oat milk provides a velvety texture that complements the natural chocolatey profile of cold brew. Always stir thoroughly to ensure the liquids are fully integrated before adding ice.
Remember that the strength of your concentrate depends on your initial brewing ratio, so taste your mixture as you go. Adjusting these proportions allows you to customize the caffeine intensity and mouthfeel, ensuring every glass meets your specific flavor preferences while maintaining that signature low-acid smoothness.
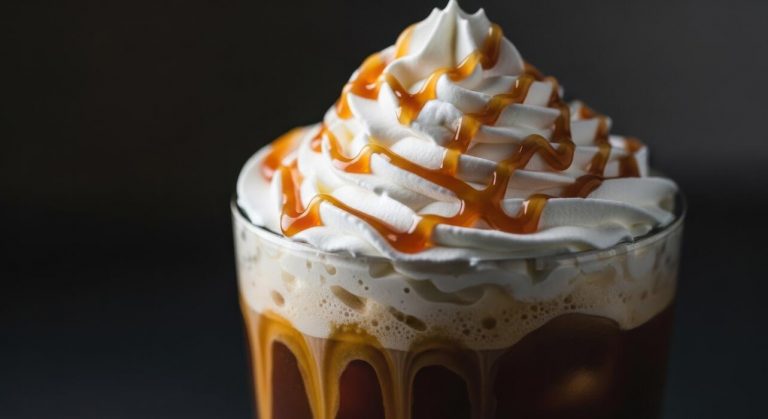
Creative ways to flavor your drink
Elevating your cold brew beyond a basic cup involves experimenting with syrups, spices, and natural extracts that enhance rather than mask the coffee’s flavor. Instead of using granulated sugar, which struggles to dissolve in cold liquids, opt for simple syrups or agave nectar to achieve a consistent sweetness throughout.
You can infuse your syrup with vanilla beans, cinnamon sticks, or even lavender to create a sophisticated, cafe-style drink at home.
For a citrusy twist that cuts through the richness, express a small piece of orange peel over the glass or add a drop of high-quality almond extract for a nutty aroma.
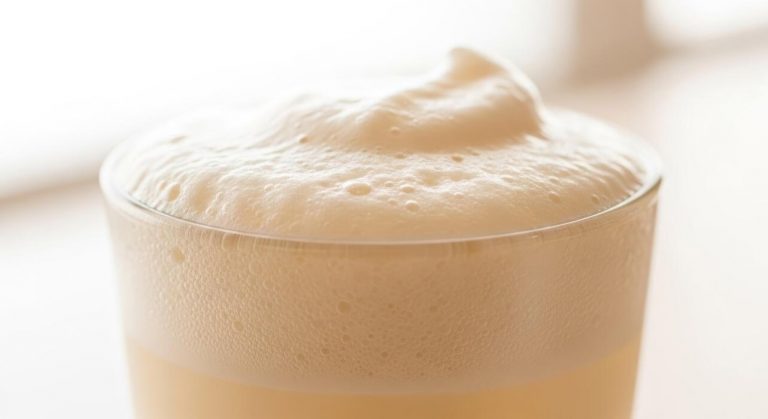
Another professional technique is to top your drink with a layer of cold foam made by frothing cold milk with a pinch of sea salt.
These additions allow you to build complex layers of flavor that highlight the unique characteristics of your chosen beans, transforming a simple concentrate into a gourmet treat that rivals any high-end coffee shop offering.
Using coffee ice cubes to prevent watering down
One of the most common mistakes when serving cold brew is using standard ice cubes, which inevitably melt and dilute the carefully balanced concentrate.
To maintain a consistent flavor profile from the first sip to the last, freeze a portion of your prepared cold brew or leftover coffee in silicone ice trays. These coffee ice cubes act as a thermal regulator without introducing extra water into your glass as they dissolve.
For an even more indulgent experience, you can freeze cubes made from a mixture of coffee and cream, which adds a beautiful marbled effect and a slow-release richness to your drink. This simple preparation step ensures your beverage stays bold and full-bodied even on the hottest summer days.
Using coffee cubes is a hallmark of a true enthusiast, showing a commitment to quality that prevents your meticulously brewed concentrate from becoming weak or flavorless. It is the ultimate solution for those who take their time sipping and want every drop to be perfect.
Tips for fixing common cold brew mistakes
How to fix bitter or sour flavors
Achieving a balanced profile requires understanding how extraction time and grind size interact. If your cold brew tastes unpleasantly bitter or harsh, it is likely over-extracted.
To fix this, ensure you are using a very coarse grind similar to sea salt; fine grounds release tannins too quickly, leading to that dry, ashy sensation.
Additionally, try reducing your steep time by a few hours, as leaving grounds in water for over twenty-four hours often pulls out unwanted woody notes. Conversely, if the brew is sour, salty, or thin, it is under-extracted.
This usually happens when the water is too cold or the steeping window is too short. Aim for a consistent room temperature steep for sixteen to eighteen hours to allow the natural sweetness to develop fully.
Always use filtered water to ensure that chlorine or mineral imbalances in tap water are not skewing the flavor profile toward the acidic side during the long immersion process.
Dealing with cloudy or muddy coffee
A murky appearance often indicates that fine particles are suspended in your concentrate, which can lead to a chalky mouthfeel. The most effective way to ensure a crystal-clear result is to double-filter your brew using different mediums.
Start by running the liquid through a coarse metal mesh to catch the large grounds, then finish with a high-quality paper filter or a fine nut milk bag to trap the microscopic silt.
If you notice a sludge at the bottom of your container, avoid squeezing the filter bag at the end of the process. While it is tempting to wring out every drop, this force pushes bitter oils and fine dust into the final carafe.
Another pro tip is to let the concentrate rest in the refrigerator for two hours before decanting; this allows any remaining sediment to settle at the bottom, letting you pour off only the clean, vibrant coffee from the top for a professional finish.
Adjusting strength for your personal taste
The beauty of cold brew lies in its versatility, but finding your ideal concentration requires a bit of experimentation with ratios. Most enthusiasts start with a 1:4 coffee-to-water ratio by weight to create a potent concentrate.
If the resulting brew feels overwhelming or syrupy, do not throw it away; simply dilute it with equal parts water or milk until it hits your sweet spot. For those who prefer a lighter, ready-to-drink version straight from the jar, try a 1:8 or 1:10 ratio instead.
Keep in mind that adding ice will further dilute the drink as it melts, so you might want to freeze some coffee into cold brew ice cubes to maintain the integrity of the flavor.
If the caffeine kick is too intense, you can blend your beans with a high-quality decaf roast. Always record your specific measurements and steeping times so you can easily replicate the perfect strength once you find the specific balance that works for you.
Frequently Asked Questions
What is the best coffee-to-water ratio for cold brew?
A standard ratio for cold brew concentrate is 1:4 (one cup of coffee to four cups of water). If you prefer a ready-to-drink brew that doesn’t require dilution, use a ratio of 1:8.
What grind size should I use for cold brew?
You should use a coarse grind, similar to the consistency of sea salt or breadcrumbs. A coarse grind prevents the coffee from becoming overly bitter and makes the filtering process much easier.
How long should I steep cold brew coffee?
For the best flavor, steep your coffee grounds for 12 to 24 hours at room temperature or in the refrigerator. Steeping for less than 12 hours may result in a weak brew, while exceeding 24 hours can lead to woody or bitter notes.
Should I steep cold brew on the counter or in the fridge?
Both methods work, but they yield different results. Room temperature steeping is faster and often extracts more floral notes, while refrigerated steeping takes longer but produces a cleaner, more mellow flavor profile.
What is the best way to filter cold brew?
To achieve a clean cup, first strain the mixture through a fine-mesh sieve to remove large grounds. Follow this by pouring the liquid through a paper coffee filter or a clean flour sack towel to remove fine sediments and oils.
What kind of coffee beans are best for cold brew?
Since cold brew highlights sweetness and minimizes acidity, medium to dark roasts are generally preferred. Look for beans with chocolatey, nutty, or earthy tasting notes for the smoothest result.
How long does homemade cold brew stay fresh?
Stored in an airtight container in the refrigerator, cold brew concentrate can last for up to two weeks. If you have already diluted the coffee with water, it is best consumed within 2 to 3 days for peak freshness.
Conclusion
Mastering cold brew at home is all about patience and finding the right balance. By using a coarse grind, filtered water, and allowing for a long steep time, you can create a smooth, low-acid concentrate that rivals any coffee shop. Don’t be afraid to experiment with different ratios and bean varieties until you find your perfect blend. Now that you have the tools, it is time to start brewing and enjoy your refreshing creation.