How To Make Pumpkin Cold Foam
Craving that iconic fall flavor without the coffee shop price tag? Learning how to make pumpkin cold foam at home is surprisingly simple and takes less than five minutes. Whether you want to top your cold brew or spice up an iced latte, this guide provides the perfect solution for achieving that velvety, spiced texture every time.
What is pumpkin cold foam?
The difference between cold foam and whipped cream
To master how to make pumpkin cold foam, you must first understand its unique texture compared to traditional toppings.
While whipped cream relies on heavy aeration and high fat content to create stiff, stable peaks that sit heavily atop a beverage, pumpkin cold foam is characterized by a pourable, velvety microfoam that gently cascades into your coffee.
This specialized foam is achieved by using a lower fat ratio, often a blend of skim milk and heavy cream, which allows the natural proteins to trap smaller air bubbles more effectively than heavy cream alone.
The result is a weightless, frothy layer that integrates seamlessly with your cold brew rather than floating in a solid mass. By incorporating real pumpkin purée and warm spices directly into this liquid base, you create a sophisticated garnish that mimics the mouthfeel of a high-end latte.
This structural difference is what defines the signature ‘Starbucks-style’ experience, ensuring every sip provides a perfect balance of creamy sweetness and bold coffee flavor without the oily residue often left behind by dense, over-beaten whipped creams.
Why it tastes better than store-bought syrup
When learning how to make pumpkin cold foam at home, the quality of your ingredients determines the final profile. Homemade versions far surpass store-bought syrups because they utilize genuine pumpkin purée and fresh dairy, avoiding the artificial aftertaste and chemical preservatives found in commercial bottles.
By whisking together real cinnamon, nutmeg, and cloves with a touch of vanilla, you achieve a multi-dimensional flavor profile that mimics a fresh pumpkin pie rather than a synthetic candy.
Most commercial syrups rely heavily on high-fructose corn syrup and artificial coloring, whereas a DIY approach allows you to control the sweetness levels using natural sweeteners like maple syrup or honey.
Furthermore, the freshness of the dairy plays a crucial role; using cold, high-quality cream ensures a bright and clean finish on the palate.
This artisanal method allows the earthy notes of the pumpkin to shine through, providing a rustic and authentic taste that complements the bitterness of a dark roast coffee perfectly, making your morning routine feel like a gourmet café luxury without the premium price tag.
The science of frothing cold milk
The secret to a successful pumpkin cold foam lies in the science of protein denaturation. Unlike steamed milk, which relies on heat to stretch fats, cold foam depends on vigorous mechanical agitation to create structure.
When you use a high-speed milk frother or a French press, you are forcing air into the milk, which causes the whey and casein proteins to unfold and form a protective film around the air bubbles.
To get the best results, it is essential to use ice-cold ingredients straight from the refrigerator, as cold temperatures help stabilize these tiny bubbles, preventing the foam from collapsing prematurely.
Adding a small amount of heavy cream to a skim milk base provides just enough fat to give the foam a rich, silky mouthfeel while maintaining the lightness required for it to remain frothy. This process creates a stable emulsion where the pumpkin solids are suspended evenly throughout the foam.
By understanding this molecular interaction, you can consistently produce a dense, cloud-like topping that holds its shape for several minutes, allowing you to enjoy a professional-grade beverage with perfectly layered aesthetics every single time.
Essential ingredients for homemade pumpkin cream

Choosing the right milk and heavy cream
To achieve the signature velvety texture of pumpkin cold foam, you must start with the correct dairy foundations. The gold standard for a thick, stable foam is a specific ratio of heavy whipping cream and 2% milk.
The heavy cream provides the necessary fat content to hold air bubbles, while the milk lightens the mixture so it can easily sit atop your cold brew without sinking immediately.
For those seeking dairy-free alternatives, barista-edition oat milk is the superior choice because it contains added stabilizers that mimic the frothing capabilities of dairy. Avoid skim milk or thin almond milks, as they often result in large, unstable bubbles that dissipate quickly.
When combining these liquids, ensure they are chilled thoroughly before frothing, as cold proteins and fats bond more effectively to create that luxurious, cloud-like consistency.
Using a handheld milk frother for at least thirty seconds will transform these liquid ingredients into a stiff, pourable cream that rivals any professional coffee shop beverage.
Real pumpkin puree vs. pumpkin pie filling
The most critical distinction when selecting your pumpkin component is choosing 100% pure pumpkin puree over pre-sweetened pumpkin pie filling. Puree consists solely of cooked, mashed squash, providing an authentic earthy flavor and a vibrant orange hue without unnecessary additives.
In contrast, pumpkin pie filling contains added sugars, starches, and preservatives that can negatively impact the viscosity and frothing ability of your cold foam.
Because real puree is quite thick, it is essential to whisk it thoroughly with your liquid ingredients to prevent clumps from settling at the bottom of your glass.
If you find the texture too fibrous, you can strain the mixture through a fine-mesh sieve before frothing to ensure a silky-smooth mouthfeel.
Using real pumpkin also allows you to control the nutritional content and flavor profile of your drink, ensuring the natural pumpkin notes shine through without being masked by the artificial metallic aftertaste often found in canned pie mixes or processed syrups.
Best sweeteners and spices to use
To elevate the flavor of your pumpkin cold foam, you need a balanced combination of sweeteners and aromatic spices. Maple syrup or vanilla simple syrup are the best liquid sweeteners because they dissolve instantly into cold dairy, preventing any grainy texture.
Maple syrup, in particular, complements the squash notes beautifully, adding a deep, autumnal complexity. For the spice profile, a high-quality pumpkin pie spice blend—which typically includes cinnamon, nutmeg, ginger, and cloves—is indispensable.
For the best results, add a pinch of sea salt to the mixture; salt acts as a flavor enhancer that cuts through the richness of the cream and makes the spices pop.
If you want an extra layer of warmth, a drop of pure vanilla extract provides a fragrant finish that ties the cream and coffee together.
Always whisk your spices into the pumpkin puree before adding the liquids to ensure the flavors are evenly distributed throughout the foam, preventing any unsightly spice clumps from floating on the surface.
How to make pumpkin cold foam at home

Step-by-step mixing instructions
To create a professional-grade pumpkin cold foam in your own kitchen, start by gathering your base ingredients: heavy cream, milk, pumpkin puree, maple syrup, and pumpkin pie spice. Begin by whisking together two tablespoons of heavy cream with one tablespoon of 2% milk to create the ideal liquid density.
Next, stir in one tablespoon of real pumpkin puree along with a teaspoon of maple syrup for natural sweetness. To achieve that signature autumnal flavor profile, add a generous pinch of ground pumpkin pie spice or a drop of vanilla extract.
Once your ingredients are combined in a tall glass, submerge your frother and blend until the volume nearly doubles. The goal is to create a mixture that is thick enough to sit atop your coffee without immediately dissolving into the brew.
This specific ratio ensures a rich, velvety mouthfeel that rivals your favorite coffee shop seasonal specials while allowing you to control the sugar content and ingredient quality for a much healthier morning treat.
The best tools for a thick froth
The secret to achieving a cafe-quality topping lies in selecting the right equipment for aeration. A handheld milk frother is the most popular and efficient choice for home baristas because it allows for precise control over the air incorporation process.
If you do not own a motorized wand, a standard French press serves as an excellent alternative; simply pump the plunger rapidly for thirty seconds to force air into the cream mixture.
For those who prefer a more automated approach, an electric milk steamer with a cold setting can produce a remarkably consistent and stable foam with minimal effort.
Regardless of the tool you choose, ensure your equipment is completely clean and free of oil residue, as any lingering fats can prevent the proteins in the milk from forming stable bubbles.
Using a chilled stainless steel pitcher or a narrow glass jar will also help maintain the cold temperature necessary for the fat molecules to trap air effectively, resulting in a stiff, peaked foam that looks beautiful.
How to get the perfect texture
Achieving the ideal consistency for pumpkin cold foam requires a delicate balance between temperature and fat content. Always start with ice-cold heavy cream directly from the refrigerator, as cold fats emulsify much better than those at room temperature.
If your foam feels too thin or watery, try increasing the ratio of heavy cream or adding a small splash of condensed milk for extra body and structural integrity.
Be careful not to over-froth the mixture, as excessive agitation can turn the cream into butter rather than a light foam; stop immediately once the surface looks smooth and glossy with micro-bubbles.
If you notice large, soapy bubbles forming, gently tap the container on your counter to pop them and create a more uniform texture. For the best visual results, pour your finished foam slowly over the back of a spoon onto your iced coffee.
This technique prevents the foam from sinking too quickly, allowing it to rest elegantly on the surface for that perfect, layered aesthetic that defines a gourmet homemade beverage.
Common mistakes to avoid when frothing
Why your foam is too runny
If your pumpkin cold foam lacks that signature thick, cloud-like consistency, the most frequent culprit is usually the temperature of your dairy.
To achieve a stable structure that sits perfectly atop your cold brew, you must ensure that your heavy cream and milk are pulled directly from the refrigerator immediately before frothing. Warm fat molecules simply cannot hold air bubbles effectively, leading to a liquid mess rather than a velvety topping.
Additionally, over-aerating the mixture by holding the frother too close to the surface for the entire duration can create large, soapy bubbles that collapse instantly. Instead, keep the whisk head submerged at a slight angle to create a tight vortex.
Another common error is skipping the heavy cream entirely; while milk provides some volume, the high fat content of heavy cream is what provides the necessary viscosity to support the pumpkin puree. For the best results, aim for a thick, pourable texture that holds its shape for several minutes.
How to fix curdled pumpkin mixture
Finding grainy bits or a separated texture in your foam is often the result of improperly incorporating the pumpkin puree. Because pumpkin is fibrous and dense, it does not naturally dissolve into cold dairy without some mechanical help.
Many beginners make the mistake of just stirring with a spoon, which leaves clumps that ruin the mouthfeel. To fix this, you should whisk the pumpkin and syrup together into a smooth paste before adding your liquid dairy.
If you notice separation occurring, it might be due to the acidity in certain pumpkin spice syrups reacting with the proteins in the milk. To prevent this chemical reaction, ensure you are using high-quality ingredients and frothing vigorously to emulsify the fats and solids.
If the mixture has already curdled, you can sometimes save it by passing it through a fine-mesh sieve to remove the larger solids, though starting fresh with a smoother base paste is usually the most reliable way to ensure a professional-grade finish.
Using the correct ingredient ratios
The balance of ingredients is the most critical factor in determining whether your pumpkin cold foam succeeds or fails. A very common mistake is adding too much pumpkin puree, which adds excessive weight and prevents the cream from expanding during the frothing process.
If the mixture is too heavy, the air bubbles will be crushed under the weight of the squash solids. The gold standard for a Starbucks-style topping is a 2:1 ratio of heavy cream to milk, which provides the perfect equilibrium between airy volume and rich stability.
Furthermore, failing to account for the sweetener’s impact on viscosity can lead to a foam that is either too thin or unpleasantly sticky. You should aim for roughly one tablespoon of pumpkin puree and one tablespoon of syrup for every half-cup of dairy.
By strictly measuring your liquid components, you avoid the guesswork that often leads to a soggy topping. Precision ensures that every batch has the structural integrity to float beautifully on your iced coffee.
Best ways to serve pumpkin cold foam
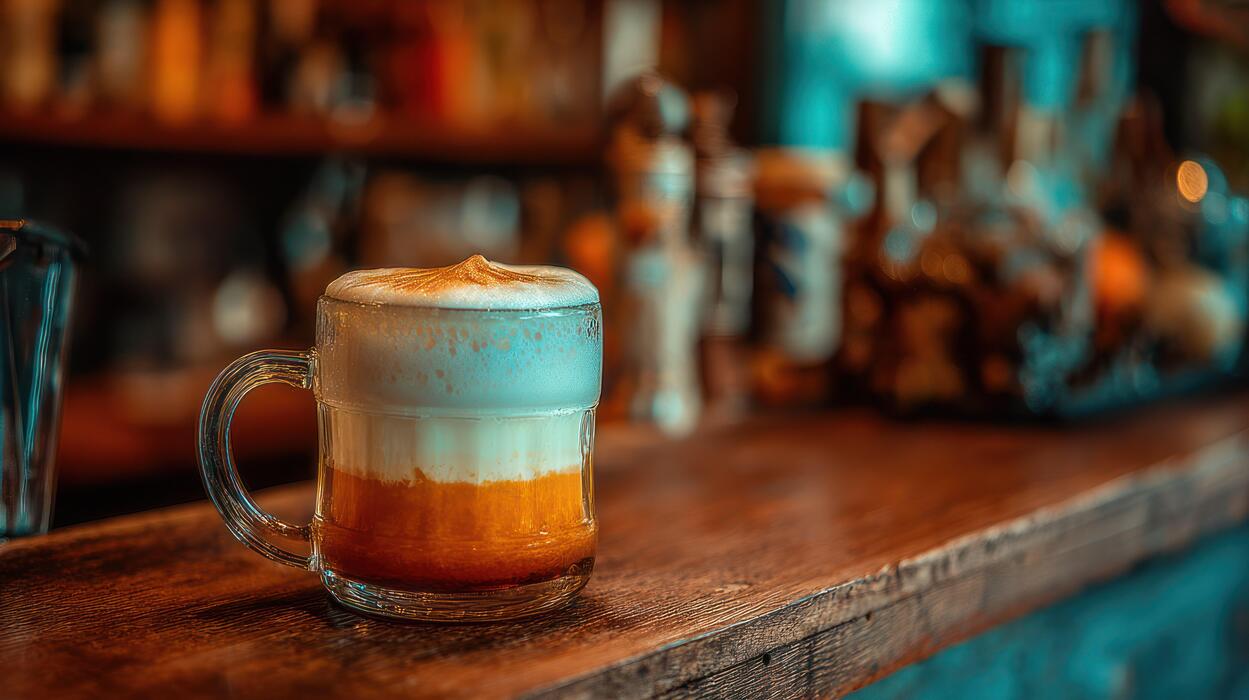
Pairing with cold brew and iced coffee
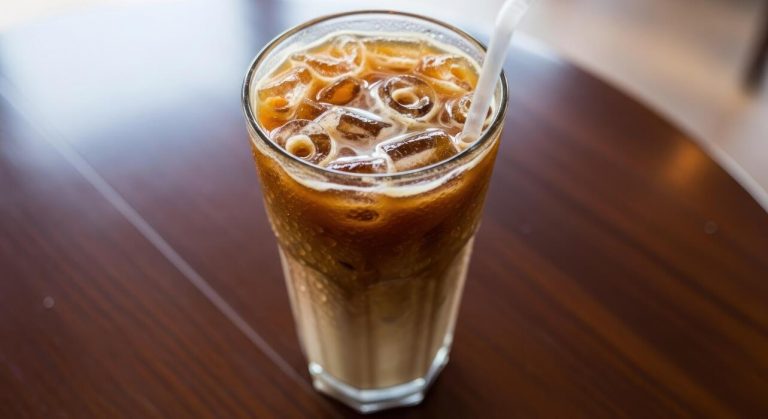
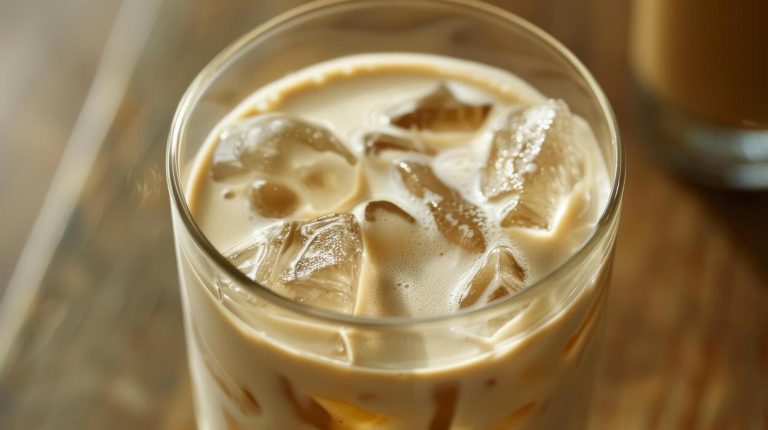
The most iconic way to enjoy homemade pumpkin cold foam is atop a glass of smooth, slow-steeped cold brew. Because cold brew has a naturally low acidity and a deep chocolatey profile, it provides the perfect canvas for the sweet and creamy pumpkin topping.
To assemble, fill a glass with ice and pour your cold brew about three-quarters of the way to the top. Slowly pour the aerated pumpkin mixture over the back of a spoon so it sits perfectly on the surface, creating a beautiful layered aesthetic.
As you sip, the velvety foam slowly integrates into the dark coffee, naturally sweetening each mouthful without the need for heavy stirring. For those who prefer traditional iced coffee, ensure your brew is fully chilled before adding the foam to prevent it from melting too rapidly.
This combination highlights the warm notes of cinnamon and nutmeg against the crisp, refreshing bite of the caffeine, making it the ultimate seasonal treat for any coffee lover.
Adding it to iced chai tea lattes
If you want to elevate your tea game, adding pumpkin cold foam to an iced chai latte creates a sophisticated flavor profile that mimics a liquid pumpkin pie.
The existing spices in the chai concentrate, such as cardamom, ginger, and cloves, act as a flavor bridge to the pumpkin puree and pumpkin pie spice found in the foam.
To master this pairing, mix your chai concentrate with your choice of milk over plenty of ice, leaving about an inch of space at the top of the glass.
Spoon the thick, frothy pumpkin layer over the tea to create a luxurious textural contrast between the fluid milk and the dense, whipped topping. This method is particularly effective because the earthy tea base balances the sweetness of the condensed milk or heavy cream used in the foam recipe.
It is a fantastic caffeine-alternative option that still delivers those cozy autumn vibes, ensuring that every sip is packed with a complex blend of aromatic spices and creamy goodness.
Creative topping and garnish ideas
To truly complete the experience of making pumpkin cold foam at home, the final presentation and garnish are essential steps that add both visual appeal and extra flavor.
Once your foam is perfectly perched atop your beverage, consider dusting the surface with a generous sprinkle of pumpkin pie spice or extra ground cinnamon to enhance the aroma as you drink.
For a bit of crunch and a professional cafe-style finish, you can crush a few graham crackers and sprinkle the crumbs over the foam to simulate a deconstructed pumpkin cheesecake effect.
Another sophisticated option is to drizzle a small amount of salted caramel or maple syrup in a cross-hatch pattern over the white and orange froth.
These small additions not only make the drink social-media-ready but also provide varying layers of texture that interact with the soft bubbles of the cold foam.
Using these garnishes allows you to customize the sweetness level and adds a festive touch that turns a simple morning caffeine routine into a celebratory seasonal experience.
Dairy-free and vegan pumpkin foam variations
Using oat milk for the best creaminess
To achieve a barista-quality pumpkin cold foam that rivals traditional dairy, oat milk is the undisputed champion due to its high fat content and natural thickening properties.
When preparing your dairy-free topper, select a full-fat or barista edition oat milk to ensure the foam holds its structure atop your iced coffee. Start by whisking together half a cup of chilled oat milk with two tablespoons of pumpkin puree, a splash of vanilla, and pumpkin pie spice.
For the most luxurious texture, use an electric milk frother on the cold setting for at least thirty seconds until thick peaks form. The natural sugars in oats provide a subtle sweetness that complements the earthy pumpkin notes perfectly.
If your foam feels too thin, adding a tiny pinch of xanthan gum can act as a stabilizer, giving you that dense, velvety mouthfeel. This method ensures your vegan pumpkin cold foam remains creamy and does not immediately dissolve into the drink, providing a professional finish to every single glass.
Coconut milk and almond milk tips
If you prefer using coconut or almond milk for your pumpkin cold foam, specific techniques are required to overcome their lower protein levels. For coconut milk, use chilled full-fat canned coconut milk rather than the carton variety, as the solid cream provides the necessary body for a stiff foam.
Whisk the coconut cream with pumpkin puree and spices until it reaches a whipped consistency. When working with almond milk, be aware that it tends to be thinner and may produce a frothier, lighter bubble rather than a thick foam.
To improve the results, combine almond milk with a teaspoon of cashew butter or a dash of coconut cream to increase the fat content. Always ensure your alternative milks are thoroughly chilled before frothing, as cold temperatures help the air bubbles remain stable.
By blending these milks with your pumpkin base, you can create a refreshing, nutty profile that offers a lighter alternative to heavier oat-based foams while still delivering that iconic, seasonal autumn flavor profile you crave.
Plant-based sweetener alternatives
Crafting the perfect vegan pumpkin cold foam requires choosing a sweetener that dissolves easily in cold liquid without altering the smooth texture. Maple syrup is the ideal choice for pumpkin recipes because its deep, amber notes naturally enhance the warmth of cinnamon and nutmeg spices.
If you prefer a neutral sweetness, a homemade simple syrup or agave nectar works efficiently as they integrate seamlessly into the cold milk without leaving a grainy residue.
For those looking for sugar-free options, liquid stevia or monk fruit drops are excellent alternatives that provide high intensity sweetness without adding bulk. Avoid using granulated sugars or thick honey, as these often sink to the bottom or clump when mixed with cold plant milks.
To ensure a professional result, whisk your chosen sweetener directly into the pumpkin puree before adding the milk; this ensures an even distribution of flavor throughout the foam. Experimenting with different syrups allows you to customize the sweetness level while keeping your pumpkin cold foam entirely plant-based and delicious.
Tips for storing and prepping in advance
How long homemade cold foam lasts
When you prepare a batch of pumpkin spice cold foam at home, its shelf life depends entirely on the freshness of your base ingredients. Generally, this mixture will remain safe and flavorful for up to 5 days when kept under strict refrigeration.
Because the recipe relies on heavy cream and milk, you must check the expiration dates on your dairy cartons before mixing.
The pumpkin puree and warm spices tend to settle at the bottom over time, so while the flavor profile remains delicious, the structural integrity of the foam will degrade after the first few hours.
To maintain the highest quality standards, avoid adding the sweetener or pumpkin until you are ready to store it, as sugar can sometimes accelerate the separation process. If you notice any sour smells or changes in the texture of the liquid, it is best to discard the batch immediately.
Keeping your fridge at or below 40 degrees Fahrenheit is the most effective way to ensure your homemade seasonal topper stays fresh for your morning coffee routine throughout the work week.
The best containers for storage
Choosing the right vessel is critical for preserving the delicate aromatics of cinnamon, nutmeg, and cloves found in pumpkin cold foam. The gold standard for storage is an airtight glass mason jar, which prevents the cream from absorbing unwanted odors from other foods in your refrigerator.
Glass is non-reactive, ensuring that the acidity of the coffee or the oils in the pumpkin puree do not leach any metallic or plastic tastes into your topping.
Ensure the lid has a silicone seal to create a completely vacuum-tight environment, which helps keep the dairy fat from oxidizing and turning stale. If you prefer convenience, a specialized glass milk carafe with a pour spout works well, provided it can be sealed tightly.
Avoid using open pitchers or plastic containers that aren’t BPA-free, as these can lead to a rapid decline in flavor quality.
By using a clear glass container, you can also easily see when the ingredients have separated, signaling that it is time for a quick shake or stir before you begin the frothing process for your next latte.
How to re-froth leftover cream
It is a common misconception that once cold foam settles back into a liquid state, it cannot be revived. In reality, you can easily re-froth the mixture to achieve that signature cloud-like consistency again.
Before you begin, give the storage jar a very vigorous shake for about thirty seconds to redistribute the pumpkin puree and spices that have likely settled at the bottom.
Once the liquid is homogenous, pour the desired amount into a tall glass and use a handheld milk frother submerged just below the surface. Aerate the mixture for twenty to thirty seconds until thick peaks form once more.
If you do not own an electric frother, you can achieve similar results by placing the liquid in a French press and rapidly pumping the plunger up and down to incorporate air.
The key to success is ensuring the cream remains ice-cold during this process; warm cream will not hold air bubbles as effectively as chilled dairy.
This simple restoration technique allows you to enjoy a professional-quality beverage without having to measure out individual ingredients every single time you crave a caffeinated treat.
Frequently Asked Questions
What are the basic ingredients for pumpkin cold foam?
To make pumpkin cold foam at home, you typically need heavy cream, 2% milk, pumpkin puree, maple syrup or sugar, and pumpkin pie spice. For the best texture, ensure your dairy is very cold before you begin frothing.
How do I get the perfect frothy texture for cold foam?
Use a handheld milk frother or a high-speed blender to aerate the mixture for about 20-30 seconds until thick and creamy. The goal is a pourable consistency that sits on top of the coffee rather than mixing in immediately.
Can I make pumpkin cold foam without a frother?
Yes, you can make it by placing the ingredients in a mason jar, sealing the lid tightly, and shaking vigorously for one minute. Alternatively, you can use a French press by pumping the plunger up and down until the volume doubles.
How do I make a dairy-free or vegan pumpkin cold foam?
Substitute the dairy with full-fat oat milk or a combination of coconut cream and almond milk. Oat milk is generally preferred for cold foam because its protein content allows it to create a more stable, creamy froth.
Should I use pumpkin puree or pumpkin spice syrup?
Real pumpkin puree provides a more authentic flavor and vibrant orange color, while syrup offers a more consistent sweetness. For the best results, many recipes use a combination of puree for texture and syrup or spices for flavor depth.
How long does homemade pumpkin cold foam last in the fridge?
Homemade cold foam is best enjoyed immediately, but you can store the un-frothed liquid mixture in an airtight container for up to 3 days. Simply froth the portion you need right before serving to ensure the bubbles stay stable.
What is the best coffee to pair with pumpkin cold foam?
Cold brew and iced americanos are the most popular choices because the bold coffee flavor contrasts well with the sweet, spiced foam. You can also add it to iced lattes for an extra layer of creaminess.
Conclusion
Mastering homemade pumpkin cold foam allows you to enjoy a luxurious, seasonal treat without leaving your kitchen. By combining heavy cream, milk, pumpkin puree, and warm spices, you can elevate any cold brew to cafe-quality status. It is a simple, cost-effective way to customize your morning caffeine routine while embracing autumn flavors. Now that you have the perfect recipe, grab your frother and start experimenting. Your delicious, velvety masterpiece is just a few whisks away.