How To Cold Brew Coffee At Home
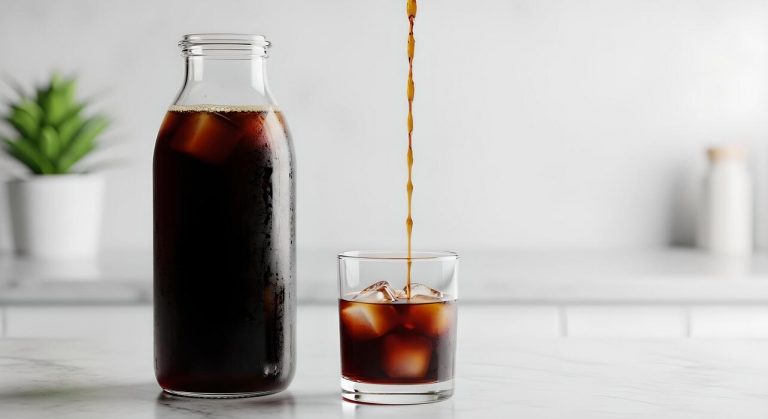
Making cafe-quality cold brew in your own kitchen is surprisingly simple and much more affordable than daily coffee shop runs. If you are wondering how to cold brew coffee at home, you have come to the right place. You do not need fancy equipment—just coffee, water, and a little patience. Let’s dive into the perfect ratio and easy technique today.
What is cold brew coffee?
The difference between cold brew and iced coffee
To successfully make cold brew coffee at home, you must first understand that it is a unique brewing method, not just a temperature preference. Unlike standard iced coffee, which is brewed hot and quickly chilled over ice, cold brew relies on time rather than heat to extract flavor.
When you brew hot coffee and pour it over ice, the immediate dilution can lead to a watery consistency and a sharper, more bitter profile. In contrast, the cold brew process involves soaking coarsely ground beans in room temperature or filtered cold water for 12 to 24 hours.
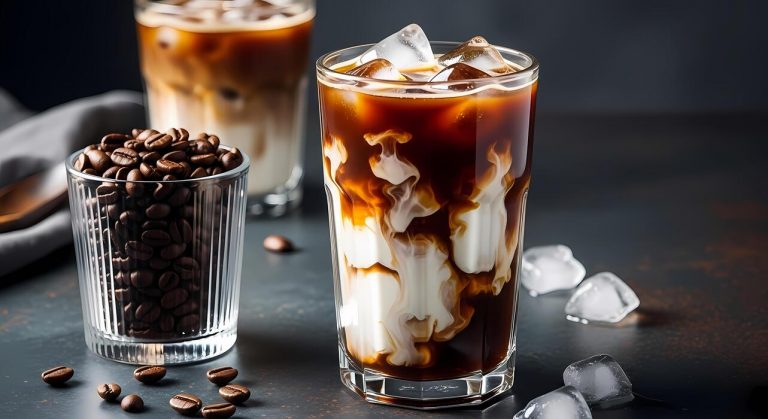
This slow immersion creates a concentrated coffee essence that is naturally smooth and heavy-bodied. Because the grounds never touch boiling water, the volatile oils and acids are extracted differently, resulting in a beverage that maintains its flavor integrity even when diluted with milk or extra water.
Mastering this distinction is the first step toward a perfect home setup.
Why cold brew tastes less acidic
One of the most significant benefits of learning how to cold brew coffee at home is the dramatic reduction in acidity, which is ideal for those with sensitive stomachs.
High temperatures used in traditional brewing methods cause the solubility of acidic compounds and oils to increase, often resulting in that characteristic bite or sourness. However, because cold brew utilizes cold water, those specific chemical compounds are never fully extracted from the coffee grounds.
Research suggests that cold brew can be up to 60% less acidic than hot-brewed coffee, offering a naturally sweet, chocolatey, and mellow flavor profile. To achieve this result at home, ensure you use a consistent coarse grind to prevent over-extraction and bitterness.
By removing the heat from the equation, you allow the subtle, nutty notes of the bean to shine through without the harshness. This solution-focused approach ensures a smoother drinking experience that requires less sugar or cream to mask traditional bitterness.
Caffeine content in cold brew vs drip coffee
When preparing your own cold brew at home, it is important to manage the potency of your final product, as the caffeine concentration is typically much higher than standard drip coffee. The extended contact time between the water and the grounds leads to a highly concentrated caffeine extract.
While a standard cup of drip coffee uses a lower ratio of grounds to water, cold brew recipes often use a 1:4 or 1:8 ratio, creating a powerful concentrate intended for dilution.
Because you are consuming a concentrated form, a single ounce of cold brew can contain significantly more caffeine than an ounce of drip coffee. To control your intake, always dilute your homemade concentrate with a one-to-one ratio of water or milk before serving.
This allows you to enjoy the robust energy boost provided by the long steeping process without over-consuming. Understanding this ratio is essential for a balanced, refreshing home brew that fits your daily energy needs perfectly.
Essential equipment for making cold brew at home

Best jars and containers to use
To begin your home brewing journey, you need a vessel that is both durable and non-reactive to maintain flavor purity. The most popular choice for beginners is a large glass Mason jar, typically in the 32-ounce or 64-ounce size, because glass does not leach chemicals or odors into your concentrate.
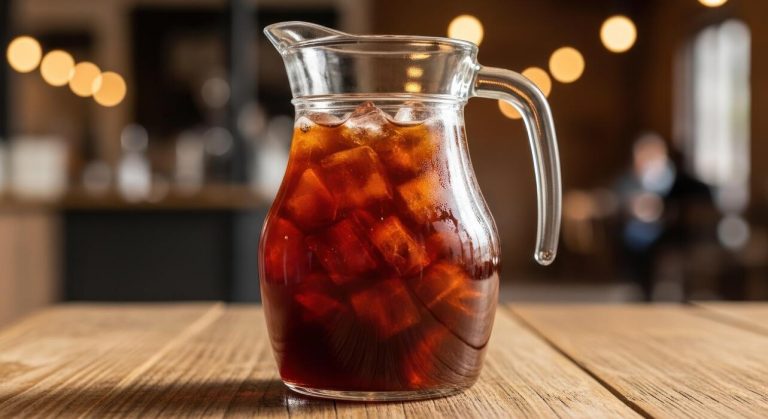
If you plan to brew in larger batches, an airtight glass pitcher or a dedicated cold brew carafe with a built-in seal is ideal for preventing oxygen from dulling the coffee’s vibrant notes.
Some enthusiasts prefer stainless steel containers for their durability and light-blocking properties, which help preserve the coffee’s delicate oils during the long extraction process. Regardless of the material, ensure the container has a wide mouth to make adding grounds and cleaning easy.
Avoid reactive metals like aluminum, which can impart a metallic taste. A secure, leak-proof lid is essential to keep your brew fresh in the refrigerator for up to two weeks without absorbing food smells.
Choosing the right filter system
Filtering is the most critical step for achieving a smooth, sediment-free cup of cold brew. You have several options, ranging from paper filters to fine-mesh stainless steel.
Paper filters, such as those used in a Chemex or specialized cold brew bags, are excellent for producing a crisp, clean profile because they trap fine particles and excess oils.
However, if you prefer a fuller body and a more sustainable approach, a permanent metal mesh filter is a great investment. Many people also find success using a nut milk bag or a double-layered cheesecloth, which allows for easy squeezing to extract every drop of concentrate.
For those using a French press, the built-in plunger works well, though you might still want to pass the final liquid through a secondary paper filter to remove the ‘sludge’ often found at the bottom.
The goal is to find a balance between convenience and clarity, ensuring your final concentrate is smooth enough to be enjoyed over ice.
Why a burr grinder matters
The secret to a successful cold brew lies in the consistency of your coffee grounds, which is why a burr grinder is indispensable compared to a blade grinder. Cold brewing requires a consistent coarse grind, similar to the texture of sea salt or breadcrumbs.
A burr grinder uses two revolving abrasive surfaces to crush beans into uniform pieces, whereas a blade grinder chops them unevenly, resulting in a mix of fine dust and large chunks.
These tiny particles, known as ‘fines,’ can lead to over-extraction and bitterness, ruining the naturally sweet profile of cold brew. Furthermore, an uneven grind makes the filtering process difficult, as fine dust will clog your filters and create a cloudy appearance.
By using a quality burr mill, you ensure that water saturates every grain equally during the 12 to 24-hour steep time, leading to a balanced, chocolatey, and low-acid result. Investing in a grinder allows you to grind fresh, preserving the aromatic oils that make home-brewed coffee taste professional.
How to choose the best coffee beans
Why coarse grind size is critical
When making cold brew at home, achieving the correct texture is the most important step in the process. You must aim for a coarse grind size that resembles sea salt or cracked peppercorns rather than a fine powder.
Because cold brew involves a long immersion period, typically between twelve and twenty-four hours, a fine grind will lead to over-extraction, resulting in a bitter and muddy flavor profile.
Furthermore, using a consistent coarse grind ensures that water can flow freely around the coffee particles, allowing for a clean and efficient filtration process once the steeping is complete. If the particles are too small, they will clog your filter and leave unpleasant sediment in your final concentrate.
Investing in a quality burr grinder is the best way to maintain this uniformity, which ultimately produces the smooth, chocolatey, and low-acid cup that cold brew enthusiasts crave. By prioritizing surface area management through proper grinding, you guarantee a balanced and delicious homemade beverage every single time.
Light roast vs dark roast for cold extraction
Choosing the right roast level significantly impacts the final taste of your cold brew. Many experts recommend dark roast beans because the long, cold steeping process excels at highlighting rich notes of chocolate, nuts, and molasses while minimizing bitterness.
Dark roasts are also more porous, making them easier to extract at lower temperatures. However, if you prefer a more complex and tea-like experience, light roast beans can offer bright floral and fruity acidity that is often muted in traditional hot brewing methods.
Because cold water doesn’t extract acids as aggressively as boiling water, light roasts result in a refreshing and crisp drink.
When selecting your beans, consider whether you plan to add milk or cream; bolder dark roasts tend to hold their flavor better against additives, whereas lighter profiles are best enjoyed black.
Ultimately, the absence of heat allows you to explore the subtle nuances of different roasts without the harshness often associated with standard drip coffee, providing a versatile palette for your home brewing experiments.
Freshness and bean storage tips
The quality of your cold brew is directly tied to the freshness of your ingredients. To get the best results, always start with whole bean coffee and grind it immediately before you begin the steeping process to preserve volatile aromatic compounds.
Look for beans with a recent ‘roasted on’ date, ideally within the last two weeks, to ensure peak flavor. Once you have purchased your beans, proper storage is essential to prevent oxidation; keep them in an airtight container stored in a cool, dark place away from direct sunlight and moisture.
Avoid storing your coffee in the freezer or refrigerator, as the fluctuating temperatures and humidity can damage the delicate oils that provide flavor.
Using filtered water alongside your fresh beans will further enhance the clarity of the brew, as it prevents mineral buildup from masking the natural characteristics of the coffee.
By treating your beans with care and focusing on freshness, you ensure that every batch of cold brew you make at home is vibrant, fragrant, and consistently high in quality.
The perfect cold brew ratio and recipe
Standard coffee-to-water ratios
Finding the ideal balance between strength and smoothness is the first step toward mastering cold brew at home.
For a versatile cold brew concentrate, the industry gold standard is a 1:4 ratio by weight, which typically translates to one cup of coarsely ground beans for every four cups of filtered water.
This concentrated base allows you to customize your final beverage by diluting it with equal parts water, milk, or oat milk over ice. If you prefer a ready-to-drink brew that requires no additional dilution, aim for a 1:8 or 1:10 ratio.
Using a kitchen scale is highly recommended for precision, as different roasts have varying densities that can skew volume-based measurements. Always use a coarse grind size, similar to sea salt or breadcrumbs, to ensure easy filtration and to prevent the over-extraction of bitter tannins.
This coarse texture allows the cold water to gently pull the chocolatey, nutty flavors from the beans without the acidic bite often found in traditional hot coffee brewing methods.
Step-by-step brewing instructions
To begin the brewing process, gather a large glass jar or a dedicated cold brew maker and ensure all equipment is clean. Start by placing your coarsely ground coffee into the container, then slowly pour filtered, room-temperature water over the grounds.
It is essential to use filtered water to ensure the cleanest flavor profile possible. Use a long spoon to gently stir the mixture, ensuring that every coffee ground is fully saturated; dry pockets can lead to an uneven extraction and a weaker final product.
Once mixed, cover the container with a lid or plastic wrap to prevent the coffee from absorbing any odors from your refrigerator. Leave the mixture to sit at room temperature or in the fridge depending on your preference for extraction speed.
After the steeping time is complete, strain the concentrate using a fine-mesh sieve lined with a paper filter, a nut milk bag, or a French press plunger. This careful filtration step ensures a silky, sediment-free texture that highlights the natural sweetness of the coffee beans.
How long to steep your coffee
Timing is the final variable in achieving the perfect glass of cold brew. Because cold water extracts flavor much slower than hot water, a long immersion period is necessary. For a balanced profile, the ideal steeping time is between 12 and 18 hours.
If you are steeping your coffee at room temperature, the process moves faster, and you should aim for the 12-hour mark to avoid over-extraction.
If you prefer to steep in the refrigerator, the cold environment slows down the chemical process, meaning you may need closer to 18 or even 24 hours to achieve full body and depth.
Be careful not to exceed 24 hours, as this can lead to woody, bitter notes and a dusty mouthfeel that masks the coffee’s delicate nuances. Once the time is up, remove the grounds immediately to stop the brewing process.
Your finished concentrate can be stored in the refrigerator for up to two weeks, allowing you to enjoy a quick, professional-quality caffeine fix every morning with minimal effort or cleanup.
Common cold brew mistakes to avoid

Using the wrong water temperature
The defining characteristic of cold brewing is the total absence of heat during the extraction process, yet many beginners mistakenly use lukewarm or even warm tap water to speed things up.
To achieve that signature smooth, chocolatey profile, you must use cold or room temperature filtered water from start to finish. Using warm water triggers a chemical reaction that releases acidic compounds and volatile oils prematurely, resulting in a brew that tastes unpleasantly sharp rather than mellow.
For the best results, start with purified water to ensure no chlorine or mineral off-flavors interfere with the delicate notes of your beans. If your kitchen is particularly warm, consider steeping your vessel inside the refrigerator to maintain a consistent, low temperature throughout the duration of the soak.
This thermal stability is essential for preventing the oxidation that leads to a stale or sour aftertaste in your final concentrate. By keeping things chilled, you guarantee a refreshing and clean cup every single time you pour.
Over-steeping and bitterness
Patience is a virtue when making cold brew, but leaving your grounds to soak for too long is a common mistake that ruins the flavor profile.
While you might think a longer steep time results in a stronger caffeine kick, it actually leads to over-extraction, pulling out woody, bitter tannins that mask the natural sweetness of the coffee.
The ideal window for a standard countertop steep is typically between 12 and 18 hours, whereas refrigerated batches can handle up to 24 hours due to the slower molecular movement.
Once you hit the 24-hour mark, the flavor quality begins to decline rapidly, often taking on a muddy or metallic taste that no amount of milk or sugar can fully fix. To avoid this, set a digital timer the moment you submerge your grounds.
If you cannot filter the coffee immediately when the time is up, it is better to finish a few hours early than to let it sit for a full second day.
Using fine grinds by accident
One of the most critical errors in home cold brewing is utilizing a fine or medium grind setting typically reserved for drip machines or espresso. Cold brew requires a consistent extra-coarse grind, similar in texture to sea salt or peppercorns, to allow water to flow freely around the particles.
When you use fine grinds, the increased surface area causes the coffee to extract far too quickly, leading to an overly intense bitterness and a cloudy appearance.
Furthermore, fine particles are notoriously difficult to filter out, often passing through mesh strainers or clogging paper filters entirely, which leaves a gritty, silty residue at the bottom of your glass. Using a burr grinder is highly recommended to achieve the necessary uniformity for a clean finish.
If you do not have a quality grinder at home, ask your local barista to grind your beans specifically for a French press or cold brew setup. This simple adjustment ensures a sediment-free concentrate that highlights the bean’s best characteristics without the sludge.
How to serve and store your cold brew
Diluting the concentrate properly
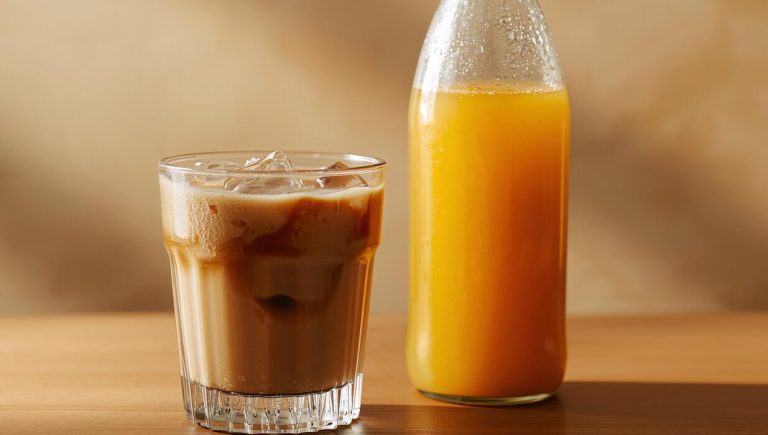
Since homemade cold brew is typically produced as a potent concentrate, mastering the dilution process is essential for achieving a balanced flavor profile. The standard industry recommendation is to start with a one-to-one ratio of coffee concentrate to filtered water or milk.
If you prefer a bolder, more caffeinated kick, you can reduce the amount of diluent, while those who enjoy a smoother, tea-like consistency should add more liquid.
It is critical to use cold or room temperature water during this step to preserve the low-acidity characteristics you worked so hard to achieve during the long steeping process.
For an elevated experience, try pouring your mixture over large ice cubes, which melt slower and prevent your beverage from becoming prematurely watered down. Always taste your brew before finishing the glass; adjusting the strength is much easier during the initial pour than halfway through your drink.
Experimenting with different ratios will eventually help you find the perfect strength that suits your specific palate and caffeine tolerance.
Shelf life in the refrigerator
One of the greatest advantages of making cold brew at home is its impressive longevity compared to traditionally brewed hot coffee. When stored in an airtight glass container or mason jar, your undiluted cold brew concentrate will remain fresh and flavorful for up to two weeks in the refrigerator.
However, for the absolute best taste and aromatic quality, many baristas suggest consuming the batch within seven to ten days. It is important to keep the concentrate tightly sealed at all times to prevent it from absorbing unwanted odors from other food items in your fridge.
If you have already diluted the concentrate with water, the shelf life significantly drops to about two or three days, so it is highly recommended to only dilute individual servings as you need them.
If you notice any sour smells or a visible layer of sediment that looks unusual, it is safer to discard the batch. Maintaining a consistent cold temperature is the most effective way to ensure your homemade caffeine supply stays crisp and delicious.
Creative ways to flavor your drink
Beyond the classic splash of milk, there are numerous ways to customize your homemade cold brew to match your cravings. Because cold brew is naturally sweeter and less acidic than hot coffee, it pairs beautifully with simple syrups, vanilla extract, or a dash of cinnamon stirred directly into the glass.
For a luxurious texture, try topping your drink with homemade cold foam made by frothing heavy cream and a touch of maple syrup. If you enjoy a refreshing twist, citrus peels or a sprig of mint can add unexpected brightness to the chocolatey notes of the beans.
Another pro tip for enthusiasts is to make coffee ice cubes using a portion of your brew; this ensures that as the ice melts, your drink actually remains flavorful rather than becoming diluted.
You can also experiment with alternative milks like oat or almond, which provide a creamy mouthfeel that complements the dense body of the concentrate. These small additions allow you to transform a basic morning routine into a sophisticated, cafe-quality beverage experience right in your kitchen.
Tips for better tasting cold brew
Using filtered water for a cleaner taste
One of the most overlooked aspects of making professional-grade cold brew at home is the quality of the water used during the long steeping process.
Since cold brew consists of roughly ninety-eight percent water, any impurities, minerals, or chlorine present in your tap water will become significantly magnified over the twelve to twenty-four hours of extraction.
To achieve a truly refined profile, you should always use filtered or bottled spring water to ensure a neutral base that allows the delicate nuances of your coffee beans to shine.
Avoid using distilled water, as it lacks the essential minerals needed to pull the flavorful oils from the grounds effectively. By prioritizing high-quality water filtration, you eliminate metallic aftertastes and harsh chemical notes that often ruin a batch.
This simple adjustment results in a cleaner, crisper finish that highlights the natural sweetness and chocolatey undertones inherent in high-quality Arabica beans, making your homemade beverage taste exactly like a premium drink from a high-end specialty cafe.
The bloom technique for cold coffee
While blooming is a standard practice for hot pour-over methods, applying a hot bloom to your cold brew can dramatically enhance the aromatic complexity of the final concentrate.
To execute this technique, start by saturating your coarse coffee grounds with a small amount of hot water, ideally around two hundred degrees Fahrenheit, just enough to dampen them without soaking.
Let this sit for approximately thirty to forty-five seconds to release trapped carbon dioxide, which often acts as a barrier to full flavor extraction. Once the bubbling subsides and the grounds have expanded, continue the process by adding the remaining volume of cold or room-temperature water.
This hybrid method helps to unlock volatile aromatic compounds and bright acidity that cold water alone often fails to extract.
By incorporating this quick preliminary step, you ensure a more vibrant and full-bodied flavor profile, bridging the gap between the smoothness of cold steeping and the rich complexity of traditional brewing, resulting in a much more sophisticated and satisfying glass of coffee.
Making cold brew coffee ice cubes
Nothing ruins a perfectly steeped batch of cold brew faster than standard ice cubes melting and diluting the rich flavor into a watery mess.
To maintain the integrity of your beverage from the first sip to the last, you should freeze extra cold brew into ice trays to create specialized coffee cubes.
As these cubes melt in your glass, they release more coffee concentrate rather than plain water, ensuring your drink remains bold and flavorful even on hot days.
For an added twist of luxury, you can even freeze a mixture of coffee and a splash of milk or simple syrup within the cubes to create a self-creaming effect as they dissolve.
Using coffee-based ice cubes is a total game-changer for those who enjoy sipping their drinks slowly over several hours. This proactive strategy prevents the dreaded dilution that occurs with regular ice, allowing you to preserve the intended strength and mouthfeel of your hard work.
It is a simple yet highly effective solution for anyone dedicated to the ultimate home-brewing experience.
Frequently Asked Questions
What is the best coffee-to-water ratio for cold brew?
A standard ratio for cold brew concentrate is 1:4 (one cup of coffee grounds to four cups of water). If you prefer a ready-to-drink brew that doesn’t require dilution, use a 1:8 ratio.
What type of coffee grind should I use for cold brew?
You should always use a coarse, even grind similar to the consistency of sea salt. Fine grounds can make the coffee over-extracted and bitter, and they are much harder to filter out of the finished liquid.
How long does cold brew need to steep?
Cold brew typically needs to steep for 12 to 24 hours at room temperature or in the refrigerator. Steeping for less than 12 hours may result in a weak flavor, while exceeding 24 hours can lead to woody or bitter notes.
Do I need a special machine to make cold brew at home?
No special equipment is required; you can simply use a glass jar or a French press. After steeping, you just need a way to filter the grounds, such as a fine-mesh sieve, cheesecloth, or a paper coffee filter.
Should I steep my cold brew in the fridge or on the counter?
Both methods work well, but room temperature steeping is generally faster and extracts more floral notes. Steeping in the refrigerator is more forgiving and results in a very clean, crisp flavor profile.
How long does homemade cold brew stay fresh?
Cold brew concentrate can last in the refrigerator for up to two weeks if stored in an airtight container. If you have already diluted the coffee with water or milk, it is best consumed within 2 to 3 days.
How do I dilute cold brew concentrate?
To serve, mix your concentrate with equal parts water or milk, typically a 1:1 ratio. You can adjust this based on your caffeine tolerance and how strong you prefer the flavor of your coffee.
Conclusion
Making cold brew coffee at home is a simple, cost-effective way to enjoy a smooth and low-acid caffeine fix. By selecting quality beans, using a coarse grind, and allowing the grounds to steep for at least twelve hours, you can create a versatile concentrate that lasts all week. Experiment with different ratios to find your perfect strength. Now that you have mastered the basics, start brewing today and enjoy the refreshing taste of homemade coffee.