Cold Brew Concentrate How To Make
Making your own cold brew concentrate at home is surprisingly simple and saves you a fortune at the coffee shop. If you are looking for that perfectly smooth, low-acid kick to start your morning, you have come to the right place. This guide breaks down the exact water-to-coffee ratios and steeping times you need for a foolproof batch every single time. We will show you how to mix, wait, and strain your way to delicious DIY caffeine.
What is Cold Brew Concentrate?
The difference between cold brew and iced coffee
Understanding the distinction between these two beverages is essential for mastering your home barista skills. Iced coffee is essentially standard drip coffee brewed with hot water, then cooled down and served over ice. This rapid extraction process often highlights acidity and bitterness, which can become diluted as the ice melts.
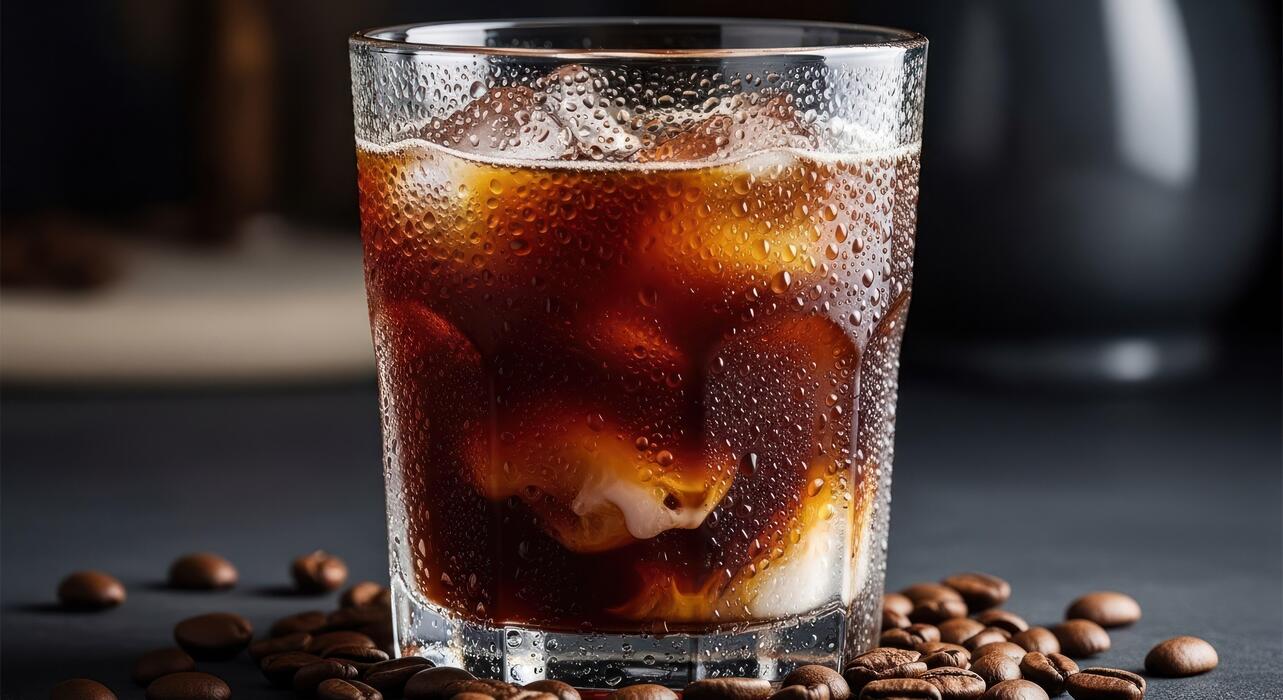
In contrast, cold brew concentrate is created by steeping coarse coffee grounds in room temperature or filtered cold water for an extended period, typically between 12 and 24 hours.
This slow, heat-free method prevents the extraction of harsh tannins and oils, resulting in a smooth, low-acid profile with a naturally sweet chocolatey undertone. Because it uses a high coffee-to-water ratio, the final product is a potent liquid designed to be diluted later.
While iced coffee is a quick fix, cold brew is a deliberate infusion that offers a much richer body and a more concentrated caffeine kick without the sour notes often associated with traditional chilled drip coffee.
Why concentrate is better than ready-to-drink
Opting to make a DIY concentrate offers several strategic advantages over buying pre-diluted, ready-to-drink bottles. First, it provides ultimate customization control, allowing you to adjust the strength of your drink exactly to your preference by varying the amount of water, milk, or cream you add.
When you brew a concentrate, you are also significantly saving refrigerator space, as one small jar can produce several liters of finished coffee. Furthermore, homemade concentrate is far more cost-effective than purchasing individual servings from a cafe or grocery store.
By controlling the extraction time and the quality of the beans, you ensure a fresher taste profile that lacks the preservatives often found in commercial shelf-stable options.
This versatility makes it a superior kitchen staple; you can even use the undiluted liquid as a powerful ingredient for baking recipes, cocktails, or protein shakes, providing a deep coffee flavor that a standard watery brew simply cannot match in intensity or culinary performance.
How long cold brew concentrate lasts
One of the most practical benefits of learning how to make cold brew concentrate is its impressive shelf life compared to hot-brewed coffee. Once you have finished the steeping process and carefully filtered out the grounds, you should store the liquid in an airtight glass container in the refrigerator.
Under these optimal conditions, your concentrate will remain fresh and flavorful for up to two weeks. It is important to keep the concentrate undiluted during storage, as adding water or milk significantly accelerates spoilage and degrades the flavor profile within just a few days.
To ensure the best quality, always use a clean vessel and keep the lid sealed tight to prevent the coffee from absorbing other food odors from your fridge. If you notice any sour smell or visible mold, it is time to discard the batch.
This long-lasting nature makes it the perfect solution for efficient meal prepping, allowing you to brew a large batch on Sunday and enjoy effortless, high-quality caffeine every morning of the work week.
Best Coffee Beans for Cold Brew
Choosing the right roast level
When learning cold brew concentrate how to make, the selection of your roast level is the most critical foundation. While you can technically use any bean, a dark roast is widely considered the gold standard for cold extraction.
Unlike hot brewing, which can highlight the delicate floral notes of a light roast, the cold steeping process excels at pulling out deep, chocolatey, and nutty undertones. Darker beans undergo a longer roasting process that reduces acidity, ensuring your final concentrate is incredibly smooth rather than sour.
Medium roasts also perform well if you prefer a balanced profile with hints of caramel and red fruit. Avoid light roasts for this specific method, as their complex brightness often translates into a thin, grassy flavor when brewed without heat.
For the best results, look for beans labeled as low acidity or specifically intended for espresso, as these flavor profiles integrate perfectly with milk or water when diluting your powerful homemade concentrate later on.
Why coarse grind size matters
The secret to a crystal-clear cold brew concentrate how to make lies entirely in the texture of your coffee grounds. You must utilize a coarse grind, similar in consistency to sea salt or peppercorns.
Because cold brew involves an extended immersion time—typically between 12 and 24 hours—the water has ample opportunity to penetrate the coffee particles. If you use a fine or medium grind intended for drip machines, the surface area is too large, leading to over-extraction and a harsh, bitter taste.
Furthermore, fine sediments are nearly impossible to filter out completely, resulting in a muddy, silty texture that ruins the mouthfeel of your drink. A coarse grind allows the water to flow freely around the particles, extracting the sweet oils and sugars slowly and naturally.
This specific texture ensures that when you finally strain your concentrate through a mesh or paper filter, the liquid remains clean, vibrant, and perfectly balanced for long-term storage in your refrigerator.
Freshly ground vs. pre-ground beans
To master cold brew concentrate how to make at a professional level, you should prioritize freshly ground beans whenever possible. Coffee begins to oxidize the moment it is ground, losing the volatile aromatic compounds that provide rich flavor.
Since cold brew relies on a long steeping time to build its character, using beans ground just minutes before adding water ensures a more robust and fragrant concentrate.
However, if you do not own a high-quality burr grinder, purchasing high-quality pre-ground coffee is a viable secondary option, provided it is explicitly labeled as a coarse grind. Many grocery store pre-ground coffees are too fine for this method, which can lead to a bitter batch.
If you must use pre-ground, ensure it is stored in an airtight container in a cool, dark place to preserve as much freshness as possible.
Ultimately, the investment in whole beans and a dedicated grinder will yield a significantly more flavorful, cafe-quality concentrate that justifies the extra effort during your preparation process.
Cold Brew Concentrate Ratio Guide

The standard 1:4 ratio for beginners
To master cold brew concentrate, the most reliable starting point is the 1:4 ratio, which uses one part coarsely ground coffee to four parts filtered water. This specific measurement creates a robust, versatile base that is significantly stronger than standard drip coffee.
Begin by combining one cup of coffee grounds with four cups of cold water in a large glass jar. It is essential to use a coarse grind, resembling sea salt, to prevent the final brew from becoming over-extracted or muddy.
Once combined, stir gently to ensure all grounds are fully saturated, then cover and let it steep at room temperature for 12 to 24 hours. This time-tested method extracts the deep chocolatey and nutty notes while leaving behind the harsh acidity typically found in hot brewing.
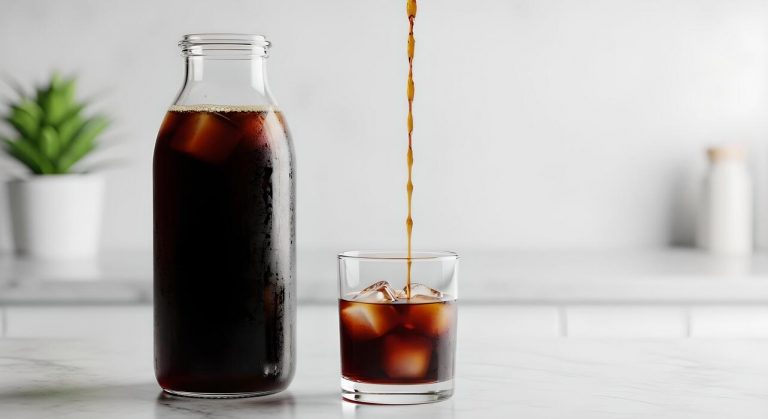
After the steeping period concludes, filter the mixture through a fine-mesh sieve or paper filter. You will be left with a powerful liquid gold that serves as the perfect foundation for various iced beverages throughout your week.
Adjusting strength for your taste
While the standard ratio is a great baseline, you can easily customize the intensity of your cold brew concentrate to suit your personal palate. If you prefer an ultra-potent concentrate that holds up against heavy cream or flavored syrups, try narrowing the ratio to 1:2 or 1:3.
This produces a viscous, bold liquid that packs a significant caffeine punch and requires minimal storage space in your refrigerator.
Conversely, if you find the 1:4 ratio too intense even after dilution, you can shift toward a 1:5 or 1:6 ratio, which yields a smoother, lighter concentrate that is closer to a ready-to-drink strength.
Remember that the final flavor is also influenced by your dilution process after brewing; most enthusiasts mix their 1:4 concentrate with equal parts water or milk.
Experimenting with these variables allows you to fine-tune the mouthfeel and aromatic profile, ensuring that every glass of cold brew you pour at home meets your exact preferences for sweetness, body, and overall strength.
Measuring by weight vs. volume
For the most consistent results in your kitchen, understanding the difference between measuring by weight versus volume is crucial. Using a digital kitchen scale to measure in grams is the gold standard for accuracy because coffee beans vary significantly in density based on their roast level and origin.
For a 1:4 ratio by weight, you would use 250 grams of coffee for every 1,000 grams (1 liter) of water. This precision ensures that every batch tastes identical, regardless of whether you are using a dark oily roast or a light fruity bean.
If you do not have a scale, measuring by volume using measuring cups is a functional alternative, but it is less precise. When using volume, remember that one cup of grounds is not the same weight as one cup of water.
To compensate for the air gaps between coarse grounds, always use a level measuring cup and avoid packing the coffee down. Whether you choose the precision of grams or the convenience of cups, staying consistent with your chosen measurement method is the secret to perfecting your home brewing.
How to Make Cold Brew Concentrate at Home
Essential equipment and supplies
To begin your cold brew journey, you need a few fundamental tools to ensure a smooth extraction process. Start with high-quality, freshly roasted coffee beans, preferably a medium or dark roast, which provides the chocolatey notes characteristic of cold brew.
You will need a burr grinder capable of producing a very coarse, sand-like texture to prevent bitterness and clogging. A large glass jar or specialized cold brew pitcher is necessary for the steeping phase, as non-reactive materials maintain the purest flavor profile.
For the filtration stage, prepare a fine-mesh sieve paired with a paper coffee filter or cheesecloth to remove all sediment, resulting in a clean concentrate. Accurate measurements are vital for consistency, so using a digital kitchen scale to weigh your beans and filtered water is highly recommended.
Finally, ensure you have plenty of filtered water, as the mineral content significantly impacts the final taste of your homemade concentrate.
Step-by-step mixing instructions
Creating a potent concentrate requires a specific ratio, typically one part coffee to four parts water by weight. Begin by grinding your beans to a coarse consistency, similar to sea salt, to avoid over-extraction.
Add the dry grounds into your brewing vessel and slowly pour half of your filtered water over them, ensuring all grounds are saturated. Use a long spoon to gently stir the mixture, breaking up any dry pockets or clumps that may hinder extraction.
Pour in the remaining water and give it one final stir before sealing the container tightly. It is important to avoid shaking the jar, as agitation can lead to a cloudy final product. Once mixed, let the container sit undisturbed in your chosen environment.
After the steeping period is complete, strain the liquid twice through your prepared filter setup to remove all fine particles. This process leaves you with a versatile, shelf-stable concentrate that can be diluted with water or milk according to your preference.
Steeping times for room temperature and fridge
The duration of your steep depends largely on the temperature of the environment, as heat accelerates the extraction of oils and caffeine. If you choose to steep at room temperature, the process is faster, typically requiring between 12 to 15 hours to reach peak flavor.
This method often results in a bolder, more robust profile but requires careful monitoring to prevent over-extraction. Conversely, steeping your concentrate in the refrigerator is a slower, more forgiving process that usually takes 18 to 24 hours.
Cold-steeping yields a smoother, sweeter concentrate with significantly lower acidity, making it ideal for those with sensitive stomachs. Regardless of the location, ensure the vessel is kept away from direct sunlight and strong odors that could permeate the glass.
Once the time is up, immediately strain the coffee to stop the brewing process. Store your finished concentrate in the fridge, where it will remain fresh and flavorful for up to two weeks.
Filtering and Storing Your Cold Brew

Best ways to strain the grounds
To successfully filter your cold brew concentrate, start by using a dual-filtration method to remove all sediment. First, pour the steeped mixture through a fine-mesh metal sieve to catch the coarse grounds.
For a truly clean profile, follow this with a second pass through a standard paper coffee filter or a high-quality nut milk bag. This secondary step is crucial because it removes the fine ‘silt’ that can lead to a chalky texture or bitterness if left in the concentrate too long.
If you find the paper filter is clogging, try stirring the liquid gently or replacing the filter halfway through the process. Using a dedicated cold brew cloth filter is another excellent option, as it is reusable and specifically woven to handle the dense viscosity of a concentrated brew.
Whichever method you choose, avoid squeezing the grounds or the filter bag at the end, as this forces excess tannins and bitter oils into your liquid, ruining the smooth flavor profile you worked so hard to achieve.
Storage containers for maximum freshness
Once your concentrate is filtered, your choice of storage container is the most significant factor in maintaining its quality. Airtight glass carafes or mason jars are the gold standard for cold brew storage because glass is non-porous and will not absorb old coffee odors or leach chemicals into your drink.
Ensure the container has a silicone or rubber gasket seal to prevent oxygen from entering, which causes the coffee to oxidize and lose its vibrant aromatic notes.
If possible, use a dark-tinted or amber glass bottle to shield the concentrate from UV light, which can degrade the delicate flavor compounds over time. Always leave as little ‘headspace’ as possible at the top of the jar to minimize air contact.
Store the container in the coldest part of your refrigerator, away from the door, to keep the temperature consistent.
When handled properly in a sealed glass vessel, your cold brew concentrate will remain delicious and potent for up to two weeks, though it is best enjoyed within the first seven to ten days.
Signs your cold brew has gone bad
Monitoring the quality of your stored cold brew concentrate is essential for both flavor and safety. The first sign that your brew is past its prime is a noticeable change in aroma, shifting from a rich, chocolatey scent to something acidic or vinegary.
If you detect any sour or ‘off’ smells, it is time to discard the batch. Visually, look for any signs of cloudiness that weren’t there initially, or in extreme cases, the presence of mold or white fuzzy spots on the surface of the liquid.
Another indicator is a significant loss of flavor; if the concentrate tastes flat, thin, or excessively metallic, the oils have likely oxidized. Since cold brew is low in acidity, it can eventually become a breeding ground for bacteria if kept too long.
A good rule of thumb is to label your container with a ‘brew date’ so you can track its age accurately. If the liquid develops a slimy texture or an unusually pungent fermented odor, do not consume it, as these are clear indicators of microbial spoilage.
How to Dilute and Serve Cold Brew
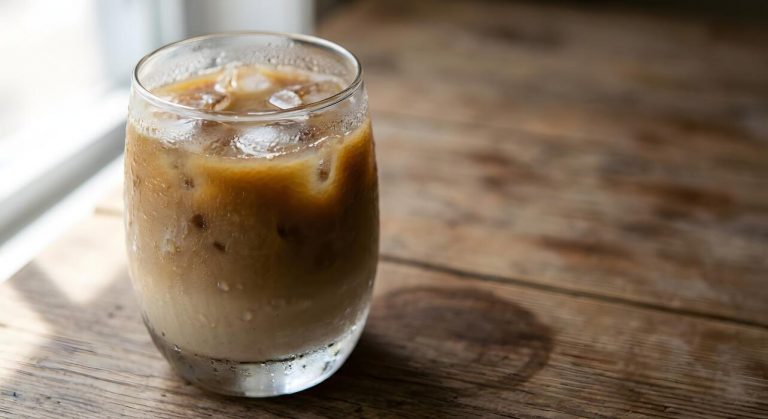
Mixing with water or milk
To transform your potent cold brew concentrate into a drinkable beverage, you must first master the dilution ratio. For most home-brewed batches, a standard 1:1 ratio of concentrate to liquid is the ideal starting point.
If you prefer a bold, caffeine-forward experience, mix equal parts concentrate and filtered water to preserve the bean’s natural profile. For those who enjoy a creamier, latte-style drink, replace the water with your choice of whole milk, oat milk, or almond milk.
The high fat content in dairy or barista-blend plant milks beautifully complements the low acidity of cold brew, resulting in a velvety mouthfeel. If you find the 1:1 mixture too intense, simply adjust by adding small increments of liquid until the strength matches your palate.
Always remember to add the concentrate to the glass first, then pour your diluting liquid over it to ensure the components integrate thoroughly without needing excessive stirring, which can introduce unwanted aeration to the final drink.
Hot vs. iced serving options
While cold brew is synonymous with chilled drinks, its versatility allows for both refreshing iced versions and comforting hot preparations. To serve it iced, fill a tall glass with large, slow-melting ice cubes before pouring in your diluted mixture. This prevents the drink from becoming watery too quickly.
For a professional touch, try freezing leftover coffee into ice cubes to maintain full flavor as they melt. Conversely, many people are surprised to learn that cold brew makes an excellent hot coffee.
Because the concentrate is already brewed, you simply need to combine it with boiling water or steamed milk. This method is often preferred by those with sensitive stomachs because the cold-extraction process results in 60% less acidity than traditional drip coffee, even when served warm.
Simply heat your concentrate gently on the stove or add it to a mug of hot water for a smooth, stomach-friendly morning cup that retains all the chocolatey and nutty notes of the original cold steep.
Flavoring ideas and sweeteners
Customizing your cold brew is the final step in creating a cafe-quality beverage at home. Since cold liquids do not dissolve granulated sugar efficiently, it is highly recommended to use liquid sweeteners like simple syrup, agave nectar, or maple syrup. These integrate instantly, ensuring every sip is consistently sweet.
For a sophisticated flavor profile, consider adding a few drops of pure vanilla extract or almond extract directly into the concentrate. If you enjoy seasonal variations, stir in a dash of cinnamon or cocoa powder; however, whisking these into a small amount of warm milk first can help prevent clumping.
For those seeking a modern twist, a splash of salted caramel or lavender syrup can elevate the beverage significantly. You can also experiment with citrus by adding a fresh orange peel, which highlights the brighter, fruity undertones often found in light-roast cold brews.
Regardless of your choice, always add flavorings gradually to avoid overpowering the rich, complex base you spent hours patiently steeping.
Tips for Better Cold Brew Results
Using filtered water for better flavor
To achieve a professional-grade cold brew concentrate, the quality of your water is just as critical as the beans you select.
Since coffee is roughly ninety-eight percent water, using tap water containing chlorine or heavy minerals can result in a metallic or harsh aftertaste that ruins the profile of your roast.
Always use freshly filtered water to ensure a clean, neutral canvas that allows the nuanced notes of the coffee to shine. If you are aiming for the best results, avoid distilled water, as it lacks the essential minerals needed to pull flavors from the grounds effectively.
Instead, opt for a standard charcoal filter or bottled spring water to maintain the ideal mineral balance. This simple adjustment prevents off-flavors and ensures your concentrate remains smooth and sweet.
By prioritizing water purity and temperature control, you create a consistent foundation that highlights the chocolatey and nutty characteristics typical of a high-quality cold brew extraction process.
Common mistakes to avoid
The most frequent error when making cold brew concentrate is using a grind size that is too fine.
You must use a consistent coarse grind similar to sea salt; if the grind is too small, the water will over-extract the beans, leading to a cloudy appearance and a bitter, astringent flavor profile.
Another critical mistake is failing to properly saturate all the grounds at the beginning of the steeping process. Ensure you stir the mixture gently to eliminate dry pockets, but avoid over-agitation which can lead to muddiness. Furthermore, many beginners rush the process by steeping for less than twelve hours.
For a true concentrate, you need a steeping time of 16 to 24 hours at room temperature or in the fridge. Finally, never skip the double filtration step if you notice sediment in your cup.
Using a paper filter after the initial mesh strain will remove fine particulates and oils, resulting in a much cleaner and more refined mouthfeel.
How to scale the recipe for large batches
Scaling your cold brew production is straightforward as long as you maintain a consistent coffee-to-water ratio, typically 1:4 or 1:5 by weight for a strong concentrate.
When preparing large volumes for the week, it is helpful to use a large glass dispenser or a dedicated brewing bucket with a built-in spigot to simplify the straining process.
Always measure your ingredients by weight using a digital scale rather than volume to ensure accuracy as you multiply the recipe.
If you are brewing in bulk, consider using disposable commercial-grade coffee filters or nut milk bags to hold the grounds, which makes cleanup significantly faster and prevents the drain from clogging. Remember that a larger volume of liquid may require a slightly longer steep time to reach full strength.
Once finished, store your concentrate in airtight glass containers in the refrigerator; it will stay fresh for up to two weeks, allowing you to enjoy a quick, high-quality caffeine fix whenever you need it.
Frequently Asked Questions
What is the best coffee-to-water ratio for cold brew concentrate?
The standard ratio for a strong cold brew concentrate is 1:4, meaning one cup of coffee grounds for every four cups of water. This creates a potent base that is meant to be diluted with water or milk before serving.
What type of coffee grind should I use for cold brew concentrate?
You should always use a coarse, even grind similar to the consistency of sea salt. Fine grounds can make the concentrate bitter, cloudy, and difficult to filter through a mesh strainer or paper filter.
How long should I steep cold brew concentrate?
For the best flavor extraction, steep the grounds in room temperature water for 12 to 24 hours. Steeping for less than 12 hours results in a weak brew, while going beyond 24 hours can lead to overly woody or bitter notes.
Do I need a special machine to make cold brew concentrate?
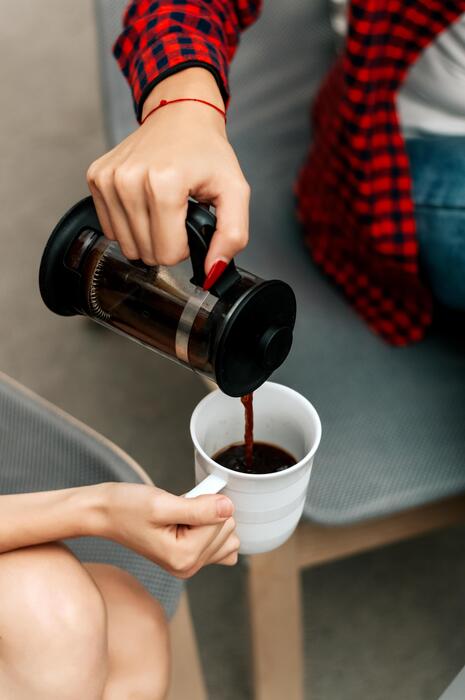
No special equipment is required; you can make concentrate using a simple mason jar or a large pitcher. Once steeped, you just need to strain the mixture through a fine-mesh sieve, cheesecloth, or a French press.
How do I dilute cold brew concentrate when I’m ready to drink it?
Most people prefer a 1:1 ratio, mixing equal parts concentrate and water or milk. However, you can adjust this based on your caffeine tolerance and flavor preference, adding more liquid for a lighter taste.
How long does homemade cold brew concentrate stay fresh?
When stored in an airtight container in the refrigerator, cold brew concentrate remains fresh and flavorful for up to two weeks. For the best taste, keep it undiluted until you are ready to serve a glass.
Conclusion
Mastering cold brew concentrate at home is both simple and rewarding. By following the correct coffee-to-water ratio and allowing ample steeping time, you can create a versatile base that lasts for weeks. Whether you prefer it iced, hot, or mixed into creative cocktails, the smooth and low-acid profile is sure to impress. Now that you have the tools and techniques, it is time to start brewing. Enjoy the convenience of delicious, barista-quality coffee anytime.