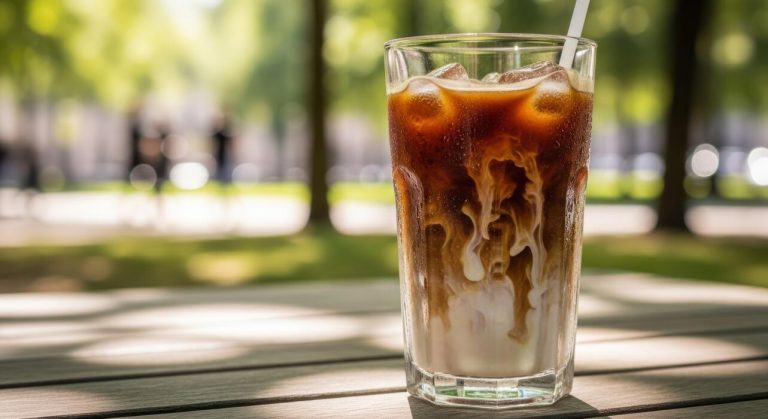
How To Make Cold Brew At Home Easy
Forget expensive coffee shop runs and complicated equipment. Learning how to make cold brew at home easy is simpler than you think. With just two basic ingredients and a little patience, you can create a smooth, low-acid concentrate that stays fresh in your fridge all week. Ready to become your own barista? Let’s dive into the ultimate DIY method.
What is Cold Brew and Why It Tastes Better
The Difference Between Cold Brew and Iced Coffee
Understanding the core difference between these two beverages is the first step in learning how to make cold brew at home easy. While iced coffee is simply hot-brewed coffee poured over ice, cold brew relies on time rather than heat to extract flavor.
By steeping coarse grounds in room temperature or cold water for 12 to 24 hours, you create a concentrated essence that is never exposed to boiling temperatures.
This fundamental shift in the brewing process prevents the solubility of bitter oils and acidic compounds that usually emerge during a traditional hot brew. When you master this method at home, you eliminate the watered-down consistency often found in standard iced coffee.
Instead, you produce a velvety, robust concentrate that maintains its integrity even when diluted with milk or water.
Starting with a simple glass jar and a strainer is all it takes to transition from the sharp, watery profile of iced coffee to the rich, heavy-bodied experience of a true cold brew.
Low Acidity and Naturally Sweet Flavor Profiles
One of the primary reasons cold brew tastes significantly better is its unique chemical composition. Because heat is absent during the extraction process, the acidic precursors and bitter tannins found in coffee beans remain trapped inside the grounds.
Research suggests that cold brew can be up to 67% less acidic than hot-brewed coffee, making it a perfect solution for those with sensitive stomachs or acid reflux. This lack of harshness allows the natural chocolatey and nutty notes of the bean to shine through without being masked by sourness.
You will find that you need far less sugar or artificial sweeteners because the slow infusion highlights a natural, caramel-like sweetness. Learning how to make cold brew at home easy allows you to customize the strength to your exact preference, ensuring every sip is smooth and mellow.
By using a long steeping time, you transform a standard bean into a gourmet treat that offers a clean finish and a highly refreshing, sophisticated palate.
Why Making It at Home Saves You Money
Transitioning to a DIY approach is the ultimate hack for your budget, as coffee shops often charge a significant premium for cold brew due to its long preparation time.
When you learn how to make cold brew at home easy, you realize that you can produce a large batch of concentrate for a fraction of the retail price.
A single bag of beans can yield enough concentrate to last an entire week, allowing you to skip the daily five-dollar expense at the local cafe. Furthermore, you do not need expensive specialized equipment; a simple French press or a fine-mesh nut milk bag works perfectly for filtration.
Because the concentrate stays fresh in your refrigerator for up to two weeks, you also reduce waste by only mixing what you plan to drink immediately.
Investing in high-quality beans once and brewing them yourself ensures you have premium, cafe-quality beverages ready at a moment’s notice, putting hundreds of dollars back into your pocket every year while maintaining a superior taste.
Essential Equipment for Easy Home Brewing

Simple Mason Jar Method
The most accessible way to start your home brewing journey is by using a standard 32-ounce mason jar, which requires almost no upfront investment. To begin, gather your favorite coarsely ground coffee beans to ensure a clean extraction without sediment.
The ideal ratio for a concentrate is one part coffee to four parts water. Simply pour the grounds into the jar, fill it with filtered room-temperature water, and give it a gentle stir to saturate all the grounds.
Secure the lid tightly and let it steep on your counter or in the fridge for about 12 to 24 hours. Once the time is up, use a fine-mesh sieve lined with a paper coffee filter or a piece of cheesecloth to strain the liquid into a clean carafe.
This low-tech method is incredibly effective because it allows for full immersion, resulting in a smooth, low-acid brew that stays fresh in your refrigerator for up to two weeks.
Using a French Press for Cold Brew
If you already own a French press, you have one of the most efficient tools for making cold brew at home without buying extra gadgets. The built-in metal mesh plunger serves as an excellent integrated filter, simplifying the cleanup process significantly.
To execute this method, add your extra-coarse grounds to the bottom of the carafe and slowly pour in cold, filtered water.
Instead of pressing the plunger down immediately, keep it in the upward position or remove the lid entirely and cover the top with plastic wrap to prevent odors from entering. After steeping for at least 16 hours, slowly press the plunger down to separate the grounds from the concentrated coffee.
The primary benefit of using a French press is that the metal filter allows natural oils to remain in the final beverage, providing a richer mouthfeel and a more robust flavor profile compared to paper filtration methods. It is a perfect multi-purpose solution for any kitchen.
Dedicated Cold Brew Makers and Filters
For those who plan to brew regularly, investing in a dedicated cold brew maker or specialized brewing bags can streamline your morning routine. These systems, such as the Toddy or specialized glass carafes with integrated stainless steel infusers, are designed to maximize flavor while minimizing the mess associated with straining.
Many of these units feature a fine-pore mesh filter that stays suspended in the water, making it easy to lift the grounds out once the extraction is complete.
Alternatively, using disposable or reusable brewing bags allows you to steep your coffee like a giant tea bag, which is the easiest way to ensure a completely sediment-free cup. These specialized tools often include airtight seals that help preserve the delicate aromatic compounds of the coffee for longer periods.
By using equipment specifically engineered for cold extraction, you can achieve consistent, professional-quality results that rival your favorite local coffee shop while enjoying the convenience of a system that is built for easy cleanup and storage.
Choosing the Best Coffee Beans and Grind Size
Why Coarse Grind is Non-Negotiable
The most critical step in learning how to make cold brew at home easy is selecting the right texture. Unlike drip coffee or espresso, cold brew requires a consistent coarse grind that resembles sea salt or cracked peppercorns.
Using a fine grind will lead to over-extraction, resulting in a bitter, muddy concentrate that is difficult to filter. Because the coffee grounds steep in water for twelve to twenty-four hours, a larger surface area ensures a slow, steady release of flavor compounds without pulling out harsh tannins.
If you use a standard pre-ground coffee from the grocery store, it is likely too fine for this method, leading to a cloudy drink and a clogged filter. For the best results, use a burr grinder on the coarsest setting to ensure uniformity.
This specific texture allows the water to flow freely around the particles, creating a clean, smooth profile that defines the classic cold brew experience while making the final straining process incredibly simple and mess-free.
Best Roast Levels for Cold Extraction
While you can technically use any bean, choosing a medium to dark roast is generally the best strategy for beginners. Cold water extraction naturally highlights the chocolatey, nutty, and caramel-like notes found in darker roasts while muting the bright acidity often found in light roasts.
If you prefer a bold, syrupy body that stands up well to milk or cream, look for beans labeled as French Roast or Espresso Blend. These beans undergo chemical changes during roasting that make their flavors more soluble during the long steeping process.
Conversely, if you enjoy a more floral or fruity profile, a medium roast can offer a complex and refreshing glass of cold coffee. Avoid very light roasts initially, as they often require much longer steep times and can taste underdeveloped or sour when brewed cold.
By selecting a high-quality dark roast, you guarantee a rich, low-acid concentrate that remains delicious for up to two weeks in your refrigerator, making your morning routine both efficient and flavorful.
Freshness and Water Quality Tips
To truly master the art of easy home brewing, you must prioritize the quality of your raw ingredients. Since cold brew is roughly ninety percent water, using filtered or bottled water instead of tap water can drastically improve the final taste by removing chlorine and minerals that cause off-flavors.
Additionally, the freshness of your beans plays a massive role in the aromatic quality of your concentrate. Always try to buy whole bean coffee and grind it immediately before you begin the steeping process to preserve the delicate oils and gasses.
If you are looking for the most convenient path, specialty coffee shops often offer to grind beans specifically for cold brew upon request. Once your beans are ground and mixed with your purified water, ensure the container is airtight and stored in a cool, dark place or the refrigerator.
This attention to detail prevents oxidation and ensures that every sip of your homemade batch is as crisp, vibrant, and satisfying as a professional pour from your favorite local cafe.
The Perfect Cold Brew Ratio and Timing
Standard Coffee-to-Water Ratios for Concentrates
To master how to make cold brew at home easy, you should begin by creating a versatile concentrate. The most reliable standard is a 1:4 coffee-to-water ratio, which uses one cup of coarsely ground beans for every four cups of filtered water.
This potent base is ideal because it saves refrigerator space and allows you to customize every cup later. Because the concentrate is strong, you should dilute it with equal parts water or milk before drinking to achieve a balanced flavor profile.
Using a coarse grind is essential here; fine grounds will result in a muddy, over-extracted liquid that is difficult to filter. By sticking to this high-density ratio, you ensure that the natural sweetness of the beans is preserved without the harsh acidity found in hot coffee.
Always use filtered water at room temperature to start the extraction process, as this provides a clean canvas that highlights the specific tasting notes of your chosen coffee roast.
Ready-to-Drink Ratios for Beginners
If you prefer a simpler approach without the need for dilution, the 1:8 ready-to-drink ratio is the most user-friendly method for beginners. This ratio involves mixing approximately one cup of coarse coffee grounds with eight cups of water, producing a smooth beverage that is ready to pour straight over ice.
This method is particularly effective if you are using a dedicated cold brew pitcher or a large French press, as it eliminates the guesswork of measuring liquids after the brewing process is complete. To keep the process easy, remember that coarse grounds are non-negotiable to prevent a bitter aftertaste.
When the timer is up, simply strain the mixture and enjoy the mellow, chocolatey notes that cold brewing naturally enhances.
This lower concentration is perfect for those who enjoy a larger volume of coffee without the intensity of a concentrate, making your morning routine seamless and highly consistent every single time you brew a fresh batch.
How Long to Steep for Maximum Flavor
Timing is the final secret to making cold brew at home easy, and the sweet spot for most palates is steeping for 12 to 18 hours. If you leave the grounds in the water for less than 12 hours, the coffee may taste weak or underdeveloped.
Conversely, steeping for longer than 24 hours can pull out woody, bitter tannins that ruin the smooth profile you desire.
For the best results, steep your coffee at room temperature on the counter for the first 12 hours to accelerate extraction, then move it to the fridge if you prefer a slower finish.
Once the time is up, strain the grounds immediately to stop the brewing process and lock in the flavor. If you find the taste too bold, aim for the shorter end of the window next time; if it feels thin, push it toward 18 hours.
Consistency in timing ensures that your homemade cold brew remains a refreshing, low-acid alternative to traditional iced coffee methods.
Step-by-Step Guide to Making Cold Brew

Mixing Your Coffee and Water
To begin your easy home setup, you must focus on the foundation of the brew: the ratio and the grind size. Achieving a smooth concentrate requires a coarse grind, similar in texture to sea salt, which prevents over-extraction and bitterness.
Start by measuring a 1:4 ratio of coffee to water for a strong concentrate, or a 1:8 ratio if you prefer a ready-to-drink beverage. Place your grounds into a large glass jar or a dedicated cold brew carafe.
Gently pour filtered, room temperature water over the dry grounds, ensuring every particle is saturated. Do not stir aggressively; instead, use a long spoon to submerge the grounds lightly so that no dry pockets remain. This initial contact is crucial because it sets the stage for a balanced flavor profile.
By keeping the mixture consistent and avoiding fine dust, you ensure a clean finish that highlights the natural sweetness of your chosen beans without the harsh acidity found in hot coffee.
The Steeping Process at Room Temp vs Fridge
Once your mixture is prepped, you have two primary options for the extraction phase: your countertop or your refrigerator. Steeping at room temperature is generally faster, typically taking between 12 to 15 hours, as the warmer environment accelerates the breakdown of compounds.
This method often results in a bolder, more robust body. Conversely, placing your vessel in the fridge requires a longer duration of 18 to 24 hours due to the cold slowing down the extraction.
The benefit of the cold method is a significantly cleaner and brighter flavor profile with even less acidity. Whichever location you choose, ensure the container is tightly sealed to prevent the coffee from absorbing any stray odors from your kitchen or fridge.
Avoid the temptation to agitate the jar during this time; patience is the key to a successful batch. Simply set a timer and let the slow immersion process work its magic to create a silky, caffeinated concentrate that stays fresh for days.
How to Properly Strain Without the Mess
Filtering your cold brew is the final hurdle to achieving a professional-grade drink at home. To avoid a muddy texture, start by pouring the mixture through a fine-mesh sieve to catch the largest grounds.
For a truly polished result, perform a second pass using a paper coffee filter or a clean flour sack towel nested inside the strainer. This step effectively removes the fine silts and oils that can make the coffee taste chalky.
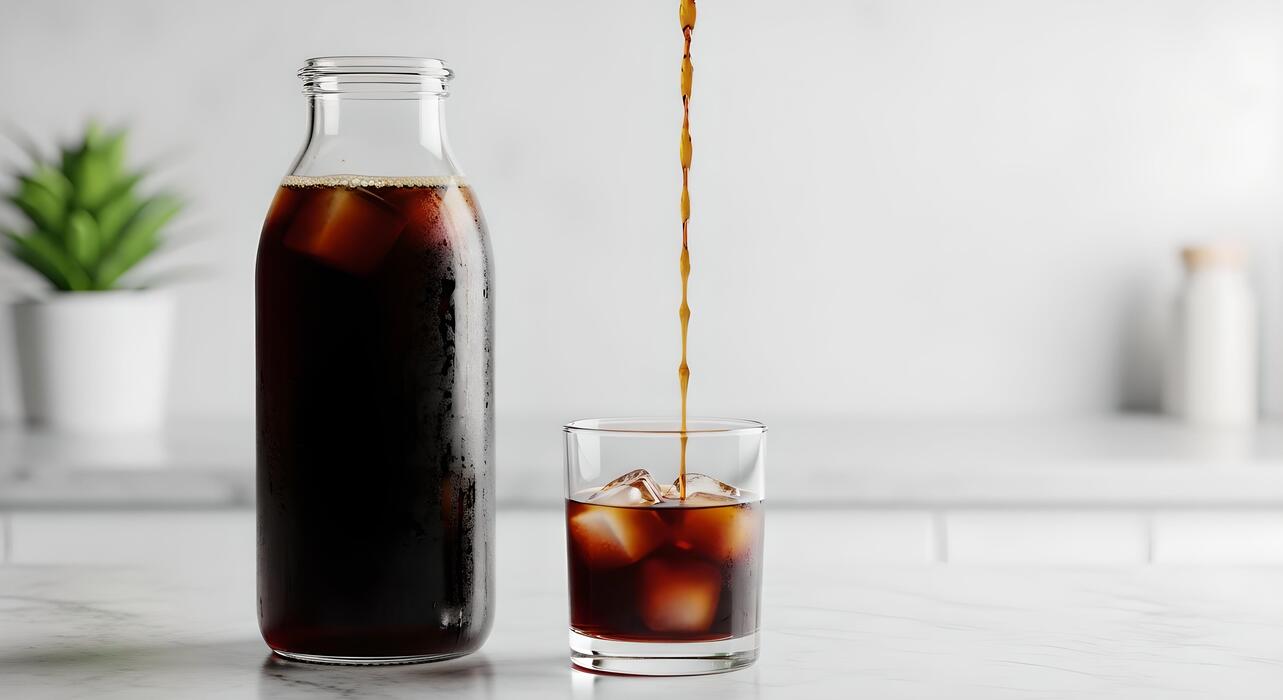
To keep the process mess-free, work in small batches and avoid squeezing the filter, as this can force bitter tannins into your final product. Let gravity do the work naturally. Once strained, transfer your clear, dark liquid into a clean glass bottle.
This concentrated elixir can be stored in the refrigerator for up to two weeks. When you are ready to serve, simply dilute the concentrate with equal parts water or milk over ice. This methodical approach ensures a smooth, sediment-free experience every time you pour a glass of your homemade brew.
How to Serve and Store Your Cold Brew
Diluting Your Concentrate Correctly
Once your brewing process is complete, you are left with a potent liquid known as concentrate. Because this mixture is significantly stronger than standard drip coffee, the most important step in serving is achieving the perfect dilution ratio.
For a standard balanced cup, start with a 1:1 ratio of coffee concentrate to filtered water. If you prefer a more robust kick that mimics an espresso-style beverage, you can reduce the water or pour the concentrate directly over large ice cubes.
Conversely, if you enjoy a smoother, lighter drink, try a 1:2 ratio. Using filtered water for dilution ensures that no mineral aftertaste interferes with the chocolatey, low-acid notes you worked hard to extract.
Always remember to add your ice after diluting to prevent the drink from becoming overly watery too quickly. Mastering this simple balancing act is the secret to making your homemade cold brew taste exactly like the premium versions sold at high-end specialty cafes.
Milk, Creamer, and Sweetener Ideas
One of the best parts of making cold brew at home is the ability to customize your glass with various additives. Because cold brew is naturally less acidic, it pairs beautifully with creamy dairy or plant-based milks like oat, almond, or coconut milk.
For a decadent treat, try adding a splash of heavy cream or making a DIY cold foam by frothing cold milk with a hand mixer. When it comes to sweetening your drink, liquid sweeteners are superior to granulated sugar, which often fails to dissolve in cold liquids.
Simple syrup, agave nectar, or maple syrup are excellent choices that integrate seamlessly. If you want to get creative, consider adding a drop of vanilla extract or a pinch of cinnamon to the grounds before brewing for an infused flavor profile.
By experimenting with these flavor enhancers and texture modifiers, you can transform a basic glass of iced coffee into a customized barista-quality beverage that perfectly suits your specific morning palate.
Storage Life and Keeping It Fresh in the Fridge
To maintain the peak flavor of your homemade batch, proper storage is absolutely essential. You should always store your cold brew concentrate in an airtight glass container or mason jar to prevent it from absorbing unwanted odors from other foods in your refrigerator.
When stored correctly, undiluted concentrate will stay fresh for up to two weeks, though the flavor is most vibrant within the first seven days.
It is highly recommended to store the liquid in its concentrated form rather than diluting the entire batch at once; this preserves the chemical stability and taste profile for much longer.
If you notice any sourness or a significant loss of aroma, it is likely time to brew a fresh jar. For an extra tip to avoid dilution, try freezing some of your concentrate into ice cubes.
Using these coffee cubes in your glass ensures that as they melt, your drink remains bold and flavorful until the very last sip is gone.
Common Mistakes to Avoid for Better Coffee
Avoiding Bitter Flavors from Over-Steeping
One of the most frequent errors when learning how to make cold brew at home is leaving the coffee to steep for too long. While heat-based brewing takes minutes, cold water extraction is slow, but it does have a limit.
If you exceed 24 hours at room temperature, you risk pulling out harsh tannins and woody flavors that ruin the smooth profile you desire. To ensure a clean finish, aim for a steeping window of 12 to 18 hours depending on your taste preferences.
If you prefer brewing in the refrigerator, you can stretch this to 24 hours because the lower temperature slows down the extraction process significantly. Always set a digital timer the moment you combine the water and grounds so you do not forget to strain the batch.
Once the time is up, filter the concentrate immediately and store it in a sealed glass container. This simple habit prevents the over-extraction of acidic compounds that lead to an unpleasant, bitter aftertaste in your morning cup.
Why You Should Never Use Fine Grounds
Using a standard drip or espresso grind is a major mistake that leads to cloudy, gritty coffee and difficult filtration. For a successful homemade batch, you must use a coarse, sea salt-like grind size to allow water to flow freely around the particles.
Fine grounds have a higher surface area, which causes them to over-extract rapidly, resulting in a muddy texture and a sharp, overly intense flavor profile. Additionally, fine particles will easily slip through mesh strainers or clog paper filters, making the cleanup process a frustrating mess.
If you are buying pre-ground coffee, look specifically for bags labeled for cold brew or French press. If grinding at home, use a burr grinder on the highest setting to achieve uniform, large chunks. This creates a much cleaner sediment-free concentrate that highlights the natural sweetness of the beans.
By avoiding fine sediment, you ensure that your final beverage remains crisp and refreshing rather than thick and silty, providing a professional-quality experience right in your own kitchen.
Fixing Weak or Watery Results
If your cold brew tastes thin or lacks the punch of a caffeine kick, the issue usually lies in your coffee-to-water ratio or your filtration method. Many beginners use too much water, forgetting that cold brew is typically intended to be a concentrate.
A foolproof starting point is a 1:4 ratio of coffee to water by weight, which creates a robust base you can later dilute with milk or ice.
If you find the result is still too weak, ensure all grounds are fully saturated at the start of the brew; dry pockets of coffee mean wasted flavor. Simply stir the mixture gently once to submerge every grain.
Another tip is to avoid over-filtering through thick paper if you want more body, as paper can strip away some of the flavorful oils. Instead, try a dual-straining method using a metal mesh sieve followed by a cheesecloth.
If your drink feels watery after adding ice, try freezing leftover coffee into ice cubes to keep your beverage strong and flavorful until the very last sip.
Frequently Asked Questions
What is the simplest coffee-to-water ratio for easy cold brew?
The easiest ratio to remember is 1:8, which means using 1 cup of coarsely ground coffee for every 8 cups of water. If you prefer a stronger concentrate to mix with milk later, use a 1:4 ratio.
Do I need special equipment to make cold brew at home?
No special equipment is required; you can simply use a large glass jar or pitcher. After steeping, you can strain the mixture through a common fine-mesh sieve lined with a paper coffee filter or a clean cheesecloth.
How long should I let the coffee steep for the best flavor?
For a smooth and balanced flavor, let your cold brew steep at room temperature for 12 to 18 hours. Avoid steeping for more than 24 hours, as this can result in a bitter, over-extracted taste.
What kind of coffee beans work best for easy cold brew?
Any coffee beans will work, but a coarse grind is essential to prevent the brew from becoming cloudy or gritty. Since cold brewing highlights nutty and chocolatey notes, medium or dark roasts are generally the most popular choices.
Should I steep my cold brew in the fridge or on the counter?
You can do either, but steeping on the counter is faster and often results in a more robust flavor profile. If you choose to steep in the refrigerator, increase the time toward the 18-24 hour mark to account for the slower extraction process.
How long does homemade cold brew stay fresh?
Once strained, your cold brew concentrate will stay fresh in a sealed glass jar in the refrigerator for up to two weeks. For the best taste, try to consume it within the first 7 days.
Conclusion
Mastering homemade cold brew is a simple way to elevate your coffee routine while saving money. By focusing on a coarse grind, the right water-to-coffee ratio, and a patient steep time, you can achieve a smooth, low-acid concentrate that lasts all week. Don’t be afraid to experiment with different beans and dilution levels to find your perfect cup. Now that you know the basics, grab your jar and start brewing your own refreshing batch today.