How To Make Cold Brew Coffee Easy
Making smooth, barista-quality cold brew at home doesn’t have to be a complicated science project. If you are tired of bitter iced coffee and expensive cafe runs, you are in the right place. We will show you exactly how to master the perfect coffee-to-water ratio and steeping time. You will be sipping refreshing, low-acid cold brew in no time with our foolproof method.
What is Cold Brew Coffee and Why It Works
Cold Brew vs. Iced Coffee: The Main Differences
To master how to make cold brew coffee easy, you must first understand that cold brew is a brewing method, not just a temperature. While standard iced coffee is brewed hot and poured over ice, cold brew relies on time rather than heat to extract flavor.
By steeping coarse grounds in room temperature or cold water for 12 to 24 hours, you create a concentrated base that is remarkably smooth. This method prevents the bitter oils and acidic compounds from releasing, which typically happens when coffee beans hit boiling water.
The result is a naturally sweet, full-bodied beverage that lacks the watery consistency often found in traditional iced coffee. Because the process is passive, it is the ultimate shortcut for busy mornings.
You simply set it on your counter or in the fridge the night before, and by the time you wake up, you have a ready-to-drink caffeine source that requires zero active monitoring or expensive espresso machinery.
Benefits of Low-Acid Brewing
One of the most significant reasons people search for cold brew solutions is the desire for a gentler caffeine experience. Cold water extraction results in a beverage that is roughly 60 to 70 percent less acidic than hot-brewed coffee.
This makes it an ideal choice for individuals with sensitive stomachs or those prone to acid reflux who still want to enjoy their daily cup. Beyond digestion, low acidity highlights the natural chocolatey and nutty notes of the beans, which are often masked by the sharp bitterness of hot coffee.
Because the chemical profile is more stable, cold brew doesn’t go stale or turn sour as quickly as hot coffee does when it cools down. This stability allows you to enjoy a consistent flavor profile from the first sip to the last.
For those looking to reduce their sugar intake, the inherent sweetness of the low-acid brew means you can often skip the heavy creamers and artificial sweeteners altogether while still enjoying a delicious, rich drink.
Why Cold Brew is Perfect for Meal Prep
Efficiency is the cornerstone of making cold brew coffee easy, and its compatibility with meal prepping is unmatched. Unlike traditional brewing methods that produce a single serving, cold brew is designed to be made in large batches that stay fresh in the refrigerator for up to two weeks.
By creating a potent coffee concentrate, you save significant time during your morning routine; you simply pour a portion of the concentrate and dilute it with water or milk to your preferred strength.
This ‘set it and forget it’ approach eliminates the need to grind beans or wait for a pot to brew every single day. Furthermore, the versatility of the concentrate allows you to use it in smoothies, protein shakes, or even baking recipes throughout the week.
Having a high-quality, pre-made caffeine base ready to go helps you avoid expensive trips to the coffee shop and ensures you always have a refreshing drink on hand. It is the most cost-effective and time-saving strategy for any dedicated coffee lover with a busy schedule.
Essential Equipment for Easy Cold Brew

The Best Glass Jars and Pitchers
To make cold brew coffee easy, your journey starts with selecting the right vessel. While specialized makers exist, a simple large Mason jar or glass pitcher is the most effective and affordable option for beginners.
Glass is the preferred material because it is non-porous and does not absorb oils or odors, ensuring your brew remains crisp and untainted by previous batches. When choosing a container, look for one with a wide-mouth opening to simplify the process of adding coarse grounds and pouring water.
A secure, airtight seal is also essential to prevent your coffee from absorbing refrigerator smells during the long steeping process. Using a clear glass pitcher allows you to monitor the color and sediment levels easily.
If you are brewing for the week, a two-quart jar typically provides enough concentrate for several servings. This low-tech approach removes the complexity of expensive machinery, making your morning routine remarkably efficient and consistently delicious without requiring any significant upfront investment in specialized kitchen hardware.
Filter Options: Cloth, Paper, or Mesh
The filtration method you choose determines the clarity and mouthfeel of your final cup. For an ultra-clean profile, disposable paper filters are excellent as they trap fine sediments and oils, resulting in a bright, crisp beverage.
If you prefer a more sustainable and cost-effective route, reusable fine-mesh stainless steel filters are incredibly convenient; they fit directly into your pitcher and allow for a quicker cleanup. However, mesh filters can sometimes leave a bit of ‘sludge’ at the bottom of the jar.
A middle-ground solution is the organic cotton cloth bag, which offers the sediment-free results of paper but with the eco-friendly benefits of being washable.
Using a cloth nut milk bag is often the easiest way to steep because you can simply lift the bag out when the timer is up, eliminating the need for a messy secondary straining step.
Selecting a high-quality filter ensures that your cold brew is smooth and free of grit, which is the hallmark of a professional-grade homemade concentrate.
Why a Quality Burr Grinder Matters
The secret to making cold brew easy and avoiding a bitter result lies in the consistency of your coffee grounds. Unlike hot drip coffee, cold brew requires an extra-coarse grind similar in texture to sea salt or peppercorns.
Using a manual or electric burr grinder is vital because it crushes the beans into uniform particles, whereas a blade grinder creates a mix of dust and large chunks.
Those tiny dust particles, known as fines, over-extract quickly and lead to a muddy, bitter taste that ruins the smooth profile of a cold steep.
A burr grinder gives you total control over the particle size, ensuring that water flows evenly around the grounds during the twelve to twenty-four-hour steeping period. If you do not own a grinder, many local cafes will grind your beans on a coarse setting upon request.
Investing in a quality grinder simplifies the process by ensuring every batch you make at home is predictably sweet, low in acidity, and perfectly balanced for a refreshing iced drink.
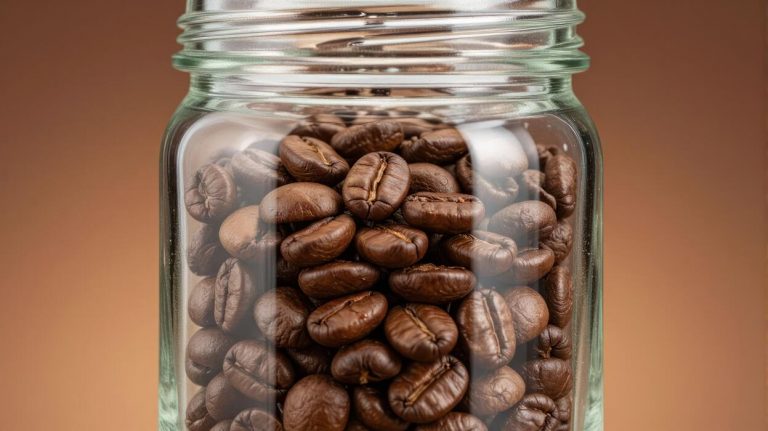
Choosing the Best Coffee Beans for Cold Water
The Best Roast Levels for Smooth Flavor
To make cold brew coffee easy and delicious, start by selecting a medium to dark roast. Unlike hot brewing, the cold extraction process takes place over 12 to 24 hours, which naturally highlights the rich, chocolatey, and nutty notes found in darker beans while leaving behind the harsh acidity.
Light roasts can sometimes result in a tea-like consistency that feels underwhelming or overly floral when served cold. By choosing a darker profile, you ensure a bold, syrupy body that holds its own even when diluted with ice or creamy milk.
Many beginners find that low-acid blends labeled for espresso or French press work exceptionally well for this method. These beans provide a consistent, reliable base that minimizes bitterness, making your home-brewing experience foolproof.
Look for flavor descriptors like caramel, cocoa, or toasted nuts to guarantee a crowd-pleasing result that tastes professional with minimal effort. Investing in the right roast level is the simplest way to ensure your concentrate is smooth and flavorful every single time.
Why You Need a Coarse Grind Size
The most critical factor in making cold brew easy is using a coarse, even grind, similar in texture to sea salt or peppercorns. If your coffee is ground too finely, it will over-extract during the long steeping period, resulting in a muddy, bitter liquid that is difficult to filter.
A coarse grind allows the cold water to flow freely around the particles, extracting the oils and flavors slowly and gently. This specific texture also makes the filtration process much faster; fine particles often clog paper filters or mesh strainers, leading to a messy cleanup and cloudy coffee.
If you do not own a high-quality burr grinder, many local cafes or grocery stores can grind your beans on the coarsest setting for you. Using the right grind size ensures that your finished concentrate is crystal clear and sediment-free, which is the hallmark of a high-quality batch.
By mastering the grind, you eliminate the most common frustrations associated with DIY cold brew, making the entire preparation and cleanup cycle significantly more efficient.
Freshness and Storage Tips
To keep your cold brew routine simple yet high in quality, focus on using freshly roasted beans and proper storage techniques. While cold brewing is more forgiving than hot methods, using beans within two to four weeks of their roast date will significantly enhance the aromatic complexity of your drink.
Always store your whole beans in an airtight container kept in a cool, dark place to prevent oxidation from dulling the flavor profile.
Once you have brewed your concentrate, it can stay fresh in the refrigerator for up to two weeks, provided it is kept in a sealed glass carafe or mason jar.
This longevity is what makes cold brew the ultimate easy option for busy mornings, as you can prep a large batch on the weekend and enjoy it all week long.
If you find you have leftover concentrate, consider freezing it into coffee ice cubes to prevent your future drinks from becoming watered down. Maintaining the integrity of your ingredients from the moment of purchase to the final pour ensures a consistently premium experience at home.
The Simple Step-by-Step Cold Brew Recipe
The Golden Ratio for Coffee to Water
To master how to make cold brew coffee easy, you must start with the correct proportions to ensure a smooth, low-acid result. The ideal starting point is a 1:8 coffee-to-water ratio, which creates a ready-to-drink beverage that is flavorful without being overpowering.
For a standard batch, use one cup of coarsely ground coffee beans for every eight cups of cold, filtered water. Using a coarse grind is critical because it prevents the over-extraction of bitter tannins and ensures the water can flow freely through the grounds during the long steeping process.
If you prefer a stronger concentrate that can be diluted with milk or ice later, you can tighten this to a 1:4 ratio. Measuring by weight is the most accurate method for consistency, but using standard measuring cups works perfectly for beginners.
Always use freshly roasted beans and filtered water to ensure the cleanest flavor profile possible, as the extended contact time amplifies any impurities found in tap water or stale beans.
Mixing and Steeping Instructions
Once you have your ingredients ready, combine the grounds and water in a large glass jar or a dedicated cold brew maker. Add the coffee first, then slowly pour the filtered water over the top, ensuring all grounds are fully saturated.
Use a long spoon to gently stir the mixture, breaking up any dry pockets or clumps that might prevent even extraction. Avoid over-stirring; you simply want a uniform slurry. Cover the container with a lid or plastic wrap to prevent the coffee from absorbing refrigerator odors.
Place the jar in the fridge or leave it on your kitchen counter for 12 to 18 hours. Steeping at room temperature accelerates the process slightly, while refrigeration results in a brighter, crisper finish.
Do not exceed 24 hours of steeping, as this can lead to a woody or unpleasantly bitter taste. This hands-off brewing method is what makes cold brew so convenient for busy mornings, as the slow infusion does all the heavy lifting while you sleep.
How to Filter Without the Mess
The final step in making cold brew coffee easy is achieving a sediment-free finish without creating a kitchen disaster. If you are using a basic jar, start by pouring the liquid through a fine-mesh sieve to remove the largest grounds.
To achieve a professional, silk-like texture, perform a second pass by lining the sieve with a dampened paper coffee filter or a clean flour sack towel. Wetting the filter first prevents it from absorbing the precious coffee oils and speeds up the drainage.
Allow the liquid to drip through naturally; never squeeze the filter, as this forces fine silt and bitter compounds into your final drink. If you are using a French press, simply plunge very slowly to keep the sediment at the bottom.
Once filtered, transfer your clean cold brew into a glass carafe. This concentrate or ready-to-drink brew will stay fresh in the refrigerator for up to two weeks, providing you with an instant, delicious caffeine fix whenever you need it most.
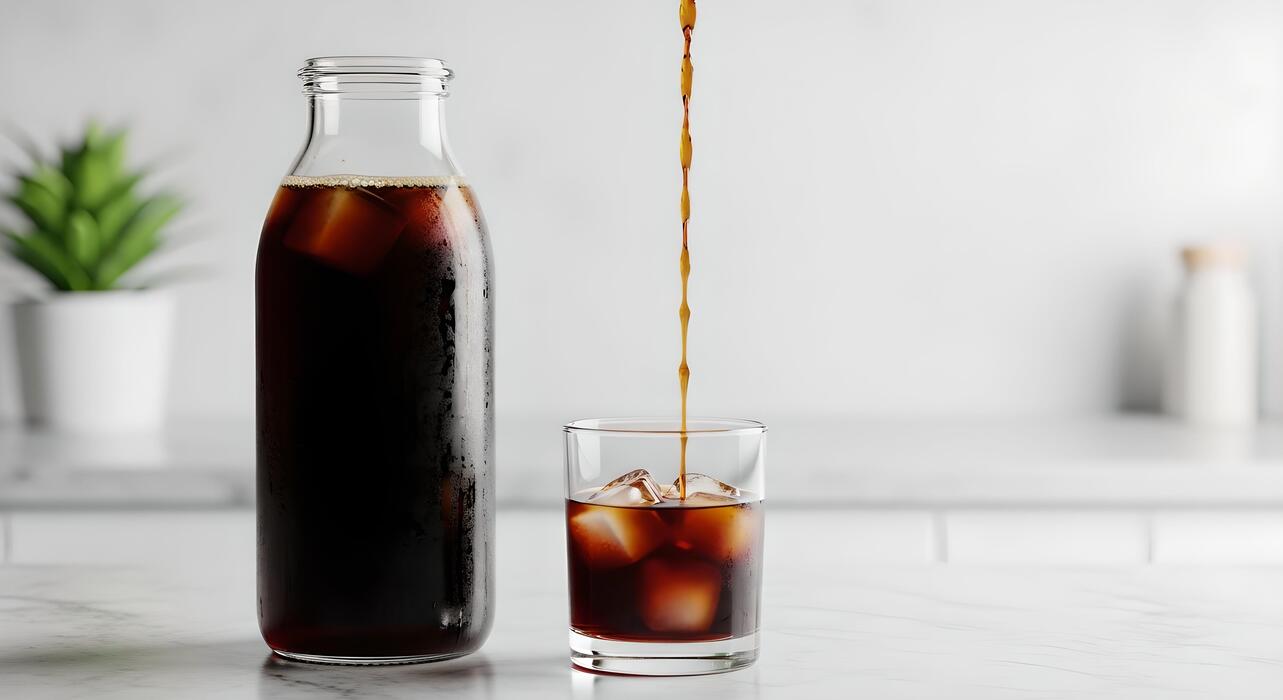
How to Store and Dilute Your Cold Brew Concentrate
Shelf Life in the Refrigerator
To keep your cold brew coffee easy and fresh, proper storage is the most critical step after the initial steep. Once you have filtered your concentrate, transfer it into a clean, airtight glass container like a mason jar or a specialized carafe.
Storing the concentrate in glass helps maintain a pure flavor profile without the risk of plastic leaching or odor absorption. When kept strictly refrigerated, your cold brew concentrate will remain delicious for up to two weeks.
However, for the absolute best taste and aromatic quality, try to consume the batch within the first seven to ten days. Always remember to keep the lid tightly sealed to prevent the coffee from absorbing the scents of other foods in your fridge.
If you notice any sour odors or a significant loss in flavor intensity, it is time to brew a fresh batch. By having a ready-to-pour concentrate waiting in the fridge, you eliminate the morning rush and simplify your daily routine.
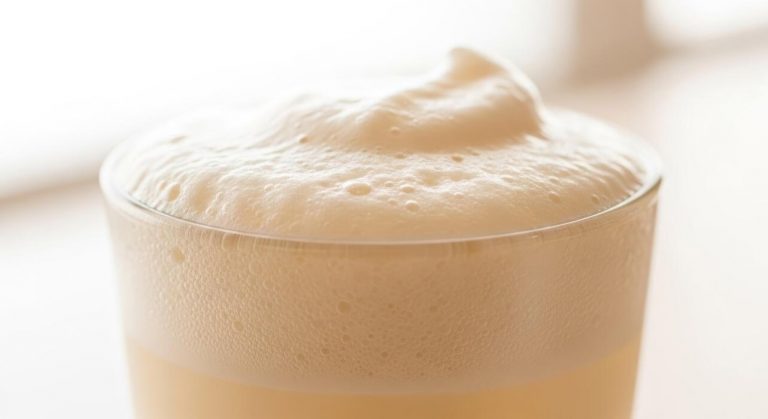
Mixing with Water, Milk, or Creamer
The beauty of a cold brew concentrate lies in its versatility, allowing you to customize every cup to your specific preference. Because the concentrate is highly potent, the standard starting point for a balanced drink is a one-to-one ratio.
Simply fill your glass halfway with coffee concentrate and top it off with filtered water for a classic black coffee, or use your favorite milk for a creamy latte experience.
If you prefer a bolder, more caffeinated kick, you can increase the coffee ratio, or add more liquid if you want a lighter refreshment. For those who enjoy flavored drinks, this is the perfect time to stir in syrups, honey, or creamers, as they integrate seamlessly into the cold liquid.
Using a concentrate makes the process incredibly easy because there is no heat involved, meaning your dairy or plant-based milks won’t curdle or separate. Experimenting with these ratios ensures you get a coffee shop quality beverage at home with minimal effort and maximum flavor.
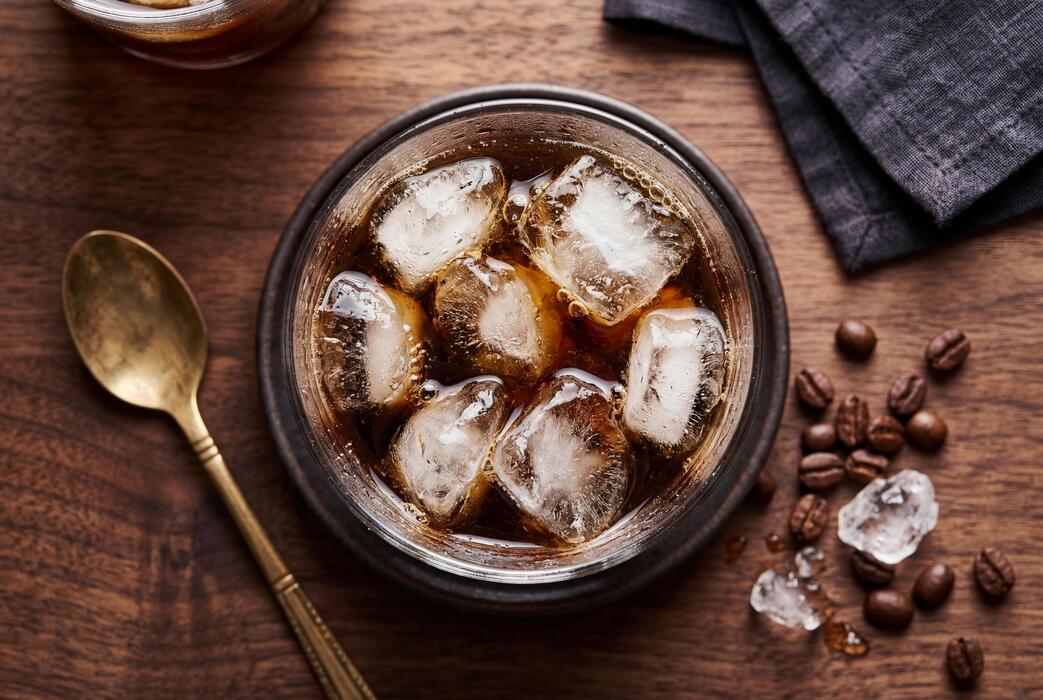
Using Coffee Ice Cubes to Prevent Watering Down
One of the most common frustrations with iced coffee is the dilution that occurs as standard ice melts, turning a rich brew into a watery mess. To solve this and keep your cold brew easy and flavorful until the very last sip, you should create specialized coffee ice cubes.
Simply pour a portion of your prepared concentrate or a slightly diluted version into a standard ice cube tray and freeze them overnight. When you are ready to serve your drink, use these frozen coffee blocks instead of regular water ice.
As the cubes melt, they release extra coffee flavor rather than plain water, maintaining the integrity and strength of your beverage. This simple hack is a game-changer for slow sippers or those living in warmer climates.
It ensures your drink stays consistently bold and refreshing from the moment you pour it until the glass is empty. Keeping a stash of these cubes in your freezer is the ultimate pro tip for a hassle-free and premium home coffee experience.
Tips for Better Tasting Cold Brew
Using Filtered Water for Cleaner Flavor
Since cold brew is composed of over ninety-eight percent water, the quality of your base liquid is the most influential factor in achieving a smooth result. Tap water often contains minerals, chlorine, and trace chemicals that can introduce metallic or harsh medicinal notes during the long extraction process.
To make the process easy and effective, always start with freshly filtered water or bottled spring water. This ensures that the delicate chocolate and nutty profiles of your coffee beans are highlighted rather than masked by impurities.
Using a simple pitcher filter or an under-sink system can significantly improve the clarity of the final cup. By removing heavy sediments and odors, you create a neutral canvas that allows the natural sweetness of the coarse grounds to shine through beautifully.
Remember that clean water equals clean flavor, making it the simplest upgrade you can implement for a professional-grade beverage at home without needing expensive specialized equipment or complex brewing techniques.
Adjusting Steep Times for Strength
Finding the perfect balance of strength and flavor depends entirely on your patience and the specific duration of the soak. For a standard concentrate, the sweet spot usually falls between twelve and eighteen hours.
If you prefer a lighter, more delicate body that highlights floral notes, aim for the shorter end of that window. However, if you are looking for a bold and robust concentrate intended for mixing with heavy milk or cream, extending the time to twenty-four hours is ideal.
Be careful not to exceed this limit, as over-extraction can lead to unpleasant woody or bitter flavors that ruin the characteristic smoothness of cold brew. You can easily manage this by setting a kitchen timer or starting your brew at a consistent time each evening.
Adjusting the duration allows you to customize the caffeine kick and mouthfeel to your personal preference. Mastering your schedule is the most reliable way to ensure a consistent and delicious brew every single time you prepare a batch.
Room Temperature vs. Fridge Steeping
Where you choose to store your brewing vessel significantly impacts the rate of extraction and the final flavor profile of your coffee. Steeping at room temperature is generally faster and tends to pull out more of the rich, heavy oils that provide a creamy texture.
This method typically takes about twelve hours and is perfect for those who want a quicker turnaround. Conversely, steeping in the refrigerator slows down the chemical process, resulting in a bright, crisp, and exceptionally clean taste.
While fridge steeping requires more time—usually upwards of twenty hours—it offers a safer environment for long-term extraction and keeps the beverage chilled and ready to serve immediately. For the easiest experience, choose the fridge method for consistency and to prevent any potential spoilage during warmer months.
Regardless of your choice, ensure the container is tightly sealed to prevent absorbing food odors from your kitchen environment. Both techniques yield excellent results if you match the timing to the specific temperature of your chosen environment.
Common Cold Brew Mistakes to Avoid
Using Finely Ground Coffee
One of the most frequent hurdles to making cold brew coffee easy is selecting the wrong grind size. Many beginners reach for standard pre-ground coffee, which is typically a medium or fine grind intended for drip machines or espresso.
However, using extra-coarse grounds is the secret to a clean and sediment-free concentrate. Fine particles extract too quickly and are incredibly difficult to filter out, often resulting in a muddy, gritty texture that ruins the mouthfeel of your drink.
When you use a coarse grind similar to sea salt, you ensure that the water flows freely through the grounds during the straining process. This makes the cleanup stage significantly faster and more efficient.
By switching to a coarse grind profile, you allow for a slow, gentle extraction that highlights the natural sweetness of the bean rather than its harsh acidity.
Investing in a quality burr grinder or purchasing coffee specifically labeled for cold brew will simplify your routine and guarantee a consistently smooth result every single time.
Over-Steeping and Bitterness
Timing is everything when you want to keep the cold brew process simple and stress-free. A common mistake is leaving the coffee grounds in the water for too long, often exceeding twenty-four hours in hopes of achieving a stronger flavor.
Unfortunately, this usually leads to over-extraction, which introduces unwanted bitterness and a woody, metallic aftertaste that masks the delicate notes of the coffee. To keep things easy, aim for a steeping window of 12 to 18 hours at room temperature.
If you prefer a refrigerated steep, you can extend this slightly, but you should still monitor the clock closely. Setting a simple timer on your phone ensures you don’t forget about your brew. Once the time is up, filter the concentrate immediately to stop the brewing process.
By adhering to a consistent steeping schedule, you remove the guesswork and ensure that your concentrate remains mellow, chocolatey, and ready to be diluted with water or milk without needing excessive sweeteners to hide the bite.
Ignoring the Cleanliness of Your Gear
To make cold brew coffee easy and delicious, you must prioritize the hygiene of your brewing equipment. Because cold brew involves a long immersion period, any residual oils or old coffee particles stuck in your jar, filter, or mesh bag can quickly turn rancid and spoil your entire batch.
This leads to an unpleasant sourness that many people mistake for bad beans. To avoid this, make it a habit to thoroughly deep-clean all components after every use using fragrance-free soap and warm water. Pay special attention to fine-mesh filters where microscopic buildup often hides.
Starting with pristine, sanitized equipment ensures that the only flavors in your cup are the ones intended by the roaster. Furthermore, using filtered water instead of tap water will prevent mineral buildup in your gear and provide a neutral base that allows the coffee’s profile to shine.
Keeping your setup spotless is a small, proactive step that prevents the frustration of wasted batches and ensures your homemade cold brew setup stays efficient and reliable for the long term.
Frequently Asked Questions
What is the easiest way to make cold brew coffee at home?
The simplest method is the ‘jar and strain’ technique. Mix coarse coffee grounds with water in a Mason jar, let it steep for 12-24 hours at room temperature, and then pour the mixture through a paper filter or fine-mesh sieve.
What is the ideal coffee-to-water ratio for simple cold brew?
A foolproof ratio for beginners is 1:4, which means one cup of coffee grounds for every four cups of water. This creates a versatile concentrate that you can dilute with water or milk to suit your taste preference.
Do I need special equipment to make cold brew easily?
No specialized equipment is required; you likely already have the tools in your kitchen. You only need a large container or pitcher, coffee grounds, water, and a way to filter the liquid, such as a coffee filter, cheesecloth, or a French press.
How long should I let cold brew steep for the best flavor?
For an easy, balanced flavor, aim for 12 to 18 hours. Steeping for less than 12 hours may result in a weak brew, while going beyond 24 hours can introduce bitter notes that counteract the natural smoothness of cold brew.
Can I use regular pre-ground coffee for easy cold brew?
While you can use pre-ground coffee, a coarse grind is highly recommended to prevent the brew from becoming muddy or over-extracted. If using standard drip coffee grounds, shorten the steep time slightly and filter the liquid twice to ensure a clean cup.
How can I make the cleanup process easier?
To minimize mess, use disposable cold brew filter bags or a ‘nut milk’ bag to hold the grounds. When the steeping time is finished, simply lift the bag out of the water and discard the grounds without needing to pour and strain the entire batch.
Conclusion
Mastering the art of cold brew coffee at home is remarkably simple and rewarding. By focusing on a coarse grind, maintaining a consistent water-to-coffee ratio, and allowing ample steeping time, you can achieve a smooth, low-acid concentrate that rivals any café. Do not be afraid to experiment with different beans or brewing durations to find your perfect flavor profile. Start your first batch today and enjoy the refreshing, caffeinated rewards of your easy homemade creation.