Cold Coffee How To Make Cold Coffee
Craving a refreshing caffeine kick but not sure where to start? Learning cold coffee how to make cold coffee at home is easier than you think, and you don’t need fancy equipment to get barista-quality results. Whether you prefer a creamy blended frappe or a smooth overnight brew, we have the perfect solution for your cravings.
What is cold coffee and why it is popular
The difference between iced coffee and cold brew
Understanding the distinction between these two methods is the first step toward mastering cold coffee. Iced coffee is essentially hot-brewed coffee served over ice, which provides a quick caffeine fix but requires a stronger brew to prevent dilution as the ice melts.
In contrast, cold brew is made by steeping coarse grounds in room temperature water for twelve to twenty-four hours. This slow extraction process results in a concentrate that is naturally lower in acidity and significantly smoother on the palate.
When you learn how to make cold coffee, choosing between these methods depends on your time constraints and flavor preferences.
Iced coffee offers a bright, acidic profile that highlights floral notes, whereas cold brew delivers a rich, chocolatey depth that remains consistent even when stored in the refrigerator for several days.
Both techniques serve as excellent foundations for adding milk, sweeteners, or flavored syrups, allowing you to customize your beverage to match the refreshing experience found in high-end specialty cafes.
Benefits of making cold coffee at home
Brewing your own chilled beverages offers several practical advantages that go beyond simple convenience. First, you gain complete control over the ingredients, allowing you to adjust the coffee-to-water ratio for your preferred strength and select high-quality beans that suit your taste.
This DIY approach is also highly cost-effective, as the price of a single specialty shop latte can often cover the cost of an entire bag of beans used for multiple home servings.
Additionally, making cold coffee at home is surprisingly efficient for busy schedules; you can prepare a large batch of concentrate over the weekend to enjoy throughout the work week. This reduces daily prep time to just a few seconds of pouring and mixing.
Furthermore, you can experiment with healthier alternatives to refined sugars, such as honey, maple syrup, or oat milk, ensuring your drink aligns with your dietary goals.
By mastering the basics of home brewing, you eliminate the need for expensive equipment while achieving a professional-grade result that is both fresh and tailored to your specific palate.
Common types of cold coffee drinks
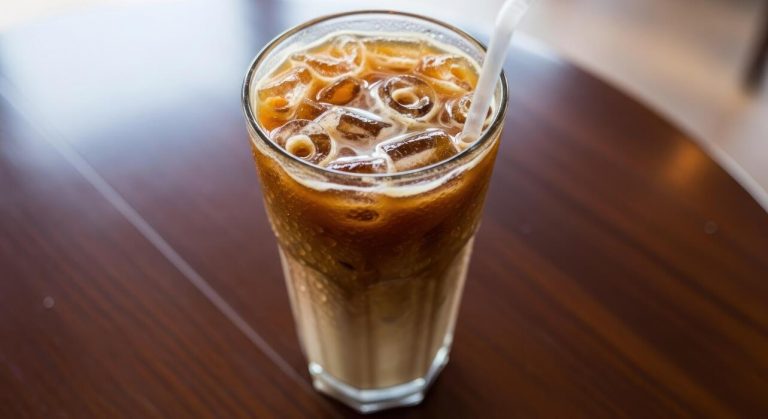
Once you understand the brewing basics, you can explore a variety of popular recipes that define the modern cold coffee landscape. The Classic Iced Latte remains a favorite, combining a shot of chilled espresso with cold milk and ice for a creamy, balanced texture.
For those who prefer something lighter, the Iced Americano offers a bold flavor by diluting espresso with cold water, preserving the coffee’s complex profile without the heaviness of dairy.
If you enjoy a frothy consistency, the Iced Frappé uses instant coffee or espresso blended with ice to create a milkshake-like treat.
Another trending option is Nitro Cold Brew, which infuses the coffee with nitrogen gas to produce a velvety mouthfeel and a cascading visual effect similar to a stout beer.
For a sweeter twist, the Vietnamese Iced Coffee utilizes dark roast coffee dripped over sweetened condensed milk, providing a decadent and intense flavor. Exploring these diverse styles allows you to expand your repertoire and enjoy a refreshing caffeinated beverage that perfectly suits any time of the day or season.
Essential tools and ingredients for the perfect brew

Choosing the right coffee beans and roast
To master the art of cold coffee, you must start with high-quality beans that can withstand the dilution of ice. For traditional iced coffee or cold brew, medium to dark roasts are generally preferred because they possess the bold, chocolatey, and nutty profiles that remain prominent even when chilled.
Lighter roasts can sometimes become overly acidic or lose their delicate floral nuances when served cold, though they work well for flash-chilled methods if brewed with precision. For a smoother, less bitter result, look for freshly roasted Arabica beans and grind them just before brewing.
If you are making cold brew specifically, a coarse grind size is essential to prevent over-extraction and ensure a clean, sediment-free concentrate. Experimenting with single-origin beans from regions like Brazil or Sumatra can provide a rich, syrupy body that elevates your homemade beverage to a professional level.
Always prioritize freshness to ensure the most vibrant flavor profile possible.
Water quality and ice cube tips
Since coffee is mostly water, the quality of your base liquid is a critical factor in achieving the perfect brew. Always use filtered or bottled water rather than tap water to avoid chlorine or mineral tastes that can distort the coffee’s natural profile.
Temperature control is equally vital; for iced pour-overs, use water just off the boil, whereas cold brew requires room temperature or chilled water. One of the most effective solutions to prevent a watery drink is using coffee ice cubes.
Simply freeze leftover coffee in trays so that as they melt, they add more flavor instead of diluting your drink.
Additionally, using large, clear ice spheres or cubes is a smart choice because they have less surface area than crushed ice, meaning they melt much slower and keep your beverage cold for longer periods.
These simple adjustments to your water and ice strategy will immediately improve the consistency and strength of every glass you prepare at home.
Must-have equipment for home baristas
Equipping your kitchen with the right tools makes the process of crafting cold coffee both efficient and enjoyable. A burr grinder is perhaps the most important investment, as it provides the uniform particle size necessary for balanced extraction.
For those who prefer a concentrated, low-acid option, a dedicated cold brew maker or a simple French press works perfectly for long steeping times. If you enjoy a quicker method, a Japanese-style dripper or a Chemex allows for flash-brewing directly over ice, preserving bright aromatics.
To achieve that signature creamy texture found in coffee shops, a handheld milk frother is an affordable tool for creating cold foam with milk or oat-based alternatives. Additionally, a digital kitchen scale ensures you maintain the correct coffee-to-water ratio every time, removing the guesswork from your morning routine.
Finally, keeping a long-handled stirring spoon and insulated glassware on hand will help maintain the ideal temperature while you enjoy your perfectly crafted, refreshing homemade creation.
How to make classic iced coffee in minutes

The hot-to-cold brewing method
The fastest way to achieve a classic iced coffee flavor profile is by using the flash-brewing technique, which involves brewing a concentrated batch of hot coffee directly over ice.
To begin, use a standard drip machine or a pour-over setup, but double the amount of coffee grounds relative to the water you would typically use. This creates a high-strength concentrate that maintains its integrity when diluted.
Start by filling a heat-resistant glass or carafe halfway with fresh ice cubes and place it under your brewer. As the scalding hot liquid hits the ice, it undergoes an immediate temperature drop, which locks in delicate aromatic oils and bright acidity that are often lost in slow-steeping methods.
This chemical reaction ensures that your beverage tastes fresh and vibrant rather than bitter or stale. Once the brewing cycle finishes, give the mixture a quick stir to ensure an even temperature throughout.
This method effectively bridges the gap between traditional brewing and instant refreshment, allowing you to enjoy a professional-quality beverage in under five minutes.
How to prevent watered-down coffee
One of the most common frustrations when making cold coffee at home is the dilution that occurs as ice melts into the warm liquid. To combat this, the most effective solution is to prepare coffee ice cubes in advance.
Simply brew an extra pot of coffee, let it cool to room temperature, and pour it into standard ice trays for freezing.
By using these frozen coffee blocks instead of water-based ice, your drink actually becomes bolder and more flavorful as it sits, rather than turning into a thin, watery mess. Additionally, you should always add your sweeteners and syrups while the coffee is still hot.
Granulated sugar and thick honey dissolve much more efficiently in heat, ensuring a smooth texture without gritty sediment at the bottom of the glass.
If you prefer a creamier finish, opt for heavy cream or full-fat oat milk, as these high-fat dairy options hold up better against melting ice than skim versions. These small adjustments transform a standard home brew into a rich, decadent treat that maintains its strength until the very last sip.
Quick cooling techniques
If you find yourself in a rush and do not have pre-frozen coffee cubes, there are several mechanical tricks to lower the temperature of your brew in seconds. The most efficient DIY method involves using a stainless steel cocktail shaker filled with plenty of ice.
Pouring your hot coffee into the shaker and agitating it vigorously for thirty seconds creates a massive surface area for heat exchange, resulting in a frosty, aerated texture similar to an espresso freddo.
If you do not own a shaker, placing your coffee mug inside a larger bowl filled with ice and rock salt creates a makeshift cooling bath that drops the temperature rapidly without adding extra water to the drink itself.
For those who make iced coffee daily, investing in a specialized hyper-chiller device can cool hot liquid by over one hundred degrees in less than a minute.
Regardless of the tool you choose, the goal is to minimize the contact time between the hot liquid and the melting ice to preserve the maximum caffeine kick and flavor profile. These rapid cooling strategies ensure you never have to wait for a caffeine fix.
How to make smooth cold brew coffee
Step-by-step cold brew concentrate guide
To begin your cold brew journey, you must start by coarsely grinding your coffee beans to a texture resembling sea salt. Fine grounds will lead to over-extraction and a muddy, bitter final product.
Once your beans are ready, place the grounds in a large glass jar or a dedicated cold brew maker. Slowly pour filtered, room-temperature water over the grounds, ensuring every particle is fully saturated.
Avoid stirring aggressively; instead, use a long spoon to gently push the grounds down so they are submerged. Cover the container with a lid or plastic wrap to prevent the coffee from absorbing any odors from your refrigerator.
After the steeping process is complete, you need to filter the mixture twice using a fine-mesh sieve followed by a paper coffee filter or a clean nut milk bag.
This meticulous filtration process is the secret to achieving that signature silky-smooth mouthfeel and a clean finish that makes cold brew concentrate so versatile for iced drinks.
The best coffee-to-water ratios
Finding the perfect balance between strength and smoothness depends entirely on your preferred coffee-to-water ratio. For a versatile and robust concentrate that you can dilute later, the industry standard is a 1:4 ratio, which means using one cup of coffee grounds for every four cups of water.
This creates a powerful base that holds up well when mixed with heavy cream, milk alternatives, or large amounts of ice. If you prefer a ready-to-drink version that requires no dilution, aim for a 1:8 or 1:10 ratio for a lighter, more refreshing profile.
Using filtered water is essential because tap water contains minerals and chlorine that can interfere with the subtle chocolate and nutty notes inherent in cold-steeped beans. Remember that because cold brew is less acidic than hot coffee, you can experiment with slightly higher concentrations without the risk of stomach irritation.
Always measure your ingredients by weight using a digital scale to ensure consistent flavor profiles every time you brew a new batch.
How long to steep for maximum flavor
Patience is the most critical ingredient when making cold brew, as the extraction happens over time rather than through heat. For the most balanced results, you should steep your coffee for 12 to 18 hours at room temperature.
Steeping for less than twelve hours often results in a weak, underdeveloped flavor that lacks the characteristic sweetness of cold brew. Conversely, pushing the time beyond twenty-four hours can lead to over-extraction, introducing woody or bitter notes that ruin the smoothness.
If you prefer to steep your coffee in the refrigerator to keep it chilled from the start, you should extend the timing toward the 20-hour mark because the cold environment slows down the chemical extraction process. Once the time is up, remove the grounds immediately to stop the brewing process.
This careful timing ensures you capture the low-acid profile and rich aromatic oils that define high-quality cold coffee. Store your finished concentrate in a sealed glass carafe in the fridge, where it will remain fresh for up to two weeks.
Best ways to sweeten and flavor your drink

How to make simple syrup at home
One of the most effective ways to sweeten cold coffee without dealing with undissolved granules at the bottom of your glass is to create a homemade simple syrup. To start, combine equal parts of filtered water and granulated white sugar in a small saucepan over medium heat.
Stir the mixture constantly until the liquid becomes completely clear, which indicates that the sugar has fully dissolved into the water. Avoid bringing the solution to a rolling boil, as this can change the viscosity and flavor profile of the sweetener.
Once ready, remove the pan from the heat and let it cool to room temperature before transferring it to a glass bottle or jar for storage. This DIY syrup integrates instantly into iced beverages, ensuring a consistent level of sweetness from the first sip to the last.
You can also experiment by using brown sugar to create a rich demerara syrup for deep caramel notes that pair beautifully with bold cold brew or chilled espresso shots.
Natural sweeteners and dairy-free milk options
For those seeking healthier alternatives to refined sugars, several natural sweeteners offer unique flavor profiles that enhance cold coffee beautifully. Agave nectar is a popular choice because it dissolves easily in cold liquids and provides a mild, honey-like taste.
Pure maple syrup is another fantastic option, contributing earthy and woody undertones that complement medium-roast beans. When it comes to creamy additions, dairy-free milks like oat, almond, and coconut milk provide distinct textures and flavors.
Oat milk is highly recommended for cold coffee because of its naturally creamy consistency and subtle sweetness that mimics traditional dairy. Almond milk offers a lighter, nuttier finish, while coconut milk adds a tropical flair.
To achieve the best results, try frothing your plant-based milk before pouring it over the ice to create a luxurious, cafe-style micro-foam.
These combinations allow you to customize the richness of your drink while keeping it plant-based and free from artificial additives, ensuring a refreshing and wholesome beverage experience every single time.
Adding vanilla, cinnamon, or chocolate
Elevating your cold coffee from basic to gourmet is easily achieved by infusing aromatic spices and extracts directly into your brew. Adding a few drops of pure vanilla extract provides a classic, floral aroma that balances the inherent bitterness of coffee beans.
If you prefer a warm, spiced profile, try shaking ground cinnamon with your coffee and ice in a mason jar; the aeration helps distribute the spice evenly so it doesn’t clump.
For chocolate lovers, whisking in a tablespoon of high-quality cocoa powder or chocolate syrup transforms your drink into a refreshing iced mocha. You can even go a step further by freezing coffee into ice cubes to prevent dilution as you enjoy your flavored creation.
Another pro tip is to infuse your simple syrup with a cinnamon stick or vanilla bean during the heating process for a more intense and integrated flavor.
These simple additions allow you to replicate expensive coffee shop favorites at home while controlling the quality of ingredients, making your morning routine both delicious and cost-effective.
Tips for professional cafe-style results
How to make coffee ice cubes
One of the most common mistakes people make when learning how to make cold coffee at home is using standard water-based ice cubes, which inevitably dilute the beverage as they melt.
To achieve professional results, you should brew a fresh pot of high-quality coffee and let it cool to room temperature before pouring it into silicone ice cube trays. For an extra flavor boost, consider adding a touch of vanilla extract or simple syrup to the liquid before freezing.
These specialized coffee cubes ensure that your drink remains bold and flavorful from the first sip to the last. Once frozen solid, store them in an airtight container to prevent them from absorbing any unwanted freezer odors.
When you are ready to serve, simply drop these dark gems into your glass and pour your chilled brew or milk over them. This simple preparation step transforms a basic iced drink into a rich, undiluted cafe experience that maintains its structural integrity even on the hottest summer days.
Creating the perfect foam or froth
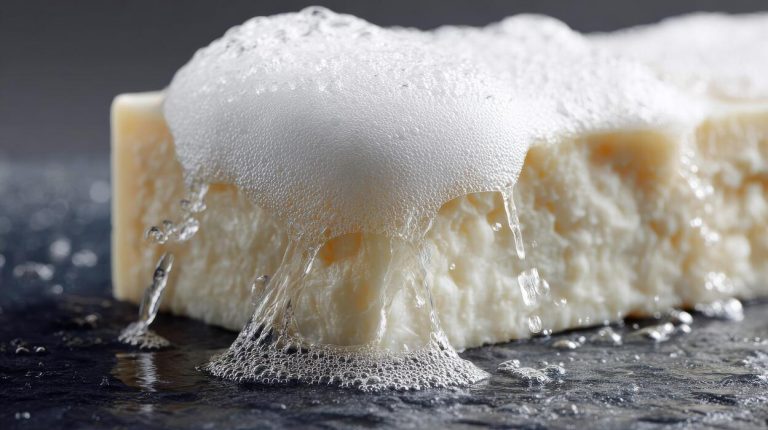
The hallmark of a professional cafe-style cold coffee is a thick, velvety layer of foam sitting gracefully on top of the liquid. To replicate this at home, you do not necessarily need an expensive espresso machine; a simple handheld milk frother or a French press can yield incredible results.
Use cold milk, as the proteins in chilled dairy or high-quality oat milk create a more stable structure when aerated. If you prefer a sweeter finish, try making cold foam by whisking heavy cream with a splash of flavored syrup until it reaches a soft-peak consistency.
Pour this mixture gently over the back of a spoon to ensure it sits on top of the coffee rather than mixing in immediately. This technique creates a luxurious mouthfeel and a striking visual contrast that elevates the entire drinking experience.
Mastering the art of aeration allows you to customize the texture of your drink, making it feel like a gourmet treat rather than just a quick morning caffeine fix.
Layering techniques for beautiful drinks
Visual presentation is a key component of the cafe experience, and mastering the art of layering will make your homemade cold coffee look like it was prepared by a seasoned barista. The secret to successful layering lies in the varying densities of your ingredients, specifically the sugar content and temperature.
Always start by filling your glass with ice, then pour in your heaviest liquid first, which is typically the sweetened milk or flavored syrup base. To create a distinct separation, slowly pour the chilled coffee over the back of a spoon held just above the milk’s surface.
This breaks the fall of the liquid and allows it to settle gently on top of the denser layer below. For a final touch, add your froth or a drizzle of chocolate sauce to complete the aesthetic.
These defined tiers of color and flavor not only look impressive on social media but also allow the drinker to experience different taste profiles as the layers gradually merge during consumption.
Common mistakes to avoid when making cold coffee
Why your coffee tastes bitter or sour
When making cold coffee, the extraction process is sensitive to both time and temperature. A common mistake is using hot water that is boiling, which scorches the beans and results in an unpleasant bitterness.
Conversely, if your coffee tastes sour or weak, it is likely under-extracted because the steeping time was too short. To fix this, ensure you are using room temperature or filtered cold water and allow the grounds to steep for at least twelve to eighteen hours.
Consistency is key when dialing in your flavor profile. If the result is too intense, you can easily dilute the concentrate with water or milk until it reaches your preferred strength.
Avoid rushing the process by squeezing the grounds at the end, as this releases excess tannins that ruin the smooth profile. By balancing the steeping duration and maintaining a steady environment, you can eliminate harsh acidic notes and enjoy a naturally sweet, velvety cup every single morning without fail.
Using the wrong grind size
The most frequent error beginners make when learning how to make cold coffee is using a fine grind intended for espresso or drip machines. Fine grounds have too much surface area, which leads to over-extraction and a muddy, sediment-filled texture that is difficult to filter.
For the perfect cold brew, you must use a coarse grind similar in texture to sea salt or breadcrumbs. This larger particle size allows water to flow freely around the beans, extracting the delicate oils and flavors slowly over time.
If you only have pre-ground coffee, try to reduce the steeping time slightly to prevent it from becoming overly harsh. Investing in a quality burr grinder allows you to customize the coarseness for a cleaner, more vibrant cup.
Remember that a silt-free finish is the hallmark of professional cold coffee, and achieving that starts with the physical structure of your coffee particles. Proper filtration becomes much easier when you start with the correct, chunky consistency.
Storage tips to keep coffee fresh
Once you have successfully brewed your batch, how you store it determines how long it remains delicious. A major mistake is leaving the coffee in an open pitcher, which exposes it to oxygen and causes it to go stale rapidly.
To maintain peak flavor, you should store your concentrate in an airtight glass container inside the refrigerator immediately after straining. Glass is preferred over plastic because it does not retain odors or leach chemicals into your beverage.
A well-sealed concentrate can last up to two weeks, though it is best consumed within the first seven days for maximum freshness. If you have leftover coffee that you cannot finish, consider freezing it into ice cubes to use for future drinks.
This prevents your next glass of cold coffee from becoming watered down as the ice melts. Always keep your storage vessel away from pungent foods like onions or garlic in the fridge, as coffee is porous and can easily absorb surrounding scents and off-flavors.
Frequently Asked Questions
What is the basic method for making cold coffee at home?
The simplest method involves blending instant coffee powder with sugar and a little warm water until frothy, then adding cold milk and ice cubes. You can also achieve a smooth texture by shaking the ingredients in a mason jar or using a handheld frother.
How do I make a cafe-style frothy cold coffee?
To get a thick, creamy foam, blend your coffee, sugar, and milk in a high-speed blender for 30-60 seconds. Adding a few ice cubes directly into the blender helps emulsify the mixture and creates a stable, frothy head on the drink.
Can I make cold coffee using brewed hot coffee?
Yes, but it is important to let the brewed coffee cool to room temperature before refrigerating it to prevent it from becoming bitter or cloudy. For the best flavor, brew the coffee at double strength to account for dilution when adding ice.
What is the difference between iced coffee and cold brew?
Iced coffee is hot-brewed coffee that is cooled and served over ice, offering a traditional crisp flavor. Cold brew is made by steeping coarse grounds in cold water for 12-24 hours, resulting in a much smoother, less acidic, and more concentrated beverage.
How can I prevent my cold coffee from getting watery?
The best way to prevent dilution is to use coffee ice cubes made by freezing leftover brewed coffee in an ice tray. Alternatively, you can make a coffee concentrate or use less milk to ensure the flavor remains bold as the ice melts.
What are some popular ways to flavor homemade cold coffee?
You can customize your drink by adding vanilla extract, chocolate syrup for a mocha version, or cinnamon for warmth. Using flavored simple syrups or condensed milk can also provide a professional, coffee-shop sweetness and texture.
Conclusion
Making delicious cold coffee at home is both simple and rewarding. By mastering basic techniques like cold brewing or chilling fresh espresso, you can enjoy cafe-quality beverages without the high price tag. Remember to experiment with different milk alternatives, sweeteners, and ice ratios to find your perfect flavor profile. Whether you prefer it bold or creamy, the possibilities are endless. Grab your favorite beans today and start crafting the ultimate refreshing treat right in your kitchen.