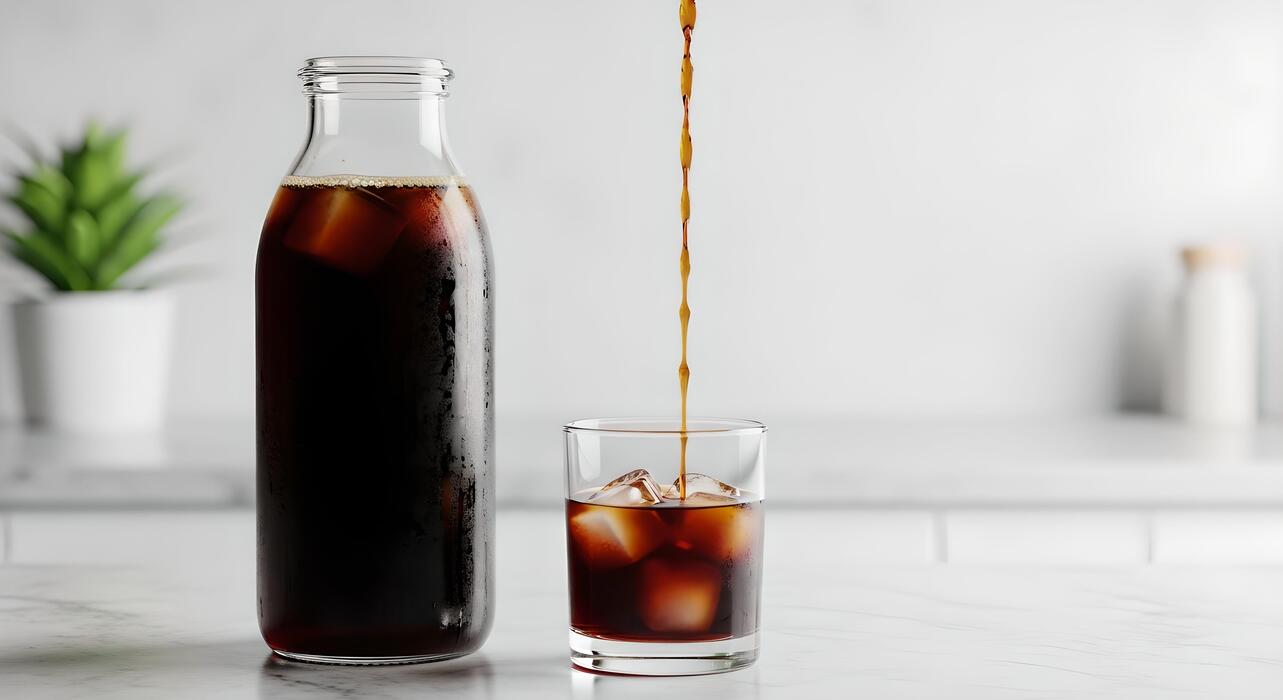
How To Make Cold Brew Coffee Measurements
Getting your cold brew coffee measurements right is the difference between a refreshing caffeine kick and a bitter disappointment. Whether you are brewing a small jar for yourself or a large batch for the week, the golden ratio is easier than you think. In this guide, we will break down the exact water-to-coffee math you need for any container size.
Cold Brew Coffee Ratio Basics
The Standard 1:8 Ratio for Ready-to-Drink Coffee
For a smooth, balanced cup that is ready to enjoy immediately after straining, the 1:8 ratio is the industry standard. This measurement translates to roughly one cup of coarsely ground coffee for every eight cups of filtered water.
Because cold brew relies on time rather than heat to extract flavor, this specific dilution ensures the profile remains refreshing without becoming overwhelming.
To achieve the best results, always use a digital scale to weigh your ingredients in grams, as volume can vary significantly depending on the roast profile and grind size.
This ratio is ideal for those who prefer drinking their coffee black or with a small splash of milk, as it highlights the natural sweetness and low acidity inherent in the cold extraction process.
Simply steep the mixture at room temperature or in the fridge for 12 to 18 hours, then filter. This creates a drinkable consistency that eliminates the need for further dilution, making your morning routine incredibly efficient and consistently delicious every single time.
The 1:4 Ratio for Cold Brew Concentrate
If you prefer a versatile base that lasts longer in the refrigerator, the 1:4 ratio is the perfect solution for creating a potent cold brew concentrate. This measurement requires one part coffee to four parts water, resulting in a bold, intense liquid that must be diluted before consumption.
The primary advantage of brewing a concentrate is the space-saving efficiency it offers in your fridge and its ability to hold up against heavy cream, syrups, or large amounts of ice.
When you are ready to serve, the standard practice is to mix equal parts concentrate and water or milk, effectively bringing it back to a standard drinking strength. This high-density brewing method requires a coarse, sea-salt-like grind to prevent over-extraction and bitterness during the long steeping window.
By mastering this ratio, you gain total control over the final cup’s intensity, allowing you to customize each serving to your specific taste preferences while ensuring you always have a high-quality caffeine kick ready to go at a moment’s notice.
How to Adjust Ratios for Strength and Flavor
Finding your perfect cup often requires small adjustments to the baseline measurements to account for bean origin and roast level. If you find your 1:8 brew too weak or tea-like, try tightening the ratio to 1:6 or 1:7 to increase the body and caffeine concentration.
Conversely, if the flavor feels too heavy or earthy, adding more water to reach a 1:10 ratio can help clarify the brighter, floral notes of the bean.
It is crucial to remember that water quality and temperature also play roles; using filtered water prevents mineral buildup from masking the coffee’s delicate profile.
Additionally, if you plan on serving your coffee over a large amount of ice, you should lean toward a stronger initial brew to compensate for the inevitable melting that occurs.
Always change only one variable at a time—either the ratio or the steep time—so you can accurately track which adjustment led to your ideal flavor profile. Experimenting with these variables allows you to transition from a basic recipe to a professional-grade custom brew tailored to your palate.
Measuring Cold Brew by Weight vs. Volume

Why Using a Digital Scale is Most Accurate
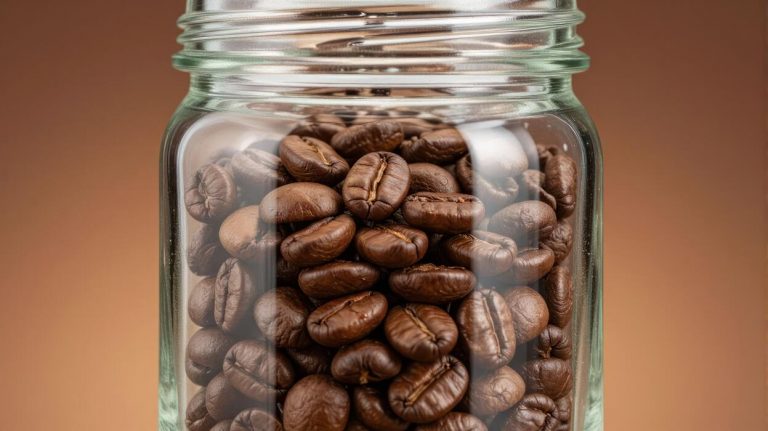
For the most consistent results, measuring by weight is the gold standard because coffee beans vary significantly in density based on their origin and roast profile.
Darker roasts are physically larger but lighter in weight, while lighter roasts are smaller and denser; therefore, a scoop of one will contain more physical coffee than a scoop of the other.
Using a digital scale ensures precision by accounting for these variations, allowing you to replicate your favorite flavor profile every single time without guesswork.
When you measure in grams, you eliminate the air gaps found between whole beans in a measuring cup, which can lead to a weak or overly bitter brew.
Investing in a simple kitchen scale allows you to standardize your cold brew process, making it easier to troubleshoot results or scale your recipe up for large batches.
By focusing on weight, you achieve a professional-grade extraction that highlights the unique chocolatey and nutty notes typical of a high-quality cold brew concentrate.
Tablespoon and Cup Conversions for Beginners
If you do not have a scale handy, you can still craft a delicious batch using standard kitchen volume tools like measuring cups and spoons.
For a standard 1:4 cold brew concentrate, a helpful rule of thumb is to use approximately one cup of coffee beans for every four cups of water.
If you are working with pre-ground coffee, remember that it packs more tightly than whole beans; generally, two level tablespoons of ground coffee weigh roughly ten grams. To make a single-serving concentrate, try using half a cup of coarse grounds steeped in two cups of filtered water.
While volume is less precise than weight, maintaining a consistent scooping technique—such as leveling off the top of the cup with a knife—will help you stay within a functional range.
This method is perfect for beginners who want to simplify the brewing process without purchasing extra equipment, providing a reliable starting point that can be adjusted to taste by adding more water or grounds in future batches.
Calculating Grams of Coffee per Ounce of Water
To master your measurements, you must understand the ratio of coffee mass to water volume, typically expressed in grams and ounces. For a robust cold brew concentrate, a 1:4 or 1:5 ratio is recommended, which translates to roughly 7 grams of coffee for every 1 fluid ounce of water.
If you prefer a ready-to-drink strength, aim for a 1:10 to 1:12 ratio, using approximately 2.5 to 3 grams of coffee per ounce of water.
To calculate your needs, simply multiply the total ounces of your pitcher by the ratio factor; for example, a 32-ounce mason jar at a 1:8 ratio would require 4 ounces (about 113 grams) of coffee.
Using this mathematical approach to brewing allows you to customize the intensity of your caffeine kick and the richness of the body.
Always record your specific measurements in a notebook so you can fine-tune the concentration over time, ensuring that every glass of cold brew you pour is perfectly balanced and tailored exactly to your personal palate.
How to Measure for Different Batch Sizes
Measurements for a Single 32-ounce Mason Jar
For a standard 32-ounce Mason jar, the ideal starting point is a 1:4 coffee-to-water ratio by weight, which yields a versatile concentrate. To achieve this, measure out 1 cup (approximately 113 grams) of coarsely ground coffee beans and combine it with 4 cups (32 ounces) of filtered water.
Since the coffee grounds occupy physical space in the jar, you may find that you can only fit about 3.5 cups of water; simply fill the jar to the brim after adding your grounds.
Ensure you use a coarse grind size similar to sea salt to prevent over-extraction and bitterness during the 12 to 24-hour steeping period. Once the brewing process is complete and you have filtered out the solids, you will be left with a potent cold brew concentrate.
This liquid is meant to be diluted with equal parts water or milk before serving. Using a Mason jar is the most accessible entry point for beginners because it requires no specialized equipment beyond a basic strainer or cheesecloth.
Scaling Up for One Gallon Batches
When you are preparing a large one-gallon batch for a full week of caffeine, precision becomes even more critical to avoid wasting expensive beans. To maintain a balanced 1:8 ready-to-drink ratio, you will need exactly 1 pound (16 ounces) of coarse coffee grounds for every 128 ounces of filtered water.
If you prefer a stronger concentrate to save fridge space, stick to the 1:4 ratio, which requires 2 pounds of coffee per gallon. Because of the high volume, it is highly recommended to use a commercial-grade nylon filter bag or a large nut milk bag to contain the grounds.
This makes the cleanup process significantly easier and prevents fine sediment from clouding the final brew. Always start by pouring a small amount of water over the grounds to ensure they are fully saturated before filling the rest of the container.
This large-scale method is the most cost-effective way to enjoy cold brew, as it minimizes daily preparation time while ensuring a consistent flavor profile across multiple servings throughout the busy work week.
Small Batch Ratios for French Press Brewing
Utilizing a French press is the most efficient method for small-batch brewing because the built-in metal mesh plunger acts as an integrated filtration system. For a standard 8-cup (34-ounce) French press, use a 1:5 ratio to create a smooth concentrate.
Measure ¾ cup (about 85 grams) of coarse grounds and add 3 cups of cold, filtered water. Stir the mixture gently with a wooden spoon to break up any dry clumps, then place the lid on top without pressing the plunger down.
Let the carafe sit at room temperature for 16 hours or in the refrigerator for up to 24 hours. When the time is up, slowly depress the plunger to separate the grounds from the liquid.
The metal filter allows natural oils to pass through, resulting in a cold brew with a heavier body and more complex mouthfeel compared to paper filters.
This method is perfect for individuals who want to experiment with different single-origin beans in smaller quantities without committing to a massive gallon-sized container, offering maximum control over the final strength.
The Role of Grind Size in Your Measurements
Why Extra Coarse Grinds Need More Coffee
When calculating your cold brew measurements, you must account for the physical space occupied by extra coarse grounds. Unlike fine espresso powder that packs tightly, coarse particles have significant air gaps between them.
To achieve a rich concentrate, you generally need to increase the volume of grounds by approximately twenty percent compared to standard drip methods. A reliable starting point is a one-to-four weight ratio, which translates to about one cup of coarse grounds for every four cups of filtered water.
Because the particles are larger, they absorb more liquid during the initial saturation phase, meaning you will end up with slightly less finished liquid than the water you poured in. Using a digital scale is essential for accuracy because the density of different beans can vary wildly.
By prioritizing weight over volume, you ensure that your measurements remain consistent even if you switch between light and dark roasts, leading to a reliable strength and flavor profile every time you brew.
How Surface Area Affects Extraction Time
The size of your coffee particles directly dictates how long the water needs to stay in contact with the beans to pull out the desired flavors. In cold brew, we use a coarse grind to intentionally limit the total surface area exposed to the water.
This slower extraction process is what prevents the bitterness often found in hot coffee, but it requires a longer steeping window of twelve to twenty-four hours.
If your grind is too fine, the increased surface area will cause the coffee to over-extract, resulting in a harsh, astringent taste that ruins the smooth profile cold brew is famous for.
Conversely, if your grind is too large, the water cannot penetrate the center of the particle, leading to a weak and watery beverage. Maintaining a consistent extra-coarse texture allows the water to gently dissolve the oils and sugars over time.
Adjusting your timer based on your specific grind size is the best way to fine-tune the final strength of your cold brew batch.
Visual Guide to the Perfect Cold Brew Grind
Identifying the correct grind size visually is the easiest way to ensure your measurements result in a high-quality concentrate. For cold brew, your coffee should resemble coarse sea salt or cracked peppercorns. You should be able to see individual jagged fragments of the bean rather than a uniform powder.
This chunky texture is vital because it allows the water to flow freely around the particles, ensuring even saturation throughout the brewing vessel. If the mixture looks like sand, it is likely too fine for a long steep and will be difficult to filter later.
Using a high-quality burr grinder is recommended over a blade grinder to achieve this uniform consistency, as blade grinders often produce a mix of dust and large chunks. Consistency in your grind size ensures that every tablespoon of coffee you measure contributes equally to the flavor.
Achieving this distinctive rocky texture is the secret to a clean, sediment-free cup that highlights the natural sweetness and chocolate notes of your chosen coffee beans.
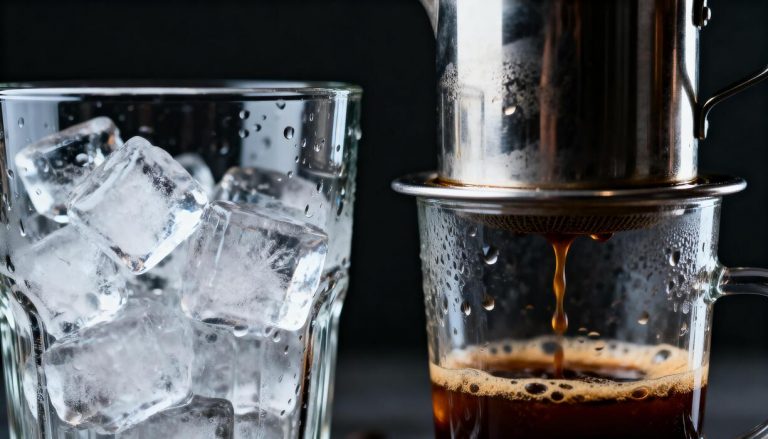
Step-by-Step Guide to Mixing Your Cold Brew
Adding Water to Coffee Grounds Correctly
To achieve the perfect concentrate, focus on the golden ratio of 1:4, which translates to one cup of coffee grounds for every four cups of water. Begin by pouring a small amount of filtered water over the dry grounds to let them bloom, even though the water is cold.
Slowly add the remaining liquid in a steady stream to avoid creating dry pockets at the bottom of your container. Using filtered water is essential because it ensures the minerals do not overpower the delicate flavor profiles of your chosen beans.
If you prefer a ready-to-drink strength, you can adjust the ratio to 1:8, but sticking to a concentrate allows for more versatility later. Ensure your vessel is large enough to accommodate the expansion of the grounds as they absorb moisture.
Precision in these initial measurements prevents bitterness and guarantees a smooth, low-acid finish that characterizes high-quality cold brew. Always use a scale for the most accurate results rather than relying solely on volume-based measuring cups.
The Best Water Temperature for Starting the Brew
Temperature control is a critical factor in the slow extraction process required for cold brew coffee. You should always use room temperature or cool filtered water to begin the process, as hot water can immediately shock the grounds and release unwanted tannins.
Aim for a starting temperature between 60°F and 70°F for the most consistent results. If the water is too cold, the extraction will be sluggish and may result in a weak, underdeveloped flavor profile.
Conversely, using lukewarm water helps to gently initiate the breakdown of oils without the harshness associated with traditional drip methods. Many enthusiasts recommend avoiding distilled water, as it lacks the essential minerals needed to pull the full range of flavors from the coffee beans.
Once the water is added, the mixture should be kept in a cool, dark place or the refrigerator to maintain a stable environment throughout the twelve to twenty-four hour steeping period. This thermal stability is the secret to achieving that signature mellow and chocolatey taste.
Stirring Techniques to Ensure Full Saturation
Once the water and coffee are combined, proper agitation is the final step to ensure a successful batch. Use a long-handled spoon or a wooden paddle to gently stir the mixture until every single coffee ground is fully submerged.
You are looking for a consistency that resembles wet sand, ensuring there are no clumps or dry clusters hiding beneath the surface. Avoid over-stirring, as excessive agitation can lead to a cloudy final product and may pull too much bitterness from the silt.
A gentle folding motion is often the most effective way to integrate the layers without introducing too much air into the brew. After the initial stir, let the mixture sit for five minutes and then give it one final, very brief stir to settle the grounds.
This ensures maximum surface area contact between the water and the coffee, which is vital for a rich and balanced extraction. Securing a tight lid after this process prevents the coffee from absorbing any stray odors from your refrigerator while it steeps to perfection.
How to Dilute Cold Brew Concentrate After Steeping
The 1:1 Dilution Rule for Serving
Once your cold brew concentrate has finished steeping, the most effective way to achieve a balanced flavor profile is by following the standard 1:1 dilution ratio. Because the concentrate is highly potent, drinking it straight can lead to an overwhelming bitterness and excessive caffeine intake.
To find the perfect balance, start by filling your glass with equal parts cold brew concentrate and filtered water. This simple measurement ensures that the rich, chocolatey notes of the beans are preserved while the acidity remains low and smooth.
If you find the flavor too intense, you can gradually add small increments of liquid until the strength matches your personal preference. Using graduated measuring cups or a digital kitchen scale can help you maintain consistency between batches.
Remember that the goal of dilution is to open up the complex aromas that were locked in the dense concentrate, transforming a heavy liquid into a refreshing, drinkable beverage that highlights the unique characteristics of your chosen coffee beans.
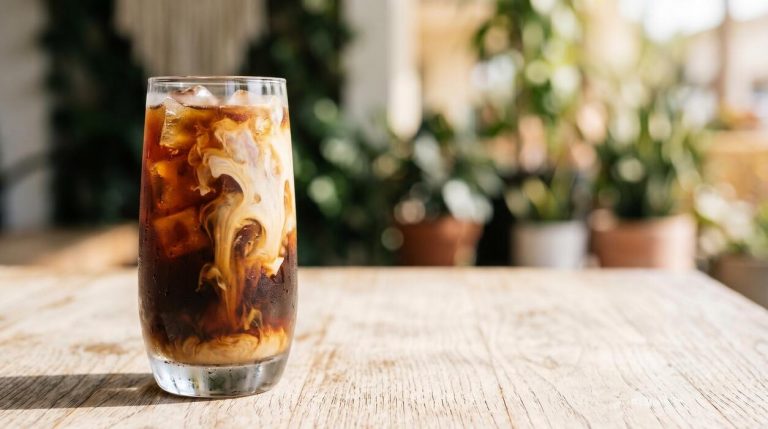
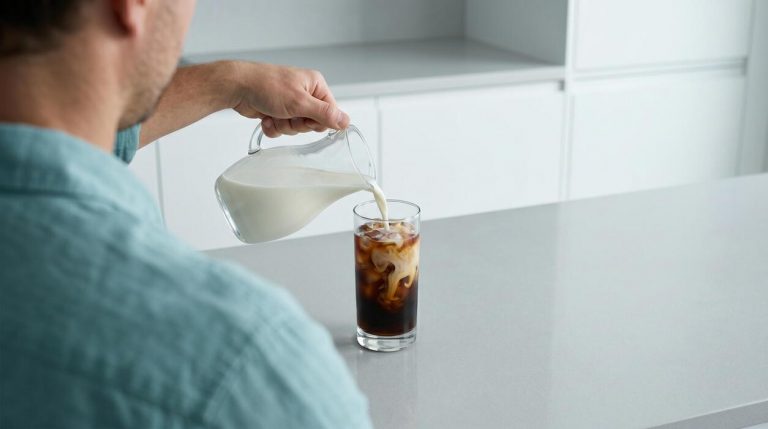
Mixing with Milk, Cream, or Water
The beauty of cold brew concentrate lies in its versatility, allowing you to customize the base liquid depending on your desired texture. If you prefer a lighter, more traditional iced coffee, diluting with filtered water is the best approach to maintain clarity and brightness.
However, for those who enjoy a richer mouthfeel, you can substitute the water entirely with milk, oat milk, or heavy cream.
When using dairy or plant-based alternatives, the 1:1 ratio still serves as an excellent starting point, though many enthusiasts prefer a 2:1 ratio of concentrate to milk to ensure the coffee flavor isn’t masked by the creaminess.
Always pour the concentrate over ice first before adding your diluting liquid to prevent splashing and to ensure immediate chilling.
Experimenting with different textures, such as adding a splash of condensed milk for a Vietnamese style or coconut milk for a tropical twist, allows you to leverage the concentrate’s strength to create a wide variety of cafe-quality drinks at home.
Calculating Final Caffeine Content per Cup
Understanding the potency of your cold brew is essential for managing your daily intake, as concentrate typically contains double the caffeine of standard drip coffee.
When you apply the 1:1 dilution rule, you are effectively bringing the caffeine concentration down to a level comparable to a strong cup of joe, usually ranging from 150mg to 200mg per eight-ounce serving.
Factors such as the bean variety and the total steeping time significantly influence the final strength; longer steep times generally result in a higher caffeine extraction. To keep your measurements accurate, consider that a typical 1:4 brewing ratio produces a very dense concentrate that requires significant thinning.
If you are sensitive to stimulants, you might opt for a 1:2 or 1:3 dilution ratio of concentrate to water to further reduce the intensity.
By keeping track of the volume of concentrate used in every glass, you can enjoy the smooth, low-acid benefits of cold brew without accidentally consuming an excessive amount of caffeine, ensuring a steady energy boost throughout the day.
Common Measurement Mistakes to Avoid
Using Too Much Coffee for Short Steep Times
One of the most frequent errors when calculating cold brew measurements is attempting to compensate for a lack of steeping time by increasing the coffee-to-water ratio.
While a standard concentrate usually requires a 1:4 or 1:5 ratio, trying to achieve full flavor in under twelve hours by using more grounds often leads to a wasteful and underdeveloped profile.
Because cold water extracts compounds much slower than hot water, a higher volume of coffee cannot physically release its complex sugars and oils if the contact time is too short. To avoid this mistake, ensure you allow for a minimum of 16 to 24 hours of extraction.
If you find your brew is consistently weak despite using the correct measurements, check your coarse grind size rather than simply adding more beans.
Maintaining the proper balance between volume and time ensures that you capture the smooth, chocolatey notes characteristic of cold brew without wasting expensive specialty beans on an inefficient and rushed brewing cycle.
Ignoring Water Quality and Mineral Content
Since cold brew is composed of approximately 98% water, failing to account for its chemical makeup can lead to inaccurate flavor measurements regardless of how precise your coffee weight is.
Many home brewers use unfiltered tap water, which often contains chlorine or high mineral concentrations that interfere with the extraction process.
Hard water can prevent the water from effectively pulling the desired flavors out of the coffee grounds, while overly soft or distilled water may lead to a flat, lifeless cup.
To achieve professional results, use filtered or spring water to ensure a neutral base that allows the coffee’s natural profile to shine. Measuring your water by weight rather than volume is also a critical step for accuracy, as a gram of water is exactly one milliliter.
By using clean, filtered water at room temperature, you create a stable environment for the coffee solubles to dissolve, preventing the metallic or bitter aftertastes that often result from poor water quality and inconsistent mineral levels during the long immersion period.
Forgetting to Account for Water Absorption by Grounds
A common point of confusion in cold brew measurements is the difference between the ‘input’ water and the ‘yield’ volume. Coffee grounds are highly absorbent and will typically retain about twice their weight in water.
For example, if you measure out 250 grams of coffee and 1,000 grams of water, you will not end up with a full liter of finished concentrate. Instead, the grounds will soak up a significant portion, leaving you with approximately 500 to 600 milliliters of liquid.
To avoid running out of coffee sooner than expected, you must adjust your initial water volume upward to account for this inevitable loss.
Always calculate your batch size based on the final amount of concentrate you wish to consume, adding extra water to the recipe to compensate for the absorption rate of the coarse grounds.
Neglecting this calculation often leads to a much smaller yield than intended, forcing brewers to stretch their concentrate too thin with milk or water, which ultimately ruins the carefully measured strength and mouthfeel of the final beverage.
Frequently Asked Questions
What is the standard golden ratio for cold brew coffee?
The most common ratio for cold brew is 1:8, which means using 1 part coffee to 8 parts water by weight. For example, if you use 100 grams of coffee grounds, you would add 800 grams (or 800ml) of filtered water.
How do I measure for a cold brew concentrate?
To make a strong concentrate intended for dilution, use a 1:4 ratio of coffee to water. This creates a potent brew that can be mixed with equal parts water or milk when you are ready to serve.
What are the measurements for a 1-quart mason jar of cold brew?
For a standard 32-ounce (1-quart) mason jar, use 1 cup of coarsely ground coffee and fill the rest of the jar with approximately 3.5 to 4 cups of water. This follows a roughly 1:8 ratio which is ideal for ready-to-drink coffee.
Can I measure cold brew coffee by volume instead of weight?
Yes, if you don’t have a scale, a common volumetric measurement is 1 cup of coffee grounds to 4 cups of water. However, since coffee density varies by roast, using a digital scale for grams is significantly more accurate for consistent flavor.
How much coffee do I need for a gallon of cold brew?
To make a full gallon of cold brew at a standard 1:8 ratio, you will need approximately 1 pound (16 ounces) of coffee grounds. Pair this with 128 ounces of water for a balanced, large-batch result.
Does the grind size affect the measurements for cold brew?
While the ratio stays the same, the grind size must be extra coarse, resembling sea salt or breadcrumbs. If the grind is too fine, the coffee will over-extract and taste bitter, regardless of how accurate your water measurements are.
What is the dilution ratio after brewing a concentrate?
If you brewed a 1:4 concentrate, the standard serving measurement is a 1:1 dilution. Mix half a cup of your cold brew concentrate with half a cup of water, milk, or your favorite creamer over ice.
Conclusion
Mastering cold brew coffee measurements is the secret to achieving a smooth, cafe-quality concentrate at home. By following the recommended coffee-to-water ratios and adjusting for your personal taste, you can eliminate bitterness and highlight the bean’s natural sweetness. Remember that consistency is key, so use a kitchen scale for the best results. Now that you have the perfect formula, feel free to experiment and enjoy the refreshing, bold flavors of your handcrafted brew.