How To Make Vanilla Cold Foam
Craving that velvety, sweet cloud on top of your iced coffee? Learning how to make vanilla cold foam at home is surprisingly simple and much cheaper than the drive-thru. Whether you have a fancy frother or just a simple jar, you can achieve that perfect Starbucks-style texture in seconds. This guide walks you through the easy three-ingredient recipe and the best techniques for thick, stable foam. Ready to upgrade your morning brew?
What is vanilla cold foam?
The difference between cold foam and steamed milk
Understanding the structural difference between these two toppings is essential for mastering your home barista skills. Unlike traditional steamed milk, which relies on high heat to create a microfoam texture for hot lattes, vanilla cold foam is processed entirely without heat to preserve its thick, velvety consistency.
When you steam milk, you are essentially stretching the proteins to create a warm, airy lift; however, cold foam utilizes high-speed aeration to build a dense, pourable layer that sits gracefully on top of cold liquids.
To achieve the perfect vanilla cold foam, you must use cold non-fat milk or heavy cream because the fat and protein structures respond differently to friction when chilled.
While steamed milk eventually dissipates and integrates into the coffee as it cools, cold foam is specifically designed to resist melting, providing a distinct textural contrast that lasts until your very last sip.
This creates a luxurious mouthfeel that mimics melted ice cream without the excessive heat of a standard cappuccino.
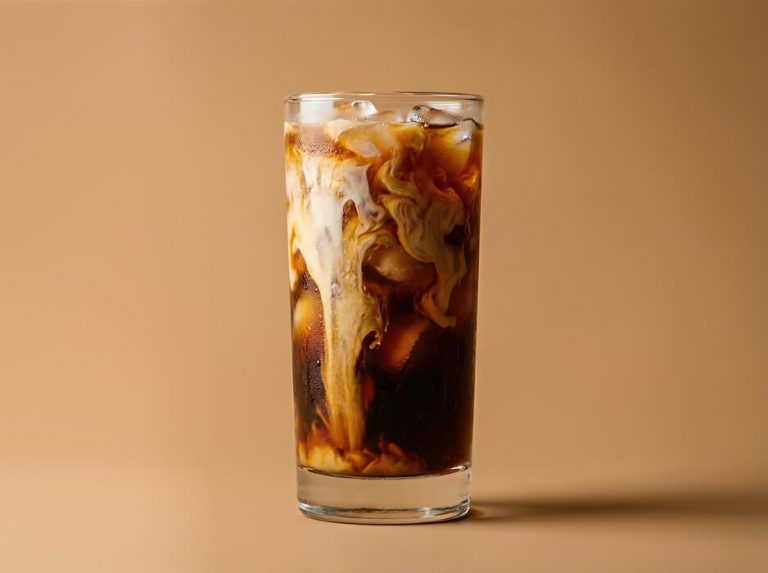
Why cold foam is better for iced coffee
Cold foam has revolutionized the iced coffee experience by solving the age-old problem of temperature imbalance. When you add hot steamed milk to an iced beverage, it immediately melts the ice cubes, resulting in a watered-down drink that loses its flavor profile.
Vanilla cold foam avoids this issue entirely by maintaining a chilled temperature profile that complements the cold brew or iced espresso base. Because the foam is aerated while cold, it possesses a unique buoyancy that allows it to float on top of the coffee rather than mixing in instantly.
This layered effect allows the drinker to sip the bold, bitter coffee through a sweet, creamy cloud of vanilla, creating a sophisticated flavor transition in every mouthful. Furthermore, the thick density of the foam acts as a thermal barrier, helping to keep the ice from melting as quickly.
By choosing cold foam, you ensure your drink remains consistently cold and flavorful, providing a professional aesthetic and a rich, indulgent texture that standard liquid creamer simply cannot replicate.
Starbucks-style vs. homemade versions
Recreating the famous Starbucks-style vanilla sweet cream cold foam at home is surprisingly simple once you understand the ratio of ingredients. The commercial version typically relies on a specific blend of heavy cream, 2% milk, and vanilla syrup to achieve that iconic pourable yet stiff consistency.
To replicate this in your kitchen, you should aim for a mixture of two parts heavy cream to one part milk, infused with high-quality vanilla extract or syrup.
While professional coffee shops use specialized high-power blenders, you can achieve similar results using a handheld milk frother or even a French press. The homemade version is often superior because you can control the sweetness levels and avoid artificial preservatives found in commercial bases.
For the best results, ensure your equipment and dairy are straight from the refrigerator, as colder liquids hold air bubbles much more effectively.
By mastering this technique, you can enjoy a customizable coffeehouse experience at a fraction of the cost, tailoring the vanilla intensity and creaminess to your exact personal preference every morning.
Ingredients for the best vanilla cold foam
Choosing the right milk and cream
To achieve a stable and luxurious texture when learning how to make vanilla cold foam, the ratio of dairy is the most critical factor. The gold standard for a café-quality finish is a combination of heavy whipping cream and 2% milk.
The heavy cream provides the necessary fat content to create a thick, velvety structure that sits perfectly atop your iced coffee without immediately dissolving. Meanwhile, the 2% milk lightens the mixture, ensuring it remains pourable and frothy rather than turning into stiff whipped cream.
If you prefer a plant-based version, barista-edition oat milk is your best bet because it contains added stabilizers and a higher fat content designed to mimic dairy foam. Avoid using non-fat milk alone, as it tends to create large, unstable bubbles that dissipate quickly.
For the best results, ensure your dairy is straight from the refrigerator, as cold molecules bond more effectively during aeration to create that signature micro-foam consistency.
Vanilla bean paste vs. vanilla extract
The flavor profile of your cold foam depends heavily on the quality of vanilla you choose to incorporate. For a truly professional look and an intense, complex flavor, vanilla bean paste is the superior choice.
It contains the actual seeds from the pod, which adds beautiful dark specks to the white foam and provides a rich, floral aroma that holds up well against strong cold brew.
However, if you are looking for a more convenient or budget-friendly option, a high-quality pure vanilla extract works perfectly for everyday preparation. When using extract, ensure it is clear if you want to maintain a bright white aesthetic, though standard amber extract is fine for taste.
Avoid imitation vanilla whenever possible, as it can leave a slightly medicinal aftertaste when mixed with cold dairy. Whichever you choose, whisk the vanilla thoroughly into the cream base before frothing to ensure the flavor is evenly distributed throughout every sip of your beverage.
Sweetener options: Simple syrup or sugar-free alternatives
A touch of sweetness is essential to balance the bitterness of the coffee and enhance the vanilla notes in your foam. Vanilla simple syrup is the most popular choice because it dissolves instantly in cold liquids, preventing any grainy texture that granulated sugar might cause.
You can easily make your own by simmering equal parts water and sugar with a vanilla bean. For those monitoring their sugar intake, sugar-free vanilla syrups or liquid stevia drops are excellent alternatives that provide the necessary sweetness without the extra calories.
These liquid sweeteners integrate seamlessly into the heavy cream and milk mixture during the frothing process. If you prefer a more natural approach, maple syrup or agave nectar can be used, though they will slightly alter the final flavor profile with their own distinct undertones.
Regardless of the sweetener you select, the key is to add it before aerating the mixture to ensure a consistent, smooth sweetness that complements the creamy texture of your homemade vanilla cold foam.
How to make vanilla cold foam at home
Step-by-step mixing instructions
To begin your homemade vanilla cold foam, gather your heavy cream, milk, and vanilla syrup in a small pitcher or glass jar. Start by pouring the heavy cream and milk into your container, ensuring they are both thoroughly chilled for the best structural integrity.
Once the dairy is combined, add your vanilla syrup, adjusting the amount based on your preferred level of sweetness. To transform these liquid ingredients into a cloud-like topping, use a handheld milk frother held at a slight angle just beneath the surface of the liquid.
Turn the frother on and move it up and down continuously for about thirty to forty-five seconds until the mixture doubles in volume and develops a stable, micro-foam consistency.
If you do not have an electric frother, you can achieve similar results by shaking the ingredients vigorously in a tightly sealed mason jar or pulsing them several times in a standard kitchen blender until the foam reaches a pourable yet thick state for your coffee.
Getting the perfect 2:1 ratio
The secret to replicating the signature taste and density of professional coffee shop cold foam lies in mastering the 2:1 ratio of dairy. This specific formula requires two parts heavy whipping cream to one part milk, which provides the ideal balance of fat content and fluidity.
For a single serving, try using two tablespoons of heavy cream mixed with one tablespoon of 2% or whole milk.
The high fat content in the heavy cream is essential because it traps air bubbles effectively, creating a long-lasting structure that sits beautifully on top of your iced coffee without immediately dissolving.
Meanwhile, the addition of milk helps thin the mixture just enough so it remains pourable and silky rather than turning into stiff whipped cream. Complete this ratio by adding half a tablespoon of vanilla syrup.
Following this precise measurement ensures that every batch you make at home has that iconic sweet cream flavor and consistent density that elevates a simple glass of cold brew into a gourmet cafe experience.
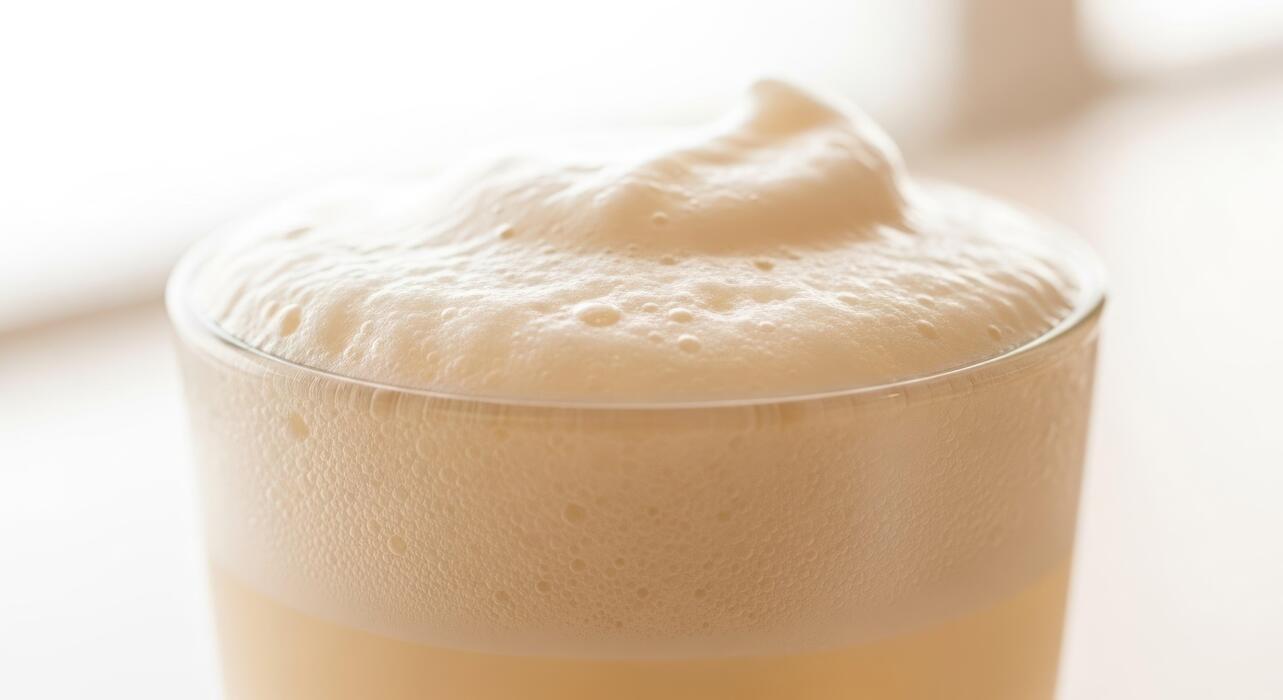
How to achieve a thick, velvety texture
Achieving a thick, velvety texture requires focusing on the temperature of your ingredients and the aeration technique used during the frothing process. Always ensure your dairy is ice-cold straight from the refrigerator, as cold proteins and fats bond more effectively to hold air.
If your cream is even slightly warm, the foam will likely be runny and collapse quickly. For the most luxurious mouthfeel, aim to create tiny micro-bubbles rather than large, soapy bubbles by keeping the frother head submerged rather than pulling it too far out of the liquid.
If you notice large bubbles forming, gently tap the container on your countertop and swirl it to incorporate the foam into a uniform, glossy texture. Another professional tip is to use vanilla bean paste instead of extract for a richer flavor profile and visible flecks of vanilla.
This attention to detail results in a stable, decadent topping that slowly cascades down into your drink, providing a smooth contrast to the bold coffee underneath while maintaining its velvety shape until the very last sip.
Best tools for frothing cold milk
Using a handheld milk frother
A handheld electric wand is arguably the most efficient way to achieve that signature Starbucks-style vanilla cold foam at home. To start, combine your choice of milk, vanilla syrup, and a touch of heavy cream in a tall glass.
Submerge the handheld milk frother whisk at a slight angle just below the surface of the liquid. Turn the device on and move it up and down to incorporate air, which creates a velvety microfoam texture that holds its shape.
Because cold milk doesn’t expand as much as hot milk, using a mix of skim milk and heavy cream provides the protein and fat necessary for stability. Continue frothing for approximately 30 to 45 seconds until the volume has nearly doubled.
This tool is ideal for rapid morning preparation because it is easy to clean and offers precise control over the aeration process. Once the mixture is thick and glossy, slowly pour it over your iced coffee for a professional-looking layered effect that tastes incredible.
The French press method
If you do not own an electric gadget, a French press is a fantastic manual alternative for creating exceptionally dense and creamy cold foam. Pour your cold milk and vanilla sweetener into the carafe, ensuring the liquid doesn’t fill more than one-third of the container.
Insert the plunger and pump it up and down rapidly with short, quick strokes for about thirty seconds. This physical agitation forces air into the milk proteins, resulting in a thick consistency that is often sturdier than what a motorized whisk can produce.
The fine mesh screen of the French press filter breaks down larger bubbles into tiny ones, which is the secret to a professional mouthfeel. It is important to use very cold milk directly from the refrigerator to ensure the foam doesn’t collapse.
This method is perfect for making larger batches of cold foam if you are serving multiple guests, as the carafe size allows for more volume than a standard frothing pitcher or a small drinking glass.
Making cold foam in a blender or jar
For those seeking a low-tech or high-volume solution, using a high-speed blender or a simple mason jar can yield great results. When using a high-speed blender, pulse the milk and vanilla mixture on a medium setting for twenty seconds until it becomes light and airy.
If you prefer the mason jar technique, simply tighten the lid and shake the container vigorously for at least one minute. While the jar method produces slightly larger bubbles, it is a reliable way to emulsify the vanilla syrup and milk without any special equipment.
To improve the results of the shake method, let the jar sit for a moment after shaking to allow the foam to stabilize and separate from the liquid. Both techniques benefit from the addition of a splash of heavy cream, which acts as a stabilizing agent for the air bubbles.
This approach is highly accessible for beginners and ensures that anyone can enjoy a delicious vanilla topper on their cold brew without needing to purchase specialized barista tools immediately.
Tips for perfect vanilla cold foam every time

Why cold temperature matters
To achieve a velvety texture when learning how to make vanilla cold foam, you must prioritize the temperature of your ingredients. Using chilled heavy cream and milk directly from the refrigerator is the most critical step for success.
When fats and proteins are cold, they trap air bubbles more efficiently, creating a stable structure that sits beautifully atop your iced coffee. If your liquids are even slightly room temperature, the molecular bonds weaken, leading to a thin, watery consistency that dissolves into your drink instantly.
For the best results, chill your frothing pitcher in the freezer for five minutes before starting. This ensures the mechanical energy from your frother doesn’t inadvertently warm the mixture. High-quality vanilla syrup should also be kept cool to maintain the integrity of the emulsion.
By maintaining a strictly cold environment, you guarantee a stiff, cloud-like peak every time you prepare your beverage. This professional technique separates amateur attempts from a true coffeehouse experience at home.
How to fix runny cold foam
If you find your mixture is too liquid, the most common culprit is an incorrect ratio of heavy cream to milk. To fix runny results, increase the heavy cream content to provide more fat solids for stabilization.
A standard 2:1 ratio of cream to 2% milk is ideal for structural integrity. If it still lacks body, try extending your frothing time by an additional thirty seconds, ensuring the whisk remains just below the surface to incorporate maximum air.
Another professional trick is to add a tiny splash of extra vanilla syrup, as the sugar acts as a stabilizer for the dairy proteins.
Ensure you are using a high-speed handheld milk frother or a dedicated electric cold foam setting; manual whisking rarely provides enough power to create the necessary micro-bubbles.
If the foam refuses to stiffen, place the entire container back in the fridge for ten minutes to reset the fat globules before attempting to froth it one final time for perfection.
Storage tips for leftover foam
While vanilla cold foam is best enjoyed immediately, you can store leftovers if you follow specific guidelines to preserve the aeration. Place any remaining foam in an airtight glass container and store it in the coldest part of your refrigerator.
It will typically stay safe to consume for up to forty-eight hours, though the bubbles will naturally deflate over time. Before using stored foam, you must re-froth the mixture for ten to fifteen seconds to revive the creamy volume and integrate any syrup that settled at the bottom.
Never store the foam in a plastic container, as odors from other foods can easily penetrate the dairy and ruin the delicate vanilla profile. Avoid freezing the mixture, as the thawing process destroys the emulsion, leaving you with a grainy and separated liquid.
By keeping your leftover base sealed and chilled, you can quickly whip up a fresh batch for your afternoon caffeine fix without starting the entire measuring process from scratch each morning.
Ways to use vanilla cold foam in drinks
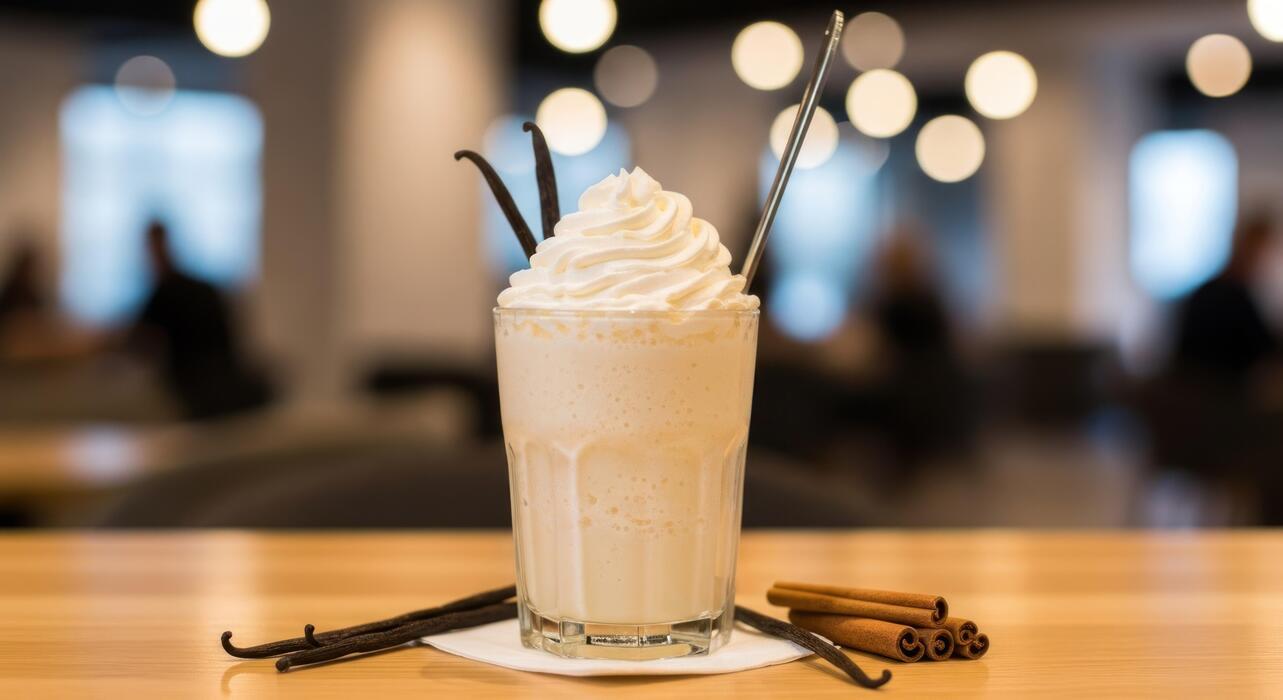
Classic vanilla sweet cream cold brew
The most iconic way to utilize your homemade vanilla cold foam is by recreating the famous coffeehouse cold brew experience. To master this drink, start with a high-quality cold brew concentrate diluted to your preference and poured over fresh ice.
Instead of stirring milk directly into the coffee, gently spoon your aerated vanilla sweet cream over the top.
The beauty of this method lies in the gradual infusion; as the foam sits, it slowly cascades down through the dark coffee, creating a beautiful marbled effect and a velvety mouthfeel with every sip.
This technique ensures that the first thing to hit your palate is the light, sweet cloud of vanilla before transitioning into the bold, nutty notes of the cold brew. For the best results, use a wide-mouthed glass to allow the foam to spread evenly across the surface.
You can even garnish the top with a tiny pinch of sea salt or cocoa powder to contrast the sweetness of the vanilla syrup.
Topping for iced lattes and americanos
Transform your standard espresso-based beverages by swapping traditional liquid creamer for a thick layer of vanilla cold foam. For an iced latte, fill your glass with ice, espresso, and your choice of milk, but leave about an inch of space at the rim.
Top the drink with the vanilla-infused foam to add a layer of luxury that doesn’t immediately dissolve into the liquid. If you prefer a lighter option, try adding the foam to an iced americano.
The contrast between the diluted espresso and the rich vanilla creaminess provides a sophisticated flavor profile without the heaviness of a full latte.
This method is particularly effective because the foam acts as a thermal barrier, keeping your drink colder for longer while providing a persistent sweetness that lasts until the final drop.
To ensure the foam holds its peak, make sure your vanilla base is chilled thoroughly before frothing, as cold proteins in the milk create a much more stable and long-lasting structure for your morning caffeine boost.
Adding foam to iced tea and matcha
Vanilla cold foam isn’t just for coffee lovers; it is an incredible addition to tea-based drinks, offering a creamy element that mimics a dessert.
For a refreshing treat, prepare a strong iced black tea or a vibrant green matcha latte and finish it with a generous dollop of frothy vanilla cream.
The floral and earthy notes of matcha pair exceptionally well with the mellow sweetness of vanilla, creating a balanced flavor profile that is both energizing and indulgent. When using foam on tea, the key is to ensure the base liquid is completely chilled to prevent the foam from melting prematurely.
This combination works beautifully with herbal teas like hibiscus or rooibos as well, providing a smooth texture that cuts through the natural tannins of the tea leaves. Using cold foam instead of traditional milk allows you to enjoy a layered beverage that looks professional and tastes complex.
Experimenting with different tea bases can turn your kitchen into a high-end tea house, providing a unique way to enjoy dairy-based or plant-based vanilla foams.
Common questions about homemade cold foam
Can you make it dairy-free or vegan?
You can absolutely create a delicious plant-based version of vanilla cold foam by selecting the right alternative milks that mimic the protein structure of dairy.
To achieve that signature thick, cloud-like consistency, it is highly recommended to use full-fat oat milk or barista-style almond milk, as these varieties are specifically formulated to foam without collapsing immediately.
Simply combine your chosen plant milk with a splash of dairy-free heavy cream or coconut cream to add the necessary richness and stability. Whisk in a high-quality vegan vanilla syrup or pure vanilla bean paste to ensure a deep, authentic flavor profile that rivals any coffee shop offering.
For the best results, ensure your alternative milk is chilled thoroughly before frothing, as cold temperatures help the plant proteins trap air bubbles more effectively.
Using a handheld electric milk frother for at least thirty seconds will produce a silky, vegan-friendly topping that pairs beautifully with your favorite cold brew or iced latte while remaining entirely cruelty-free.
How many calories are in vanilla cold foam?
The caloric content of your homemade vanilla cold foam depends largely on the specific ingredients and ratios used during preparation. Typically, a standard serving made with two tablespoons of heavy cream, one tablespoon of 2% milk, and a pump of vanilla syrup contains approximately 100 to 150 calories.
If you are looking to reduce the calorie count without sacrificing the luxurious texture, you can swap the heavy cream for half-and-half or whole milk, which brings the total down to roughly 60-80 calories per serving.
For an even lighter option, utilize sugar-free vanilla syrup and skim milk to create a fluffy topping that is significantly lower in sugar and fat.
It is important to remember that while the foam feels light and airy, the dense fats in the cream are what provide the velvety mouthfeel and flavor.
By measuring your ingredients carefully and opting for low-calorie sweeteners, you can enjoy this decadent treat daily while still adhering to your specific nutritional goals and maintaining a balanced, healthy lifestyle.
How long does the foam stay fluffy?
Homemade vanilla cold foam is designed for immediate enjoyment and generally maintains its peak fluffiness for about five to ten minutes after being poured over a cold beverage.
Because the structure relies on tiny air bubbles suspended in a mixture of fat and protein, the foam will gradually begin to dissipate and dissolve into the coffee as the temperature rises or the bubbles pop.
To extend the lifespan of your foam, always start with ice-cold ingredients and use a high-speed frother to create the smallest, most stable micro-bubbles possible. If you find your foam is separating too quickly, increasing the ratio of heavy whipping cream will provide more structural integrity than using milk alone.
While you can technically store leftover foam in a sealed container in the refrigerator for up to twenty-four hours, it will likely lose its volume and become liquid again.
If this happens, simply re-froth the mixture for fifteen seconds to revive the airy texture before serving it over your next refreshing glass of iced coffee.
Frequently Asked Questions
What are the ingredients for vanilla cold foam?
To make a standard vanilla cold foam, you need heavy cream, 2% milk, and vanilla syrup. The ideal ratio is typically three parts heavy cream to two parts milk, plus one to two tablespoons of syrup.
How do I froth vanilla cold foam without a frother?
If you don’t have an electric frother, you can use a French press by pumping the plunger up and down rapidly for 30 seconds. Alternatively, you can shake the ingredients vigorously in a tightly sealed mason jar until the volume doubles.
What is the secret to getting the perfect thick consistency?
The secret lies in using very cold heavy cream and maintaining a specific fat content. Using a handheld milk frother at the surface of the liquid to incorporate air will create that signature ‘cloud-like’ texture that sits on top of your coffee.
Can I make vanilla cold foam dairy-free?
Yes, you can use full-fat oat milk or a combination of coconut cream and almond milk. For the best results, use ‘Barista Edition’ plant milks as they contain stabilizers that help hold the foam structure longer.
How long does homemade vanilla cold foam last?
Vanilla cold foam is best enjoyed immediately after frothing for the fluffiest texture. However, you can store the pre-mixed liquid ingredients in the fridge for up to 3 days and simply froth right before serving.
How do I make a sugar-free vanilla cold foam?
Simply replace the standard vanilla simple syrup with a sugar-free vanilla syrup or a few drops of vanilla extract and a keto-friendly sweetener like monk fruit or stevia. The frothing process remains exactly the same.
Conclusion
Creating café-quality vanilla cold foam at home is both simple and rewarding. By combining milk, heavy cream, and vanilla syrup, you can achieve a velvety texture that elevates any iced coffee. Whether you use a handheld frother or a blender, the key lies in using cold ingredients for maximum fluffiness. Now that you have mastered this technique, you can skip the coffee shop lines and enjoy a luxurious, personalized treat right in your own kitchen.