How To Make Cold Brew Cream At Home
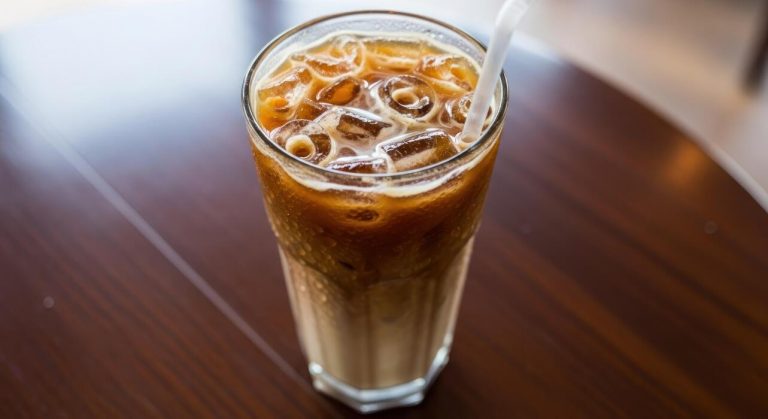
If you are tired of paying coffee shop prices for that velvety finish on your morning caffeine, you have come to the right place. Learning how to make cold brew cream at home is surprisingly simple and requires just a few basic ingredients from your fridge. Whether you crave a thick vanilla foam or a silky sweet cream stir-in, this guide provides the perfect DIY ratios. Stick around to discover our foolproof method for achieving professional results in your own kitchen.
What is cold brew cream and why you need it
The difference between cold foam and liquid creamers
Understanding the structural differences between cold foam and standard liquid creamers is essential for mastering the perfect home cold brew experience. Cold foam is essentially aerated dairy or non-dairy milk, processed through high-speed agitation to create a frothy, cloud-like texture that sits elegantly on top of your drink.
In contrast, cold brew cream is a denser, liquid-based additive designed to emulsify and integrate fully with the coffee’s body. To achieve the best results at home, use a handheld milk frother for foam or a simple whisk for creamers.
While foam provides a sensory, light mouthfeel that dissipates slowly, a rich cream concentrate offers a consistent flavor profile from the first sip to the last.
Liquid creamers are often preferred for those who enjoy a velvety, heavy body, whereas cold foam is the go-to for a visually stunning, Starbucks-style aesthetic. Both methods require cold ingredients to ensure the fat molecules remain stable and don’t break down upon contact with your chilled coffee base.
Why homemade cream tastes better than store-bought
Creating your own cold brew cream at home offers a level of freshness and customization that mass-produced, store-bought alternatives simply cannot match. Commercial creamers are frequently loaded with artificial thickeners, preservatives, and hydrogenated oils to extend shelf life, which can leave a waxy film on the palate.
By making your own, you gain total control over the sweetness levels and flavor infusions, such as using real vanilla beans, high-quality maple syrup, or even a pinch of sea salt.
This DIY approach allows you to use organic heavy cream or high-fat coconut milk, resulting in a cleaner, more vibrant taste that complements the chocolatey notes of cold brew. Furthermore, homemade versions lack the chemical aftertaste found in stabilizers like carrageenan.
Because you are preparing it in small batches, the volatile aromatic compounds remain intact, ensuring every glass of coffee tastes like it was prepared by a professional barista in a high-end cafe without the premium price tag or unnecessary additives.
The science of fat content in cold coffee
The success of a cold brew cream relies heavily on the science of lipid distribution and temperature. Unlike hot coffee, which can melt fats easily, cold brew requires a cream with a high butterfat content to maintain a smooth emulsion without clumping.
Using heavy cream (at least 36% fat) or half-and-half provides the necessary viscosity to coat the tongue, which effectively neutralizes the perceived bitterness and acidity of the coffee beans.
When you pour a high-fat cream into cold coffee, the lipids act as a flavor carrier, trapping the delicate floral and nutty notes that might otherwise be lost. It is scientifically beneficial to chill your mixing vessel before combining ingredients to keep the fat globules small and uniform.
This prevents the cream from separating or looking oily on the surface. Achieving the right balance of fat and liquid ensures a luxurious mouthfeel that lingers pleasantly.
For a dairy-free alternative, full-fat oat milk or cashew cream offers similar molecular stability, providing that essential richness required for a balanced, cafe-quality beverage.
Essential ingredients for the perfect cold brew cream

Best types of dairy and non-dairy bases
To achieve a professional-grade cold brew cream at home, the foundation of your mixture is critical. For traditional dairy enthusiasts, using heavy whipping cream is the gold standard because its high fat content creates a stable, luxurious foam that sits beautifully atop your coffee.
Many baristas recommend a blend of heavy cream and whole milk in a two-to-one ratio to ensure the texture is pourable yet thick enough to resist immediate dilution.
If you prefer plant-based alternatives, full-fat oat milk is the superior choice due to its natural proteins and creamy mouthfeel that mimics cow’s milk better than almond or soy options. For an even richer vegan version, consider incorporating coconut cream, which adds a tropical undertone and a dense, velvety consistency.
Regardless of the base you select, ensure the liquid is thoroughly chilled before frothing, as cold molecules trap air more effectively, resulting in a microfoam that lasts until your very last sip of coffee.
Natural sweeteners vs. flavored syrups
Choosing the right sweetening agent defines the character of your cold brew cream. For a clean, classic taste, liquid sweeteners are preferred over granulated sugars because they integrate instantly without leaving a gritty residue at the bottom of your glass.
Simple syrup or agave nectar provide a neutral sweetness that lets the coffee beans shine, while honey or maple syrup offer earthy, complex notes that pair exceptionally well with darker roasts.
If you are looking to replicate popular coffee shop recipes, high-quality flavored syrups like vanilla, caramel, or toasted marshmallow are essential. These concentrated syrups allow you to control the intensity of the flavor without thinning out the cream’s body.
For those seeking a healthier alternative, monk fruit drops or stevia can be used, but be mindful of the potency to avoid a bitter aftertaste.
Experimenting with different ratios will help you find the perfect balance between the bitterness of the cold brew and the sweetness of the cold foam topper.
Adding salt and vanilla for depth
The secret to a truly gourmet cold brew cream lies in the subtle flavor enhancers that provide balance and complexity.
A small pinch of sea salt is the most underrated ingredient in a home barista’s toolkit; it acts as a flavor catalyst that cuts through the bitterness of the coffee while heightening the perception of sweetness in the cream. This creates a salted-caramel effect that feels sophisticated on the palate.
Simultaneously, adding pure vanilla extract or vanilla bean paste introduces a floral aroma and a layer of warmth that rounds out the sharp edges of the caffeine. While extract is convenient for daily use, the paste provides those aesthetic black specks that signify a premium beverage.
Together, these two additions transform a simple dairy topping into a multidimensional culinary foam.
For the best results, whisk these enhancers into the liquid base before you begin the frothing process to ensure every bubble is infused with the seasoning, creating a consistent taste profile from the first sip to the very last.
How to make cold brew cream at home: A step-by-step guide

Mixing your base ingredients
To begin your journey into crafting the perfect cold brew cream, you must start with high-quality liquid components. For a classic sweet cream finish, combine heavy whipping cream, whole milk, and a touch of sweetened condensed milk in a chilled mixing bowl.
If you prefer a dairy-free alternative, full-fat coconut milk or barista-blend oat milk works exceptionally well due to their high fat content. Once your base is poured, incorporate your desired flavorings such as pure vanilla extract, a pinch of sea salt, or even a dash of cinnamon.
Use a hand frother or a small whisk to blend these ingredients until they are completely integrated but not yet stiff. The goal is to achieve a smooth, uniform consistency that will pour elegantly over your coffee.
Ensuring all your ingredients are cold before you begin mixing will help the proteins and fats emulsify more effectively, resulting in a professional-grade topping that enhances the overall texture of your morning beverage.
Choosing the right ratio for thickness
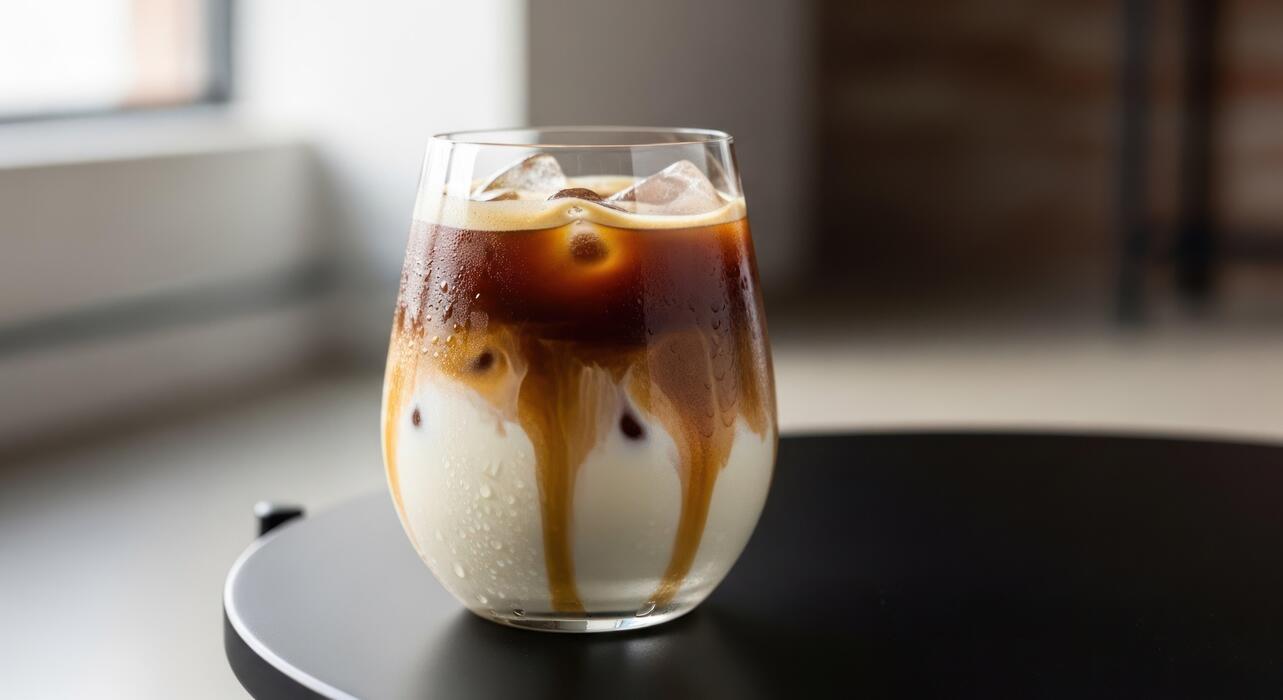
The secret to a luxurious cold brew cream lies in mastering the specific ratio of fat to liquid to achieve your desired density. For a light, pourable cream that creates beautiful marbling effects, aim for a 2:1 ratio of heavy cream to milk.
If you desire a thick, spoonable cold foam that sits prominently on top of the ice, increase the proportion of heavy cream or use a mechanical milk frother on the cold setting to incorporate more air.
Those who prefer a leaner topping should utilize 2% milk with a splash of half-and-half, though it may dissipate faster into the coffee.
Always remember that the viscosity of your sweetener also affects the final thickness; using maple syrup or simple syrup will result in a thinner consistency compared to the dense richness of condensed milk.
Experimenting with these proportions allows you to customize the mouthfeel and richness of the cream to perfectly complement the bold, chocolatey notes of your favorite cold brew concentrate.
Storage tips to keep it fresh
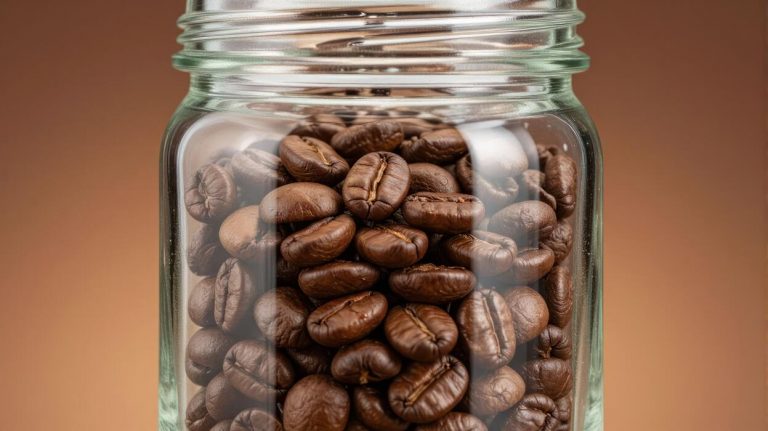
Once you have perfected your homemade cold brew cream, proper storage is essential to maintain its flavor and structural integrity. Transfer any leftover cream into an airtight glass jar, such as a mason jar, to prevent it from absorbing odors from other foods in your refrigerator.
Because the ingredients are dairy-based, always keep the container in the coldest part of the fridge, typically the back of the middle shelf rather than the door. Homemade cream usually stays fresh for about five to seven days, or until the expiration date of your original dairy components.
Before each use, give the jar a vigorous shake or a quick ten-second froth to re-emulsify the fats that may have settled during storage. Avoid freezing the mixture, as this will destroy the creamy texture and cause the fats to separate upon thawing.
By following these simple preservation steps, you can enjoy a cafe-quality experience every morning with minimal effort and guaranteed freshness for your daily caffeine routine.
Best ways to froth your cream for a fluffy texture
Using a handheld milk frother
For those seeking the most efficient and convenient way to achieve a silky cold brew topping, a handheld battery-operated milk frother is the ultimate tool. To begin, pour your heavy cream and desired sweeteners into a tall glass to prevent splashing during the process.
Submerge the whisk head completely before turning the device on to avoid creating unnecessary air bubbles. Hold the frother at a slight angle and move it slowly up and down for approximately thirty to forty-five seconds.
You are looking for a thick, paint-like consistency that holds its shape without becoming overly stiff like whipped cream. This method is highly effective because the high-speed rotation creates a uniform microfoam that integrates perfectly with the coffee.
Ensure you stop as soon as the cream doubles in volume to maintain that pourable, velvety texture. Using a chilled metal pitcher can further enhance the stability of the foam, keeping the cream cold and preventing it from thinning out too quickly.
The French press plunging method
If you do not own an electric gadget, your standard French press is an incredible manual alternative for creating voluminous cream. Pour your cold cream mixture into the carafe, ensuring the liquid level is high enough for the mesh filter to reach.
Place the lid on and begin pumping the plunger vigorously with short, rapid strokes. This action forces air through the mesh screen and into the fat molecules of the cream, resulting in a dense and incredibly stable foam that rivals professional coffee shop quality.
Continue this motion for about twenty seconds, then check the texture. The goal is to create a fluffy head that sits gracefully on top of your cold brew without sinking immediately.
This technique is particularly useful because the fine mesh screen breaks down larger bubbles into smaller ones, providing a more luxurious mouthfeel. Once finished, give the carafe a gentle swirl and a light tap on the counter to remove any remaining large air pockets before pouring it over your drink.
Creating foam with a standard kitchen blender
When you are preparing multiple servings of cold brew for guests, utilizing a standard kitchen blender is the most practical solution for bulk frothing. Add your cold cream and flavorings into the blender jar, ensuring the lid is tightly secured to manage the high-speed agitation.
Use the pulse setting in short bursts of five seconds rather than running a continuous cycle. This level of control is vital because blenders are powerful enough to turn cream into butter if left unattended for too long.
Monitor the cream closely until it reaches a soft-peak stage, where it looks glossy and light. The wide blades are excellent for incorporating air quickly, making this the fastest method for achieving a fluffy texture.
If your blender has a variable speed dial, start at the lowest setting and gradually increase it to maintain better control over the final density.
Once the cream looks aerated and thick, use a long spoon to gently layer the clouds of foam over your ice-cold coffee for a beautiful presentation.
Popular flavor variations for your coffee cream
How to make vanilla sweet cream
To replicate the luxury of a coffeehouse at home, start with a base of heavy cream, 2% milk, and high-quality vanilla syrup.
The secret to achieving that silky, pourable texture is to mix two parts heavy cream with one part milk, ensuring the consistency is thick enough to swirl into your cold brew without immediately disappearing.
For the best flavor profile, use pure vanilla bean paste or extract rather than imitation flavorings to achieve a deep, aromatic sweetness. Simply whisk the ingredients together in a small pitcher until fully combined but not yet stiff.
This versatile cream is perfect for those who enjoy a smooth, balanced sweetness that cuts through the natural acidity of cold-brewed beans. You can store any leftover mixture in an airtight container in the refrigerator for up to five days.
Always give the container a quick shake before pouring it over your ice to ensure the vanilla and fats are perfectly emulsified for every delicious sip you take.
Recipe for salted caramel cold foam
If you prefer a structured topping that sits elegantly atop your coffee, salted caramel cold foam is the ultimate solution. Begin by combining heavy cream and a splash of skim milk, as the higher protein content in skim milk actually helps stabilize the air bubbles for a longer-lasting foam.
Add a generous tablespoon of caramel sauce and a pinch of fine sea salt to create that addictive sweet-and-salty contrast. To achieve the perfect aeration, use a handheld milk frother or a French press to pump air into the liquid until it doubles in volume and reaches a soft-peak stage.
The resulting foam should be thick and velvety, allowing it to rest on top of the cold brew before slowly cascading down in beautiful ribbons.
This technique ensures that you get a hit of savory caramel with every sip, transforming a basic home brew into a gourmet specialty beverage that rivals any professional cafe creation with minimal effort or expensive equipment.
Seasonal flavors like pumpkin spice and mocha
Adapting your cold brew cream for the changing seasons is an excellent way to keep your morning routine exciting. For a classic autumn twist, whisk real pumpkin puree and pumpkin pie spice into your cream base, ensuring you strain the mixture through a fine-mesh sieve to maintain a smooth texture.
During colder months, you can transition to a rich mocha version by dissolving dark cocoa powder and a hint of espresso powder into warm cream before chilling it down for use.
If you want something refreshing for summer, consider adding a drop of peppermint extract or even lavender syrup for a floral note. The key to successful seasonal variations is to infuse the flavors into the dairy thoroughly so they don’t settle at the bottom of your glass.
By experimenting with these aromatic additions, you can enjoy a customized, cafe-style experience year-round while controlling the quality of ingredients. These variations provide a sophisticated flavor profile that elevates the natural chocolatey notes found in most cold brew blends.
Tips for making dairy-free and vegan cold brew cream
The best plant-based milks for frothing
To achieve a professional-grade cold brew cream at home, selecting the right base is essential for texture and stability. While standard almond milk is popular, it often lacks the protein structure needed to hold air bubbles, resulting in a thin consistency.
For the best results, look for barista-style oat milk, which is specifically formulated with added fats and stabilizers to mimic the creamy mouthfeel of dairy. Oat milk provides a naturally sweet profile that complements the bold notes of cold brew without overpowering it.
Another excellent option is soy milk, which boasts a high protein content that creates a dense, long-lasting microfoam when aerated. If you prefer a nuttier flavor, cashew milk offers a remarkably smooth texture that blends seamlessly into coffee.
Always ensure your plant milk is chilled thoroughly before frothing, as cold liquids hold air much better than room-temperature alternatives. Using a high-speed handheld milk frother will help you achieve that velvety, coffee-shop quality finish every single time.
Using coconut cream for maximum thickness
If you are looking for an ultra-indulgent, decadent topper for your morning caffeine fix, canned coconut cream is the ultimate solution for vegan cold brew foam. Unlike thin carton milk, full-fat coconut cream contains a high concentration of healthy fats that provide a luxurious, heavy-cream consistency.
To prepare this, refrigerate a can of coconut milk overnight to separate the solid cream from the liquid water. Scoop out the solid white cream and whisk it vigorously with a touch of maple syrup or vanilla extract until it reaches soft peaks.
This method creates a stable, thick layer that sits beautifully on top of your drink rather than sinking immediately. For an even lighter texture that still feels rich, you can blend coconut cream with oat milk in a one-to-one ratio.
This hybrid approach reduces the strong tropical flavor while maintaining a superior thickness that rivals traditional heavy whipping cream. It is the perfect solution for those who prioritize a creamy, dessert-like experience with their homemade cold brew.
How to prevent separation in cold coffee
One of the biggest challenges when making dairy-free cold brew cream is preventing the dreaded curdling or separation that occurs when plant fats meet acidic coffee. To ensure a smooth and unified beverage, always pour your cream slowly over the back of a spoon to buffer the contact.
This technique helps the cream float and integrate gradually rather than clumping at the bottom. Additionally, adding a tiny pinch of sunflower lecithin or xanthan gum during the frothing process can act as a powerful stabilizer, keeping the fats and liquids emulsified for much longer.
Temperature also plays a vital role; ensure your cold brew concentrate is well-chilled, as extreme temperature fluctuations can trigger separation in sensitive nut milks. If you notice your cream breaking apart, a quick ten-second stir with a whisk can often re-emulsify the mixture.
By choosing low-acid cold brew beans and using a high-fat creamer base, you can maintain a beautiful, homogenized appearance that looks as good as it tastes throughout your entire drinking experience.
Common mistakes to avoid when making cream at home
Why your cream isn’t getting thick enough
One of the most frequent errors when preparing cold brew cream is using dairy with insufficient fat content. If you attempt to whisk half-and-half or whole milk alone, you will likely end up with a thin, watery liquid rather than a plush topper.
To achieve that signature velvety texture, you must use heavy whipping cream with at least 36% fat content as your primary base. Another common pitfall is over-diluting the mixture with too much liquid cold brew concentrate.
While you want that coffee flavor to shine through, adding more than a tablespoon or two can break the emulsion. Instead, maintain a strict ratio of cream to coffee to ensure the proteins can trap air effectively.
If your mixture remains runny, try chilling your mixing bowl and whisk in the freezer for ten minutes before starting. This cold environment helps the fat globules stay solid, allowing them to build a stable structure that holds its shape when poured over your iced beverage.
How to fix overly sweet mixtures
Achieving the perfect balance of flavors is a delicate process, and many home baristas accidentally create a cloying topping by adding too much syrup or sugar at once. When making cold brew cream, the sweetness should enhance the coffee’s notes, not mask them entirely.
If you find your mixture is too sugary, the best solution is to gradually fold in extra unsweetened cream to dilute the sugar concentration without losing the thick consistency. Additionally, adding a tiny pinch of sea salt can work wonders to neutralize excessive sweetness while making the coffee flavors pop.
Many people forget that flavored syrups are highly concentrated, so always measure your sweeteners accurately using a spoon rather than pouring directly from the bottle.
If the cream feels one-dimensional, a drop of pure vanilla extract or a dusting of unsweetened cocoa powder can provide a sophisticated profile that cuts through the sugar. Always taste your mixture mid-way through the whipping process to adjust the balance before it reaches its final peak.
Temperature control for better foam
The success of a cold brew cream depends almost entirely on the temperature of your ingredients and tools. A mistake often made is using room-temperature cream or letting the mixture sit out on the counter while preparing the rest of the drink.
To ensure a professional-grade foam, you must keep all ingredients refrigerated until the exact moment you are ready to blend.
When the fat in the cream gets too warm, it loses its ability to trap air bubbles, resulting in a flat, greasy liquid that sinks straight to the bottom of the glass.
For the best results, utilize a handheld milk frother or a chilled glass jar for shaking, as these methods generate less heat than a high-speed standing blender. If you are making a large batch, work in small increments to prevent the friction from warming the dairy.
By keeping everything ice-cold, you create a dense, micro-foam layer that sits beautifully on top of your cold brew, providing that sought-after aesthetic and a luxurious mouthfeel with every single sip.
Frequently Asked Questions
What are the basic ingredients for homemade cold brew cream?
To make a basic cold brew cream, you typically need heavy whipping cream, a sweetener like simple syrup or maple syrup, and a splash of milk or half-and-half to thin it out. You can also add vanilla extract or other flavorings to customize the taste to your preference.
How do I make cold brew cream thick and frothy?
The best way to achieve a thick, frothy consistency is to use a handheld milk frother or a small blender for about 30 seconds. If you don’t have these tools, you can shake the ingredients vigorously in a sealed mason jar until the mixture doubles in volume.
Can I make a dairy-free cold brew cream at home?
Yes, you can create a delicious dairy-free version by using full-fat coconut milk or a barista-blend oat milk. These alternatives provide the necessary fat content to create a creamy texture that mimics traditional heavy cream.
How long does homemade cold brew cream last in the fridge?
Homemade cold brew cream typically stays fresh for 3 to 5 days when stored in an airtight container in the refrigerator. Always give the container a quick shake before using, as the ingredients may naturally separate over time.
What is the difference between cold brew cream and sweet cream cold foam?
Cold brew cream is a dense, pourable flavored creamer that mixes into the coffee, whereas cold foam is aerated more intensely to sit on top of the drink. While they use similar ingredients, the foam requires more air incorporated during the frothing process.
How do I add flavors like vanilla or caramel to my cream?
To add flavor, simply whisk in a half-teaspoon of extract or a tablespoon of flavored syrup before frothing the cream. Popular options include vanilla bean paste, salted caramel syrup, or even a pinch of cinnamon for a spiced profile.
Conclusion
Creating café-quality cold brew cream at home is a simple yet rewarding process that elevates your daily caffeine routine. By mastering the balance of heavy cream, sweetener, and your favorite flavorings, you can bypass expensive coffee shop prices while tailoring every glass to your preference. Now that you have the techniques and tips needed for success, it is time to start experimenting. Grab your whisk and enjoy the smooth, velvety luxury of homemade cream today.