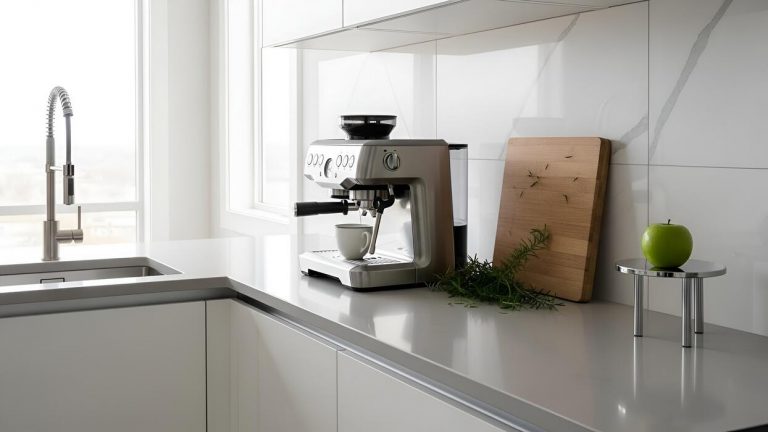
How To Make Cold Brew Like Starbucks
If you are tired of spending five dollars every morning, learning how to make cold brew like Starbucks at home is a total game-changer. You don’t need fancy equipment to replicate that signature smooth, velvety flavor and high caffeine kick. Whether you crave their classic black brew or that famous vanilla sweet cream topper, we have perfected the ratio and technique for you.
What makes Starbucks cold brew different?
The specific coffee bean blend they use
To replicate the Starbucks signature taste, you must start with the right foundation: their proprietary Nariño 70 cold brew blend. Unlike their standard espresso roast, this specific mixture consists of 70% Colombian Nariño beans and 30% African beans.
This combination is crucial because it creates a flavor profile that is naturally sweet with distinct chocolatey notes and a smooth citrus finish. When selecting beans at home, look for a medium-to-dark roast that emphasizes low acidity and nutty undertones.
Many home baristas find success using the official Starbucks Cold Brew Pitcher Packs or purchasing whole bean Guatemala Antigua or Kenya blends to mimic that complex depth. The goal is to avoid oily beans that can lead to bitterness during the long immersion process.
By prioritizing a high-quality Arabica blend that originates from high-altitude regions, you ensure that your homemade concentrate has the same velvety body and clean aftertaste that makes the commercial version so popular among coffee enthusiasts worldwide.
Steeping time and temperature standards
Precision in timing is what separates a standard iced coffee from a true Starbucks-style cold brew. Starbucks utilizes a 20-hour immersion process conducted at room temperature to extract the most desirable flavor compounds.
To achieve this at home, you should aim for a window of 18 to 24 hours depending on your taste preference. Steeping for too short a time results in a weak, acidic tea-like liquid, while exceeding 24 hours can introduce harsh, woody flavors.
It is vital to steep the grounds at room temperature rather than in the refrigerator, as the cooler environment slows down extraction and prevents the oils from fully developing. Once the timer hits the 20-hour mark, you must immediately filter the concentrate to stop the brewing process.
This controlled environment ensures a low-acid profile that is roughly 60% less acidic than hot-brewed coffee. Following these strict temporal standards allows the natural sweetness of the beans to shine without the need for excessive sugar or heavy creamers.
The coarse grind size requirement
The mechanical secret to the Starbucks method lies in the texture of the coffee particles. They utilize an extra-coarse grind, similar in consistency to sea salt or peppercorns. Using a fine or medium grind will result in an over-extracted, bitter mess because the water cannot flow freely between the particles.
A consistent coarse grind allows for a slow, steady saturation which is essential for the long-contact immersion method. If you are grinding at home, a burr grinder is highly recommended over a blade grinder to ensure uniformity; uneven pieces will lead to an inconsistent flavor profile.
This specific texture also makes the final filtration much easier, preventing sediment and sludge from passing through your mesh or paper filter into the final carafe.
By maintaining a large surface area on each coffee particle, you facilitate a gentle extraction that highlights the rich cocoa and caramel notes typical of the Starbucks experience. Remember that the ratio should be roughly one part coffee to four parts water for a concentrate that mimics their professional strength.
Best coffee beans for a Starbucks taste

Choosing dark roast vs medium roast
To replicate the signature Starbucks cold brew flavor profile, you must understand the distinction between roast levels. Starbucks typically utilizes a specific dark roast profile for their cold brew, which emphasizes low acidity and heavy body.
When shopping for beans, look for labels like Dark Roast or French Roast to capture those familiar notes of cocoa and toasted nuts. While a medium roast might offer more subtle floral nuances, it often lacks the punchy, bittersweet intensity that defines the Starbucks experience.
Choosing a dark roast ensures a robust base that remains prominent even after heavy dilution with water or the addition of cream. For the most authentic result, avoid light roasts entirely, as their high acidity can become unpleasantly sour during the long extraction process.
Instead, focus on oily, dark beans that can withstand a twenty-hour steep time, resulting in a smooth, syrup-like concentrate that serves as the perfect foundation for your favorite at-home coffee beverages.
Why Latin American and African blends work
The secret to the complexity found in Starbucks cold brew lies in their strategic blending of beans from different origins. Specifically, a mix of Latin American and African beans creates a balanced flavor hierarchy that is difficult to achieve with single-origin coffee.
Latin American beans provide the essential chocolatey and nutty undertones that form the backbone of the drink’s sweetness. Meanwhile, the inclusion of African beans adds a whisper of citrus and spice, preventing the brew from tasting flat or one-dimensional.
When selecting your beans, look for a multi-region blend that highlights this specific combination. This synergy allows the cold brew to maintain a clean finish and a multi-layered aroma that mimics the professional barista quality found in stores.
By sourcing a blend that targets these two regions, you ensure your homemade version captures the sophisticated, well-rounded profile that has made the Starbucks recipe a global standard for cold coffee enthusiasts who appreciate depth and character.
Freshness and storage tips for your beans
Even the highest quality beans will fail to produce a Starbucks-level cold brew if they are not stored and handled with care. For the best results, always purchase whole beans and grind them immediately before you begin the steeping process.
A coarse, sea-salt-like grind is vital to prevent over-extraction and bitterness. To maintain peak flavor, store your coffee in an opaque, airtight container kept in a cool, dark place.
Exposure to oxygen, light, and moisture are the primary enemies of coffee freshness, leading to stale notes that will ruin your cold brew concentrate.
Avoid the common mistake of storing beans in the freezer, as fluctuating temperatures can introduce condensation and damage the delicate oils responsible for that rich Starbucks aroma. Aim to use your beans within two weeks of opening the bag for maximum potency.
By prioritizing freshly ground coffee and proper storage, you guarantee a vibrant, aromatic cup that tastes just as fresh as a pour from your local cafe.
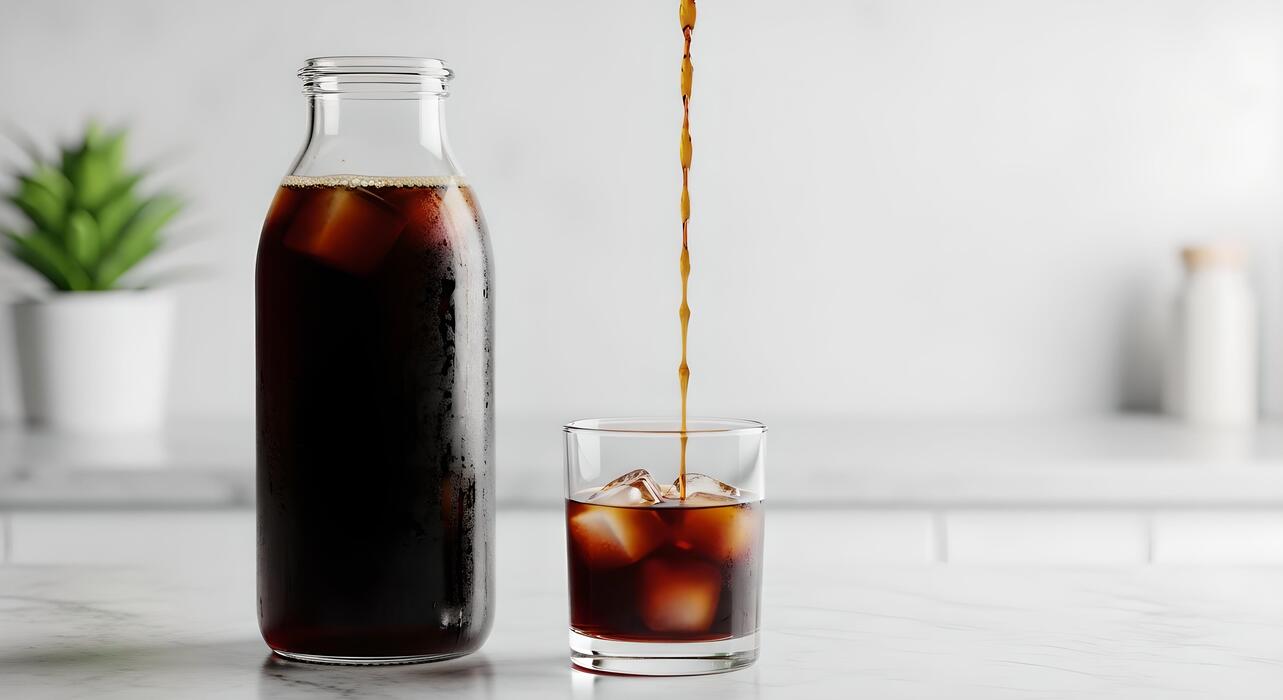
The exact cold brew ratio and measurements

Calculating the coffee-to-water ratio
To replicate the signature Starbucks flavor profile at home, you must master the specific coffee-to-water ratio used in their professional brewing process. Starbucks typically utilizes a high-concentration ratio of approximately 1:4 or 1:5 for their initial brew, which creates a potent cold brew concentrate.
This means for every one part of coarsely ground coffee, you will add four or five parts of filtered water. If you prefer a smoother, less intense cup that mimics their final served version, a 1:8 ratio is often the sweet spot for home baristas.
Using this precise mathematical approach ensures that you extract the deep chocolate and citrus notes without over-extracting the bitter tannins.
Always ensure you are using a very coarse grind size, similar to sea salt, to prevent the brew from becoming muddy or overly acidic during the long twelve to twenty-four hour steeping period required for that classic, velvety Starbucks texture and bold caffeine kick.
Measuring by weight vs volume
For the most consistent results that mirror the quality control of a professional cafe, measuring your ingredients by weight using a digital scale is the superior method.
Coffee beans vary significantly in density based on their roast level; therefore, a cup of dark roast weighs less than a cup of light roast despite taking up the same volume.
To achieve the Starbucks standard, aim for 113 grams (4 ounces) of coffee per 4 cups of water for a standard batch.
If you do not have a scale, you can use volume measurements by following a rule of one cup of whole beans to four cups of water, but be aware that this is less precise.
Using a scale eliminates the guesswork and ensures that every batch you brew has the exact same strength and body. This level of precision is exactly how commercial chains maintain their flavor identity across thousands of locations globally, allowing you to enjoy that reliable coffeehouse experience in your own kitchen.
Adjusting strength for concentrate or ready-to-drink
Deciding whether to brew a concentrate or a ready-to-drink version is essential for matching your personal taste to the Starbucks menu. If you brew using the 1:4 concentrate ratio, you are creating a versatile base that must be diluted before consumption.
Starbucks baristas typically cut the concentrate with equal parts water or milk and plenty of ice, which prevents the drink from becoming watery as the ice melts. If you prefer a ‘ready-to-drink’ style that requires no dilution, use a 1:10 or 1:12 ratio during the steeping process.
This lighter ratio allows you to pour the coffee directly over ice for a crisp, refreshing beverage. Keep in mind that a concentrate stays fresh longer in the refrigerator, often lasting up to two weeks, whereas a ready-to-drink version may lose its vibrancy after a few days.
Experimenting with these dilution levels allows you to customize the caffeine intensity and mouthfeel to perfectly suit your morning routine or afternoon pick-me-up.
Step-by-step guide to brewing at home
Preparing the coarse coffee grounds
To replicate the signature Starbucks profile at home, you must start with the correct grind size and high-quality beans. Starbucks uses a specific Latin American and African blend, so look for a medium-to-dark roast with notes of cocoa or citrus.
The most critical step is achieving a coarse, sandy texture similar to sea salt or breadcrumbs. If your grind is too fine, the coffee will become overly bitter and difficult to filter; if it is too coarse, the flavor will be weak and underdeveloped.
Use a burr grinder for consistency and aim for a 1:4 coffee-to-water ratio for a concentrated base, or a 1:8 ratio for a ready-to-drink beverage. Weighing your coffee in grams ensures accuracy, as volume measurements can vary significantly between different bean types.
By focusing on freshly ground beans and the specific coarse setting, you create the necessary surface area for a slow, gentle extraction that mimics the smooth, low-acid finish found in professional coffee shops.
The immersion brewing process
Once your grounds are prepared, place them into a large glass pitcher or a dedicated cold brew maker. Slowly pour filtered, room-temperature water over the grounds, ensuring every particle is fully saturated. Avoid using hot water, as the goal is a chemical-free extraction that highlights sweetness rather than acidity.
Use a long spoon to gently submerge the crust of floating grounds, but do not over-stir, as this can lead to cloudiness. Seal the container to prevent the coffee from absorbing odors from your refrigerator.
For a true Starbucks flavor, allow the mixture to steep for 12 to 20 hours at room temperature or in the fridge. A longer steep time typically yields a bolder, more caffeinated concentrate that stands up well to ice and milk.
This immersion technique allows the water to pull deep chocolate notes from the beans over time, resulting in a velvety mouthfeel that is significantly less acidic than traditional iced coffee brewed with hot water.
Filtering methods for a clean cup
After the steeping period is complete, you must separate the solids from the liquid to achieve a crisp, professional finish. Start by pouring the mixture through a fine-mesh stainless steel sieve to remove the largest grounds.
For the second pass, which is essential for that polished Starbucks look, use a paper coffee filter or a nut milk bag. This secondary filtration removes fine sediments and oils that can make the brew taste muddy or dusty over time.
Do not squeeze the filter bag or press the grounds, as this forces bitter tannins into your final drink. Once filtered, you will have a potent cold brew concentrate that can be stored in the refrigerator for up to two weeks.
To serve, mimic the cafe experience by diluting the concentrate with equal parts water or milk over fresh ice. This careful multi-stage filtration process ensures your homemade version is just as smooth and refreshing as the cup you would buy from a barista.
How to make Starbucks sweet cream and foam
Recipe for Vanilla Sweet Cream
To replicate the signature Starbucks flavor at home, you must master the specific ratio of ingredients used in their vanilla sweet cream. Start by combining heavy whipping cream, 2% milk, and vanilla syrup in a pitcher.
The secret to the authentic taste is using a ratio of roughly two parts heavy cream to one part milk, ensuring the mixture is rich but still pourable.
For a standard batch, stir together one cup of heavy cream, a half-cup of 2% milk, and three to four tablespoons of high-quality vanilla simple syrup.
It is crucial to whisk the ingredients gently rather than whipping them at this stage; you want a silky liquid consistency that marbleizes beautifully when poured into your cold brew. This base serves as the foundation for almost all their specialty cold foam drinks.
Always store your prepared sweet cream in the refrigerator until the exact moment of serving to maintain the necessary fat stability required for a professional-grade coffee house finish.
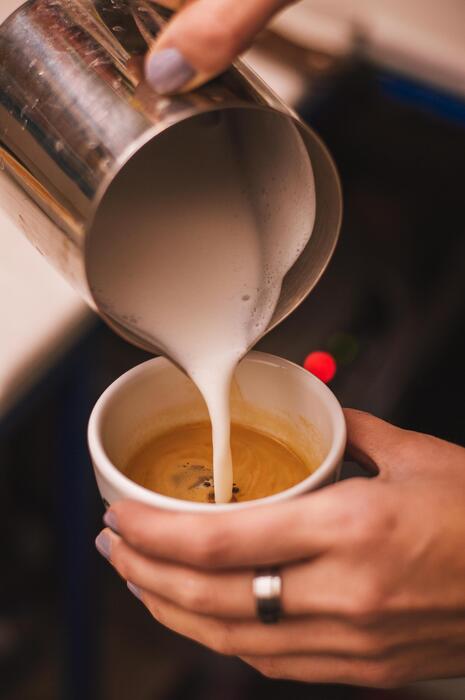
Creating the Salted Caramel Cream Cold Foam
Once you have your vanilla sweet cream base ready, transforming it into the popular salted caramel version requires just two additional flavor components. Measure out about a half-cup of your prepared sweet cream and add two pumps of caramel syrup along with a generous pinch of sea salt.
The salt is the most important element here, as it cuts through the sugar and enhances the deep notes of the coffee. Use a handheld milk frother to aerate the mixture for approximately fifteen to twenty seconds until it doubles in volume and reaches a soft-peak consistency.
You are looking for a texture that is thick enough to sit on top of the black cold brew without immediately sinking, yet fluid enough to sip through a strawless lid. Pour this salty-sweet topping over your ice and coffee slowly.
The result is a luxurious, velvety layer that mimics the exact mouthfeel of the Starbucks original, providing a complex flavor profile that balances sweetness and salinity perfectly.
Tools for getting the perfect foam texture
Achieving the dense, micro-bubble structure characteristic of Starbucks cold foam depends heavily on the equipment you use during the aeration process. The most accessible and effective tool for home baristas is the electric handheld milk frother, which allows for precise control over the thickness of the foam.
For those seeking a more automated experience, a high-end electric milk steamer with a ‘cold froth’ setting can produce incredibly consistent results by using a spinning whisk mechanism.
Alternatively, if you do not have specialized gadgets, a French press is a surprisingly effective substitute; simply pour your cream mixture into the carafe and pump the plunger up and down rapidly for thirty seconds to incorporate air.
Regardless of the method, the key is to ensure all tools and ingredients are thoroughly chilled before you begin. Cold fats trap air much more efficiently than warm ones, so using a cold glass beaker will help you achieve that stiff, cloud-like topping that defines a premium cold brew experience.
Common mistakes when making cold brew
Using the wrong grind size
To replicate the signature Starbucks profile, you must avoid using fine or medium-fine coffee grounds which lead to over-extraction and a muddy mouthfeel. The most frequent error is using pre-ground coffee intended for drip machines. For a professional result, always use an extra-coarse grind resembling sea salt or peppercorns.
This specific texture ensures that water flows evenly around the particles, extracting the deep chocolate and caramel notes without pulling out harsh tannins.
A coarse grind also makes the filtration process significantly easier, preventing fine sediment from clogging your mesh filter or paper bag, which often results in a cloudy beverage. By selecting the right grind consistency, you allow for a slow, gentle extraction that mimics the commercial immersion method used in cafes.
Investing in a quality burr grinder allows you to achieve this consistent coarse texture, which is the fundamental building block for a clean, crisp, and naturally sweet cold brew concentrate that tastes exactly like the premium version you buy daily.
Over-steeping and bitterness issues
Many home baristas mistakenly believe that leaving the coffee to steep for several days will result in a stronger, better flavor. However, over-steeping is a critical mistake that leads to extreme bitterness and an unpleasant woody aftertaste.
To achieve that smooth Starbucks finish, you should aim for a steeping window of 12 to 20 hours at room temperature. If you exceed 24 hours, the water begins to break down organic materials that produce acidic and bitter compounds, ruining the mellow profile cold brew is famous for.
If you prefer to brew in the refrigerator, you can extend the time slightly, but you must monitor the flavor profile closely after the 18-hour mark. Once the time is up, immediately strain the concentrate to stop the extraction process.
Diluting your final product is also essential; remember that Starbucks uses a concentrate-to-water ratio to balance the strength. By strictly timing your brew and filtering promptly, you prevent the harshness that typically plagues homemade batches, ensuring a balanced and refreshing drink.
Using tap water vs filtered water
One of the most overlooked factors in recreating the Starbucks experience is the quality of the water used during the long immersion process. Since cold brew is roughly 98% water, using standard tap water can introduce chlorine, minerals, and metallic undertones that distort the delicate flavor of the beans.
Starbucks utilizes a sophisticated triple-filtration system to ensure a neutral base that highlights the coffee’s natural sweetness. When brewing at home, you should always use freshly filtered water or bottled spring water rather than pouring directly from the faucet.
Hard water contains excess minerals that can hinder the extraction of oils, while soft water might over-extract, leading to a flat taste. By choosing purified or filtered water, you eliminate chemical odors that compete with the coffee’s aroma.
This simple adjustment ensures a clean finish and allows the subtle nutty and cocoa notes of your roast to shine through. Prioritizing water quality is the easiest way to elevate your brew from a basic homemade caffeine fix to a cafe-quality beverage with a professional profile.
Ways to serve and store your cold brew
How long cold brew stays fresh in the fridge
To replicate the Starbucks experience at home, you must manage your coffee’s shelf life with precision. Once you have filtered your concentrate, store it in an airtight glass carafe or mason jar to prevent the absorption of fridge odors.
A pure cold brew concentrate will typically remain flavorful and vibrant for seven to ten days when kept properly chilled. However, if you have already diluted the concentrate with water, you should aim to consume it within three to four days to ensure the best taste.
The oxidation process accelerates once water is added, which can lead to a muted profile or a sour aftertaste over time. Always keep your container toward the back of the refrigerator where temperatures are most stable.
If you notice any unusual cloudiness or a significant loss in that signature chocolatey aroma, it is time to brew a fresh batch. Marking the date on your container is a professional habit that ensures you always enjoy the smoothest cup possible without the risk of staleness.
The best ice cubes for iced coffee
One common mistake that ruins a perfect home brew is using standard ice that dilutes the drink as it melts. To maintain that rich, bold Starbucks consistency until the very last sip, you should create specialized coffee ice cubes.
Simply pour a portion of your prepared cold brew into silicone ice trays and freeze them overnight. As these cubes melt into your glass, they release more coffee flavor rather than plain water, keeping your beverage’s strength perfectly balanced.
If you prefer using traditional water ice, opt for large, slow-melting spheres or oversized cubes which have less surface area and melt significantly slower than small chips.
Using filtered water for your ice is also essential, as any impurities in tap water will eventually alter the clean taste of your brew. By controlling the dilution rate through high-quality ice, you preserve the low-acidity profile and smooth mouthfeel that makes cold brew so popular.
This simple step elevates a basic iced drink into a professional-tier coffee house staple right in your kitchen.
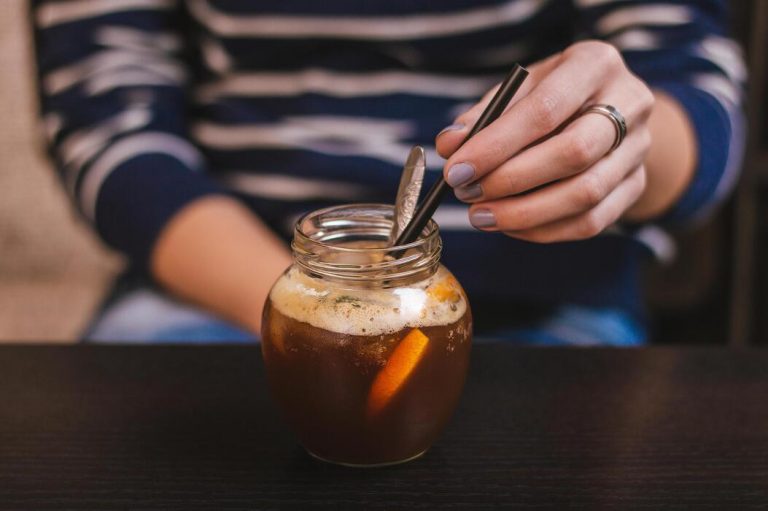
Adding syrups and milk like a barista
The secret to achieving that iconic Starbucks flavor profile lies in the order of operations and the quality of your additives. To mimic their signature drinks, always add your syrups or sweeteners first while the coffee is at room temperature or before adding ice to ensure they dissolve completely.
For a classic taste, use vanilla or caramel simple syrups, which blend seamlessly into cold liquids unlike granulated sugar. When it comes to dairy, Starbucks often uses a heavy cream or a specific 2% milk blend to achieve a velvety texture.
If you are going dairy-free, oat milk is the preferred choice for baristas because its natural fats create a creamy consistency that rivals traditional dairy.
For the ultimate finishing touch, consider making a DIY cold foam by frothing a small amount of milk with a handheld aerator until it reaches a thick, cloud-like state, then gently layering it over the top of your coffee.
This layering technique provides a luxurious contrast between the bold, dark coffee and the sweet, creamy topping for a cafe-quality finish.
Frequently Asked Questions
What coffee beans does Starbucks use for their cold brew?
Starbucks uses a specific ‘Cold Brew Blend’ which consists of medium-roast beans from Latin America and Africa. To replicate the taste at home, choose a high-quality medium to dark roast with chocolatey and citrus notes.
What is the correct grind size for Starbucks-style cold brew?
You must use an extra-coarse grind, similar in texture to sea salt or peppercorns. A coarse grind prevents the coffee from becoming overly bitter and ensures a clean, smooth filtration process during the long steeping time.
What is the water-to-coffee ratio for Starbucks cold brew?
Starbucks typically brews a concentrate using a ratio of approximately 1 part coffee to 4 parts water. When serving, they dilute this concentrate with equal parts water or milk and ice to achieve the final balanced flavor.
How long should I steep the coffee to match the Starbucks profile?
Starbucks steeps their cold brew for 20 hours at room temperature. For home brewing, aim for a window of 12 to 20 hours; steeping longer than 24 hours can result in woody or overly acidic flavors.
Should I steep cold brew in the fridge or on the counter?
While Starbucks often steeps at room temperature for a bolder profile, you can steep in the fridge for a lighter, crisper taste. If steeping in the fridge, you may need to increase the time to 24 hours to account for the slower extraction.
How do I make the Starbucks Sweet Cream topping?
To make their signature Vanilla Sweet Cream, whisk together heavy cream, 2% milk, and vanilla syrup until slightly thickened but still pourable. For the ‘Cold Foam’ version, use a frother or blender to create a thicker, aerated texture.
How should I filter the cold brew for a smooth finish?
Use a fine mesh sieve lined with a paper coffee filter or a nut milk bag to remove all sediment. Double-filtering ensures the silky mouthfeel that characterizes the Starbucks professional brewing process.
Conclusion
Mastering the art of Starbucks-style cold brew at home is all about the right coffee-to-water ratio and a patient steeping process. By using a coarse grind and filtered water, you can achieve that signature smooth, low-acid flavor profile from your own kitchen. Now that you know the secrets to this refreshing beverage, it is time to start brewing. Experiment with different beans and toppings to create your perfect custom cup today.