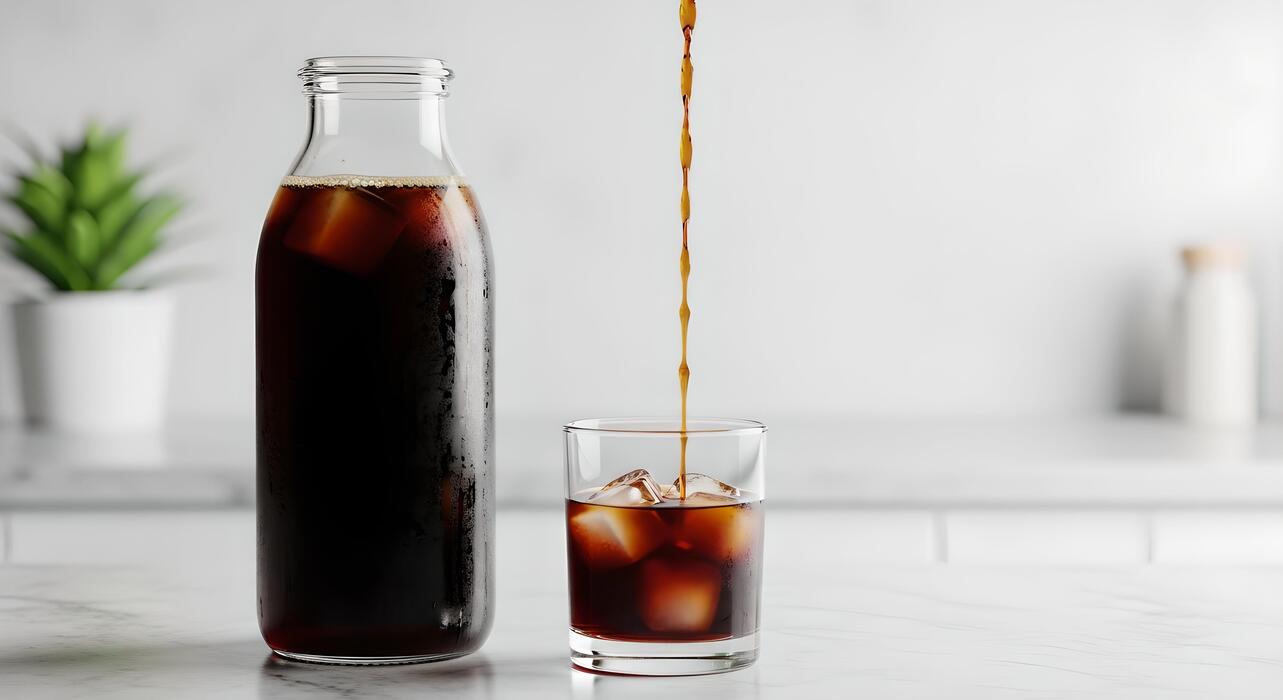
How To Properly Make Cold Brew Coffee
How to properly make cold brew coffee isn’t just about dumping grounds in water—it’s mastering the ratio, grind, and steep time to avoid bitterness or watery results. If you’ve ever ended up with muddy, acidic, or weak cold brew, you’re in the right place.
What is Cold Brew Coffee and Why Make It at Home?
Cold brew vs. iced coffee: key differences
Understanding the difference is crucial for mastering your brew. Cold brew is made by steeping coarse-ground coffee in cold or room-temperature water for 12-24 hours, then filtering out the grounds. This slow extraction produces a smooth, low-acid concentrate that’s less bitter and naturally sweet.
Iced coffee, in contrast, is simply hot-brewed coffee that’s chilled and poured over ice. This method often results in a more acidic, bitter taste due to the heat extraction. For homemade cold brew, always use a coarse grind (like sea salt) to avoid over-extraction and muddiness.
The ideal ratio is 1:4 to 1:8 coffee to water by weight—start with 1:5 for a balanced concentrate. Remember, cold brew is not just iced coffee with a fancy name; it’s a different chemical process that yields a smoother, richer flavor profile.
When making it at home, patience is key: the longer steep time (up to 24 hours) extracts more flavor without the harsh compounds.
Benefits of homemade cold brew
Making cold brew at home gives you total control over flavor, strength, and cost. First, you save significant money—a single batch costs pennies compared to $4-6 café drinks. Second, you customize the coffee-to-water ratio to your taste: use 1:4 for a bold concentrate or 1:8 for a ready-to-drink strength.
Third, homemade cold brew is naturally less acidic (up to 67% less than hot coffee), which is gentler on your stomach and teeth. Fourth, it’s incredibly convenient—brew a large batch every week and store it in the fridge for up to two weeks.
To maximize benefits, use fresh, whole-bean coffee and grind it yourself just before steeping. A simple mason jar or French press works perfectly. For a smooth result, filter twice: once through a fine-mesh sieve and again through a paper filter or cheesecloth.
This removes all sediment, yielding a clean, silky concentrate. Experiment with beans from different regions to find your favorite flavor profile.
Common myths about cold brew coffee
Let’s bust three persistent myths so you can brew with confidence. Myth 1: Cold brew is just iced coffee left out. False—cold brew requires a long, cold steep (12-24 hours) to extract flavor without heat, which is completely different from chilling hot coffee.
Myth 2: You need expensive equipment. Not true—a mason jar, fine-mesh strainer, and cheesecloth or a nut milk bag are all you need. No fancy cold brew maker required. Myth 3: Cold brew is always super strong. Actually, you control the strength.
A 1:8 ratio (coffee to water) produces a mild, ready-to-drink brew, while 1:4 creates a concentrate you dilute. Pro tip: Always use filtered water for the best taste—tap water can introduce off-flavors. Also, don’t steep longer than 24 hours, as it can become overly bitter.
Finally, store your cold brew in an airtight container in the fridge, and it stays fresh for up to two weeks without losing quality. Enjoy your perfectly smooth homemade cold brew!
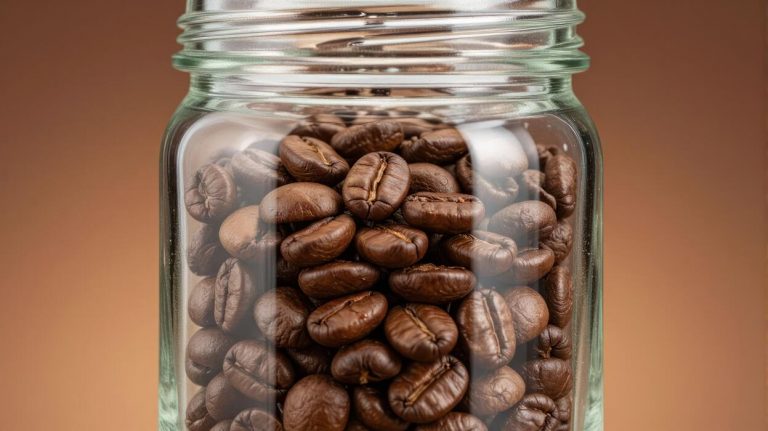
How to Choose the Right Coffee Beans for Cold Brew

Best roast levels for smooth cold brew
For a perfectly smooth and rich cold brew, medium to dark roasts are your best choice. Dark roasts, with their longer roasting time, develop deep, chocolatey, and nutty flavors that shine in cold brew, while their lower acidity prevents bitterness from extracting during the long steep.
Medium roasts offer a balanced profile with subtle sweetness and a touch of fruitiness, but avoid light roasts, as they can taste overly sour or grassy when cold-brewed due to their higher acidity. Stick with beans labeled ‘full city,’ ‘Vienna,’ or ‘French roast’ for the richest, most velvety results.
For a cleaner taste, try a medium roast from a single origin like Brazil or Sumatra—these beans naturally have low acidity and bold body. Avoid flavored beans as the oils can turn rancid during steeping. Always check the roast date: fresh beans (within 2-4 weeks) produce the most vibrant flavor.
Remember, cold brew concentrates flavor, so prioritize beans with tasting notes like ‘cocoa,’ ‘caramel,’ or ‘toasted nuts’ for a consistently smooth brew.
Single origin vs. blends: which works better
For cold brew, blends often outperform single origins because roasters craft them specifically for balance and body. Blends combine beans from multiple regions to create a consistent, rounded flavor profile that stands up to dilution with water or milk.
For example, a blend of Colombian and Ethiopian beans can offer both chocolatey richness and subtle fruitiness without being overpowering. Single origins can work well if you choose low-acidity beans like those from Brazil, Sumatra, or Guatemala, which provide sweet, nutty, or earthy notes.
However, bright single origins (e.g., from Kenya or Ethiopia) can become too acidic or tea-like in cold brew. If you’re experimenting, try a single origin that’s specifically recommended for cold brew, like a natural-processed Ethiopian with blueberry notes—it can add unique complexity.
For everyday drinking, a dark roast blend ensures reliability and smoothness, while single origins let you explore distinct flavors. Ultimately, blends are safer for beginners, while single origins reward adventurous palates.
Grind size: why coarse matters
Grind size is critical for cold brew success: always use a coarse grind, similar to breadcrumbs or sea salt. Coarse grounds extract slowly and evenly over 12-24 hours, preventing over-extraction that causes bitterness and astringency.
If you grind too fine (like for espresso), the water will draw out harsh compounds too quickly, leaving a muddy, unpleasant taste. Invest in a burr grinder for consistent coarse particles; blade grinders create uneven sizes that lead to bitter or weak results.
A good rule: set your grinder to the coarsest setting or use a French press grind. For pre-ground beans, look for ‘cold brew grind’ or ‘coarse grind’ on the package. Test your grind by pinching a few grounds: they should feel gritty, not powdery.
If you see fine dust, sift it out with a fine-mesh strainer. Remember, coarse grounds also make filtration easier—they won’t clog your cheesecloth or cold brew maker. Stick to coarse for a clean, smooth concentrate every time.
Essential Equipment for Making Cold Brew at Home
Basic tools you already have
You likely already own everything needed to start cold brewing today. Grab a large glass jar or pitcher (at least 64 ounces) and a fine-mesh strainer or sieve. A wooden spoon or long-handled spatula works well for stirring the grounds and water.
For filtering, you can use paper coffee filters, a clean kitchen towel, or even a nut milk bag. The key is to have a container that allows for easy mixing and a filtering system that catches the fine coffee sediment.
Start with a 1:8 ratio of coffee to water—for every 1 cup of coarse-ground coffee, use 8 cups of filtered water. Stir well, cover, and let it steep at room temperature or in the fridge for 12–24 hours.
After steeping, pour the mixture through your strainer lined with a filter into a clean container. This no-fuss method produces a smooth, concentrated brew that can be diluted with water or milk.
The beauty is that you can scale up or down based on your jar size, making it perfect for beginners.
Specialized cold brew makers worth buying
If you plan to make cold brew regularly, a dedicated maker simplifies the process. Look for options like the Toddy Cold Brew System or OXO Brew Cold Brew Coffee Maker. These typically include a large brewing container, a reusable fine-mesh filter, and a glass carafe for storage.
The Toddy uses a felt filter for ultra-smooth results, while OXO’s model has a patented rainmaker shower head that evenly saturates grounds. Most systems work by steeping coarse grounds in water for 12–24 hours, then releasing the concentrate through a spigot or by lifting the filter basket.
A specialized maker eliminates the need for separate straining and reduces sediment. They also offer consistent batch sizes (often 2–4 quarts of concentrate) and are easy to clean. Prices range from $30 to $60, making them a worthwhile investment for avid cold brewers.
Always choose one with a wide mouth for easy cleaning and a durable, BPA-free plastic or glass carafe.
DIY setup with a mason jar and filter
For a compact, zero-waste approach, use a quart-size mason jar and a reusable cotton or nylon filter bag. Simply add 1/2 cup coarse-ground coffee to the bag, tie it closed, and place it in the jar. Fill with 4 cups of filtered water, ensuring the bag is fully submerged.
Secure the lid loosely to allow gases to escape, then steep for 12–18 hours at room temperature. After steeping, lift out the filter bag and let it drip into the jar for a minute. You can squeeze the bag gently (avoid breaking the grounds) to extract more liquid.
The result is a clean, sediment-free concentrate. This method is highly portable and perfect for small batches. For larger quantities, use a half-gallon mason jar and double the ingredients. The reusable filter bag can be rinsed and air-dried for repeated use, reducing waste.
This DIY setup is ideal for travelers, dorm rooms, or anyone wanting a minimalist cold brew routine without extra equipment.
Step-by-Step Guide to Making Cold Brew Coffee
How to measure coffee and water ratios
The golden ratio for cold brew is 1:8 coffee to water by weight for a balanced concentrate. Use a kitchen scale for precision: for every 1 ounce (28 grams) of coarsely ground coffee, add 8 ounces (237 ml) of filtered water.
For a stronger brew that stands up to milk, try 1:5; for a lighter, ready-to-drink version, use 1:10. Always grind your beans coarsely—similar to breadcrumbs—to avoid over-extraction and bitterness. A fine grind will clog filters and create sludge.
Start with a clean, large jar or French press, add the grounds, then pour water slowly, stirring gently to ensure all grounds are saturated. Weighing your ingredients eliminates guesswork and ensures repeatable results.
If you lack a scale, use 1 cup of coarse grounds to 4 cups of water as a rough estimate, but volume measures are less reliable due to bean density variations.
Proper steeping time and temperature
Steep cold brew at room temperature (68–72°F / 20–22°C) for 12 to 18 hours. This slow extraction yields a smooth, low-acid concentrate without bitterness. Avoid refrigeration during steeping—cold temperatures slow extraction and can produce a weak, sour brew.
Set your jar on the counter, away from direct sunlight or heat sources. Timing matters: 12 hours gives a mild, tea-like body; 18 hours produces a bold, rich concentrate. Stir the mixture once at the 6-hour mark to redistribute grounds for even extraction.
Never exceed 24 hours, as over-steeping leads to off-flavors and excessive caffeine. Use a timer or phone reminder to track the steep. After steeping, the grounds should have settled, and the liquid will appear dark and aromatic.
For a quicker option, steep in the fridge for 24–36 hours, but expect a lighter flavor profile.
Filtration methods for clear, grit-free coffee
After steeping, filter the concentrate twice to remove fine particles. First, pour through a fine-mesh strainer lined with cheesecloth or a nut milk bag into a clean container. Gently press the grounds with a spoon to extract remaining liquid—avoid squeezing hard, which pushes bitter sediment through.
Second, pass the liquid through a paper coffee filter (V60 or Chemex) or a reusable metal filter for a crystal-clear finish. Paper filters catch micro-fines that cause grittiness, while metal filters retain more oils for a fuller mouthfeel.
For large batches, use a cold brew-specific filtration system with a reusable microfiber filter. If you’re short on time, a simple strainer alone works but may leave some silt. Let the filtered concentrate settle in the fridge for 30 minutes, then decant carefully, leaving any sediment behind.
Store in a sealed glass container for up to 2 weeks—shake before each use as oils may separate.
Tips for Customizing Your Cold Brew Strength and Flavor
Adjusting brew time for stronger or milder taste
The simplest way to customize cold brew strength is by adjusting the brew time. For a milder, smoother taste, steep coarse-ground coffee in cold water for 12 to 14 hours at room temperature or in the fridge. This extracts subtle flavors without bitterness.
For a bolder, stronger brew, extend the steeping to 18 to 24 hours. This draws out deeper, more robust coffee notes, but be cautious—steeping beyond 24 hours can introduce bitterness. Always start with a 1:4 coffee-to-water ratio (by weight) for a standard concentrate.
For a milder ready-to-drink version, use a 1:8 ratio. Taste-test after 12 hours and continue steeping if desired. Strain through a fine-mesh sieve or cheesecloth to remove grounds. Remember, longer steep = stronger flavor, but balance is key to avoid over-extraction.
Experiment with your preferred time, noting the results in a brewing journal for consistency.
Adding flavors like vanilla, cinnamon, or chocolate
Elevate your cold brew by infusing flavors during or after brewing. For a natural infusion, add 1 vanilla bean (split) or 2 teaspoons of vanilla extract to the grounds before steeping.
For cinnamon, stir in 1-2 cinnamon sticks (or 1 teaspoon ground) during the brew; this imparts a warm, spicy note without overpowering. For chocolate, mix in 1-2 tablespoons of cocoa powder or broken dark chocolate pieces (70% cacao or higher) with the coffee grounds.
These flavors meld beautifully over 12-24 hours. Alternatively, add flavors post-brew by stirring in syrups (vanilla, caramel, or chocolate) to your finished concentrate. For a less sweet option, use spices like nutmeg or cardamom directly in the cup. Tip: Start with small amounts—flavors intensify during steeping.
Strain thoroughly to remove solids. This approach lets you create custom batches for different moods, from a cozy cinnamon-vanilla blend to a decadent mocha-style cold brew.
How to make concentrate vs. ready-to-drink cold brew
The key difference lies in the coffee-to-water ratio. For a concentrate, use a 1:4 ratio (e.g., 1 cup coffee to 4 cups water). Steep for 12-24 hours, then strain. The result is a strong, syrupy base that you dilute with water, milk, or ice (typically 1:1 or 1:2).
Concentrate stores well in the fridge for up to two weeks. For ready-to-drink cold brew, use a 1:8 ratio (1 cup coffee to 8 cups water). Steep for the same time, but the brew is already diluted for immediate enjoyment.
Ready-to-drink is smoother and less intense, perfect for sipping straight or over ice. Brewing method is identical: coarse grind, cold water, and a covered container. Strain using a fine-mesh sieve or a dedicated cold brew bag.
Pro tip: Make a batch of concentrate, then portion it into jars—dilute each serving as needed. This saves space and lets you control strength daily. Both methods yield low-acid, smooth coffee; choose based on your routine.
How to Store and Serve Cold Brew Coffee Properly
Best containers for refrigeration
To preserve your cold brew’s peak flavor and freshness, always use an airtight glass container for refrigeration. Glass is non-reactive and won’t absorb odors or impart any metallic taste, unlike plastic or some metal containers. A glass carafe with a tight-sealing lid or a large mason jar works perfectly.
Avoid leaving the brew in the original brewing vessel if it’s not airtight, as exposure to air accelerates oxidation and staling. For long-term storage, consider individual glass bottles with airtight caps—this minimizes oxygen exposure each time you pour a serving.
Always allow your cold brew to cool to room temperature before sealing and refrigerating, as placing a warm container directly in the fridge can create condensation inside the lid, which can dilute the concentrate.
Keep the container on a middle shelf where the temperature is most stable, not in the door where it fluctuates with every opening. Proper storage in a clean, sealed glass container will maintain your cold brew’s smooth, rich taste for up to two weeks.
Shelf life and signs of spoilage
Properly stored cold brew concentrate can last 7 to 14 days in the refrigerator, while ready-to-drink diluted cold brew is best consumed within 3 to 5 days. The low acidity of cold brew means it spoils differently than hot-brewed coffee.
Always check for visual and olfactory signs of spoilage before drinking. A sour, vinegary, or off-putting smell indicates bacterial growth or fermentation—discard immediately. If you see cloudiness, sediment, or a slimy film on the surface or around the container’s rim, the brew has gone bad.
Mold can appear as fuzzy green, white, or black spots. Taste is the final test: if the coffee tastes flat, overly bitter, or has a funky aftertaste, it’s past its prime.
To maximize shelf life, always use clean utensils when pouring and never return unused cold brew from a glass back into the main container. Store the concentrate away from strong-smelling foods like onions or garlic, as coffee easily absorbs odors.
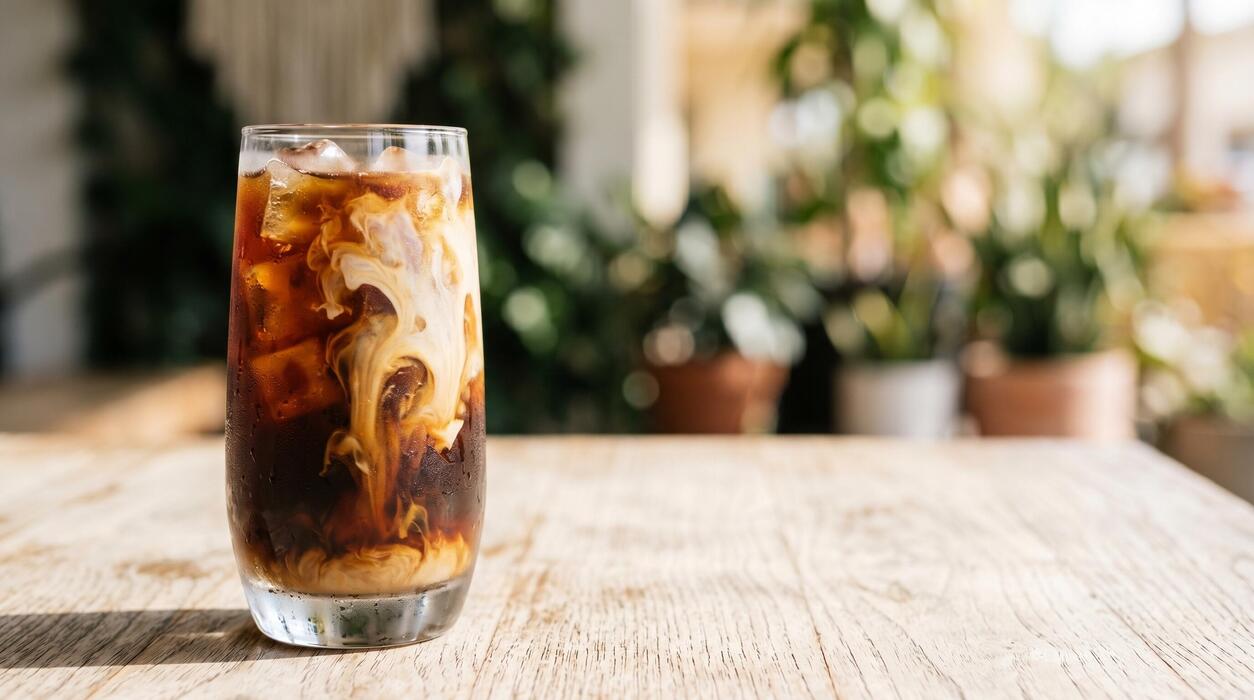
Serving ideas: over ice, with milk, or black
For the classic iced cold brew, fill a tall glass with large ice cubes (they melt slower and won’t water down your drink). Pour the concentrate over the ice, then top with cold water or milk in a 1:1 or 1:2 ratio, depending on your strength preference.
For a creamy, café-style drink, add a splash of whole milk, oat milk, or a dollop of sweetened condensed milk for a Vietnamese-inspired treat. If you prefer it black, serve the concentrate over ice with a little water and enjoy the silky, naturally sweet flavor with no bitterness.
For a refreshing twist, try adding a pinch of sea salt or a few drops of vanilla extract before stirring. You can also make cold brew cocktails: mix with bourbon or rum and a dash of simple syrup.
For a dairy-free option, blend with almond milk and a frozen banana for a creamy smoothie. Always stir well before serving, as the concentrate can settle at the bottom of the container.
Troubleshooting Common Cold Brew Problems
Why your cold brew tastes bitter or sour
If your cold brew is bitter or sour, the issue is likely over-extraction or under-extraction. For bitterness, you’ve extracted too many tannins—usually from too long a steep (over 24 hours) or too fine a grind. Switch to a coarse grind (like breadcrumbs) and steep for 12-18 hours at room temperature.
For sourness, you’ve under-extracted, leaving acids behind. This happens with too short a steep (under 12 hours) or too cold water. Use cold, filtered water and steep for at least 14 hours.
Also, ensure your coffee-to-water ratio is balanced—a standard 1:8 ratio (e.g., 1 cup coffee to 8 cups water) prevents extremes. Taste test at 12 hours and adjust steep time next batch. Remember, freshly roasted beans (within 2 weeks) also reduce off-flavors.
Store your brew in the fridge immediately after filtering to halt extraction.
Fixing weak or watery cold brew
Weak or watery cold brew typically means too little coffee or too short a steep. Start by increasing your coffee-to-water ratio to 1:5 or 1:6 (e.g., 1 cup coffee to 5 cups water) for a stronger concentrate.
Use a coarse grind—finer grinds extract faster but can cause over-extraction if steeped too long. Steep for at least 16-20 hours at room temperature, then taste. If still weak, extend steep time by 2-4 hours next batch.
Another fix: double-filter your brew after steeping to remove fine particles that dilute flavor. Use a paper filter over a mesh sieve. Also, avoid using stale beans—they lack oils and flavor compounds.
For an immediate boost, mix your weak brew with a small amount of freshly brewed hot coffee concentrate (cooled) to intensify taste without starting over.
Dealing with cloudy or sludgy results
Cloudy or sludgy cold brew comes from fine coffee particles that weren’t filtered out. First, ensure your grind is coarse—a burr grinder on a coarse setting prevents excess fines.
After steeping, filter twice: first through a fine-mesh sieve or cheesecloth, then through a paper coffee filter or a nut milk bag. Avoid pressing or squeezing the grounds during filtering, as this forces sludge through.
If your brew is still cloudy, let it settle in the fridge for 30 minutes after filtering, then carefully pour off the clear liquid, leaving sediment behind. Another tip: use a French press as your brewing vessel—its built-in mesh filter reduces grit.
For ultimate clarity, use immersion cold brew bags that contain grounds, eliminating the need for post-steep filtering. Always wash equipment thoroughly to avoid stale residue that adds cloudiness.
Frequently Asked Questions
What is the best coffee-to-water ratio for cold brew?
The standard ratio is 1:4 or 1:5 coffee to water by weight (e.g., 1 cup coffee grounds to 4 cups water). Use coarse grounds, like sea salt, to avoid over-extraction and bitterness.
How long should I steep cold brew coffee?
Steep for 12 to 24 hours at room temperature or in the refrigerator. 12-16 hours yields a balanced flavor, while 24 hours produces a stronger, more concentrated brew.
Do I need to use filtered water for cold brew?
Yes, filtered water improves taste by removing impurities like chlorine. Cold brew extracts flavors slowly, so water quality significantly affects the final result.
How do I filter cold brew after steeping?
Pour through a fine-mesh sieve lined with a coffee filter or cheesecloth into a clean container. For best results, use a paper filter to remove fine sediment for a smoother drink.
Should I use light or dark roast coffee for cold brew?
Medium to dark roasts are preferred for their rich, chocolatey notes. Light roasts can taste acidic or sour in cold brew due to lower extraction of oils.
Can I make cold brew in a French press?
Yes, add coarse grounds and cold water to a French press, stir, and let steep. After steeping, press the plunger down slowly, then pour through a filter for clarity.
How do I store cold brew concentrate?
Store in an airtight container in the refrigerator for up to 2 weeks. Dilute with water or milk (1:1 ratio) before drinking for a standard strength.
Conclusion
Mastering cold brew is simple: use coarse grounds, a 1:8 coffee-to-water ratio, steep for 12-24 hours at room temperature, then filter thoroughly. The result is a smooth, less acidic concentrate that stays fresh for weeks. Dilute with water or milk to taste. Ditch the bitter, burnt coffee and embrace this silky, forgiving method. Your perfect summer brew awaits—start your batch tonight.