How To Make Great Cold Brew
Learning how to make great cold brew is simple, but most guides skip the one ratio that unlocks smooth, concentrated flavor without bitterness. You want rich, low-acid coffee, not a watery, over-steeped mess. You’re in the right place to master the exact grind size, steep time, and filter method that delivers café-quality results at home. Let’s cut through the noise and get it right.
What Makes Cold Brew Different from Iced Coffee
Cold brew vs. iced coffee: key differences
Understanding the difference is the first step to making great cold brew. Iced coffee is simply hot-brewed coffee that is chilled and poured over ice. This process can extract bitter compounds and high acidity from the beans, especially if the hot brew sits.
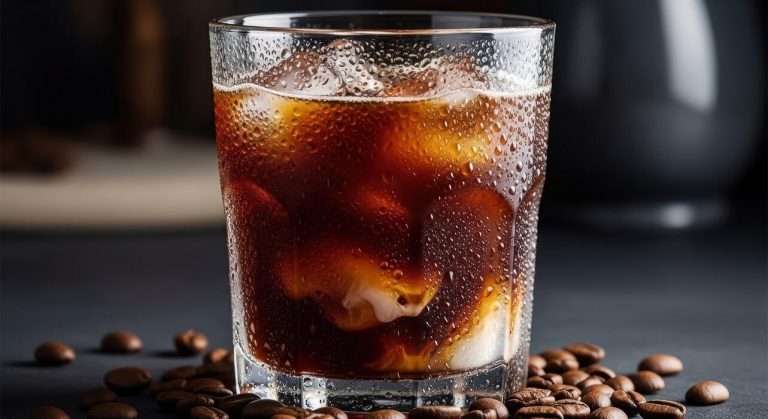
In contrast, cold brew is made by steeping coarse-ground coffee in cold or room-temperature water for 12-24 hours. This gentle, long extraction never involves heat, which fundamentally changes the flavor profile. For a superior result, always use a coarse grind (like breadcrumbs) to avoid over-extraction and silt.
A 1:4 to 1:8 coffee-to-water ratio (by weight) creates a concentrate you can dilute with water or milk later. The key is patience: never rush the steep.
While iced coffee is quick, cold brew rewards you with a smoother, richer base that stays fresh in the fridge for up to two weeks.
Why cold brew tastes smoother and less acidic
The secret to cold brew’s signature smoothness lies in chemistry. Heat accelerates the extraction of certain compounds, including chlorogenic acids and oils that contribute to bitterness and a sharp, acidic taste. By using cold water, you dramatically slow this process.
Cold water preferentially extracts the sweeter, fruitier flavor compounds and caffeine while leaving behind many of the harsh, astringent elements. The result is a cup with up to 67% less perceived acidity than hot-brewed coffee, making it gentler on your stomach and teeth.
To maximize smoothness, start with fresh, medium-to-dark roasted beans—they have less inherent acidity than light roasts. A 24-hour steep at room temperature yields the fullest, roundest flavor. After filtering, you’ll have a concentrate that tastes almost syrupy and chocolatey, never sharp or bitter.
The science behind cold extraction
Mastering cold brew means controlling the extraction rate. Cold water is a less effective solvent than hot water, so the process relies on time rather than temperature. The ideal steep temperature is between 35°F and 70°F; colder slows extraction too much, while warmer can start to mimic hot brewing.
During the steep, water first hydrates the coffee grounds, then slowly dissolves soluble solids—sugars, oils, and caffeine—in a specific order. The key is to stop the brew before bitter compounds, which dissolve last, are released.
A 16- to 18-hour steep at room temperature is a reliable sweet spot for most beans. For precision, use a fine-mesh filter or a paper filter after steeping to remove all micro-grounds, which can continue to extract and cause bitterness.
The final concentrate should taste balanced and sweet, not hollow or harsh.
Best Coffee Beans for Cold Brew
Single origin vs. blend: which works better
For great cold brew, choose a blend over a single origin for a more balanced and forgiving flavor. Single-origin beans highlight specific tasting notes, like bright citrus or floral hints, which can become muted or muddled during the long, cold extraction.
Blends, on the other hand, are crafted by roasters to combine complementary profiles, ensuring a smooth, consistent cup every time. However, if you love exploring unique flavors, try a single origin like Ethiopian Yirgacheffe for a fruity, wine-like cold brew or a Sumatra for earthy, herbal notes.
The key is to experiment: start with a high-quality blend from a reputable roaster, then branch out to single origins once you master your brew ratio (typically 1:8 coffee to water). Remember, cold brew softens acidity and bitterness, so even bold single origins become approachable.
For beginners, a blend offers reliability; for enthusiasts, single origins provide variety.
Recommended roast levels for cold brew
Medium to dark roasts are the top choice for cold brew, as they deliver a rich, chocolatey body with low acidity. Dark roasts, like French or Italian, shine in cold brew because the long steep time extracts deep, caramelized sugars and minimizes bitter notes—perfect for a smooth, full-bodied concentrate.
Light roasts can work but often result in a grassy or sour flavor due to under-extraction, so they require a finer grind or longer steep (18–24 hours).
For best results, choose a medium-dark roast like a Guatemala Antigua or a Sumatra Mandheling; these beans offer a sweet, nutty profile that stands up to milk or sweeteners. Avoid overly dark roasts that taste ashy or burnt, as cold brew can amplify those charred notes.
Remember, freshness matters: use beans roasted within 2–4 weeks for optimal flavor. Experiment with roast levels to find your perfect balance, but start with a medium-dark for a guaranteed crowd-pleaser.
Where to buy quality beans for cold brewing
Buy from specialty roasters that prioritize freshness and transparency for the best cold brew. Local coffee shops often sell freshly roasted beans with roast dates clearly marked—look for bags roasted within the last two weeks.
Online, trusted roasters like Counter Culture, Stumptown, and Onyx Coffee Lab offer cold brew-specific blends, such as Counter Culture’s ‘Hologram’ or Stumptown’s ‘Hair Bender’, which are optimized for smooth extraction. Subscription services like Trade Coffee or Driftaway curate beans based on your taste preferences, delivering fresh batches monthly.
For budget-friendly options, Costco’s Kirkland Signature Colombian or Trader Joe’s organic blends perform surprisingly well due to consistent roast quality. Always check for ‘cold brew’ or ‘cold brew grind’ labels on packaging, as pre-ground options save time. Avoid supermarket beans without roast dates—they’re often stale.
Invest in whole beans and grind coarse just before brewing for maximum flavor. Your cold brew will thank you.
How to Grind Coffee for Cold Brew

Coarse grind: why it matters
For great cold brew, coarse grind is non-negotiable. Unlike hot brewing, cold water extracts flavor slowly, so a coarse grind prevents over-extraction and bitterness. Think of breadcrumbs—chunky, not powdery.
This size allows water to flow through coffee grounds evenly during a 12-24 hour steep, pulling out sweet, chocolatey notes without harsh tannins. If you grind too fine, you’ll get a muddy, over-extracted brew that’s bitter and cloudy. A coarse grind also makes filtering easier—no sludge in your final cup.
Pro tip: test your grind by pinching it; it should feel like rough sand, not flour. Adjust coarseness based on your brewer: French press-style setups prefer slightly coarser than cloth or paper filters. Consistency matters, so use a burr grinder for uniform particles. Remember: coarse = smooth, fine = bitter.
Your goal is a balanced, sippable concentrate that shines over ice or with milk.
Grinder types and settings to use
Burr grinders are ideal for cold brew because they produce uniform, coarse particles without heat damage. Blade grinders create uneven sizes, leading to over-extracted fines and under-extracted boulders. For burr grinders, set to the coarsest setting (often 30-40 on Baratza Encore or 8-10 on Hario Skerton).
If using a blade grinder, pulse in short bursts and shake the grinder to avoid powder—but expect less consistency. Manual grinders work well for small batches; just adjust to the loosest setting. For electric models, always start coarse and adjust finer if needed after a test brew.
A common mistake is using a medium grind (like for drip coffee); this extracts too quickly, making cold brew acidic. Pro tip: if your grinder lacks numbers, aim for a texture resembling sea salt.
Invest in a quality burr grinder for repeatable results—it’s the single best upgrade for consistent cold brew. Avoid pre-ground coffee; it’s usually too fine and stale.
Common grinding mistakes to avoid
Mistake #1: grinding too fine. Fine grounds extract quickly, turning cold brew bitter and murky. Always err on the coarser side—you can steep longer if needed. Mistake #2: inconsistent grind size. Uneven particles cause uneven extraction: fines over-extract (bitter), while boulders under-extract (sour).
Use a burr grinder and sift if necessary. Mistake #3: using pre-ground coffee. It’s usually ground for hot brew (medium-fine) and stale, yielding flat, bitter cold brew. Mistake #4: not adjusting for brew time. A 12-hour steep needs coarser grind than 24 hours—experiment to find your sweet spot.
Mistake #5: ignoring water-to-coffee ratio. Grind size affects extraction rate, so stick to a 1:4 to 1:8 ratio (coffee:water) by weight. Pro tip: after grinding, do a quick visual check—if you see dust, your grind is too fine. Fix it before brewing.
Avoid these pitfalls, and you’ll consistently make smooth, rich cold brew concentrate.
Simple Cold Brew Recipe: Step by Step
Ingredients and equipment you need
To make great cold brew, start with coarsely ground coffee—a burr grinder set to a coarse, sea-salt-like texture is best. You’ll need filtered water (tap water can introduce off-flavors) and a large jar or pitcher (32-64 oz works well).
For steeping, use a fine-mesh strainer, cheesecloth, or a dedicated cold brew bag to separate grounds from liquid. Optional but helpful: a scale for precise measurements, and a wooden spoon for stirring. Avoid pre-ground coffee, as it’s too fine and will make your brew bitter.
If you don’t have a grinder, buy whole beans and ask your café to grind them on the coarsest setting. Your container should be glass or BPA-free plastic to avoid metallic tastes. Clean all equipment thoroughly to prevent any residue from affecting flavor.
The correct coffee-to-water ratio
The golden ratio for cold brew is 1 part coffee to 4 parts water by weight (e.g., 100g coffee to 400g water). This yields a concentrate that you’ll dilute with water or milk when serving. For a ready-to-drink strength, use 1:8 ratio (e.g., 100g coffee to 800g water).
Always use weight measurements for accuracy—volume measures like cups can vary widely with coarse grounds. If you prefer a bolder brew, increase coffee to 1:3; for a lighter, tea-like brew, use 1:5. Stir the grounds and water thoroughly to ensure even extraction.
Let the mixture sit for 12-24 hours at room temperature or in the fridge. After steeping, strain through a fine-mesh sieve lined with cheesecloth or a nut milk bag. Store the concentrate in a sealed jar in the fridge for up to two weeks.
Steeping time and temperature tips
Steep your cold brew at room temperature (68-72°F) for 12-18 hours for a balanced, smooth flavor. Steeping longer than 24 hours can extract bitter compounds, while less than 12 hours yields weak coffee.
If you use a refrigerator steep (35-40°F), extend the time to 18-24 hours to compensate for slower extraction. Avoid direct sunlight or warm spots above 75°F, which can cause over-extraction and sourness.
For consistent results, set a timer and taste test at the 12-hour mark—if it’s too weak, let it steep another 2-4 hours. Stir the mixture halfway through to ensure even saturation. After steeping, strain immediately to stop extraction.
If you’re using a cold brew maker with a filter, follow its recommended steeping time, but always adjust based on your taste preference.
Tips for Filtering and Storing Cold Brew
Best methods to filter out grounds
Achieving a smooth, sediment-free cold brew starts with effective filtering. The simplest method is to pour your steeped concentrate through a fine-mesh sieve lined with a coffee filter or cheesecloth placed over a large pitcher.
For best results, use a paper filter designed for cold brew or a reusable metal mesh filter that catches even the smallest particles. If you’re using a French press, plunge slowly and consider a second pass through a paper filter to eliminate silt.
For large batches, a nut milk bag or dedicated cold brew filter bag works wonders—simply steep the grounds inside the bag and lift it out, leaving a clean concentrate.
Another pro tip: let the brewed coffee sit for 10 minutes after the first filter, then pour again through a fresh filter; this catches sediment that settles later. Avoid squeezing the grounds bag, as that forces bitter oils through.
Double filtering is key for a crisp, clear cup that tastes pure and refreshing.
How to store cold brew for maximum freshness
To preserve cold brew’s bright flavor and smooth character, store it in an airtight glass container—avoid plastic, which can absorb odors and alter taste. Immediately after filtering, transfer the concentrate to a clean jar or pitcher and seal tightly. Refrigerate at 35-40°F to slow oxidation and microbial growth.
For best quality, store cold brew concentrate separately from water or milk; dilute only when serving to maintain its shelf life. Use a dark or opaque container if possible, as light degrades flavor compounds. Label the container with the date made and consume within 7-10 days for optimal taste.
Avoid leaving cold brew at room temperature for more than 2 hours total. If you notice off smells or a sour taste, it’s time to discard. Never freeze cold brew—thawing creates a watery, flat texture. For daily convenience, portion into smaller bottles to minimize air exposure each time you pour.
How long cold brew lasts in the fridge
Properly stored cold brew concentrate retains peak flavor for 7 to 10 days in the refrigerator, though it’s best enjoyed within the first week. The cold brewing process extracts fewer acidic compounds than hot coffee, which slows spoilage but doesn’t stop it.
After day 10, you may notice a duller, more bitter taste as oxidation sets in. To maximize shelf life, always use clean utensils when pouring and never return used coffee to the storage container.
If you dilute your concentrate with water or milk, the mixture lasts only 3-4 days because dairy spoils faster. Signs of spoilage include mold, off-putting sourness, or a fermented smell—discard immediately if these appear.
For longer storage, freeze cold brew in ice cube trays; these cubes can be added to drinks later without diluting flavor. Remember, homemade cold brew lacks preservatives, so date your container and trust your senses to enjoy it at its freshest.
How to Customize Your Cold Brew Flavor
Additives like vanilla, cinnamon, or chocolate
Elevate your cold brew by infusing it with aromatic additives during the steeping process. For a subtle vanilla note, split a vanilla bean and add it to the grounds before brewing, or stir in 1-2 teaspoons of vanilla extract after straining.
Cinnamon adds warmth without sweetness: drop a cinnamon stick into the cold brew concentrate as it steeps, or sprinkle ground cinnamon into the finished glass. For a mocha twist, incorporate cocoa nibs or unsweetened cocoa powder directly into the coffee grounds—about one tablespoon per cup of grounds works well.
Alternatively, dissolve dark chocolate shavings in a small amount of hot water and mix into the finished concentrate. Start with small amounts and taste-test after 12 hours, as these flavors intensify over time. Remember, cold brew extracts flavors slowly, so pre-infusing these additives ensures a smooth, integrated taste without bitterness.
Milk, cream, and non-dairy options
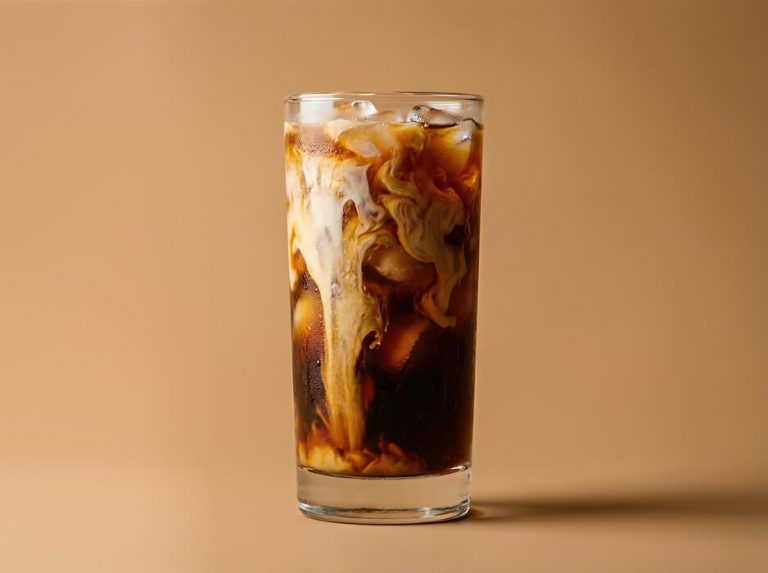
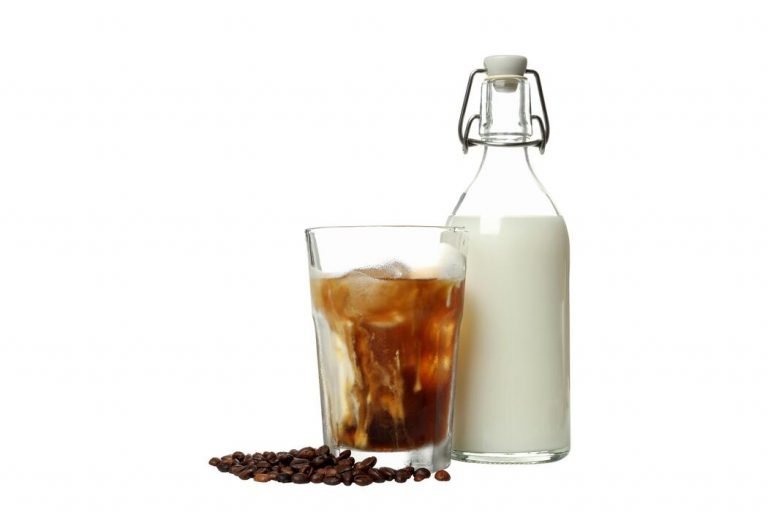
The right dairy or non-dairy addition transforms cold brew into a creamy, balanced beverage. For traditional richness, use whole milk or heavy cream—start with a 1:4 ratio of cream to cold brew concentrate, adjusting to taste. Half-and-half offers a middle ground with less fat but plenty of body.
For plant-based options, oat milk is a top choice because its natural sweetness and creamy texture complement cold brew without curdling. Almond milk works well but is thinner; choose an unsweetened, barista-style version for better froth. Coconut milk adds a tropical hint, while soy milk provides protein-rich creaminess.
To avoid dilution, always pour milk or cream into the glass first, then add cold brew concentrate over it. For a frothy finish, shake the milk in a jar or use a milk frother before adding.
Experiment with ratios—less milk for a bolder coffee taste, more for a latte-like experience—and remember that cold brew’s natural sweetness means you may need less dairy than with hot coffee.
Sweeteners and syrups that work best
Sweetening cold brew requires syrups or powders that dissolve easily in cold liquid. Simple syrup (equal parts sugar and water, simmered until dissolved) is the gold standard—add 1-2 tablespoons per serving, adjusting to preference. For deeper flavor, use brown sugar simple syrup or maple syrup, which adds earthy sweetness.
Honey can be used but should be mixed with a little warm water first to prevent clumping. Agave nectar dissolves instantly and has a mild taste, making it ideal for lighter roasts.
For zero-calorie options, stevia drops or monk fruit syrup work well—start with a few drops since they’re highly concentrated. Flavored syrups like vanilla, caramel, or hazelnut add both sweetness and aroma; purchase sugar-free versions if desired.
To make your own flavored syrup, steep a cinnamon stick or vanilla bean in simmering simple syrup for 10 minutes. Always stir sweeteners thoroughly into the cold brew, or shake them in a sealed jar to ensure even distribution without settling at the bottom.
Common Cold Brew Problems and Fixes
Why your cold brew tastes bitter
Bitterness in cold brew usually comes from over-extraction, often caused by a grind that is too fine or a brew time that is too long. Unlike hot coffee, cold water extracts flavors slowly, so a coarse grind is essential to prevent pulling harsh, bitter compounds.
If your cold brew tastes bitter, first check your grind size—it should resemble coarse sea salt or breadcrumbs. Next, reduce your steep time: start at 12 hours for room temperature or 18 hours in the refrigerator, and adjust down if needed.
Another culprit is water temperature—using warm water can accelerate extraction, so always use cold or room-temperature filtered water. Finally, ensure your coffee-to-water ratio is balanced; a common starting point is 1:8 (coffee to water) by weight.
If bitterness persists, try a lighter roast coffee, as dark roasts can contribute more bitter notes. By dialing in grind, time, and ratio, you can achieve a smooth, sweet concentrate.
How to fix weak or watery cold brew
A weak or watery cold brew is typically a sign of under-extraction, meaning the coffee grounds haven’t released enough flavor. The most effective fix is to increase your coffee-to-water ratio.
Start with a ratio of 1:5 or 1:6 (coffee to water) by weight for a stronger concentrate, then dilute to taste later. If your ratio is already high, extend your steep time by 2-4 hours, but avoid going beyond 24 hours to prevent bitterness.
Another factor is grind size—if it’s too coarse, the water can’t extract enough; aim for a medium-coarse grind, slightly finer than what you’d use for a French press. Also, ensure your water is fresh and cold, as stale or warm water can reduce extraction efficiency.
Finally, consider your coffee beans: freshly roasted, medium-roast beans often yield more robust flavor. After adjusting, taste test and dilute with water or milk until you reach your desired strength.
Dealing with cloudy or gritty cold brew
Cloudy or gritty cold brew is usually a filtration issue or a sign of over-extracted fines (tiny coffee particles). To fix this, start by using a coarser grind to reduce the amount of sludge produced.
After steeping, filter your brew twice: first through a fine-mesh strainer or cheesecloth, then through a paper coffee filter or a nut milk bag for clarity. If you use a French press, press slowly to avoid disturbing the grounds at the bottom.
Another tip is to let the brew settle after filtering—pour it into a carafe and refrigerate for 30 minutes; any remaining sediment will sink, allowing you to decant the clear liquid. Avoid stirring the concentrate during storage, as this can resuspend particles.
For a cleaner result, try a cold brew bag or reusable filter that holds grounds securely. Finally, use filtered water to prevent mineral haze. With these steps, your cold brew will be smooth and sediment-free.
Frequently Asked Questions
What is the best coffee-to-water ratio for cold brew?
A common starting ratio is 1:8 (coffee to water by weight), such as 1 cup of coarsely ground coffee to 8 cups of water. For a stronger concentrate, use 1:5, which you can later dilute with water or milk.
What grind size should I use for cold brew?
Use a coarse grind, similar to breadcrumbs or sea salt. Fine grinds can lead to over-extraction and a bitter, muddy taste, while coarse grinds ensure a smooth, clean flavor.
How long should I steep cold brew?
Steep for 12 to 24 hours at room temperature or in the refrigerator. 18 hours is a popular sweet spot for balanced flavor, but adjust based on your taste preference—longer steeps yield stronger, more concentrated brew.
Should I use cold water or room temperature water?
Room temperature or cold water both work, but room temperature water can extract flavors slightly faster. For a smoother, less acidic result, use filtered cold water and steep in the fridge.
How do I filter cold brew after steeping?
Pour the mixture through a fine-mesh sieve lined with a coffee filter, cheesecloth, or a nut milk bag into a clean container. For clarity, repeat filtering or use a paper filter to remove fine sediment.
Can I use any coffee beans for cold brew?
Yes, but medium to dark roast beans with chocolatey, nutty, or fruity notes work best. Avoid light roasts, as they can taste sour or grassy. Freshly ground beans yield the richest flavor.
How do I store cold brew and how long does it last?
Store in an airtight container in the refrigerator for up to 2 weeks. Keep it away from light and heat, and avoid adding milk or sweeteners until serving to preserve freshness.
Conclusion
Mastering cold brew is about patience and ratio, not complexity. Use coarse grounds and steep for 12-24 hours for a smooth, concentrated base. Always filter twice for clarity. Remember, a 1:8 coffee-to-water ratio yields a strong concentrate you can dilute to taste. Experiment with steep time and beans to find your perfect cup. Now, grab your mason jar and start brewing—a rich, less acidic coffee experience awaits you.