
How To Properly Make Iced Coffee At Home
How to properly make iced coffee at home is a question that separates watery, bitter brews from rich, café-quality drinks. The core mistake is pouring hot coffee over ice, which melts it and dilutes flavor. You’ve come to the right place for the fix. We’ll cover cold brew, Japanese-style brewing (hot coffee over ice for quick chilling), and the crucial coffee-to-water ratio to ensure bold, smooth results every time.
Why Make Iced Coffee at Home Instead of Buying It
Cost savings compared to coffee shop prices
Making iced coffee at home slashes your daily coffee budget dramatically. A single café iced latte can cost $4–$6, while homemade versions run about $0.50–$1.00 per serving using quality beans and milk. Over a month, that’s a savings of $100–$150 if you skip the drive-thru.
To maximize savings, buy whole beans in bulk (store them airtight in a cool, dark place) and invest in a simple cold brew pitcher or French press. Pre-portion your grounds the night before so you can brew quickly in the morning.
You can also reuse coffee grounds for a second, weaker batch if you’re on a tight budget. For milk, opt for store-brand or plant-based alternatives on sale. Skip expensive syrups by making your own simple syrup with equal parts sugar and water (add vanilla, cinnamon, or mint for flavor).
With these strategies, you’ll enjoy iced coffee every day without guilt—and have extra cash for other treats.
Control over coffee strength and flavor
Homemade iced coffee puts you in the driver’s seat for strength and taste. Unlike café drinks that may be watery or overly bitter, you can adjust coffee-to-water ratio to your preference.
For a strong, smooth base, use double-strength brew (twice the grounds per cup of water) since ice dilutes the coffee. For cold brew, steep coarse grounds in cold water for 12–24 hours—this yields a low-acid, naturally sweet concentrate that you can dilute to taste.
Experiment with bean origins: light roasts for floral notes, medium for balanced body, dark for bold chocolate. Add flavor variations like a pinch of salt to reduce bitterness, cinnamon for warmth, or a splash of vanilla extract. You can also control sweetness—use honey, agave, or sugar-free syrups.
For milk lovers, choose oat, almond, or whole milk to match your dietary needs. Pro tip: Brew a batch of strong coffee, pour it into ice cube trays, and use coffee ice cubes to avoid dilution while sipping.
This level of customization ensures every glass is exactly how you like it.
Fresher taste with homemade ingredients
Store-bought iced coffee often sits on shelves for weeks, losing its vibrant aroma and becoming stale. At home, you can brew with freshly roasted beans (buy from local roasters or check roast dates on bags) for a bright, complex flavor that rivals any café.
Grind beans just before brewing—whole beans stay fresh longer than pre-ground. Use filtered water to avoid off-tastes from tap water minerals. For cold brew, the slow extraction preserves delicate oils and reduces bitterness, giving you a smooth, naturally sweet result that bottled versions lack.
You can also incorporate fresh ingredients like lemon zest, mint leaves, or fruit purees for seasonal twists. If you prefer hot brew iced, pour it over ice immediately after brewing to lock in freshness—never refrigerate hot coffee for later, as it can turn sour.
Bonus: Make your own creamers with heavy cream, sweetened condensed milk, or coconut milk for a richer taste without preservatives. With homemade iced coffee, you’ll enjoy a crisp, authentic flavor that’s impossible to replicate from a carton.
Best Coffee Beans and Grind Size for Iced Coffee
Choosing between light, medium, and dark roasts
Your roast choice directly shapes your iced coffee’s flavor. For a crisp, refreshing brew, light roasts are ideal—they preserve bright, fruity, and floral notes that shine when chilled.
Medium roasts offer a balanced middle ground, with subtle caramel sweetness and moderate acidity, making them a versatile pick for both hot brew iced coffee and cold brew.
Dark roasts bring bold, smoky, and chocolatey flavors, but their bitterness can become more pronounced as the coffee cools, so use them if you enjoy a robust, less acidic cup.
Pro tip: Always select single-origin beans for cleaner taste, and avoid pre-ground options—grind whole beans just before brewing to maximize freshness. For cold brew, which steeps for 12-24 hours, a medium to dark roast often yields a smooth, rich concentrate that pairs well with milk or cream.
For hot brew iced coffee, light or medium roasts prevent over-extraction when you pour over ice. Ultimately, experiment with small batches to find your preferred profile, but remember: the best iced coffee starts with high-quality, freshly roasted beans.
Why coarse grind works for cold brew
Cold brew requires a coarse grind, similar to raw sugar or sea salt, to achieve its signature smooth, low-acid taste. The extended steeping time (12-24 hours) means finer grinds would over-extract, resulting in a bitter, muddy brew.
Coarse particles allow water to slowly pull out desirable oils and flavors without releasing harsh compounds. To nail the grind, use a burr grinder set to its coarsest setting—blade grinders create uneven pieces, leading to inconsistent extraction.
Key steps: Use a 1:4 coffee-to-water ratio by weight, combine with cold or room-temperature water, and steep in a sealed container. After steeping, filter through a fine-mesh sieve or cheesecloth to remove grounds. The resulting concentrate is perfect for pouring over ice, milk, or water without dilution.
Avoid pre-ground coffee labeled for automatic drip, as it’s too fine. With a coarse grind, you’ll unlock a silky, chocolatey cold brew that’s endlessly customizable—add vanilla, cinnamon, or a splash of cream for your ideal iced coffee.
Fine grind tips for hot brew iced coffee
For hot brew iced coffee, a fine grind (like table salt) ensures rapid extraction, preventing the ice from diluting the flavor. The method is simple: brew a double-strength batch by using twice the coffee grounds per water volume.
For example, use 4 tablespoons of fine-ground coffee per 8 ounces of water in a pour-over or drip machine. Critical tip: Brew directly into a heatproof carafe filled halfway with ice—this instantly chills the coffee while locking in aromatics.
A fine grind maximizes surface area, so extraction happens quickly during the 3-4 minute brew time, balancing acidity and sweetness. Avoid over-extraction by using water just off the boil (195-205°F) and pouring in a steady, even stream.
For espresso-based iced coffee, pull a double shot directly over ice—fine grind is essential for proper pressure and crema. Store leftover concentrate in the fridge for up to 3 days.
This method yields a vibrant, bold iced coffee that doesn’t taste watery, perfect for adding milk, syrup, or a pinch of salt to enhance sweetness.
How to Make Iced Coffee with Hot Brew Method

Brewing double-strength coffee to avoid dilution
To make iced coffee that doesn’t taste watery, always brew your hot coffee at double strength. This means using twice the amount of coffee grounds per the same volume of water as you would for hot coffee.
For example, if your standard recipe uses 2 tablespoons of grounds per 6 ounces of water, use 4 tablespoons. The concentrated coffee will retain its bold flavor even after melting ice dilutes it.
A good rule of thumb is a 1:8 coffee-to-water ratio for double-strength brew, compared to 1:16 for regular. Use a drip brewer, French press, or pour-over to extract the full flavor.
This method ensures your iced coffee remains robust and not weak or bitter. For best results, use freshly ground, medium-coarse beans and filtered water. Brew directly into a heatproof carafe or glass.
Once brewed, you’ll have a strong base that can be chilled and poured over ice without losing its character.
Cooling the coffee quickly before adding ice
After brewing double-strength coffee, cool it rapidly to prevent excess ice melt and preserve flavor. Let the hot coffee sit at room temperature for about 5 minutes, then transfer it to a heatproof container and place it in an ice bath—a bowl filled with ice and water.
Stir the coffee gently to speed up cooling. This brings the temperature down in under 10 minutes, reducing the need for excessive ice later. Alternatively, you can pour the hot coffee into a metal or glass carafe and refrigerate it for 30 minutes.
Quick cooling locks in the aromatic oils and prevents the coffee from becoming overly bitter from prolonged heat exposure. Avoid adding ice directly to hot coffee, as this melts the ice quickly and dilutes the brew.
For an even faster method, pour the hot coffee over a large block of ice in a separate pitcher, then strain it. This technique yields a smooth, concentrated iced coffee ready for serving.
Pouring over ice for instant chill
Once your double-strength coffee is cooled, pour it over a generous amount of ice for immediate refreshment. Use large ice cubes or ice blocks, as they melt slower than small cubes, minimizing dilution.
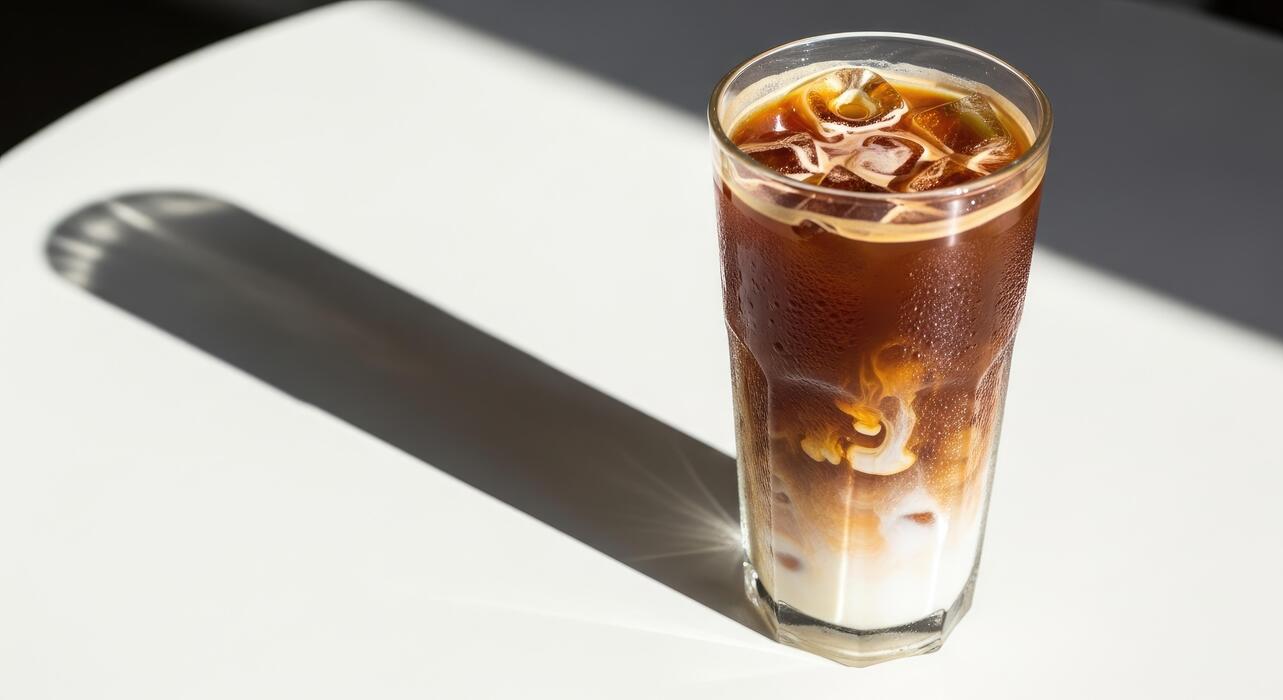
Fill a tall glass to the brim with ice, then slowly pour the chilled coffee concentrate over it. The instant contact with cold ice locks in the flavor and temperature. For a creamy twist, add a splash of milk, cream, or a flavored syrup before pouring.
Stir gently to combine, and enjoy a crisp, undiluted iced coffee. If you prefer a stronger coffee flavor, use less ice; for a milder taste, add more. You can also prepare ahead by freezing coffee into ice cubes—these won’t water down your drink.
This method is perfect for hot days, delivering a satisfying, barista-quality iced coffee at home. Serve immediately to savor the full aroma and smooth finish.
How to Make Cold Brew Iced Coffee at Home
Simple cold brew recipe with coarse grounds
To make perfect cold brew at home, start with coarsely ground coffee beans—similar to breadcrumbs. A burr grinder set to a coarse setting works best, as fine grounds can make your brew bitter and muddy.
Use a 1:4 ratio of coffee to water by weight (e.g., 1 cup coffee to 4 cups water) for a strong concentrate. Combine the grounds and cold, filtered water in a large jar or pitcher, stirring gently to ensure all grounds are saturated.
Cover and let it steep at room temperature or in the fridge—both work, but room temperature extracts flavor faster. Avoid hot water, as heat extracts bitter compounds. This simple method requires no special equipment, just a container and a bit of patience.
The result is a smooth, low-acid coffee base that you can dilute later. For best results, use fresh, high-quality beans—medium or dark roasts shine in cold brew. Remember, coarse grounds are key: they prevent over-extraction and make straining easier.
Steeping time and ratio for smooth flavor
The magic of cold brew lies in its long, gentle steeping time—typically 12 to 24 hours at room temperature or up to 36 hours in the fridge. A 12-hour steep yields a lighter, tea-like brew, while 24 hours delivers a rich, chocolatey concentrate.
Stick to the 1:4 coffee-to-water ratio for a balanced concentrate; adjust to 1:3 for extra strength or 1:5 for a milder base. Steeping longer than 24 hours can cause bitterness, so set a timer. For the smoothest flavor, use filtered water and avoid stirring after the initial mix.
The cold extraction process minimizes acidity and bitterness, unlocking natural sweetness and subtle notes like cocoa or nuts. Experiment with steeping times to find your perfect balance: start at 18 hours for a crowd-pleasing middle ground.
Remember, the ratio and time work together—too little coffee or too short a steep results in weak brew, while too much coffee or time creates harshness. Patience rewards you with a silky, smooth concentrate.
Straining and storing cold brew concentrate
After steeping, strain the cold brew through a fine-mesh sieve lined with a coffee filter, cheesecloth, or a nut milk bag. Pour slowly to avoid clogging, and gently press the grounds to extract every drop—but don’t squeeze too hard, as that can release bitter sediment. For double clarity, strain twice.
The resulting concentrate is shelf-stable in the fridge for up to two weeks when stored in a sealed glass jar or bottle. Avoid plastic containers, as they can absorb odors. To serve, dilute the concentrate with equal parts water or milk (or adjust to taste) over ice.
For a creamier drink, use oat or almond milk. Remember, the concentrate is strong—start with a 1:1 ratio and tweak from there. Store it away from strong-smelling foods to preserve its clean flavor. Proper straining and storage ensure your cold brew stays smooth, fresh, and ready to enjoy anytime.
No reheating needed—just pour, dilute, and sip.
Tips for Avoiding Watery or Bitter Iced Coffee

Using coffee ice cubes to maintain strength
One of the biggest mistakes in iced coffee is using regular ice cubes, which melt and dilute your brew, leaving it watery and weak. To avoid this, brew a double-strength batch of coffee and pour it into ice cube trays.
Once frozen, use these coffee cubes in your glass instead of water-based ice. This method ensures that as the cubes melt, they enhance rather than weaken the flavor.
For best results, use freshly brewed coffee that has cooled to room temperature before freezing to prevent ice crystals from altering the taste. You can also experiment with adding a pinch of salt or a splash of vanilla extract to the brew before freezing for extra depth.
When ready to serve, fill your glass halfway with coffee ice cubes, pour your freshly brewed coffee over them, and stir gently. This technique preserves the robust coffee profile from first sip to last, making each drop as bold as intended.
Pro tip: store coffee cubes in a sealed bag to avoid absorbing freezer odors, and always use them within two weeks for peak freshness.
Adding milk or creamer before ice
The order in which you assemble your iced coffee directly impacts its texture and flavor balance. To prevent a watery, diluted drink, always add your milk, creamer, or alternative milk to the glass before the ice.
This simple sequence allows the cold dairy to chill the coffee immediately upon contact, reducing the amount of ice needed and slowing the melting process.
Start by pouring your desired amount of milk or creamer into the bottom of a tall glass—about one-quarter to one-third of the glass works well for a balanced cup. Then add a handful of ice cubes, followed by your freshly brewed, cooled coffee.
The cold milk buffers the coffee, so it doesn’t shock the ice into rapid melting. For a creamier texture, use whole milk or a barista-style oat milk that withstands temperature changes.
If you prefer a sweeter drink, stir in a simple syrup or flavored syrup before the ice, as cold ingredients blend more evenly. This method also helps maintain the coffee’s natural oils and prevents a bitter aftertaste, ensuring each sip is smooth and satisfying.
Adjusting brew time to prevent bitterness
Bitterness in iced coffee often stems from over-extraction during the brewing process, especially when using hot water that sits too long with the grounds. To achieve a smooth, balanced flavor, shorten your brew time compared to hot coffee recipes.
For drip coffee makers, reduce the contact time by using a finer grind and a shorter brewing cycle, or simply stop the machine after extracting about 75% of the water.
For French press or pour-over methods, steep for no more than 3 to 4 minutes, then immediately separate the grounds from the liquid. Cold brew is an excellent alternative, as its long, cold extraction (12–24 hours) naturally reduces bitterness and acidity.
If you prefer hot-brewed iced coffee, use a ratio of 1:15 coffee to water (e.g., 2 tablespoons of grounds per 6 ounces of water) and brew at 195–205°F. After brewing, chill the coffee quickly by placing it in an ice bath or refrigerating it uncovered for 10 minutes.
This rapid cooling locks in the delicate flavors and stops any residual extraction. Taste your coffee before icing; if it’s slightly bitter, add a pinch of salt to neutralize the harsh notes without altering the overall profile.
Best Add-Ins and Flavor Variations for Iced Coffee
Classic sweeteners like simple syrup or honey
To sweeten your iced coffee without the gritty texture of granulated sugar, use simple syrup or honey. Simple syrup dissolves instantly in cold liquid, making it ideal. Make your own by combining equal parts sugar and water in a saucepan, heating until dissolved, then cooling.
Store it in the fridge for up to a month. For a richer flavor, try honey or agave nectar—both mix well when stirred vigorously. Start with 1-2 teaspoons per cup, adjusting to taste. Avoid powdered sugar, as it clumps.
For a twist, infuse your syrup with vanilla beans, cinnamon sticks, or citrus zest while heating. This adds depth without extra effort. If using honey, warm it slightly to improve flow. Remember, cold dulls sweetness, so you may need a bit more than you’d use in hot coffee.
These options let you control sweetness precisely, ensuring your iced coffee is perfectly balanced every time.
Dairy and non-dairy milk options
Choosing the right milk can transform your iced coffee. Whole milk or half-and-half creates a creamy, rich texture that stands up to ice without becoming watery. For a lighter option, 2% milk works well, but avoid skim milk as it can taste thin.
Non-dairy alternatives like oat milk offer a naturally sweet, velvety consistency that blends seamlessly. Almond milk adds a nutty undertone, but opt for unsweetened versions to control sugar. Coconut milk provides tropical richness, though it can separate if not shaken well.
For a protein boost, try soy milk or pea milk. Always pour milk over ice first, then add coffee to preserve temperature and prevent curdling. Experiment with barista blends, which are formulated to froth and mix without splitting.
A splash of cream or a dollop of whipped cream can elevate the experience. The key is to match the milk’s fat content with your desired richness, ensuring a smooth, satisfying sip.
Spices, extracts, and syrups for unique flavors
Elevate your iced coffee with spices, extracts, and flavored syrups for a café-style treat at home. Start with ground cinnamon, nutmeg, or cardamom—sprinkle a pinch directly onto the coffee grounds before brewing, or stir into the finished drink.
For a smoother infusion, use vanilla or almond extract; just a few drops add warmth and complexity. Flavored syrups like caramel, hazelnut, or peppermint are easy to make by combining sugar, water, and your chosen flavoring. Simmer with vanilla bean, cocoa powder, or fresh mint leaves, then strain and cool.
Store syrups in a sealed jar for weeks. For a seasonal twist, add pumpkin pie spice or lavender syrup. Remember to balance flavors—start with small amounts and taste as you go.
These add-ins let you customize your iced coffee endlessly, turning a simple brew into a signature beverage that rivals any coffee shop creation.
How to Store and Serve Iced Coffee for Best Results
Refrigerating brewed coffee for up to a week
Once your coffee is brewed and cooled, transfer it to an airtight glass container—like a mason jar or a carafe with a tight seal. This prevents the coffee from absorbing fridge odors and losing its flavor.
Allow the coffee to cool completely at room temperature before refrigerating, as placing hot coffee directly in the fridge can cause condensation and dilute the taste.
Properly stored, black coffee can maintain its quality for up to a week, though it’s best enjoyed within the first 3-4 days for peak freshness. Avoid adding milk or sugar before storage, as these can spoil faster.
If you want to prep for a week, brew a concentrated batch (using a 1:4 coffee-to-water ratio) and dilute it with water or milk when serving. This method preserves the coffee’s boldness and prevents it from tasting stale.
For quick chilling, pour brewed coffee into an ice cube tray—these coffee ice cubes are perfect for future iced drinks without dilution.
Serving over fresh ice for optimal taste
When you’re ready to serve, use fresh, large ice cubes—preferably made from filtered water or leftover coffee. Large cubes melt slower, reducing dilution and keeping your iced coffee strong from the first sip to the last. Fill a glass with ice first, then pour the chilled coffee over it.
This technique ensures the coffee hits the cold surface immediately, locking in its flavor. For a more intense taste, try coffee ice cubes: freeze leftover coffee in an ice cube tray and use them instead of regular ice. This prevents the watery, weak result that often comes from melting ice.
If you prefer a creamier texture, add a splash of cold milk or a dairy-free alternative before pouring the coffee. Stir gently to combine, and avoid over-mixing, which can introduce air and change the mouthfeel.
Serve immediately for the best experience—iced coffee is at its peak when freshly poured over ice, not after sitting.
Reusing leftover coffee for iced coffee treats
Don’t pour out that leftover coffee—it’s a versatile ingredient for creative iced coffee treats. Make coffee ice cubes as mentioned, perfect for adding to cold brew or iced lattes without watering them down.
You can also blend leftover coffee with milk, a banana, and a dash of cinnamon for a quick coffee smoothie—a refreshing, energy-boosting breakfast. Another idea: use it in desserts.
Freeze leftover coffee in an ice cube tray, then blend the cubes with a splash of vanilla extract and almond milk for a dairy-free coffee slushie. Or, mix leftover coffee with condensed milk and pour into popsicle molds for coffee popsicles—a sweet, caffeinated summer treat.
For a savory twist, add a small amount to barbecue sauce or marinades for a rich, smoky depth. Always store leftover coffee in the fridge within two hours of brewing, and use it within 3-5 days for the best flavor in these recipes.
Frequently Asked Questions
What is the best way to make iced coffee at home without it getting watery?
To avoid watery iced coffee, brew your coffee double-strength (using twice the coffee grounds) and then pour it over ice. Alternatively, make coffee ice cubes by freezing leftover coffee to use instead of regular ice.
Can I use regular hot coffee to make iced coffee?
Yes, but let the hot coffee cool to room temperature first before pouring over ice to prevent rapid dilution. For best results, brew it stronger than usual to account for melting ice.
What is cold brew coffee, and how is it different from iced coffee?
Cold brew is made by steeping coarsely ground coffee in cold water for 12-24 hours, resulting in a smoother, less acidic concentrate. Iced coffee is simply hot-brewed coffee that is chilled and served over ice.
How do I make iced coffee using a French press?
Brew double-strength coffee in your French press using hot water (about 4 minutes steep), press the plunger, let it cool slightly, then pour over a glass filled with ice. Add milk or sweetener as desired.
Should I use a specific coffee grind for iced coffee?
For hot-brewed iced coffee, use a medium grind similar to drip coffee. For cold brew, use a coarse grind to prevent over-extraction during the long steep. A finer grind can lead to bitterness.
How can I make iced coffee taste like from a café?
Use freshly ground coffee beans, brew at a 1:8 coffee-to-water ratio (double strength), and chill it quickly. Add a splash of milk or cream, and sweeten with simple syrup (dissolved sugar in water) for even mixing.
What is the ideal coffee-to-water ratio for iced coffee?
For hot-brewed iced coffee, use 2 tablespoons of coffee per 6 ounces of water (double your usual ratio) since ice dilutes it. For cold brew, use a 1:4 or 1:5 ratio of coffee to water, then dilute with water or milk when serving.
Conclusion
Mastering iced coffee at home is simple: brew double-strength coffee to prevent dilution, cool it completely before pouring over ice, and avoid hot coffee on ice for a bitter taste. For best results, use cold brew or chill your coffee first. Now you can skip the café lines and enjoy a perfectly smooth, refreshing iced coffee anytime. Experiment with milk or syrups to make it your own.