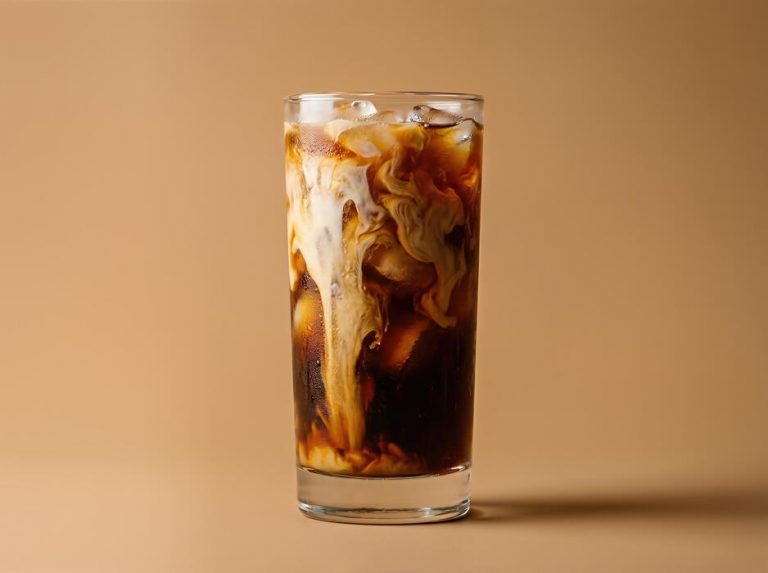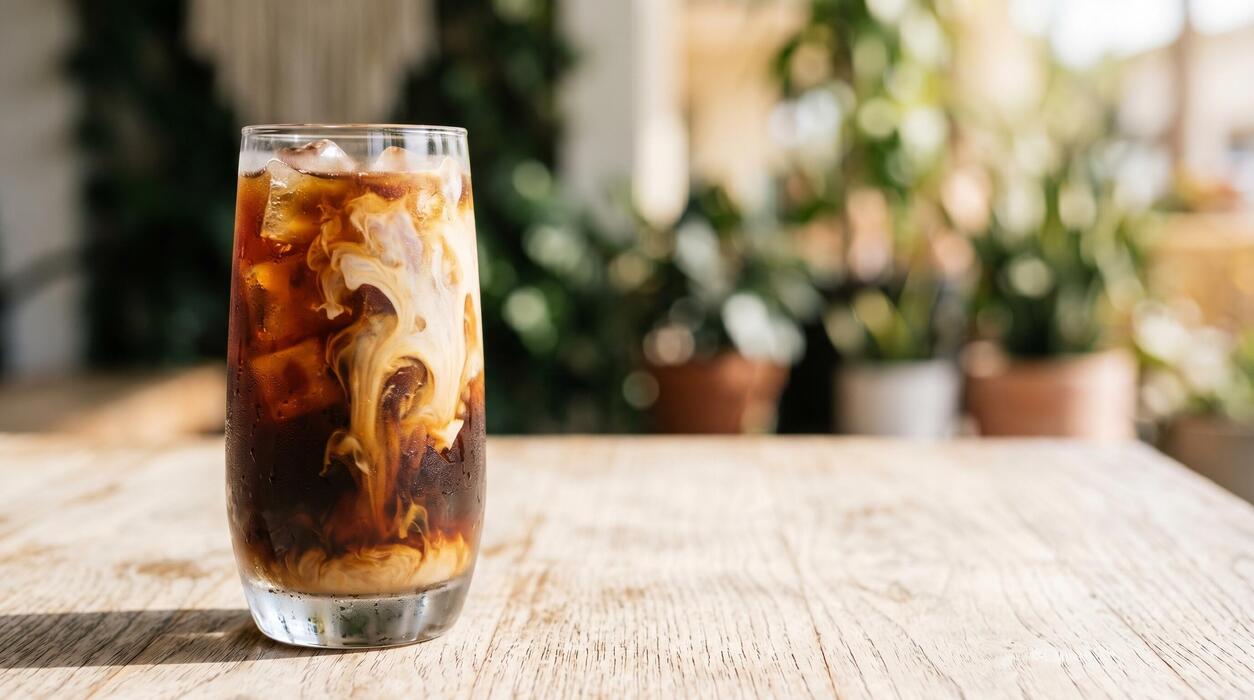
How To Prepare Iced Coffee At Home
Wondering how to prepare iced coffee at home without it turning watery or bitter? You’re in the right place. The secret isn’t just pouring hot coffee over ice—that dilutes flavor fast. Instead, we’ll cover three proven methods: cold brew for smoothness, Japanese-style for instant intensity, and using coffee ice cubes to keep every sip strong. No fancy gear required. Let’s fix your morning routine.
Why Make Iced Coffee at Home
Save money compared to coffee shop prices
Making iced coffee at home can cut your daily coffee costs dramatically. A single café iced coffee often costs $4–6, while a homemade version runs about $0.25–$0.50 per glass. That’s a savings of over $1,000 per year if you typically buy one daily.
Use a cold brew concentrate or simply brew double-strength hot coffee and chill it. Store your batch in a pitcher in the fridge for up to a week, so you can pour a glass each morning without any effort.
Invest in a reusable straw and a large tumbler to replicate the café experience. For even more savings, buy whole beans in bulk and grind them fresh—this boosts flavor and lowers cost per cup. Over time, you’ll also avoid impulse purchases of pastries or extras.
The key is to make a weekly ritual of preparing a batch, ensuring you always have a delicious, budget-friendly iced coffee ready. Start today and watch your coffee budget shrink.
Control strength and sweetness to your taste
When you make iced coffee at home, you’re in charge of every detail. Adjust the coffee-to-water ratio to create a brew that’s exactly as bold or mild as you like. For a stronger base, use a 1:4 ratio for cold brew or brew hot coffee with twice the grounds.
Sweetness is equally customizable—skip sugary syrups and use simple syrup (equal parts sugar and water) so it dissolves easily in cold drinks. Add a splash of vanilla extract, a pinch of cinnamon, or a dash of flavored creamer to match your mood.
You can also experiment with milk alternatives: oat milk for creaminess, almond milk for a nutty note, or whole milk for richness. Taste as you go and adjust the sweetener or milk until it’s perfect for you.
This control means you can reduce sugar intake without sacrificing flavor, or go all out with a dessert-like treat. No more settling for a drink that’s too weak or too sweet—your home iced coffee is always tailored to your personal preferences.
Avoid watery or weak iced coffee
The biggest frustration with iced coffee is dilution from melting ice, but at home you can prevent this easily. Brew coffee double-strength—use twice the coffee grounds you normally would for hot coffee—so that even when ice melts, the flavor remains robust.
Another trick is to make coffee ice cubes: freeze leftover coffee in an ice cube tray, then use those cubes instead of regular ice. This keeps your drink cold without watering it down.
For cold brew, steep coarsely ground beans in cold water for 12–24 hours, then strain—this method naturally yields a smooth, concentrated brew that stays strong over ice. Also, chill your glass and milk beforehand to slow melting.
Pro tip: Add a pinch of salt to your coffee grounds before brewing; it reduces bitterness and enhances richness, making your iced coffee taste fuller. With these techniques, every sip will be as flavorful as the first, and you’ll never suffer from a weak, watery iced coffee again.
Enjoy a consistently bold and satisfying drink every time.
Best Coffee Beans for Iced Coffee

Choose medium or dark roast for bold flavor
When brewing iced coffee, the roast level directly impacts the final taste, especially since ice dilutes the coffee. Medium and dark roasts are the best choices because their robust, deep flavors cut through the melting ice, ensuring your drink remains rich and satisfying.
Dark roasts offer smoky, chocolatey notes that stand up well to milk or sweeteners, while medium roasts provide a balanced acidity with caramel or nutty undertones. Light roasts, though flavorful hot, often become too acidic or sour when chilled.
For a classic iced coffee, opt for a Colombian or Brazilian dark roast for a smooth, full-bodied brew. If you prefer a brighter profile, a medium roast from Guatemala or Sumatra works beautifully. Always check the roast date on the bag—freshness is key.
Avoid stale beans, as they yield flat, bitter flavors. Experiment with single-origin or blends, but remember: bold roasts ensure your iced coffee doesn’t taste watery or weak.
Use whole beans and grind just before brewing
To maximize flavor in your iced coffee, always start with whole beans and grind them immediately before brewing. Pre-ground coffee loses its volatile oils and aromas within minutes, leading to a stale, flat taste.
Whole beans, however, retain freshness for weeks when stored in an airtight container away from light and heat. Invest in a burr grinder for consistent particle size—this ensures even extraction, preventing over-bitter or under-extracted sips.
For iced coffee, a medium-coarse grind is ideal for methods like cold brew or pour-over, while a medium grind works for hot brew then chilled. Grind only what you need per batch; grinding too much ahead of time defeats the purpose.
The aroma released during grinding signals peak flavor, so enjoy that sensory moment. By grinding fresh, you’ll unlock nuanced tasting notes—like cocoa, berries, or nuts—that elevate your homemade iced coffee. This small step transforms a simple drink into a café-quality experience.
Avoid pre-ground coffee for fresher taste
Pre-ground coffee is convenient but compromises the freshness and complexity of your iced coffee. Once ground, coffee beans oxidize rapidly, losing up to 60% of their aromatic compounds within 15 minutes. This results in a dull, one-dimensional brew that ice cannot rescue.
For a truly refreshing iced coffee, skip the pre-ground bags and prioritize whole beans. When you grind at home, you control the coarseness to match your brewing method—finer for espresso-based iced lattes, coarser for cold brew. Pre-ground coffee is often ground for drip machines, which may not suit your recipe.
Additionally, commercial pre-ground coffee sits on shelves for months, absorbing moisture and stale odors. Buy small batches of whole beans from local roasters and use them within two weeks of roasting. Store them in a cool, dark cabinet, not the fridge.
The effort pays off: your iced coffee will have vibrant acidity, sweetness, and a clean finish that pre-ground simply cannot deliver.
How to Brew Hot Coffee for Iced Coffee

Double the coffee grounds for a stronger brew
When brewing hot coffee destined for iced coffee, you must compensate for the dilution caused by melting ice. The key is to double the amount of coffee grounds you would normally use.
For example, if your standard ratio is 1 to 2 tablespoons of grounds per 6 ounces of water, use 2 to 4 tablespoons for the same water volume. This ensures that after the ice melts, the resulting drink is bold and flavorful, not watery or weak.
A good starting point is a 1:8 coffee-to-water ratio by weight, but you can adjust based on your preferred strength. Remember, the stronger you brew, the more pronounced the coffee’s natural notes will remain once chilled.
This technique works with any method, from drip to French press, so you can enjoy a robust iced coffee every time.
Brew with a drip coffee maker or pour-over
For a clean, balanced iced coffee, use a drip coffee maker or pour-over method to brew your hot coffee. Both methods produce a smooth, sediment-free cup that chills well without bitterness. Start by placing your doubled coffee grounds in the filter.
If using a drip machine, simply brew directly into a heatproof carafe. For a pour-over, pour hot water (just off the boil) in slow, circular motions over the grounds, allowing the coffee to drip into a vessel.
The key is to avoid over-extraction: keep the brew time to 3-4 minutes for optimal flavor. Once brewed, the hot coffee will be concentrated and ready to cool. This approach gives you full control over strength and taste, making it ideal for customizing your iced coffee at home.
Cool the coffee quickly to preserve flavor
After brewing, it’s crucial to cool the hot coffee quickly to lock in its fresh, aromatic notes and prevent stale, bitter flavors. The fastest method is to pour the freshly brewed coffee directly over a full glass of ice.
This rapid chilling stops the extraction process and preserves the coffee’s natural sweetness and acidity. For an even quicker cool-down, you can use a technique called “flash chilling”: brew the coffee directly into a heatproof container filled with ice, using a ratio of 2 parts coffee to 1 part ice.
Alternatively, place the brewed coffee in the freezer for 10-15 minutes, stirring occasionally to ensure even cooling. Avoid letting it sit at room temperature for too long, as this can lead to oxidation and a flat taste.
Proper cooling ensures your iced coffee is crisp, bright, and delicious from the first sip to the last.
How to Make Cold Brew Iced Coffee
Mix coarse coffee grounds with cold water
Start by selecting a high-quality, coarsely ground coffee—aim for a consistency similar to breadcrumbs. A medium-dark roast often yields a smooth, rich flavor. In a large jar or pitcher, combine 1 cup of coarse coffee grounds with 4 cups of cold, filtered water.
This 1:4 ratio creates a balanced concentrate; adjust for stronger or milder results. Stir gently to ensure all grounds are fully saturated—no dry clumps. Avoid hot water, as it extracts bitter compounds. The cold brew method relies on time, not heat, so patience is key.
Use a clean container with a tight-fitting lid to prevent absorbing fridge odors. For best results, use freshly ground beans for optimal flavor. This simple mixture is the foundation for a smooth, low-acid iced coffee that’s perfect for hot days.
Once combined, seal the container and prepare for the next step.
Steep in the fridge for 12 to 24 hours
Place the sealed container in the refrigerator and let it steep undisturbed. The cold environment slowly extracts flavors without bitterness, producing a smooth, naturally sweet concentrate. Steep for 12 to 24 hours—12 hours yields a lighter brew, while 24 hours gives a bolder, more robust profile.
Avoid steeping longer than 24 hours, as over-extraction can make it taste muddy. Do not leave it at room temperature, as this risks bacterial growth and off-flavors. During steeping, you can gently swirl the container once or twice to redistribute grounds, but avoid shaking vigorously.
This long, cold infusion unlocks rich chocolate and nutty notes, perfect for iced coffee. The result is a concentrate that’s lower in acidity than hot-brewed coffee, making it easier on your stomach. Set a timer to track your preferred strength—experiment to find your ideal balance.
Strain through a fine mesh or cheesecloth
After steeping, strain the concentrate to remove the grounds. Place a fine-mesh sieve lined with a cheesecloth or a clean, thin kitchen towel over a large bowl or pitcher. Slowly pour the coffee mixture through the strainer, allowing the liquid to drip through.
Press gently on the grounds with a spoon to extract every drop, but avoid squeezing hard to prevent sediment. For an ultra-clear brew, strain a second time using a paper coffee filter or a nut milk bag. Discard the used grounds—they’re great for compost.
Transfer the strained cold brew concentrate to a sealed glass jar and refrigerate. This concentrate lasts up to two weeks in the fridge. To serve, fill a glass with ice, pour 1 part concentrate to 1 part water or milk, and adjust to taste.
Enjoy a silky, refreshing iced coffee that’s perfectly customizable.
Tips to Avoid Watery Iced Coffee
Use coffee ice cubes instead of regular ice
One of the most effective ways to prevent watery iced coffee is to replace regular ice cubes with frozen coffee cubes. Simply brew a batch of your favorite coffee, let it cool to room temperature, then pour it into an ice cube tray and freeze overnight.
When you add these cubes to your fresh coffee, they melt and enhance the flavor rather than diluting it. For best results, use the same coffee you plan to drink so the taste remains consistent. You can also experiment with cold brew concentrate for an even bolder flavor.
To speed up cooling, freeze the cubes in a single layer on a baking sheet before transferring to a bag. This method ensures your iced coffee stays strong and rich from the first sip to the last, without the dreaded watery aftertaste.
Remember to leave a little room in your glass for the cubes to expand as they freeze.
Chill your glass and coffee before serving
Another simple yet powerful tip is to pre-chill both your glass and your coffee before assembling your drink. Place your serving glass in the freezer for at least 15-20 minutes, or fill it with ice water while you prepare the coffee.
Meanwhile, brew your coffee slightly stronger than usual—use a 1:15 coffee-to-water ratio instead of the standard 1:16—to account for any minimal dilution. Let the coffee cool to room temperature or refrigerate it for 30 minutes before pouring over ice.
This dual-chilling approach minimizes the temperature shock that causes ice to melt rapidly. For an even faster chill, pour the coffee into a metal shaker or bottle and shake it with ice for 10-15 seconds, then strain out the ice before serving.
By starting with cold components, you reduce the amount of ice needed and keep your drink concentrated and refreshing.
Add milk or creamer first to dilute less
The order in which you add ingredients can significantly impact dilution. Instead of pouring coffee over ice and then adding milk, put the milk or creamer in first before the ice and coffee.
This technique works because the milk acts as a protective barrier between the ice and the hot or warm coffee, slowing down the melting process.
For example, fill your glass with 1/4 to 1/3 cup of cold milk or creamer, then add your ice cubes, and finally pour the coffee over the top. This not only preserves the coffee’s strength but also creates a smoother, more integrated flavor as the coffee mixes with the milk.
For an extra creamy texture, use whole milk or oat milk. If you prefer black coffee, try adding a splash of cold water first instead. This simple tweak ensures your iced coffee stays bold and delicious, even on hot days, without needing extra coffee or ice.
Simple Iced Coffee Recipes to Try
Classic iced coffee with milk and sugar
Start with strong, freshly brewed coffee to avoid a watery taste. Brew a double-strength batch by using twice the usual coffee grounds, then let it cool to room temperature. Fill a tall glass with ice cubes, leaving space for milk.
Pour the cooled coffee over the ice, filling the glass about two-thirds full. Add your preferred milk—whole milk adds creaminess, while oat or almond milk keeps it lighter. Sweeten to taste with simple syrup (equal parts sugar and water, dissolved) or a few teaspoons of granulated sugar.
Stir well to combine all flavors. For a smoother texture, consider shaking the coffee with ice in a cocktail shaker before pouring. This method chills the coffee rapidly without diluting it too much. Serve immediately with a straw, and adjust milk and sugar ratios to your liking.
This classic recipe is endlessly customizable and perfect for hot days.
Vanilla iced coffee with syrup
Elevate your iced coffee with homemade vanilla syrup for a café-quality drink. To make the syrup, combine 1 cup water, 1 cup sugar, and 2 teaspoons vanilla extract in a saucepan; heat until sugar dissolves, then cool.
Brew a strong coffee concentrate—cold brew works exceptionally well for its smooth, low-acid profile. Fill a glass with ice and pour the coffee over it, leaving room for milk. Add 1-2 tablespoons of vanilla syrup depending on your sweetness preference.
Stir thoroughly to integrate the syrup, then top with cold milk or cream. For extra richness, use half-and-half. Garnish with a vanilla bean pod or a sprinkle of cinnamon for visual appeal. This recipe is easily scaled up for a pitcher, making it perfect for entertaining.
The syrup keeps in the fridge for up to two weeks, so you can enjoy vanilla iced coffee anytime without extra effort.
Iced latte with frothed milk
An iced latte requires espresso or very strong coffee as the base. Brew a double shot of espresso (or ½ cup strong coffee) and let it cool slightly. Meanwhile, froth cold milk using a handheld frother, French press, or jar with a lid—aim for a thick, creamy foam.
Fill a glass with ice cubes and pour the cooled espresso over them. Slowly add the frothed milk, holding back the foam with a spoon, then spoon the foam on top. For a sweet touch, drizzle caramel or chocolate syrup inside the glass before adding ice.
Stir gently to combine layers, or leave them distinct for a visual effect. This method creates a rich, velvety texture without a machine. For a dairy-free version, use oat milk, which froths beautifully. Serve immediately with a straw.
Adjust coffee strength and milk amount to suit your taste, and enjoy a barista-style drink at home.
How to Store and Serve Iced Coffee
Keep brewed coffee in the fridge for up to 3 days
To maximize freshness and flavor, store your brewed coffee in an airtight container like a glass pitcher or mason jar immediately after cooling. Avoid leaving it at room temperature for more than two hours, as this can cause bitterness and bacterial growth.
Refrigerate the coffee for up to three days for the best taste, but use it within 24 hours for peak quality. Before storing, let the coffee cool to room temperature to prevent condensation, which dilutes the flavor.
Do not add milk or sweeteners until serving, as they can spoil faster and alter the coffee’s texture. For convenience, brew a double batch and portion it into individual servings—this saves time and reduces waste. If you notice a stale or sour aroma, discard the coffee and brew fresh.
Pro tip: Label the container with the brew date so you always know its freshness. This method ensures your iced coffee stays bold and smooth, ready to pour over ice whenever you crave a refreshing pick-me-up without daily brewing.
Serve over fresh ice for best texture
The secret to perfect iced coffee texture is using fresh, large ice cubes instead of crushed or old ice. Fresh ice melts slower, preventing rapid dilution that weakens the coffee’s robust flavor.
Fill your glass completely with ice before pouring the chilled coffee over it—this chills the drink instantly without watering it down. For an even bolder approach, freeze coffee into ice cubes using leftover brew; these coffee ice cubes maintain intensity as they melt.
Avoid using ice that has been sitting in the freezer for weeks, as it can absorb odors and impart off-flavors. Stir the coffee and ice gently for 10-15 seconds to integrate the temperature evenly, then serve immediately.
If you prefer a creamier texture, add milk or a splash of cream after pouring over ice to keep the layers distinct. This technique guarantees a crisp, satisfying sip every time, making your homemade iced coffee rival café-quality drinks.
Add flavor twists like cinnamon or cocoa
Elevate your iced coffee with simple flavor twists that require zero extra effort. Stir in 1/4 teaspoon of ground cinnamon or 1 tablespoon of unsweetened cocoa powder directly into the brewed coffee before chilling—this infuses the entire batch with warm, aromatic notes.
For a smoother integration, whisk the spice with a splash of hot water to create a paste, then mix it in. Alternatively, infuse the coffee grounds with cinnamon sticks or cocoa nibs during brewing for a deeper flavor.
After chilling, garnish the glass with a cinnamon stick or a dusting of cocoa powder for visual appeal. You can also add a dash of vanilla extract or a pinch of nutmeg for complexity.
These additions work best with black coffee, but if you use milk, opt for unsweetened almond or oat milk to complement the spices. Experiment with ratios to suit your taste—start small and adjust.
These easy flavor boosts turn a basic iced coffee into a personalized treat, perfect for any time of day.
Frequently Asked Questions
What is the simplest way to make iced coffee at home?
Brew a pot of your favorite coffee double-strength (using twice the coffee grounds), then let it cool to room temperature. Pour it over a glass filled with ice cubes and add milk or sweetener to taste for a quick, refreshing drink.
How do I make iced coffee without diluting it?
Use coffee ice cubes made by freezing leftover brewed coffee in an ice cube tray. Alternatively, brew a concentrated cold brew by steeping coarse-ground coffee in cold water for 12-24 hours, which stays strong even as ice melts.
Can I make iced coffee with instant coffee?
Yes, dissolve 1-2 teaspoons of instant coffee in a small amount of hot water (about 2 tablespoons), then stir in cold water or milk. Pour over ice for an instant iced coffee without needing a brewer.
What is cold brew coffee and how is it different from iced coffee?
Cold brew is made by steeping coarsely ground coffee in cold water for 12-24 hours, then straining, resulting in a smooth, less acidic concentrate. Iced coffee is typically hot-brewed coffee that is cooled and poured over ice.
How can I make a creamy iced coffee like from a café?
Blend chilled strong coffee with milk, a splash of cream, and sweetener (like simple syrup or condensed milk) with ice until frothy. For a layered look, pour cold milk over ice first, then slowly add the coffee.
What type of coffee beans work best for iced coffee?
Medium to dark roast beans are popular for their bold flavor that stands up to ice and milk. For cold brew, a coarse grind of a single-origin or blend with chocolate or nutty notes works well to avoid bitterness.
How do I sweeten iced coffee without sugar crystals?
Use liquid sweeteners like simple syrup (equal parts sugar and water heated until dissolved), honey, agave nectar, or flavored syrups. These dissolve instantly in cold coffee, unlike granulated sugar.
Can I prepare iced coffee ahead of time for the week?
Yes, brew a large batch of concentrated coffee or cold brew and store it in the refrigerator in a sealed container for up to a week. Just pour over ice and add milk when ready to serve.
Conclusion
In summary, making exceptional iced coffee at home is simple and rewarding. Whether you choose cold brew for smoothness or flash-brewed coffee for boldness, the key is using fresh, coarsely ground beans and cooling it quickly to avoid dilution. Don’t be afraid to experiment with milk, syrups, or ice cubes made from coffee.