How To Make Cold Foam At Home
Craving that velvety, cloud-like topping on your favorite iced coffee but tired of the coffee shop price tag? You are in the right place. Learning how to make cold foam at home is surprisingly simple and requires just a few basic ingredients you likely already have in your kitchen. Whether you prefer a classic vanilla flavor or a salty-sweet finish, this guide provides the quick, foolproof methods you need to achieve café-quality froth in under two minutes.
What is cold foam and why is it popular?
The difference between cold foam and hot frothed milk
Understanding the structural difference between these two toppings is essential for mastering your home barista skills. Unlike traditional frothed milk, which relies on steam to create heat-expanded bubbles, cold foam is produced by aerating cold milk at high speeds.
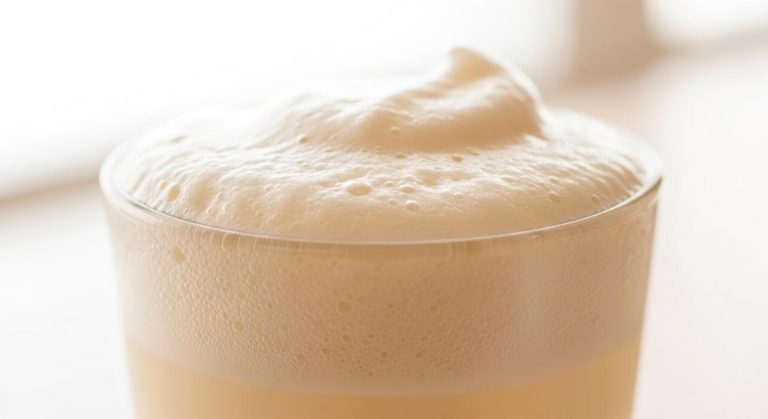
This results in a thick, velvety microfoam that retains its structure without melting into your drink immediately.
When you are learning how to make cold foam at home, it is important to use non-fat or low-fat milk, as the higher protein content stabilizes the bubbles better than fat does in a cold state.
Hot frothed milk is designed to blend with espresso for lattes, whereas cold foam is meant to sit as a distinct, creamy layer on top of chilled beverages.
By using a handheld milk frother or a specialized cold setting on an electric aerator, you can achieve a stiff peak consistency that mimics the premium experience found at high-end coffee shops.
This cooling technique ensures that your iced coffee remains refreshing while adding a luxurious, cloud-like finish that hot steam simply cannot replicate.
Why cold foam is perfect for iced coffee
The primary reason cold foam has become a global sensation is its ability to provide a creamy sensation without diluting the temperature of your beverage.
If you were to add hot frothed milk to an iced Americano or cold brew, the ice would melt rapidly, leading to a watery and unappealing drink. Cold foam solves this problem by maintaining a consistent chilled temperature that complements the ice.
Furthermore, because it is significantly denser than standard milk, it allows for a gradual infusion of flavor. As you sip, the coffee passes through the sweet, aerated layer, creating a balanced flavor profile in every mouthful.
When experimenting with how to make cold foam at home, you can easily customize the experience by adding vanilla syrup, cinnamon, or sea salt directly into the milk before frothing.
This versatility makes it the ideal companion for cold brew, which often has a bold, acidic profile that benefits from a smooth, sweetened topping. It transforms a basic caffeinated drink into a sophisticated, cafe-quality treat that looks as impressive as it tastes.
How cold foam enhances drink texture
Texture is a critical component of the sensory experience when enjoying a beverage, and cold foam offers a unique mouthfeel that liquid milk cannot achieve. The aeration process creates thousands of tiny micro-bubbles that result in a velvety, marshmallow-like consistency that lingers on the palate.
When you learn how to make cold foam at home, you are essentially creating a structural topping that acts as a bridge between the liquid coffee and the air. This layer provides a rich, decadent contrast to the thin consistency of iced tea or cold brew.
Because the foam is so stable, it stays suspended at the top of the glass, allowing you to enjoy a multi-textured drinking experience from the first sip to the last.
This physical separation of layers is visually stunning and ensures that the creaminess is distributed evenly rather than sinking to the bottom.
By mastering the timing of your frothing device, you can control the density of the foam, opting for either a light, airy finish or a heavy, spoonable cream that elevates the overall sophistication of your homemade refreshments.
Essential ingredients for DIY cold foam
Choosing the right milk for maximum froth
To achieve that velvety, cloud-like texture characteristic of professional coffee shops, the fat and protein content of your milk play a critical role.
For the best results at home, skim milk or 2% milk are actually superior to whole milk because their protein structure stabilizes air bubbles more effectively, creating a stiff foam that sits perfectly atop your iced coffee.
If you prefer a richer, more decadent mouthfeel similar to a Starbucks copycat recipe, you should mix heavy cream and milk in a two-to-one ratio. This combination provides enough weight to carry flavor while maintaining a frothy consistency.
Ensure your milk is poured straight from the refrigerator, as cold temperatures allow the proteins to trap air much better than room-temperature liquids.
Using a handheld milk frother or a French press to aerate the cold dairy for about thirty seconds will yield a glossy, thick microfoam that transforms a standard home-brewed caffeine fix into a luxurious cafe-quality experience every single morning.
Sweeteners and flavor syrups to use
Cold foam is significantly enhanced by the addition of sweetness, which helps balance the bitterness of cold brew or espresso.
For a seamless texture, you should always use liquid sweeteners rather than granulated sugar, as crystals will not dissolve in cold dairy and may leave a gritty residue at the bottom of your glass.
Vanilla simple syrup is the most popular choice for a classic finish, but you can easily experiment with caramel, mocha, or seasonal flavors like pumpkin spice.
If you are looking for a more natural approach, maple syrup or agave nectar blend beautifully into the foam without overpowering the coffee’s natural notes.
To take your DIY creation to the next level, try adding a pinch of sea salt or a drop of pure vanilla extract to the mixture before frothing. This small addition enhances the depth of the flavor profile, making the foam taste more professional.
Always whisk your chosen flavorings into the milk before you start aerating to ensure an even distribution throughout.
Non-dairy and vegan milk alternatives
If you are following a plant-based diet, you can still enjoy a spectacular cold foam by selecting the right dairy-free base. The key is to look for ‘Barista Edition’ plant milks, which are specifically formulated with added stabilizers to mimic the frothing capabilities of dairy.
Oat milk is the top contender for vegan cold foam due to its naturally creamy texture and high carbohydrate content, which helps it hold its shape for a long duration.
Another excellent option is full-fat coconut milk, which provides a tropical twist and a very thick, luxurious consistency that pairs exceptionally well with iced lattes.
While almond milk is a popular low-calorie choice, it tends to produce a thinner, more dissipate foam, so it is often best to blend it with a little cashew milk for added body.
Regardless of which alternative you choose, ensure the liquid is thoroughly chilled before frothing and use a high-speed electric whisk to create the necessary friction for a stable, long-lasting vegan foam topping.
How to make cold foam with a handheld milk frother
Step-by-step instructions for the wand method
To begin making cold foam at home, pour approximately half a cup of cold milk into a tall glass or a specialized frothing pitcher, ensuring you leave ample room for the liquid to expand.
Submerge the head of your handheld milk frother just below the surface of the milk and turn it on. Hold the device at a slight angle to create a powerful vortex, which helps incorporate air efficiently.
As the volume begins to increase and the texture thickens, slowly move the wand deeper into the liquid to ensure the entire mixture is aerated. Continue this process for about thirty to forty seconds until the foam is dense and stiff enough to hold its shape.
For the best results, use refrigerated non-fat milk or oat milk, as these often hold their structure better when frothed cold. Once finished, gently tap the pitcher on the counter to break any large bubbles, then pour the velvety foam over your favorite iced coffee or cold brew immediately.
Tips for achieving a thick velvety texture
The secret to café-quality cold foam lies in the temperature of your ingredients and the fat content of the liquid. Always start with chilled milk directly from the refrigerator, as colder proteins stabilize the air bubbles more effectively than room-temperature options.
If you prefer a richer flavor, try a combination of heavy cream and milk, often referred to as a sweet cream base. Adding a teaspoon of simple syrup or vanilla extract before frothing can also improve the stability of the foam while enhancing the taste.
Another professional tip is to ensure your frother has fresh batteries or a full charge; a high rotation speed is essential for creating those micro-bubbles that result in a smooth, velvety mouthfeel rather than large, soapy bubbles.
If the foam feels too thin, continue frothing for an additional fifteen seconds while moving the wand up and down to catch more air. Consistency is key, so practice your technique to find the perfect angle for your specific frother model.
Cleaning your frother after use
Maintaining your handheld frother is essential for hygiene and ensuring the longevity of the motor and whisk attachment. Immediately after you finish frothing, rinse the stainless steel whisk head under warm running water to prevent milk proteins from drying and hardening on the coils.
For a deeper clean, fill a glass with warm, soapy water and submerge the whisk, turning the device on for a few seconds to let the centrifugal force scrub the internal gaps of the coil. Rinse once more with clean water and pat dry with a soft cloth.
It is crucial to remember that the handle, which contains the motor and batteries, is typically not waterproof; therefore, you should never submerge the entire unit or place it in the dishwasher. Simply wipe the handle with a damp cloth if any splashes occur.
Storing your frother in a dedicated stand or a clean drawer will keep the whisk from bending, ensuring that your next batch of homemade cold foam is just as perfect as the last.
Best ways to make cold foam without a frother
Using a French press for dense foam
One of the most effective ways to achieve a professional-grade texture without an electric frother is by using a standard French press. To begin, pour your chilled milk and chosen sweetener into the carafe, filling it no more than one-third of the way to allow room for expansion.
Insert the plunger and perform rapid, short pumps for approximately thirty to forty-five seconds. This repetitive motion forces air into the liquid, creating a velvety, micro-foam consistency that is nearly identical to what you would find at a high-end coffee shop.
The fine mesh screen of the plunger is the secret to breaking down air bubbles into a uniform, dense structure that sits perfectly atop iced coffee. Once the volume has doubled, remove the lid and gently swirl the carafe to incorporate any remaining large bubbles.
This method is highly recommended for those who prioritize a thick, pourable cream that holds its shape for an extended period without quickly dissolving into the drink.
The mason jar shake method
If you are looking for the simplest approach that requires zero specialized equipment, the mason jar shake method is your best solution.
Start by pouring cold heavy cream, milk, and a splash of vanilla syrup into a clean glass jar, ensuring there is plenty of empty headspace at the top for the foam to build.
Seal the lid tightly to prevent any messy leaks and shake the jar vigorously with both hands for at least sixty seconds. The kinetic energy from shaking introduces air into the fat molecules, resulting in a light and airy topping that provides a delightful mouthfeel.
While this technique produces larger bubbles than a French press, it is incredibly efficient for a quick morning caffeine fix. For the best results, use well-chilled ingredients directly from the refrigerator, as cold fats stabilize much better during the aeration process.
Once the mixture looks frothy and has significantly increased in volume, simply remove the lid and spoon the cloud-like foam over your favorite cold brew or iced latte.
Making foam in a high-speed blender
For those preparing multiple servings at once, a high-speed blender is a fantastic tool for creating consistent cold foam in seconds. Place your milk, cream, and desired flavorings into the blender pitcher and secure the lid firmly.
Start the machine on the lowest speed setting and gradually increase it for about twenty seconds until you see the liquid transform into a thick, voluminous peak. Using a blender is particularly effective because the powerful blades create a high-vortex environment that emulsifies the ingredients more thoroughly than manual shaking.
This method works exceptionally well with plant-based milks like oat or almond, which often require more mechanical force to develop a stable froth. To ensure the foam remains cold and crisp, avoid blending for too long, as the friction from the blades can generate unwanted heat.
When finished, you will have a smooth and glossy foam ready to be drizzled over your beverages. This approach is perfect for hosting guests or prepping a large batch of sweet cream to keep in the fridge for later use.
How to make Starbucks copycat vanilla sweet cream cold foam

The secret ratio of heavy cream to milk
To achieve that signature velvety texture found in a Starbucks copycat vanilla sweet cream cold foam, you must master the precise balance of dairy. The gold standard for this recipe is a 2:1 ratio of heavy whipping cream to 2% milk.
This specific combination ensures the foam is thick enough to sit elegantly on top of your cold brew without immediately dissolving, yet fluid enough to sip through a straw.
While it might be tempting to use only heavy cream, the addition of 2% milk is the essential secret to creating air bubbles that hold their shape during the frothing process.
When you use a handheld milk frother, you should aim for a consistency that resembles melted vanilla ice cream or wet paint. If your mixture feels too stiff, a small splash of extra milk can loosen it up.
Always ensure your dairy products are ice-cold before you begin mixing, as cold molecules bond more effectively to trap air, resulting in a professional-grade microfoam that rivals any coffee shop experience.
Adding vanilla bean paste vs extract
Flavoring your cold foam is where you can truly customize the luxury of your homemade beverage. While standard vanilla extract is the most convenient option for everyday use, switching to vanilla bean paste provides a superior flavor profile and those beautiful, tiny black specks seen in high-end desserts.
The paste contains the actual seeds from the pod, offering a more intense, floral aroma that permeates the cream more effectively than liquid extract alone. If you prefer a smoother, more subtle sweetness, a high-quality pure vanilla extract is perfectly sufficient and blends seamlessly into the milk and cream mixture.
To mimic the Starbucks sweetness level, you should also incorporate about two tablespoons of vanilla simple syrup alongside your chosen flavoring agent. This ensures the sweetness is evenly distributed throughout the foam.
Regardless of which option you choose, always whisk the flavoring into the dairy before you start frothing to ensure every sip of your cold foam is consistently infused with that rich, comforting vanilla essence that defines the classic sweet cream experience.
Storing leftover sweet cream in the fridge
One of the best parts about making this vanilla sweet cream at home is that you can prepare a larger batch in advance to save time during your morning routine.
You should store any un-frothed liquid in an airtight glass jar or a sealed carafe to maintain its freshness and prevent it from absorbing other odors in your refrigerator.
When kept at a consistent cold temperature, the sweet cream mixture will typically stay fresh for up to five days, or until the expiration date of your dairy products.
It is important to note that you should only froth the amount you plan to use immediately; frothing the entire batch at once will cause it to lose its airy structure over time.
Before using your chilled leftovers, give the container a gentle shake or stir to reintegrate the vanilla syrup and fats that may have settled at the bottom.
This ensures that every time you are ready for a treat, you have a perfectly balanced base ready to be whipped into a cloud-like topping for your favorite iced coffee or cold brew.
Creative cold foam flavor variations
How to make salted caramel cold foam
To create a decadent salted caramel cold foam at home, start by combining two tablespoons of heavy cream with one tablespoon of 2% milk in a small glass.
The secret to the perfect flavor profile is adding one tablespoon of high-quality caramel syrup and a generous pinch of fine sea salt. Use a handheld milk frother to aerate the mixture until it doubles in volume and achieves a thick, velvety consistency that holds its shape.
For those who prefer a deeper flavor, you can drizzle extra caramel sauce along the inner rim of your glass before pouring. This variation works exceptionally well over cold brew or iced lattes, providing a perfect balance of sweet and savory notes.
By adjusting the salt content, you can customize the intensity to your liking. Ensure your ingredients are chilled before frothing to maintain the structural integrity of the bubbles, resulting in a professional-grade topping that rivals any coffee shop specialty drink.
Seasonal pumpkin spice and cinnamon recipes
Embrace the flavors of autumn by crafting a pumpkin spice cold foam that transforms your standard iced coffee into a seasonal treat. Begin with your base of heavy cream and milk, then whisk in one tablespoon of pumpkin puree and a teaspoon of maple syrup for natural sweetness.
Incorporate a blend of ground cinnamon, nutmeg, and cloves to achieve that signature warm spice profile. Froth the mixture until it becomes light and airy, ensuring the puree is fully integrated for a smooth texture.
If you want a simpler cinnamon version, omit the pumpkin and use a splash of cinnamon dolce syrup instead. These spiced foams are excellent when paired with vanilla-based iced drinks or plain black cold brew.
Garnishing the top with an extra dusting of cinnamon adds a professional touch and enhances the aromatic experience. This homemade method allows you to enjoy festive flavors year-round without relying on artificial store-bought creamers or expensive seasonal menu markups.
Chocolate and mocha foam for dessert coffees
For a rich, dessert-like finish to your morning caffeine routine, chocolate cold foam is an effortless yet sophisticated choice. Combine your cream base with one tablespoon of chocolate syrup or a teaspoon of high-quality cocoa powder and a touch of powdered sugar.
If you prefer a mocha flavor, add a tiny splash of concentrated coffee or espresso to the mix. Froth the liquid until it reaches a thick, mousse-like consistency that sits perfectly atop your beverage.
To elevate the presentation, you can top the foam with chocolate shavings or a light cocoa dusting. This variation is particularly delicious on iced mochas or even as a topping for iced white chocolate mochas for a double-chocolate effect.
Using low-fat milk alongside heavy cream ensures the foam remains light enough to sip while staying rich enough to feel indulgent. Experimenting with dark chocolate cocoa powder can provide a more sophisticated, less sweet alternative for those who enjoy a deeper, more complex cocoa flavor profile.
Tips for perfect cold foam every time
Why temperature matters for foam stability
To achieve a professional-grade topping, you must understand that cold milk creates better structure than room-temperature liquids. The proteins in dairy are more stable when chilled, allowing them to trap air bubbles efficiently without collapsing under their own weight.
If your milk sits out on the counter even for a few minutes, the fat globules begin to soften, which prevents the foam from holding those stiff, velvety peaks you see at high-end coffee shops.
For the best results, always pull your milk or heavy cream directly from the refrigerator right before you begin frothing. Using a chilled frothing pitcher can also provide an extra thermal barrier, ensuring the friction from the handheld frother motor doesn’t warm the liquid too quickly.
This thermal control is the secret to ensuring your foam stays sitting beautifully on top of your beverage rather than immediately melting into the coffee. Consistency is key, so keep everything ice-cold until the very last second for a dense, cloud-like texture every single time you brew.
How to fix runny or flat foam
If you find your cold foam is too liquid, the most common culprit is an incorrect ratio of fat to protein.
For the perfect Starbucks-style consistency, try mixing two parts heavy whipping cream with one part milk; the higher fat content provides the necessary structural integrity to keep the foam thick and luscious.
If it still looks flat, ensure you are positioning your frother just below the surface to incorporate enough air at the start before moving deeper to emulsify the mixture.
Another quick fix for runny foam is to add a splash of flavored syrup or a pinch of powdered sugar, as the sugar molecules help stabilize the protein bonds during the aeration process.
If bubbles are too large and popping quickly, give the pitcher a firm tap on the counter and a gentle swirl to break down the large bubbles into a microfoam.
This adjustment transforms a watery mess into a glossy, professional finish that holds its shape for several minutes, providing that luxurious mouthfeel you crave in a homemade specialty drink.
Best coffee drinks to top with cold foam
While you can technically add cold foam to anything, it truly shines when paired with iced beverages like cold brew or iced americanos.
The density of the foam allows it to sit on top of the dark coffee, creating a beautiful visual contrast and a layered flavor experience where you sip the strong coffee through the sweet, creamy topping.
An iced vanilla latte topped with salted caramel cold foam is a fan favorite, providing a multidimensional texture that evolves as you drink. You can also experiment with nitro cold brew, where the natural creaminess of the nitrogen bubbles complements the velvety foam perfectly.
Avoid using cold foam on piping hot drinks, as the heat will cause the cold aeration to dissipate almost instantly, losing the signature thick texture that makes it special. Instead, stick to chilled bases or even iced matcha lattes for a refreshing twist.
By choosing the right base, you ensure that your handcrafted foam remains the star of the show, providing a decadent, cafe-quality finish to your daily caffeine routine at home.
Frequently Asked Questions
What are the basic ingredients needed for cold foam?
To make a standard cold foam at home, you typically need non-fat milk, 2% milk, or a heavy cream and milk blend, along with a sweetener like simple syrup or vanilla. Non-fat milk is often preferred because it contains a higher protein-to-fat ratio, which helps create a more stable, airy foam.
What is the easiest way to froth cold foam without a machine?
The simplest manual method is using a handheld milk frother or a French press. For a French press, pour your cold milk mixture into the carafe and pump the plunger up and down rapidly for about 30 seconds until the volume doubles and becomes thick.
Can I make cold foam using a glass jar?
Yes, you can make a quick version by pouring milk and sweetener into a mason jar, sealing the lid tightly, and shaking it vigorously for 30-60 seconds. While the bubbles may be slightly larger than those from a frother, it still creates a delicious topping for iced coffee.
How do I make Starbucks-style Vanilla Sweet Cream Cold Foam?
To replicate the Starbucks recipe, mix heavy cream, 2% milk, and vanilla syrup in a 3:2:1 ratio. Froth this mixture until it reaches a thick, pourable consistency that sits on top of your iced coffee rather than sinking immediately.
Which dairy-free milks work best for homemade cold foam?
Oat milk and soy milk are the best plant-based options because they have the creamy consistency and protein structure required to hold bubbles. Look for ‘Barista Edition’ versions of these milks, as they are specifically formulated to froth better than standard versions.
How long does homemade cold foam last in the fridge?
Cold foam is best enjoyed immediately after frothing because the air bubbles will eventually dissipate. However, you can store the un-frothed cream mixture in a sealed container in the refrigerator for up to 3-5 days and froth individual portions as needed.
Conclusion
Creating coffee shop quality cold foam at home is both simple and rewarding. By choosing the right milk and using a handheld frother or blender, you can achieve that perfect velvety texture every time. Whether you prefer classic vanilla or seasonal flavors, mastering this technique allows you to elevate your morning routine while saving money. Now that you have the tools and tips, start experimenting with different combinations and enjoy your professional homemade brew.