How To Make Cold Press Coffee
Making smooth, low-acid cold press coffee at home is easier than you think. If you are tired of bitter brews and expensive coffee shop runs, you have come to the right place. We will cover the ideal coffee-to-water ratio and the best steeping techniques to get you results fast. Let’s dive into how to make the perfect cold press coffee.
What is cold press coffee?
The difference between cold press and iced coffee
Understanding the distinction between these two brewing methods is essential for mastering how to make cold press coffee at home. Traditional iced coffee is simply standard drip coffee brewed with hot water and then poured over ice, which often leads to a diluted flavor profile and increased bitterness.
In contrast, cold press coffee uses a slow extraction process involving coarse grounds steeped in room temperature or cold water for 12 to 24 hours. This immersion technique ensures that you never expose the delicate beans to high temperatures, preventing the release of harsh oils.
When you learn how to make cold press coffee, you are essentially creating a robust coffee concentrate that maintains its structural integrity even when diluted with water or milk.
By avoiding the rapid cooling process used in iced coffee, the cold press method preserves a smoother mouthfeel and complex flavor notes that would otherwise be lost.
Choosing the cold press method allows for a more consistent and refreshing beverage that stays fresh in your refrigerator for up to two weeks.
Why cold brew tastes less acidic
One of the most significant benefits of learning how to make cold press coffee is the dramatic reduction in acidity, which makes it much gentler on the stomach. Science shows that heat is the primary catalyst for releasing the acidic oils and compounds found in coffee beans.
Because the cold press method relies entirely on time rather than temperature, these acidic components remain trapped within the grounds rather than leaching into your final cup. Research indicates that cold pressed coffee can be up to 67% less acidic than traditional hot-brewed coffee.
This results in a naturally sweet, mellow flavor profile that highlights chocolatey and nutty undertones without the sour bite. For individuals with sensitive digestive systems or acid reflux, switching to a cold press routine is a perfect solution.
By using a consistent coarse grind and filtered water, you can achieve a velvety finish that requires less sugar or cream to mask bitterness. This chemical difference is why cold brew remains a favorite for those seeking a clean and balanced caffeine experience that focuses on natural sweetness.
Caffeine content in cold press concentrate
When you follow the steps for how to make cold press coffee, the result is a highly concentrated liquid that packs a significant caffeine punch.
Because the grounds are in contact with water for an extended period, the extraction of caffeine is much more thorough than in a quick two-minute drip brew. Most cold press recipes utilize a higher coffee-to-water ratio, typically around 1:4 or 1:8, creating a potent energy-boosting base.
It is important to remember that this concentrate is designed to be diluted; drinking it straight can provide a much higher dose of caffeine than a standard cup of joe. To manage your intake effectively, you should mix your concentrate with equal parts water, milk, or a plant-based alternative.
This versatility allows you to customize the strength of your drink based on your personal energy needs. Because the caffeine is extracted slowly, many drinkers report a more sustained energy lift without the jittery crash often associated with hot espresso.
Mastering the ratio is the final step in perfecting your homemade cold press coffee for a productive daily routine.
Essential equipment for home brewing
Best types of containers to use
Selecting the right vessel is the foundational step in learning how to make cold press coffee effectively.
For the best results, you should prioritize large glass carafes or mason jars because glass is non-reactive and will not leach unwanted metallic or plastic flavors into your concentrate during the long sixteen-hour steeping process.
If you are brewing in bulk, a food-grade plastic bucket is a functional alternative, provided it is BPA-free and specifically rated for culinary use.
It is essential that your chosen container has a wide-mouth opening, which allows for easy stirring of the grounds and simplifies the cleanup process once the brewing cycle is complete.
Furthermore, ensure the container features an airtight seal or lid to prevent the coffee from absorbing odors from other items in your refrigerator.
Using a dedicated cold brew pitcher with an integrated core can also streamline the experience by keeping the grounds contained while the water extracts the rich, chocolatey notes from your beans.
Choosing the right filter system
The filtration stage is where you define the texture and clarity of your final beverage. To achieve a crisp, sediment-free cup, a dual-filtration method is often recommended by professionals.
Start by using a stainless steel mesh sieve to remove the primary bulk of the coarse grounds, then pass the liquid through a high-quality paper filter or a fine nut milk bag to catch the microscopic silty particles.
Paper filters are particularly effective at absorbing oils, resulting in a cleaner flavor profile, whereas metal filters allow more oils to pass through for a creamier mouthfeel. If you prefer a more sustainable approach, a reusable cloth filter offers a middle ground, providing excellent clarity without the waste of disposables.
Regardless of the material, always pre-rinse your filters with fresh water before use to eliminate any papery or dusty aftertaste. This ensures that the natural sweetness and low acidity of your cold press coffee remain the focal point of the drink.
Why a burr grinder matters
The secret to a successful cold press extraction lies almost entirely in the consistency of your grind size. Using a burr grinder is non-negotiable because it crushes the beans into uniform particles, unlike blade grinders that create a dusty mix of boulders and fine powder.
For cold brew, you must achieve an extra-coarse grind that resembles sea salt or cracked peppercorns. If your grind is too fine, the water will over-extract the beans, leading to a bitter, muddy flavor that ruins the smooth profile cold brew is famous for.
Additionally, fine particles can clog your filters, making the straining process incredibly frustrating and messy. A burr grinder allows for precise micro-adjustments, ensuring that every batch you brew has the same reliable strength and clarity.
Investing in a quality burr mill ensures that the surface area is optimized for the slow, cold-water immersion process, allowing the water to gently pull out the nuanced sugars and aromatics without the harshness associated with unevenly ground coffee beans.
Choosing the best coffee beans

Why coarse grind size is critical
When learning how to make cold press coffee, the texture of your beans is the most influential factor in your final result. You must use a coarse, sea salt-like grind size to ensure a clean and balanced extraction.
Because cold brew relies on a long immersion time—typically twelve to twenty-four hours—a fine grind will over-extract, leading to an unpleasantly bitter and muddy concentrate. Furthermore, coarse grounds act as a natural filter, allowing the water to flow through the mesh or paper more easily during the final straining process.
If the particles are too small, they will clog your filter and leave behind a silty residue that ruins the velvety mouthfeel associated with high-quality cold press. Investing in a burr grinder is the best way to achieve the necessary consistency.
By keeping the surface area of the coffee particles large, you ensure that the water extracts the sweet, chocolatey notes slowly and evenly without pulling out harsh tannins or unwanted acidity.
Light roast vs. dark roast for cold brew
Selecting the right roast profile is a matter of personal preference, but understanding how temperature affects flavor will help you choose the best beans. Many professionals recommend dark roasts for cold press because the cold extraction process highlights rich, low-acid notes like cocoa, caramel, and toasted nuts.
Since cold water does not extract the acidic compounds as effectively as hot water, dark roasts lose their potential for smokiness and instead become incredibly smooth and sweet. On the other hand, using a light roast can result in a refreshing, tea-like beverage that emphasizes floral and fruity characteristics.
However, light roasts may require a longer steeping time to fully develop their complex flavors. If you are a beginner, look for a medium-to-dark blend specifically labeled for cold brew to guarantee a bold body that holds up well when diluted with milk or ice.
Experimenting with different origins will reveal how the cold immersion method transforms the unique profile of each bean variety.
Freshness and water quality tips
To elevate your cold press coffee from average to exceptional, you must prioritize the quality of your raw ingredients. Always start with freshly roasted whole beans and grind them immediately before you begin the steeping process.
Coffee begins to oxidize and lose its aromatic oils the moment it is ground, so using pre-ground coffee often results in a flat or stale flavor profile. Additionally, since cold brew is composed of roughly 98% water, the purity of your water source is vital.
Avoid using tap water if it has a strong chlorine taste or high mineral content, as these elements will interfere with the delicate oils of the coffee.
Instead, use filtered or bottled spring water to ensure a crisp, clean finish that allows the natural sweetness of the beans to shine through. By combining high-quality, freshly ground beans with purified water, you create the perfect environment for a slow extraction that yields a concentrated, flavorful syrup.
This attention to detail ensures your homemade cold brew rivals any specialty coffee shop.
Step-by-step cold press coffee recipe
Measuring your coffee-to-water ratio
To begin your cold press journey, you must first establish the perfect balance between your grounds and your liquid. For a versatile and potent cold brew concentrate, we recommend a standard ratio of 1:4, which translates to one cup of coarsely ground coffee for every four cups of filtered water.
If you prefer a lighter, ready-to-drink beverage right out of the jar, you might opt for a 1:8 ratio instead. It is crucial to use a consistent coarse grind—similar in texture to sea salt or breadcrumbs—to prevent the final brew from becoming overly bitter or cloudy.
Utilizing a kitchen scale for precise weight measurements will yield the most consistent results across different batches.
By starting with high-quality, freshly roasted beans and measuring them accurately, you ensure that the extraction process begins on a solid foundation, allowing the natural sweetness and low acidity of the cold press method to shine through in every single sip you take.
Mixing and steeping instructions
Once your ingredients are measured, place the coarse grounds into a large glass jar or a dedicated cold brew carafe. Pour your filtered, room-temperature water over the grounds in a slow, circular motion to ensure every particle is saturated.
Use a long spoon to gently stir the mixture, breaking up any dry clumps or ‘rafts’ that form on the surface. Unlike traditional hot coffee, this method relies entirely on time rather than heat to extract flavor.
Cover the container tightly with a lid or plastic wrap to prevent the coffee from absorbing any stray odors from your refrigerator.
Allow the mixture to steep for 12 to 24 hours at room temperature or inside the fridge; a longer steep time generally results in a deeper, more robust flavor profile.
Avoid the temptation to agitate the jar frequently during this period, as a still steeping environment helps maintain a clean, sediment-free profile while the water slowly draws out the rich chocolatey and nutty notes.
How to strain and filter the concentrate
After the steeping period is complete, the final step is to separate the liquid from the spent grounds to achieve a smooth finish. Begin by pouring the mixture through a fine-mesh sieve to catch the largest particles.
For a truly professional, sediment-free result, perform a second pass by lining the sieve with a paper coffee filter, cheesecloth, or a nut milk bag. This secondary filtration step is essential for removing fine silts that can cause a gritty mouthfeel or a muddy appearance.
Let the liquid drip through naturally without squeezing the filter, as pressing on the grounds can force bitter tannins into your concentrate.
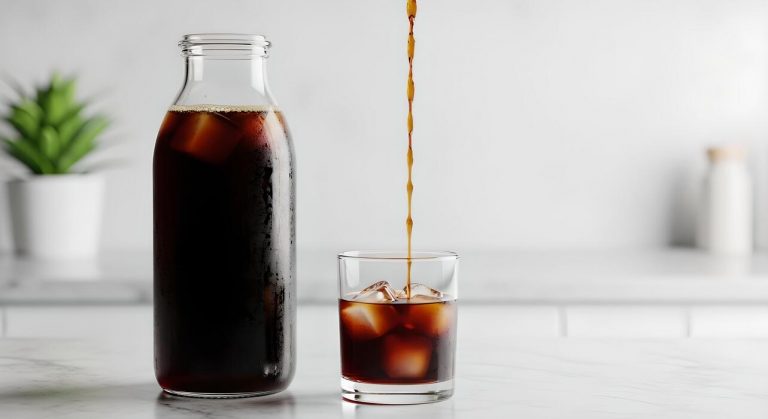
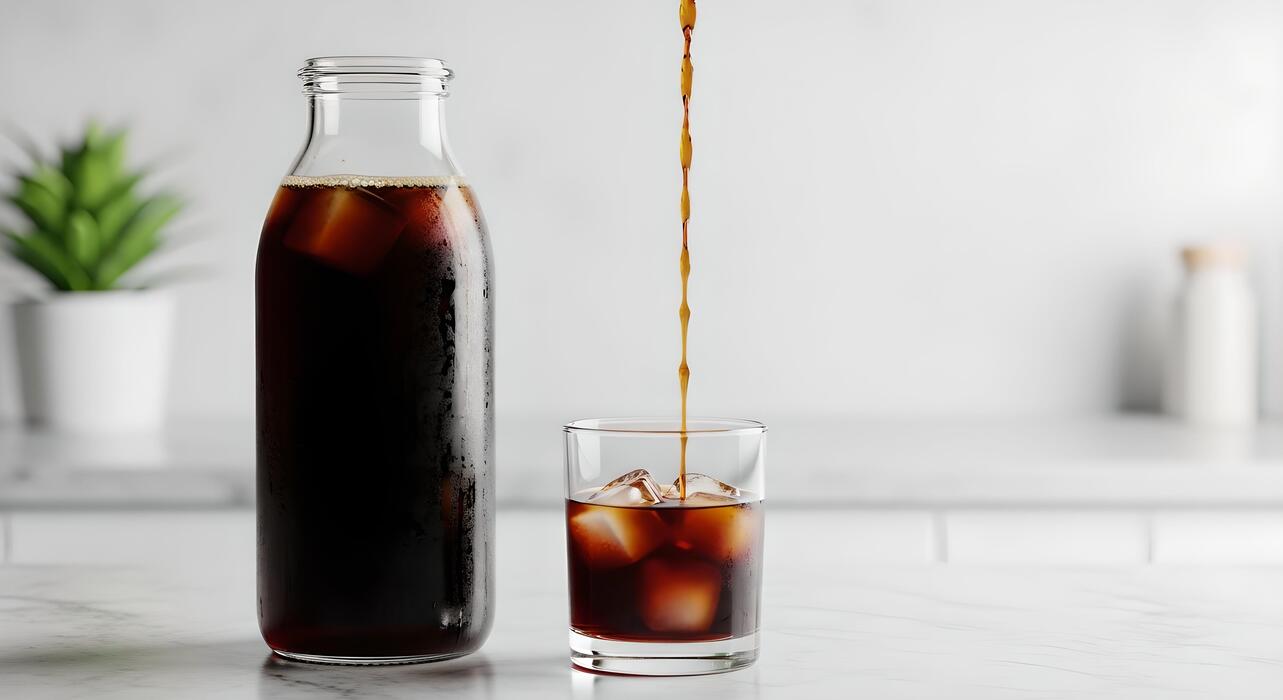
Once fully strained, you will be left with a rich, velvety coffee concentrate that can be stored in an airtight glass bottle in the refrigerator for up to two weeks.
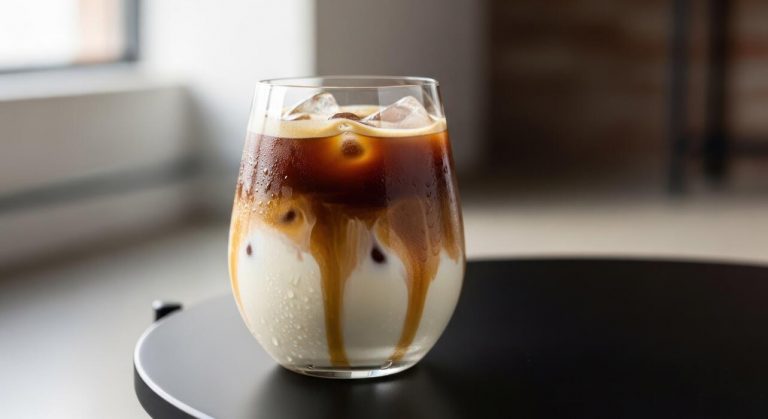
To serve, simply dilute your cold press with equal parts water or milk over ice, adjusting the strength to your personal preference for the ultimate refreshing caffeine kick.
How to store and dilute your brew

Proper refrigeration techniques
Once your filtration process is complete, you must transfer your cold press concentrate into a clean, airtight glass container to preserve its delicate flavor profile.
Using glass, such as a mason jar or a specialized carafe, is highly recommended because it does not leach chemicals or retain odors from previous beverages like plastic containers often do. Before pouring the brew, ensure the vessel is completely dry and sterilized to prevent any bacterial growth.
Seal the lid tightly to minimize oxygen exposure, which is the primary cause of flavor degradation and oxidation in coffee.
Store the container in the main body of the refrigerator rather than the door; the door area experiences frequent temperature fluctuations every time it is opened, which can negatively impact the stability of the concentrate.
Keeping the brew at a consistent, cold temperature ensures that the rich, chocolatey notes remain intact while preventing the development of any sour or metallic off-flavors over time.
How long cold press coffee stays fresh
The shelf life of your cold brew depends heavily on whether you have already diluted it or kept it in its concentrated form. A pure, undiluted cold press concentrate will typically stay fresh for up to two weeks when stored properly in a sealed glass container within the refrigerator.
During the first seven days, the flavor remains at its absolute peak, offering the smoothest profile. After the one-week mark, you may notice a gradual decline in aromatic intensity, though it remains perfectly safe to consume.
However, if you have already mixed the concentrate with water or milk, the shelf life drops significantly to about two to three days maximum.
It is always best practice to smell the brew before using it; if you detect any hint of fermentation, mold, or a distinct vinegary scent, discard it immediately. To maximize longevity, always use filtered water during the initial brewing process to reduce impurities that might accelerate spoilage.
Mixing ratios for water and milk
Finding the perfect balance for your final drink involves understanding that cold press is a highly potent concentrate meant to be diluted. For a standard cup of black coffee, a 1:1 ratio of concentrate to water is the most common starting point for most home brewers.
If you prefer a bolder, more caffeinated kick, you might opt for a 2:1 ratio, whereas those sensitive to strength may prefer 1:2. When preparing a latte-style beverage, replace the water with your choice of dairy or plant-based milk using the same 1:1 proportions.
Because cold brew is naturally low in acidity, it pairs exceptionally well with creamy oat milk or almond milk, which highlights its natural sweetness. If you plan on serving your coffee over ice, remember that the melting cubes will further dilute the mixture.
In this specific scenario, consider using slightly more concentrate or even making coffee ice cubes to ensure your beverage remains flavorful and robust from the first sip to the very last drop.
Common cold brew mistakes to avoid
Fixing bitter or sour flavors
If your cold press coffee tastes unpleasantly sharp or overly dull, you are likely dealing with an extraction imbalance. To achieve that signature smooth profile, you must balance your coffee-to-water ratio meticulously, typically aiming for a 1:4 or 1:5 concentrate.
A sour taste usually indicates under-extraction, often caused by using water that is too cold or not allowing enough time for the compounds to dissolve. Conversely, bitterness stems from over-extraction or using low-quality beans.
To fix this, always use filtered water to ensure no chlorine or mineral off-notes interfere with the natural sweetness of the bean. Additionally, ensure you are thoroughly saturating all grounds at the start of the process to prevent dry pockets that lead to uneven brewing.
Adjusting your steep time by just an hour or two can make a massive difference in the final clarity and flavor profile of your brew, transforming a mediocre jar of coffee into a professional-grade beverage you can enjoy all week long.
The dangers of over-steeping
Patience is a virtue when learning how to make cold press coffee, but leaving your grounds in water for too long is a recipe for disaster.
While a standard brew takes 12 to 24 hours, exceeding the 24-hour mark starts to extract woody, astringent tannins that ruin the mellow flavor profile.
Many beginners think more time equals more caffeine or strength, but in reality, you are simply pulling out organic materials that should remain in the trash. Once the peak flavor is reached, strain your coffee immediately to stop the chemical reaction.
If you find your schedule makes it difficult to strain on time, consider brewing in the refrigerator to slow down the extraction process slightly.
Remember that cold brew is a concentrate; you can always dilute a strong brew later with water or milk, but you can never remove the harsh, bitter notes caused by over-steeping.
Setting a precise timer is the easiest way to ensure your batch remains consistently delicious, sweet, and low in acidity every single time.
Why you should never use fine grounds
The most critical technical error in cold press preparation is using a grind size intended for drip machines or espresso. You must use an extra-coarse grind resembling sea salt or peppercorns to allow water to flow freely between the particles.
Fine grounds provide too much surface area, which leads to rapid over-extraction and a muddy texture that is nearly impossible to filter out. When you use fine sediment, the result is often a cloudy, gritty liquid that leaves a dusty film on the palate.
Furthermore, fine particles can clog your mesh filter or cheesecloth, making the straining process a messy and frustrating ordeal. By sticking to a coarse setting, you ensure that the water extracts the oils and caffeine slowly and evenly over many hours.
If you do not have a quality burr grinder at home, ask your local barista to grind your beans specifically for cold brew. This simple adjustment in particle size is the primary secret to achieving that clean, crisp, and refreshing mouthfeel that characterizes high-quality cold press coffee.
Creative ways to serve cold press coffee
Making cold brew coffee ice cubes
To prevent your refreshing beverage from becoming watery as it sits, one of the most effective solutions is to create cold brew ice cubes. Simply take a portion of your freshly strained concentrate and pour it directly into a clean silicone ice tray.
For an elevated twist, you can drop a single coffee bean or a small pinch of sea salt into each mold before freezing to enhance the natural chocolatey notes of the roast.
Once these cubes are solid, use them to chill your morning glass; as they melt, they release more caffeine and flavor rather than diluting the drink with plain water. This technique is especially helpful if you enjoy sipping your coffee slowly over several hours.
You can also experiment by layering the cubes with a touch of vanilla bean paste or almond milk before they hit the freezer. This simple preparation ensures that your last sip of cold press coffee is just as bold, rich, and flavorful as the very first one you took.
Nitro-style coffee at home
You can replicate the creamy, velvety texture of a professional taproom beverage by creating a nitro-style coffee experience in your own kitchen without expensive equipment. The secret lies in rapid aeration to incorporate tiny bubbles into the liquid.
Pour your cold press concentrate into a high-speed blender or a standard handheld milk frother and pulse for approximately thirty seconds until a thick, micro-foam head develops on the surface.
For an even more authentic result, use a whipped cream dispenser charged with a nitrogen or nitrous oxide cartridge to achieve that signature cascading effect and silky mouthfeel. This process naturally mimics the sweetness of the beans, often reducing the need for added sugars or heavy creamers.
Serve the aerated coffee immediately in a chilled glass to preserve the delicate foam layer. This method transforms a standard cold brew into a luxurious, bubbly treat that feels like a gourmet indulgence, providing a unique texture that highlights the complex, low-acid profile of your carefully steeped cold press grounds.
Flavoring with syrups and spices
Personalizing your cold press coffee is easy when you experiment with infused simple syrups and dry aromatic spices.
Unlike hot coffee, cold brew does not dissolve granulated sugar well, so it is best to prepare a liquid sweetener by simmering equal parts water and sugar with ingredients like cinnamon sticks, lavender, or vanilla.
For a sugar-free alternative, you can stir a pinch of ground cardamom or nutmeg directly into the dry coffee grounds before the steeping process begins; this allows the oils to fuse during the long extraction period for a deeply integrated flavor.
Another creative solution is to muddle fresh mint leaves or a piece of orange zest at the bottom of your glass before adding the ice and concentrate. These small additions provide a bright citrus lift or a cooling finish that complements the earthy depth of the coffee.
By mastering the balance of these botanical elements, you can craft a sophisticated, cafe-quality beverage that caters perfectly to your specific palate and seasonal preferences every single day.
Frequently Asked Questions
What is the best coffee-to-water ratio for cold press coffee?
The standard ratio for a cold brew concentrate is 1:4 (one cup of coffee grounds to four cups of water). If you prefer a ready-to-drink brew that is less intense, you can use a 1:8 ratio.
What grind size should I use for cold press coffee?
You should use a coarse grind, similar to the consistency of sea salt or breadcrumbs. Using a fine grind will result in an over-extracted, bitter flavor and will make the filtering process very difficult.
How long should cold press coffee steep?
The ideal steeping time is between 12 and 24 hours at room temperature or in the refrigerator. Steeping for less than 12 hours may result in a weak flavor, while exceeding 24 hours can lead to woody or bitter notes.
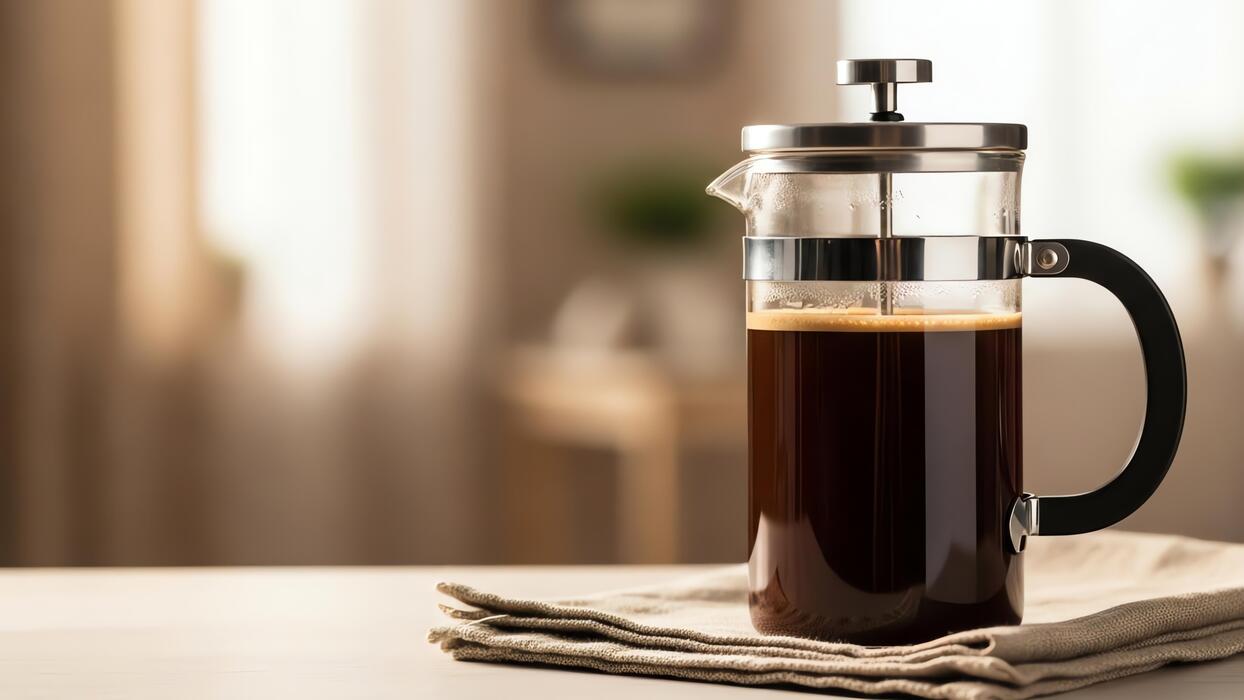
Do I need a special machine to make cold press coffee?
No, you do not need a specialized machine; a simple glass jar or a French press works perfectly. After steeping, you simply need a way to filter the grounds, such as a fine-mesh sieve, cheesecloth, or a paper coffee filter.
How do I serve cold brew once it is finished?
If you made a concentrate, dilute it with equal parts water or milk before serving over ice. You can also customize your drink with sweeteners, syrups, or creamers to suit your taste preferences.
How long does homemade cold press coffee stay fresh?
Stored in an airtight container in the refrigerator, cold brew concentrate can stay fresh for up to two weeks. However, for the best flavor profile, it is recommended to consume it within the first seven days.
Should I steep my cold brew in the fridge or on the counter?
Both methods work, but they yield slightly different results. Room temperature steeping is faster and often extracts more floral notes, while refrigerated steeping is slower and typically produces a smoother, more mellow flavor.
Conclusion
Mastering cold brew coffee at home is a simple yet rewarding process that transforms your morning routine. By focusing on a coarse grind, the right water-to-coffee ratio, and a patient steeping time, you can create a smooth, low-acid concentrate that lasts all week. Don’t be afraid to experiment with different beans and dilution levels to find your perfect flavor profile. Now that you have the tools, it is time to start brewing your own refreshing batches.