How To Make Coffee Concentrate At Home
If you are tired of watery iced coffee or constant coffee shop runs, learning how to make coffee concentrate at home is a total game changer. This simple method allows you to brew a potent, smooth base that stays fresh in your fridge for days. Whether you prefer a bold cold brew or a quick hot cup, we will show you exactly how to master the ratio and process. Read on to discover the easiest way to save time and money.
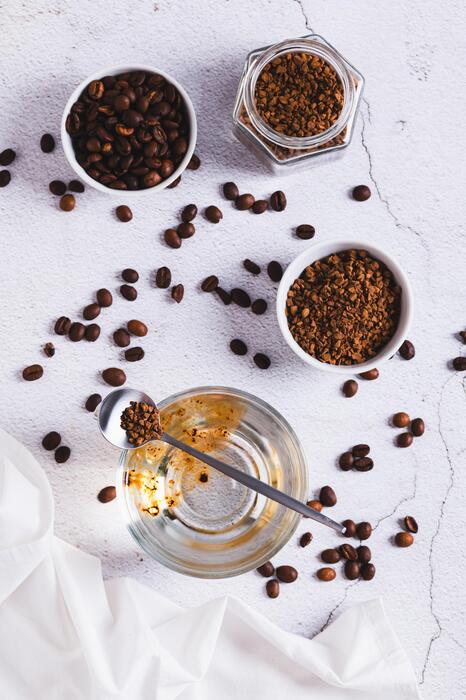
What is coffee concentrate and why you need it
The difference between concentrate and regular cold brew
Understanding the distinction between these two methods is essential for anyone learning how to make coffee concentrate at home.
While standard cold brew is typically prepared at a 1:8 or 1:10 ratio and served immediately, a true coffee concentrate uses a much higher ratio of grounds to water, usually around 1:4. This creates a powerful, syrupy liquid that is far too intense to drink straight.
The primary difference lies in the versatility and chemical potency of the final product. Regular cold brew is a finished beverage, whereas concentrate serves as a versatile base for various drinks.
By utilizing a longer steeping time of 12 to 24 hours, you extract a dense profile of flavors and caffeine that remains stable even when diluted.
This condensed format allows you to control the strength of every cup, meaning you can add hot water for a smooth morning brew or mix it with cold milk for a rich iced latte that never tastes watered down by melting ice cubes.
Benefits of making your own at home
Taking the time to prepare your own concentrate offers significant advantages over buying pre-made bottles from the store. First and foremost, you gain complete control over the bean quality and roast profile, allowing you to select single-origin beans or specific blends that suit your palate.
This DIY approach is also highly cost-effective, as a single bag of beans can produce enough concentrate to last an entire week, saving you substantial money compared to daily cafe visits.
Furthermore, homemade concentrate is a massive time-saver for busy mornings; because the extraction is already done, you can prepare a gourmet beverage in under sixty seconds by simply pouring and diluting.
You also eliminate the need for specialized equipment, as a simple mason jar and a fine-mesh strainer are all you need to achieve professional results.
By making it yourself, you ensure there are no added preservatives or artificial flavorings, resulting in a cleaner, fresher, and more personalized caffeine experience that perfectly fits your lifestyle and taste preferences.
How long homemade concentrate lasts
One of the greatest functional benefits of learning how to make coffee concentrate at home is its impressive shelf life. When stored correctly in an airtight glass container in the refrigerator, your concentrate will maintain its peak flavor and potency for up to two weeks.
The high concentration of solubles acts as a natural stabilizer, though you should always keep the liquid chilled to prevent oxidation and bacterial growth.
It is important to note that you should only dilute the concentrate right before serving rather than mixing it with water for long-term storage, as dilution speeds up the degradation of flavor.
If you find that you have made a larger batch than you can consume within fourteen days, you can freeze the concentrate in ice cube trays to preserve it for months. These coffee cubes are perfect for chilling iced drinks without losing any strength.
Always perform a quick scent check before use; if the aroma shifts from chocolatey to sour, it is time to brew a fresh batch to ensure quality.
Essential tools and ingredients for the perfect batch
Choosing the right coffee beans and roast level
To craft a superior coffee concentrate, your choice of beans acts as the foundation for the entire flavor profile.
While you can technically use any variety, medium to dark roasts are generally preferred because they possess lower acidity and more robust, chocolatey notes that hold up well during the long extraction process.
Look for freshly roasted whole beans rather than pre-ground options to ensure the volatile aromatic compounds are preserved until the moment you brew. Specialty beans from regions like Brazil or Sumatra often provide the earthy, nutty characteristics that make for a rich concentrate.
Avoid light roasts if you are sensitive to brightness, as the extended steeping time can sometimes over-emphasize acidic fruit notes. By selecting high-quality, specialty-grade Arabica beans, you ensure a smooth finish without the bitterness often found in lower-grade Robusta varieties.
Investing in the right roast level ensures your homemade concentrate tastes professional and balanced every single time you pour a glass.
The importance of a coarse grind size
The secret to a clear, sediment-free coffee concentrate lies almost entirely in the texture of your grounds. You must use a coarse grind size, similar to the consistency of sea salt or cracked peppercorns, to facilitate a slow and even extraction.
If the grind is too fine, the water will over-extract the coffee, resulting in a harsh, bitter liquid that is difficult to filter. Furthermore, fine particles can clog your filter or pass through entirely, leaving a gritty sludge at the bottom of your container.
Using a burr grinder is highly recommended over a blade grinder because it produces uniform particles, which is essential for a consistent flavor profile.
Because the coffee sits in water for twelve to twenty-four hours, the reduced surface area of a coarse grind prevents the brew from becoming overwhelming or astringent.
Achieving the perfect coarse texture ensures that you extract only the desirable oils and flavors while keeping the final concentrate bright, clean, and incredibly smooth.
Water quality and filtration tips
Since coffee is composed of over ninety-eight percent water, the quality of your liquid base is just as critical as the beans themselves.
For the best results, always use filtered or bottled spring water rather than straight tap water, which often contains chlorine, minerals, or fluoride that can distort the delicate flavors of the coffee.
Excessive minerals can lead to a metallic aftertaste, while water that is too soft may fail to extract enough flavor, leaving your concentrate tasting thin. Aim for a neutral pH level to ensure the natural sweetness of the beans shines through.
Additionally, consider your filtration method for the final stage; using a dual filtration process—such as a fine mesh sieve followed by a paper coffee filter—will remove all fine silts and oils for a crisp finish.
Starting with cold or room temperature water is also vital, as hot water changes the chemical extraction process and can introduce unwanted bitterness. Superior water quality guarantees a professional-grade concentrate that stays fresh in your refrigerator.
The best coffee to water ratio for concentrate

Standard ratios for strong concentrate
To achieve a robust coffee concentrate at home, the industry standard is a 1:4 coffee-to-water ratio by weight. This measurement ensures that the finished liquid is potent enough to be diluted without losing its characteristic flavor profile.
For most home setups, using one cup of coarsely ground coffee to four cups of cold filtered water provides a reliable starting point. It is essential to use a coarse grind, similar in texture to sea salt, to prevent over-extraction and bitterness during the long steeping process.
Using a kitchen scale is highly recommended over volumetric measurements because coffee beans vary significantly in density; weighing your ingredients in grams ensures professional-grade consistency every time you brew. This 1:4 ratio creates a syrupy, dense liquid that serves as the perfect base for iced lattes or hot americanos.
By adhering to these precise measurements and using filtered water, you eliminate variables that could compromise the clarity and sweetness of your homemade cold brew concentrate.
How to scale the recipe for large batches
Scaling your coffee concentrate for weekly meal prep is straightforward as long as you maintain your established mathematical proportions. If you decide to move from a small jar to a large dispenser, simply multiply both the coffee and water weight by the same factor to keep the concentration uniform.
For a gallon-sized batch, you would typically use approximately one pound of coffee beans to four quarts of water. Ensure your container is large enough to allow for the expansion of the grounds as they saturate, as coffee can increase in volume significantly once wet.
When working with larger volumes, stirring the mixture thoroughly at the beginning is vital to ensure no dry pockets remain, which would lead to under-extraction. Additionally, consider that larger batches may require a slightly longer filtration time due to the increased sediment.
Using a double-filtration method with a mesh sieve followed by a paper filter will keep your large-scale production crisp, clean, and free of any unwanted sludge or fine particles.
Adjusting strength based on your taste
While the 1:4 ratio is the gold standard, the beauty of making concentrate at home is the ability to customize the intensity to your specific palate.
If you find the result too intense or heavy, you can shift toward a 1:5 or 1:6 ratio for a smoother, ready-to-drink style that requires less dilution.
Conversely, if you plan on mixing your concentrate with heavy creams or flavored syrups, a tighter 1:2 or 1:3 ratio will provide a bold ‘espresso-style’ kick that cuts through dairy easily.
Remember that the steeping time also dictates strength; twelve to eighteen hours at room temperature is usually ideal, but you can shorten or lengthen this window to manipulate the caffeine content and acidity. Always perform a taste test before final filtration.
If the brew tastes weak, let it sit for another two hours. By documenting your specific ratios and steeping times, you can fine-tune the process until you discover the perfect balance of strength, aroma, and mouthfeel for your morning routine.
Step-by-step guide to making coffee concentrate
Mixing and blooming the coffee grounds
To begin your journey toward a perfect home brew, start by selecting a high-quality, coarse-ground coffee that mimics the texture of sea salt. For a standard concentrate, use a 1:4 coffee-to-water ratio, which ensures a bold flavor profile that holds up when diluted later.
Place your grounds into a large glass jar or specialized cold brew carafe. Before drowning the grounds in the full amount of liquid, perform a quick blooming phase by pouring just enough filtered water to saturate the surface.
Stir gently with a wooden spoon to ensure there are no dry pockets hidden at the bottom. This initial step allows trapped carbon dioxide to escape, preventing a sour or overly acidic profile in the finished product.
Once the grounds have expanded and settled, slowly pour in the remaining water in a circular motion. Give it one final, very light stir to ensure a uniform saturation throughout the vessel.
Secure the lid tightly to prevent any outside odors from contaminating the delicate oils during the long extraction process ahead.
Steeping times for room temperature vs. fridge
The duration of your steep is the most critical factor in determining the final strength and smoothness of your concentrate. If you prefer to leave your container on the kitchen counter at room temperature, the extraction process happens more rapidly, requiring a window of 12 to 15 hours.
This method often yields a slightly more floral and bright flavor profile. Conversely, if you choose to steep the mixture inside the refrigerator, the cold environment slows down the chemical reaction significantly.
For a fridge-steeped batch, you should aim for 18 to 24 hours to achieve the desired depth and richness. Leaving the grounds in for longer than 24 hours can result in a bitter, woody taste that ruins the signature smoothness of cold brew.
Always set a timer or mark the container with the start time to avoid over-extraction. Finding your personal sweet spot within these timeframes will allow you to customize the caffeine intensity and body of your morning cup to your exact liking every time.
How to filter the concentrate without the mess
Filtering is often the most daunting part of the process, but using the right tools ensures a sediment-free finish without the cleanup headache. Start by setting a fine-mesh sieve over a clean pitcher or bowl.
Line the sieve with a dampened paper filter or a double layer of cheesecloth; pre-wetting the filter prevents it from absorbing the precious coffee oils and speeds up the flow. Slowly pour the steeped mixture through the filter, letting gravity do the work rather than forcing the liquid through.
If the flow slows down due to fine silt, resist the urge to squeeze the filter, as this releases bitter tannins and cloudiness into your concentrate. For the cleanest results, you may want to perform a secondary pass through a fresh filter to remove any remaining micro-particles.
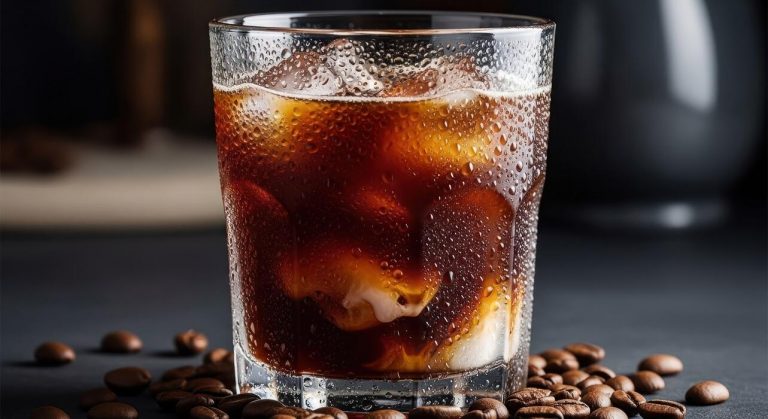
Once the liquid has finished dripping, discard the spent grounds into your compost bin. Transfer the final, crystal-clear liquid into a glass bottle for storage. This mess-free technique leaves you with a versatile base that stays fresh in the fridge for up to two weeks.
Common mistakes to avoid when brewing

Why you should never use fine grounds
When making coffee concentrate at home, the most critical error is using a fine or medium-fine grind size typically reserved for drip machines or espresso.
Because concentrate involves an extended steeping time of twelve to twenty-four hours, fine particles will over-extract almost instantly, leaving you with a muddy and unpleasant result. To achieve a clean and smooth profile, you must always use a coarse, sea-salt consistency for your beans.
Fine grounds also create a significant filtration challenge; they tend to clog paper filters or pass through metal mesh, resulting in a gritty texture in your final cup. By sticking to a consistent coarse grind, you ensure that the water saturates the coffee evenly without pulling out harsh compounds.
This approach preserves the delicate flavor notes of the bean while making the final straining process much faster and more efficient. Using the correct grind is the foundation of a professional-grade homemade concentrate that remains versatile for both hot and iced drinks.
Avoiding over-extraction and bitterness
A common mistake many beginners make is leaving the coffee grounds to steep for too long, often exceeding twenty-four hours in hopes of a stronger brew. However, extended steeping leads to severe over-extraction and a sharp, bitter aftertaste that even milk or sugar cannot fully mask.
To maintain a balanced flavor, you should aim for a sweet spot of sixteen to eighteen hours at room temperature. If you prefer a slower extraction, you can steep it in the refrigerator for up to twenty-four hours, but no longer.
Additionally, avoid stirring the mixture aggressively during the steeping process; a gentle initial stir to ensure all grounds are wet is sufficient. Agitating the grounds too much can release excess tannins, which contribute to an astringent mouthfeel.
By monitoring your steeping time closely and minimizing agitation, you produce a concentrate that is rich, bold, and naturally sweet. This disciplined approach prevents the concentrate from becoming an undrinkable, acidic mess that ruins your morning routine.
Proper storage containers to prevent oxidation
Once you have successfully brewed and filtered your concentrate, how you store it is just as important as the brewing process itself.
Leaving your coffee in an open pitcher or a plastic container can lead to rapid oxidation, which turns the flavor stale and metallic within just a day or two.
To keep your batch fresh for up to two weeks, you must use an airtight glass container, such as a mason jar or a specialized glass carafe.
Glass is non-porous and will not absorb old odors or leach chemicals into your brew, ensuring the purity of the coffee flavor remains intact. It is also vital to keep the container in the coldest part of your refrigerator and away from pungent foods like onions or garlic.
Every time you open the jar, you expose the liquid to oxygen, so minimizing headspace in the bottle can further extend the shelf life. Investing in high-quality storage ensures that your hard work results in a consistently delicious beverage every time you pour.
How to use your coffee concentrate
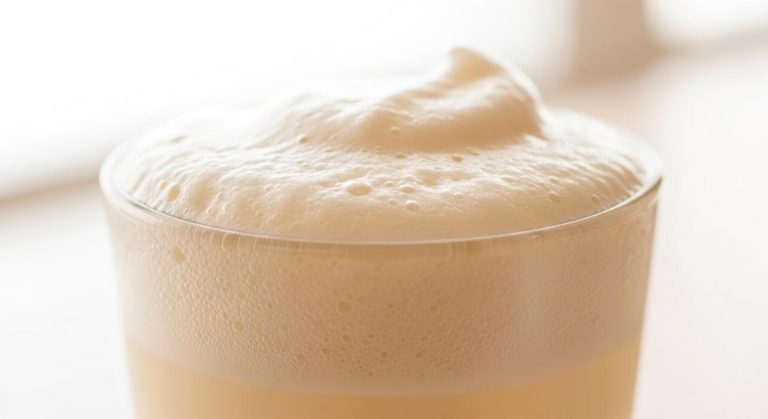
Mixing ratios for iced coffee and lattes
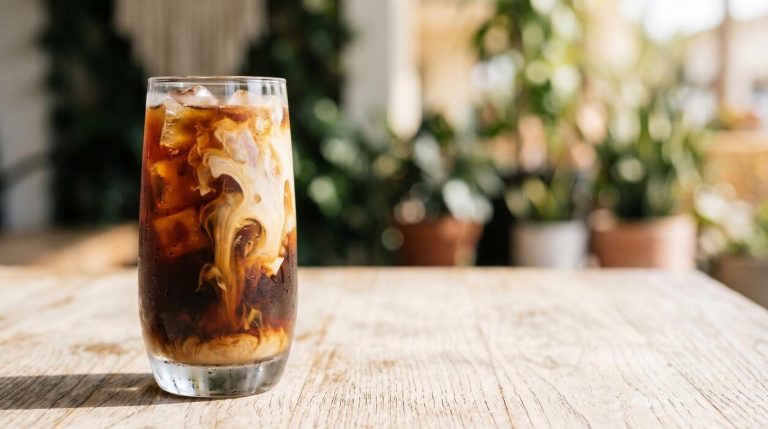
To craft the perfect beverage from your homemade coffee concentrate, understanding the dilution ratio is essential for balancing flavor and strength. For a standard glass of iced coffee, start with a one-to-two ratio, combining one part concentrate with two parts filtered water or milk over plenty of ice.
If you prefer a bolder, more robust kick that mimics a professional cold brew, try a one-to-one ratio instead.
When preparing iced lattes, swap the water entirely for your favorite dairy or plant-based milk, such as oat or almond milk, to create a creamy texture that complements the chocolatey notes of the beans.
Always pour the concentrate over ice first before adding your diluting liquid to ensure instant chilling and proper integration. You can easily adjust these measurements based on your personal caffeine tolerance or the specific roast profile of the beans you used.
Experimenting with these proportions allows you to customize every cup to your exact taste preferences effortlessly at home.
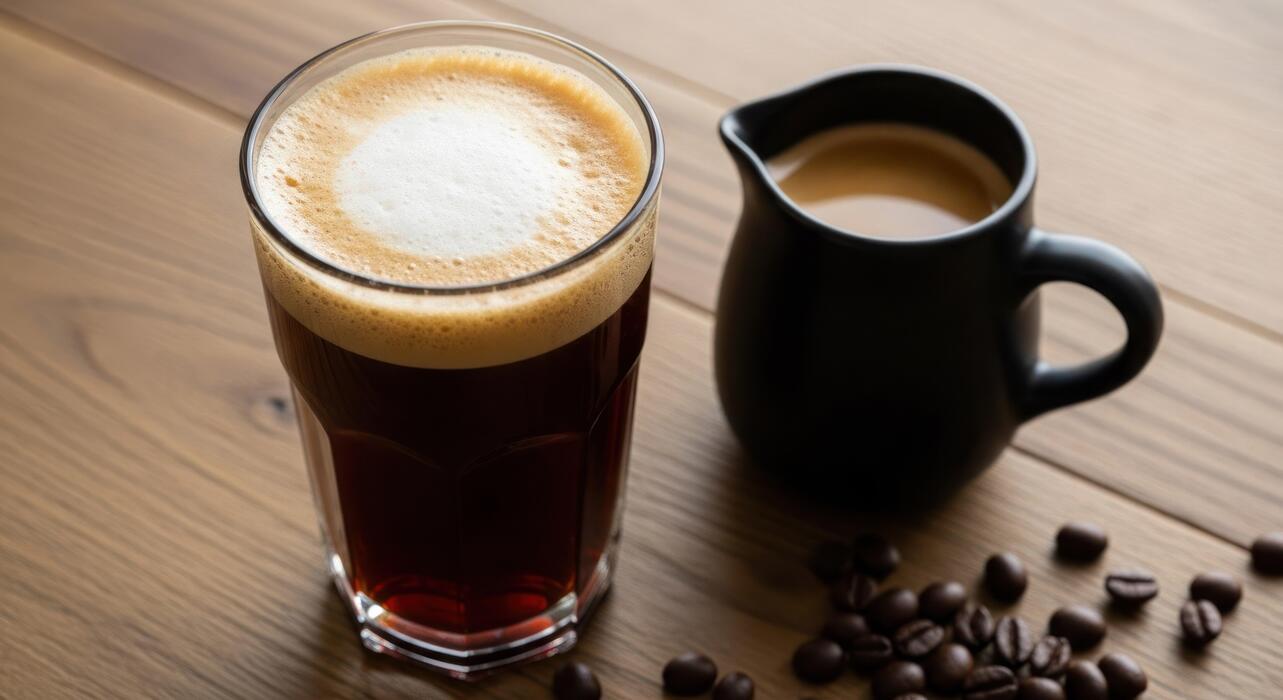
Making hot coffee with cold concentrate
Many people mistakenly believe that coffee concentrate is strictly for cold drinks, but it is actually a fantastic shortcut for a smooth cup of hot coffee. To transform your refrigerated concentrate into a steaming beverage, simply combine one part concentrate with two parts boiling filtered water.
This method effectively mimics the experience of an Americano but with significantly lower acidity since the grounds were never exposed to high heat during the initial extraction process.
It is important to avoid boiling the concentrate directly on the stove or in the microwave, as excessive heat can scorch the delicate oils and result in a bitter, unpleasant aftertaste. Instead, use the hot water to bring the concentrate up to the desired drinking temperature.
If you enjoy a hot cafe au lait, you can use steamed milk in place of water for a rich, velvety finish. This technique is incredibly convenient for busy mornings when you want a high-quality hot brew without waiting for a traditional machine to finish cycling.
Creative ways to use concentrate in recipes
Beyond traditional drinking, coffee concentrate serves as a versatile and potent ingredient in various culinary applications due to its intense flavor profile.
You can incorporate a splash of concentrate into baking recipes like chocolate cake, brownies, or tiramisu to deepen the cocoa notes and add a sophisticated complexity to the sweets.
For a refreshing treat, try pouring the liquid into ice cube trays to create coffee cubes that won’t dilute your drinks as they melt, or blend them into a thick coffee protein smoothie for a morning boost.
In the kitchen, a tablespoon of concentrate can be added to savory marinades or dry rubs for steak and brisket, where the natural acidity helps tenderize the meat while providing a rich, earthy crust.
You can even whisk it into a homemade vinaigrette or a chocolate ganache for a surprising twist. Having a jar of concentrate in your fridge opens up a world of gourmet possibilities, allowing you to infuse professional-grade coffee flavor into almost any dish or dessert.
Tips for better tasting coffee concentrate
The double-filtration method for clarity
To achieve a professional-grade finish for your homemade coffee concentrate, employing a double-filtration technique is essential for removing fine sediments that cause bitterness and a muddy mouthfeel. Start by running your steeped mixture through a coarse metal mesh sieve to catch the larger grounds and minimize the initial mess.
Immediately following this, perform a second pass through a high-quality paper filter or a fine nylon nut milk bag. This secondary layer of filtration is crucial because it traps microscopic particles and oils that can oxidize and ruin the flavor profile over time.
By ensuring a cleaner liquid, you significantly extend the shelf life of your concentrate in the refrigerator. Using paper filters specifically helps in capturing diterpenes, resulting in a brighter and crisper taste that mimics high-end cafe cold brew.
Always remember to pre-wet your paper filter with cold water before the second strain to ensure that no papery taste leaches into your final brew, maintaining the pure essence of the beans.
How to customize flavor with spices
Elevating your coffee concentrate at home is easily achieved by incorporating aromatic spices directly into the dry grounds before you even add water. This method, known as dry-infusion, allows the natural oils of the spices to meld seamlessly with the coffee during the long extraction process.
For a warm, comforting profile, consider adding a cinnamon stick or ground cardamom to the mixture; these spices complement the chocolatey notes found in medium and dark roasts.
If you prefer something more adventurous, a small pinch of sea salt or a dash of vanilla bean can drastically reduce perceived bitterness and enhance the natural sweetness of the coffee beans. Ensure you use whole spices whenever possible to avoid making the concentrate cloudy or gritty.
By experimenting with these additives during the steeping phase, you create a complex, signature base that requires fewer sugary syrups later on, allowing you to enjoy a healthier and more sophisticated beverage that is perfectly tailored to your personal palate preferences.
Testing different steep times for unique profiles
The duration of your steep is perhaps the most influential variable in determining the final strength and acidity of your homemade concentrate. While the standard recommendation is usually twelve to eighteen hours, subtle adjustments can lead to vastly different results.
A shorter steep time of approximately twelve hours at room temperature typically highlights floral and acidic notes, making it ideal for those who enjoy light-bodied, refreshing iced coffees.
Conversely, extending the process to twenty-four hours in the refrigerator results in a much bolder, syrupy body with deep cocoa and nutty undertones.
It is vital to monitor the temperature of your environment, as heat accelerates extraction; if your kitchen is particularly warm, consider moving the vessel to the fridge to prevent over-extraction. To find your perfect balance, try sampling the concentrate at two-hour intervals once you pass the twelve-hour mark.
This hands-on approach allows you to pinpoint the exact moment when the flavors are most vibrant, ensuring you never end up with a batch that tastes overly woody or astringent.
Frequently Asked Questions
What is the basic ratio for making coffee concentrate at home?
The most common ratio for a strong concentrate is 1:4, which means using one cup of coarsely ground coffee for every four cups of water. This creates a potent base that is meant to be diluted with water or milk before drinking.
Do I need special equipment to make coffee concentrate?
No special equipment is required; you can simply use a large glass jar or pitcher for steeping. To strain the concentrate, you can use a fine-mesh sieve lined with cheesecloth, a paper coffee filter, or a French press.
What type of coffee grind is best for concentrate?
A coarse grind, similar to the texture of sea salt, is ideal for making concentrate. Using a fine grind can lead to over-extraction, resulting in a bitter taste and making the liquid much more difficult to filter.
How long should I let the coffee concentrate steep?
For the best flavor profile, let the mixture steep at room temperature for 12 to 18 hours. Avoid steeping for longer than 24 hours, as this can pull unpleasant bitter notes from the grounds.
How do I store homemade coffee concentrate and how long does it last?
Store your strained concentrate in a sealed glass container in the refrigerator. It typically stays fresh and flavorful for up to two weeks, making it a convenient option for quick morning coffee.
How do I serve the concentrate once it is ready?
Since the liquid is highly concentrated, you should mix one part coffee concentrate with one or two parts of water, milk, or cream. It can be served over ice for cold brew or mixed with hot water for a quick hot cup.
Conclusion
Making coffee concentrate at home is a simple, cost-effective way to elevate your morning routine. By mastering the right coffee-to-water ratio and allowing for a patient steep, you unlock a versatile base perfect for iced lattes or hot brews. This DIY method offers incredible flavor control and convenience for busy schedules. Now that you know the basics, grab your favorite beans and start experimenting. Enjoy the rich, bold rewards of your very own homemade batch today.