How To Make Vanilla Sweet Cream Cold Foam
Ever wonder how to recreate that velvety, marshmallow-like topping from your favorite coffee shop right at home? You are in the right place. Making vanilla sweet cream cold foam is surprisingly simple and requires only three basic ingredients you likely already have in your fridge. In this guide, we will show you exactly how to achieve that perfect cloud-like consistency in under two minutes. Whether you have a frother or just a jar, you will master this delicious recipe today.
What is vanilla sweet cream cold foam?
The difference between cold foam and whipped cream
To master how to make vanilla sweet cream cold foam, you must first understand its unique structural composition compared to standard whipped cream. While traditional whipped cream is aerated until it reaches stiff, stable peaks that sit heavily atop a beverage, cold foam is designed to be pourable and velvety.
The secret lies in the aeration process; rather than using a whisk to create a solid structure, you use a high-speed frother to incorporate micro-bubbles into a liquid base of heavy cream, 2% milk, and vanilla syrup.
This creates a delicate, frothy layer that slowly cascades into your cold brew, flavoring the coffee as you sip.
Unlike whipped cream, which remains a separate entity on top of the drink, this specific foam acts as a bridge between the bitter coffee and the sweet dairy, providing a more integrated tasting experience.
Achieving this requires a precise balance of fats and sugars to ensure the bubbles remain stable without turning into a solid mass of cream.
Why Starbucks fans love this topping
The obsession with this particular topping stems from its ability to transform a basic iced coffee into a gourmet cafe experience at home. Fans appreciate the luxurious mouthfeel that only a cold, aerated dairy topping can provide, offering a contrast to the sharp acidity of a dark roast cold brew.
By learning how to make vanilla sweet cream cold foam, you gain the ability to customize the sweetness levels and flavor intensity to your exact preference, avoiding the often overly sugary commercial versions.
The visual appeal of the white foam marbleizing into the dark coffee is another major draw, making the drink as aesthetically pleasing as it is delicious.
Furthermore, the combination of fragrant vanilla bean notes and the rich fat content of the cream provides a satisfying indulgence that doesn’t overwhelm the palate.
It offers a sophisticated way to enjoy a cold beverage, providing a silky texture that lingers much longer than standard milk or creamer, turning every sip into a multifaceted flavor journey.
Key characteristics of the perfect sweet cream texture
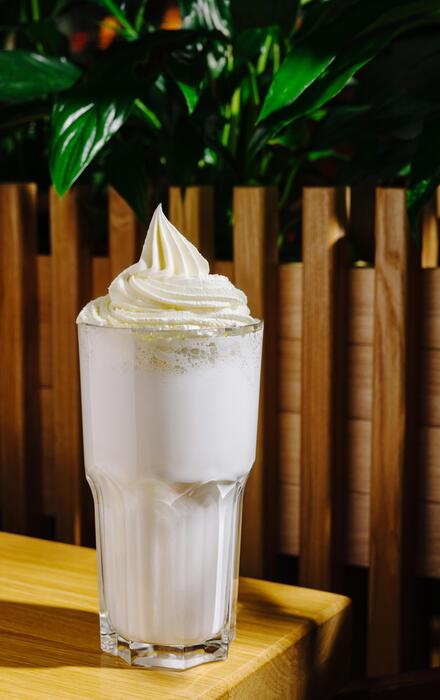
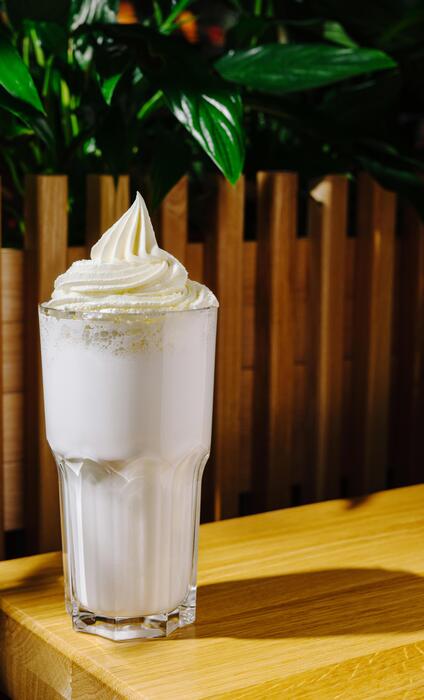
The hallmark of a perfectly executed vanilla sweet cream cold foam is its micro-foam consistency, which should resemble wet white paint rather than shaving cream.
When you are learning how to make vanilla sweet cream cold foam, you must aim for a texture that is thick enough to sit on the surface of the liquid for several minutes but fluid enough to flow through the lid of your cup.
This is achieved by using a specific 3:2:1 ratio of heavy cream, 2% milk, and vanilla syrup, ensuring the fat content is high enough for stability but diluted enough for pourability.
A successful foam will have no visible large bubbles; instead, it should appear as a smooth, uniform layer with a glossy sheen. If the foam is too stiff, it won’t mix with the coffee; if it is too thin, it will dissipate instantly.
The ideal result is a pillowy, cloud-like topping that provides a rich, creamy sweetness in every mouthful while maintaining its integrity until the very last drop of your beverage is finished.
Ingredients for homemade vanilla sweet cream
Heavy cream and milk ratios
To achieve that signature velvety texture found in professional coffee shops, you must balance your heavy cream and 2% milk using a specific 2:1 ratio.
This combination is the foundation of a successful cold foam because the fat content in the heavy cream provides the necessary structure, while the milk lightens the mixture to ensure it pours smoothly over your cold brew.
For a standard batch, combine half a cup of heavy whipping cream with a quarter cup of 2% milk. If you use whole milk, the foam will be slightly denser, whereas skim milk may result in a thinner consistency that dissipates quickly.
Always ensure your dairy is ice cold before you begin frothing, as cold molecules trap air bubbles more effectively than room-temperature ingredients.
Whisking these together gently before adding your sweetener ensures a consistent microfoam that sits perfectly on top of your drink without sinking immediately to the bottom of the glass.
Choosing the right vanilla syrup
The flavor profile of your vanilla sweet cream depends entirely on the quality and type of vanilla syrup you select. To replicate the classic cafe taste, use a high-quality pure vanilla bean syrup that contains real vanilla extract rather than artificial flavorings.
For a standard recipe, add two tablespoons of syrup to your cream and milk mixture. If you prefer a more intense aromatic experience, you can add a tiny splash of vanilla bean paste, which introduces those beautiful dark specks into the white foam.
It is important to stir the syrup thoroughly into the dairy base before frothing to ensure the sweetness is evenly distributed. If you find the foam too sweet, you can easily adjust the ratio by decreasing the syrup by half a tablespoon.
Remember that the syrup also acts as a stabilizer; the sugar content helps the protein structures in the milk hold their shape for a longer duration, resulting in a luxurious mouthfeel that lasts.
Sugar-free and dairy-free alternatives
If you are looking to customize your cold foam for dietary preferences, you can successfully swap ingredients while maintaining a creamy consistency. For a sugar-free version, replace the standard syrup with a monk fruit or stevia-based vanilla syrup, which provides the necessary sweetness without the added calories.
Creating a dairy-free version requires more attention to fat content; the best results come from combining full-fat coconut milk with extra-creamy oat milk. These specific plant-based options have enough lipids to create a stable foam that mimics the behavior of heavy cream.
Avoid using thin almond milk as the primary base, as it often fails to hold air bubbles, leading to a watery topping. When using non-dairy alternatives, it is often helpful to use a high-speed electric frother for at least thirty seconds to build the required volume.
Regardless of the substitutions, keeping your equipment and liquids chilled remains the most critical factor for achieving a professional, cafe-quality finish at home.
How to make vanilla sweet cream cold foam at home
Step-by-step mixing instructions
To replicate the signature Starbucks flavor profile, start by combining heavy cream, 2% milk, and vanilla syrup in a precise ratio. The ideal balance for a rich yet pourable texture is two parts heavy cream to one part milk, plus two tablespoons of high-quality vanilla syrup.
Pour these ingredients into a small pitcher or glass measuring cup, ensuring they are straight from the refrigerator as cold temperatures are vital for stabilization. Stir the mixture gently with a spoon until the syrup is fully integrated into the dairy.
This base liquid can be stored in an airtight container for up to five days, allowing you to whip up a fresh batch of velvety cold foam in seconds whenever a caffeine craving strikes. Always ensure your dairy is fresh to achieve the best flavor and consistent aeration results.
Using a handheld milk frother
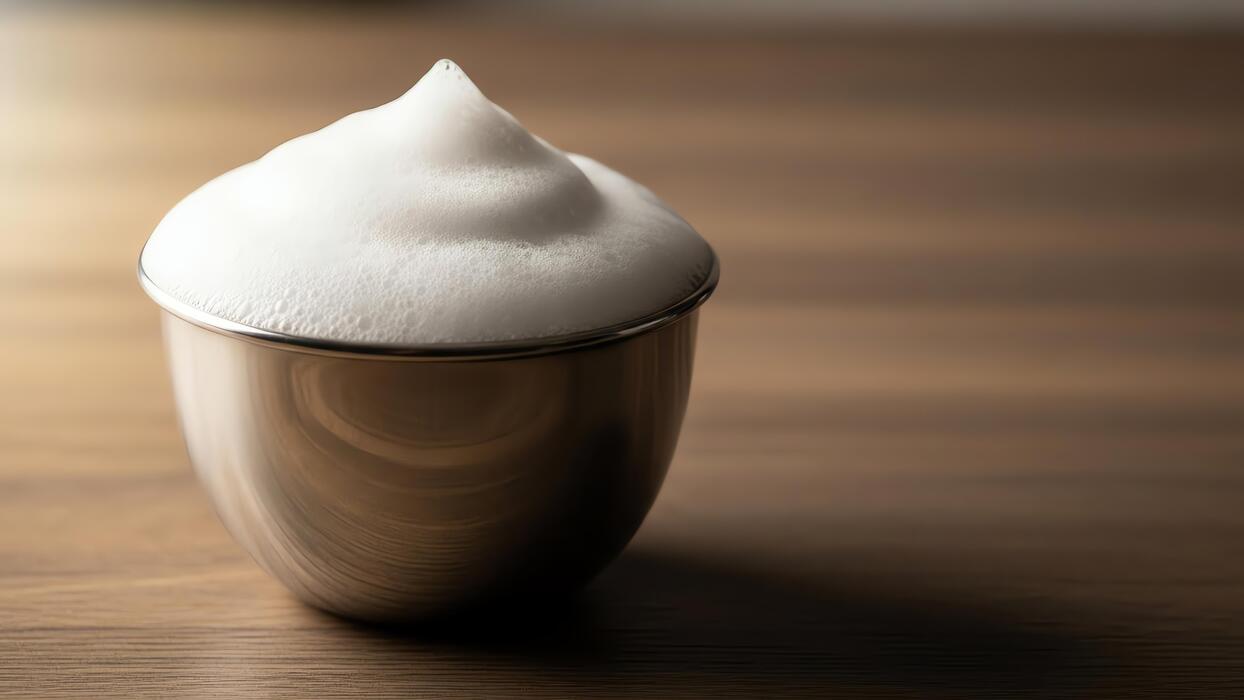
The most efficient way to achieve a meringue-like consistency for a single serving is by using a battery-operated handheld milk frother. Submerge the whisk head of the frother into your prepared vanilla sweet cream mixture, tilting the glass at a 45-degree angle to incorporate air.
Turn the device on and move the frother up and down, keeping it just below the surface to create micro-bubbles. Continue frothing for approximately 20 to 30 seconds until the volume doubles and the texture becomes thick and glossy.
This method is preferred by home baristas because it offers maximum control over density, allowing you to create a foam that sits perfectly atop your cold brew without immediately sinking.
Once finished, tap the glass on the counter to pop any large bubbles for a professional, smooth finish before pouring it over your ice.
The blender method for large batches
If you are hosting guests or preparing multiple drinks, using a high-speed blender or a specialized aerating container is the most effective strategy. Pour your vanilla cream base into the blender carafe, ensuring the liquid covers the blades entirely.
Use the lowest speed setting for about 15 to 20 seconds; over-blending at high speeds can accidentally turn your sweet cream into whipped cream or butter. The goal is to introduce enough air to create a pourable, silken foam that maintains its structure.
This method is excellent for achieving a uniform texture across several servings simultaneously. For the best results, serve the foam immediately after blending, as the aeration may begin to dissipate if left standing.
If the foam settles, a quick five-second pulse in the blender will easily restore that desired cloud-like topping for your iced coffee beverages.
Making cold foam with a French press
For those without electric gadgets, a French press is a surprisingly effective tool for creating dense, long-lasting cold foam. Pour your chilled vanilla sweet cream into the carafe of the French press, filling it no more than one-third full to allow room for expansion.
Insert the plunger and perform rapid, short pumps for about 30 seconds. The fine mesh screen of the filter forces air into the fats of the heavy cream, resulting in a luxurious micro-foam that rivals any coffee shop version.
Once the cream has doubled in volume and feels resistant to the plunger, remove the lid and give the carafe a gentle swirl. This manual technique is highly regarded for creating a stable foam structure that holds up exceptionally well against the ice cubes in your drink.
It is a reliable, low-tech solution for achieving professional-grade results at home.
Tips for getting the perfect consistency
Why cold temperature matters
Achieving the ideal texture for vanilla sweet cream cold foam starts with the temperature of your ingredients and equipment. For the best results, you must ensure your heavy cream and milk are pulled directly from the refrigerator right before you begin the frothing process.
Fat molecules in dairy are far more stable when chilled, allowing them to trap air more efficiently without collapsing into a liquid mess. If the cream reaches room temperature, the proteins lose their structural integrity, resulting in a flat topping that sinks immediately into your coffee.
Many professional baristas even suggest chilling your frothing pitcher or glass in the freezer for five minutes prior to use. This creates a thermal barrier that prevents the friction of the whisk from warming the liquid.
By keeping everything ice-cold from start to finish, you guarantee a stiff, velvety peak that sits beautifully atop your cold brew, providing that signature luxurious mouthfeel that defines a high-quality cafe beverage at home.
How to avoid over-mixing your cream
The line between perfect vanilla sweet cream and homemade butter is thinner than you might think. When using a handheld milk frother or a blender, you should monitor the density closely and stop as soon as the mixture thickens to a pourable, paint-like consistency.
Over-mixing occurs when the fat globules are agitated for too long, causing them to clump together into solid masses rather than light, airy bubbles. To prevent this, pulse your frother in short bursts of five to ten seconds instead of running it continuously.
You are looking for a ‘soft peak’ stage where the foam holds its shape but still flows smoothly when the vessel is tilted. If you notice the cream becoming grainy or overly stiff, you have likely gone too far.
If this happens, you can sometimes save the batch by whisking in a splash of cold milk to thin it back out. Patience is key; a gentle approach ensures your foam remains silky and easy to sip through a lid.
The secret to long-lasting foam bubbles
The longevity of your sweet cream foam depends entirely on the ratio of fats to proteins and the method of aeration. To ensure your bubbles do not dissipate within seconds, you must maintain a precise 2:1 ratio of heavy whipping cream to 2% milk.
While heavy cream provides the richness, the proteins found in the milk act as the scaffolding that supports the air bubbles. Additionally, the incorporation of vanilla syrup adds a slight viscosity that helps stabilize the foam’s structure.
For the longest-lasting results, try to froth the mixture just below the surface to create large volumes of air first, then move the whisk deeper to micro-foam the liquid and break those larger bubbles into a fine, dense lattice.
This technique, often used by latte artists, creates a structural foam that remains intact even as you tilt the cup to drink. Using a high-quality immersion frother allows for better control over this aeration process, resulting in a professional-grade topper that resists melting into the ice below.
Best ways to serve vanilla cold foam
Classic cold brew pairings
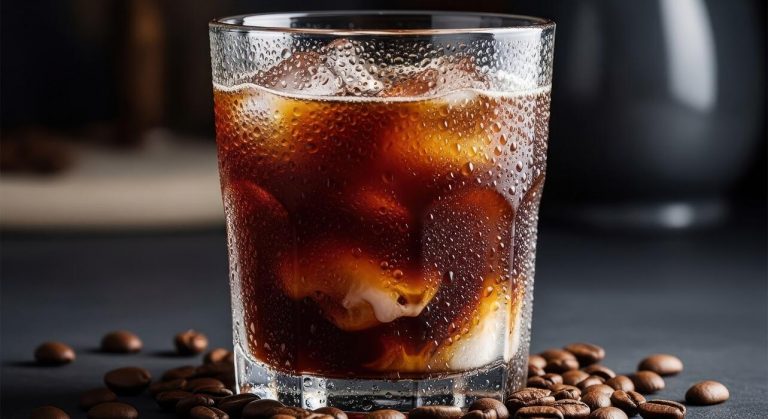
The most iconic way to enjoy vanilla sweet cream cold foam is atop a glass of smooth, slow-steeped cold brew coffee. To achieve the perfect balance, pour your cold brew over plenty of ice, leaving about an inch of space at the top of the glass.
Slowly spoon the freshly frothed mixture of heavy cream, 2% milk, and vanilla syrup over the surface.
Unlike traditional creamers that mix instantly, the dense texture of the foam allows it to sit elegantly on top, creating a beautiful cascading effect as the sweetened cream slowly bleeds into the dark coffee.
This method ensures that every sip begins with a velvety, marshmallow-like sweetness followed by the bold, chocolatey notes of the cold brew. For the best results, use a strawless lid or sip directly from the rim to experience the temperature contrast between the chilled foam and the refreshing coffee underneath.
This creates a professional cafe-quality beverage experience right in your own kitchen with minimal effort.
Adding foam to iced lattes and americanos
Elevate your standard espresso routine by swapping traditional stirred-in milk for a layer of vanilla cold foam on iced lattes and americanos.
When preparing an iced latte, use slightly less milk than usual to account for the volume of the foam, then crown the drink with the aerated vanilla cream to add a luxurious mouthfeel.
For an iced americano, the foam acts as a creamy buffer against the intense espresso shots, mellowing the acidity while maintaining the drink’s integrity.
The key to success is ensuring the foam is whipped to a soft-peak consistency using a handheld milk frother or a high-speed blender, which prevents it from dissolving too quickly into the hot espresso layers.
This technique transforms a basic caffeine fix into a decadent, multi-textured treat that rivals expensive boutique coffee shop offerings. By layering the foam, you control the sweetness level of each sip, making it an excellent solution for those who want a customizable and sophisticated coffee drink at home.
Creative flavor variations to try
Once you have mastered the base recipe for vanilla sweet cream cold foam, you can experiment with creative infusions to further customize your beverages. Try adding a pinch of sea salt to the cream mixture to create a salted vanilla profile that enhances the caramel notes in medium-roast beans.
Alternatively, you can whisk in a dash of cinnamon or pumpkin spice during the frothing process to transition your drinks into different seasons. For a floral twist, a drop of lavender extract paired with the vanilla base creates a sophisticated topping for iced Earl Grey tea or matcha lattes.
If you prefer a richer profile, replacing a portion of the vanilla syrup with white mocha sauce or toasted nut syrups provides a deeper complexity that pairs perfectly with darker roasts.
These simple adjustments allow you to repurpose the same basic ingredients into a wide variety of signature drinks, ensuring your home barista skills remain versatile and exciting for any palate or occasion throughout the entire year.
How to store leftover sweet cream
Proper refrigeration techniques
To maintain the delicate consistency of your vanilla sweet cream, proper storage starts with the right container. Transfer any leftover mixture immediately into an airtight glass jar or a sealed carafe to prevent the cream from absorbing unwanted odors from other foods in your refrigerator.
Glass is preferred over plastic as it keeps the liquid colder and is easier to sanitize thoroughly. Ensure the lid is screwed on tightly to minimize air exposure, which can cause the heavy cream to develop a thin skin or oxidize over time.
When placing the container in the fridge, avoid the door shelves where temperature fluctuations are most frequent. Instead, tuck the sweet cream into the back of the main refrigerator shelf where the environment remains consistently cold.
This stability is essential for keeping the fats in the heavy cream and the proteins in the milk stable, ensuring that when you are ready for another cold foam topping, the base remains perfectly emulsified and ready for frothing without any separation issues.
How long homemade sweet cream stays fresh
While professional coffee shops go through gallons daily, your homemade batch requires careful monitoring of its shelf life. Generally, a DIY vanilla sweet cream mixture will stay fresh for up to five days, provided it is kept under constant refrigeration.
However, the true expiration date is dictated by the earliest expiration date of the dairy products you used. If your heavy cream or 2% milk was nearing its ‘best by’ date when you mixed the batch, the sweet cream will likely sour sooner.
Always perform a quick scent and texture check before using leftovers; if the liquid has thickened significantly or developed a tangy aroma, it should be discarded.
Because the mixture contains sugar and vanilla syrup, it may last slightly longer than plain milk, but the quality of the foam begins to degrade after the third day.
For the best results and the thickest cold foam peaks, try to consume your homemade batch within forty-eight to seventy-two hours of initial preparation.
Refreshing the foam before serving
It is completely normal for the ingredients in your sweet cream to settle or separate slightly after sitting in the refrigerator. To achieve that signature Starbucks-style cloud texture with your leftovers, you must thoroughly shake or stir the liquid before attempting to froth it.
Pour the chilled liquid into your frothing vessel and use a handheld milk frother or a French press to aerate the mixture until it doubles in volume.
If the cream has become too thick to pour smoothly, adding a tiny splash of fresh milk can help loosen the consistency without diluting the vanilla flavor profile.
Remember that cold temperatures are vital for successful aeration; never let the cream sit on the counter before frothing, as warm fats will not hold air bubbles effectively. Once you have achieved a thick, pourable foam that holds its shape, layer it gently over your cold brew or iced coffee.
By refreshing the emulsion right before serving, you ensure a professional velvety finish that mimics the luxury of a freshly made beverage from a high-end cafe.
Common mistakes when making cold foam
Why your foam is too runny
One of the most frequent errors when preparing vanilla sweet cream cold foam is failing to chill your ingredients and equipment properly.
If your heavy cream or mixing bowl is even slightly warm, the fat globules will not stabilize, resulting in a thin, liquid mess rather than a thick, pillowy texture. To achieve that signature Starbucks-style consistency, ensure your heavy cream and milk are pulled directly from the fridge seconds before blending.
Furthermore, the duration of your frothing plays a critical role in the final structure. Using a high-speed handheld frother for at least thirty to forty-five seconds is essential to incorporate enough air for a velvety finish.
If you find the foam remains runny, try chilling your metal pitcher in the freezer for five minutes prior to use.
This creates a temperature-stable environment that allows the proteins to bond effectively, ensuring your cold foam sits perfectly on top of your cold brew without immediately dissolving into the coffee layer below.
Fixing overly sweet or bland cream
Achieving the perfect flavor balance in your vanilla sweet cream requires precision, as common mistakes often involve guestimating the syrup-to-dairy ratio. If your foam tastes bland, you likely haven’t used enough high-quality vanilla syrup or pure vanilla extract, which provides the depth needed to compete with strong coffee.
Conversely, an overly sweet foam can overpower the natural notes of your cold brew. The golden ratio generally follows a two-to-one-to-one formula: two parts heavy cream, one part two-percent milk, and one part vanilla syrup.
If the mixture feels cloying, add a tiny pinch of sea salt to the blend; this small addition cuts through the sugar and enhances the aromatic vanilla notes. Always taste your base liquid before frothing it.
It is much easier to adjust the sweetness levels in the liquid phase than it is to try and fold in more syrup once the foam has already been aerated and structured, which can cause the delicate bubbles to collapse.
Using the wrong type of milk
The science of cold foam relies heavily on the specific fat and protein content of your dairy choices. A major mistake is trying to substitute the heavy cream with half-and-half or using only skim milk, which lacks the necessary lipids to hold air bubbles.
To replicate the authentic vanilla sweet cream experience, you must use a combination of heavy whipping cream and 2% milk. The heavy cream provides the luxurious thickness and stability, while the 2% milk adds the protein required for a light, frothy volume.
If you are attempting a dairy-free version, standard almond or soy milks often fail because they lack the fat density of heavy cream. Instead, opt for a barista-edition oat milk or full-fat coconut cream to ensure the foam doesn’t immediately dissipate.
By maintaining the correct ratio of high-fat dairy to lower-fat milk, you create a structural matrix that is both creamy and buoyant, allowing your homemade vanilla sweet cream cold foam to maintain its integrity until the very last sip.
Frequently Asked Questions
What are the core ingredients for vanilla sweet cream cold foam?
The classic recipe uses a 3:2:1 ratio of heavy cream, 2% milk, and vanilla syrup. This combination provides the perfect balance of richness and pourability while maintaining a stable froth.
How do I froth the sweet cream without a professional milk steamer?
You can easily achieve a thick foam using a handheld milk frother, a French press, or a high-speed blender. Simply combine the ingredients and aerate for about 20-30 seconds until the mixture doubles in volume and becomes velvety.
Can I make a dairy-free version of vanilla sweet cream cold foam?
Yes, you can substitute the dairy with a mix of full-fat canned coconut milk and barista-edition oat milk. These specific plant-based options have the necessary fat content to hold air bubbles and create a stable foam structure.
How long does homemade vanilla sweet cream last in the fridge?
The un-frothed sweet cream mixture can be stored in an airtight container for up to 5 days. For the best texture, always wait to froth the cream until right before you are ready to serve your coffee.
Why is my cold foam turning out too thin or watery?
The most common reason for thin foam is using too much milk or not enough heavy cream. Ensure your ingredients are ice-cold before frothing, as warm cream will not hold air as effectively as chilled cream.
What is the best way to serve vanilla sweet cream cold foam?
Slowly pour the frothed cream over a glass of cold brew or iced coffee filled with ice. The foam should sit on top of the coffee initially and gradually cascade down, creating a beautiful marbled effect.
Conclusion
Mastering vanilla sweet cream cold foam at home is a simple way to elevate your coffee routine. By balancing heavy cream, milk, and vanilla syrup, you can achieve that signature velvety texture without a trip to the cafe. Whether you use a frother or a jar, the results are consistently delicious. Now that you know the secret, feel free to experiment with sweetness levels and enjoy your barista-quality creations from your own kitchen.