How Make Cold Brew At Home
If you are wondering how to make cold brew at home without the expensive cafe price tag, you have come to the right place. Making smooth, bold coffee at your kitchen counter is surprisingly simple and requires zero fancy equipment. Whether you want a refreshing morning kick or a DIY concentrate for the week, this guide delivers a foolproof method.
What is cold brew coffee?
The difference between cold brew and iced coffee
Understanding the fundamental distinction between these two beverages is the first step to mastering your home setup. Traditional iced coffee is simply standard drip coffee brewed with hot water and then poured over ice, which often results in a watery, diluted flavor profile as the ice melts.
In contrast, making cold brew at home involves a prolonged steeping process where coarse grounds sit in room temperature or cold water for 12 to 24 hours. This immersion method creates a concentrated syrup that maintains its structural integrity even when diluted with water or milk.
By choosing cold brew, you are opting for a full-bodied extraction that highlights the natural sugars of the bean rather than the sharp bitterness associated with rapid cooling.
When you prepare this at home, you have total control over the strength, allowing you to create a rich coffee base that stays fresh in your refrigerator for up to two weeks, providing a consistent and convenient caffeine solution every morning.
Why cold brew tastes less acidic
The secret to the smooth, chocolatey profile of cold brew lies in the chemistry of the extraction temperature. High heat acts as a catalyst that releases specific oils and fatty acids from the coffee grounds which can taste sour or metallic to sensitive palates.
Because the cold brew method uses cold or ambient water, those acidic compounds are never fully extracted, resulting in a drink that is roughly 60% less acidic than hot-brewed coffee. This makes it an ideal solution for coffee lovers who suffer from acid reflux or sensitive stomachs.
When you make cold brew at home, you are essentially performing a gentle flavor extraction that preserves the delicate, nutty notes of the bean without the harsh chemical bite.
By utilizing a coarse grind size and a long soak, you ensure that the water pulls out the pleasant sweetness while leaving the bitter tannins behind, resulting in a velvety finish that requires much less sugar or cream to be palatable for the average drinker.
Caffeine content in cold brew vs drip coffee
There is a common misconception regarding the potency of cold brew, but the reality depends entirely on your dilution ratio. Because cold brew uses a higher coffee-to-water ratio during the steeping phase, the resulting concentrate is significantly more caffeinated than standard drip coffee.
However, most home recipes suggest a one-to-one dilution with water or milk, which brings the caffeine levels closer to a traditional cup.
The extended contact time between the water and the grounds ensures that a high volume of caffeine is pulled into the liquid, making it a highly efficient stimulant for those who need a morning boost.
To manage your caffeine intake at home, you can easily adjust the strength by adding more filtered water to your glass. This versatility allows you to enjoy a potent energy source that is smoother on the system than a quick shot of espresso.
Always remember to store your concentrate in a sealed container to preserve its chemical potency and flavor for the best results throughout the week.
Essential equipment for making cold brew at home
Choosing the right glass jar or pitcher
To start your home brewing journey, selecting the proper vessel is the first critical step toward success. A large glass Mason jar or a dedicated glass carafe is the gold standard because glass is non-reactive and will not leach unwanted flavors into your coffee during the long steeping process.
Unlike plastic containers, which can retain oils and odors from previous batches, glass ensures a clean, crisp flavor profile every time you brew. Look for a container with a wide mouth to make adding coffee grounds and pouring water effortless.
An airtight seal is essential to prevent your coffee from absorbing refrigerator odors like onions or garlic while it sits for 12 to 24 hours. If you plan on making large batches, a one-quart or two-quart jar provides the perfect capacity for a concentrated brew that can be diluted later.
Investing in a durable borosilicate glass pitcher can also prevent cracking if you choose to use slightly warm water to bloom your grounds before cold steeping.
Filter options: Cheesecloth, paper, or fine mesh
Filtering is the stage where you define the texture and clarity of your final beverage. For those who prefer a silky, sediment-free cup, a standard paper coffee filter or a dedicated cold brew filter bag is the most effective choice.
These dense fibers catch the smallest particles and oils, resulting in a bright and clean finish. Alternatively, a fine mesh metal strainer is a sustainable, reusable option that allows more natural oils to pass through, creating a fuller body and a creamier mouthfeel.
If you are using household items, layering cheesecloth over a sieve works remarkably well, though it may require multiple passes to remove all the fine silt.
For the most convenient experience, many enthusiasts opt for integrated stainless steel infusion filters that sit directly inside the jar, allowing you to simply lift the grounds out once the steeping time is complete.
Whichever method you select, ensure you rinse your filter first to remove any potential papery or metallic tastes that could interfere with the coffee’s natural sweetness.
Why a burr grinder matters for coarse grounds
The secret to a balanced, non-bitter cold brew lies almost entirely in the size and consistency of your coffee grounds. You must aim for a very coarse, pebble-like grind similar to sea salt.
Achieving this consistency is nearly impossible with a blade grinder, which hacks beans into uneven shards and fine dust. Instead, a burr grinder is essential because it uses two revolving surfaces to crush the beans into uniform pieces. This uniformity ensures that the water extracts flavor evenly from every grain.
If your grind is too fine, the water will over-extract the coffee, leading to a harsh, bitter, and cloudy concentrate that is difficult to filter. Furthermore, fine particles can clog your filtration system, making the cleanup process frustrating.
By using a burr grinder to maintain a consistent coarse setting, you maximize the sweet, chocolatey notes characteristic of cold brew while minimizing acidity. This precision allows the cold water to slowly pull out the best flavors over time, resulting in a smooth and professional-grade concentrate right in your kitchen.
Best coffee beans and water ratios

The ideal coffee-to-water ratio for concentrates
To master the art of cold brew at home, you must start with a reliable concentrate ratio, which provides a versatile base for various drinks. The industry standard for a robust cold brew concentrate is a 1:4 or 1:5 coffee-to-water ratio by weight.
For example, mixing 250 grams of coffee with 1 liter of water creates a potent liquid that stands up well to ice and milk. Using a digital scale is essential to ensure accuracy, as volumetric measurements like cups can be inconsistent depending on the roast profile.
This concentrated approach allows you to save space in your refrigerator and gives you the flexibility to dilute the final brew to your personal preference later.
Most enthusiasts find that a 1:1 dilution with cold water or milk after the steeping process yields a perfectly balanced cup that highlights the natural sweetness of the beans without being overly intense or watery.
Why you should use a coarse grind size
The texture of your coffee grounds is the most critical factor in achieving a clean, sediment-free cold brew. You should always aim for a very coarse grind size, similar in consistency to sea salt or peppercorns.
Because cold brew involves a long immersion time—typically between 12 to 24 hours—finer grounds will over-extract rapidly, leading to a bitter and harsh flavor profile that ruins the smooth experience.
Furthermore, using a coarse grind makes the final filtration process significantly easier; fine particles can clog paper filters or pass through metal mesh, resulting in a cloudy, muddy cup. By maintaining a consistent coarse particle size, you ensure that the water extracts the desirable oils and sugars slowly and evenly.
If you are grinding at home, use a high-quality burr grinder rather than a blade grinder to achieve the uniformity required for a professional-grade extraction that remains bright and flavorful throughout the long steeping duration.
Using filtered water for better flavor
Since cold brew is composed of approximately 98% water, the quality of your tap water directly impacts the final taste of your coffee. For the best results, you should always use filtered or bottled spring water rather than straight tap water.
Tap water often contains chlorine, minerals, and impurities that can create off-flavors or a metallic aftertaste during the lengthy extraction process. A carbon-activated filter or a simple pitcher filter can effectively remove these unwanted elements, allowing the nuanced notes of your coffee beans to shine.
Additionally, avoid using distilled water, as it lacks the essential minerals needed to pull the flavorful compounds out of the coffee grounds, often resulting in a flat or dull beverage.
By starting with clean, odor-free water at room temperature, you create the perfect chemical environment for a slow extraction that emphasizes the chocolatey, nutty, and fruity characteristics of your chosen beans while ensuring a crisp and refreshing finish every time.
Step-by-step guide to making cold brew
Mixing your grounds and water
To begin your home brewing journey, you must start with the right foundation by selecting a coarse grind size that resembles sea salt or raw sugar. Using a fine grind will result in a cloudy, over-extracted, and bitter beverage that lacks the signature smoothness of cold brew.
Aim for a standard ratio of 1:4, which means using one cup of coffee grounds for every four cups of filtered water.
Place your grounds into a large glass jar or a specialized cold brew pitcher, then slowly pour your cold or room temperature filtered water over them in a circular motion. It is vital to ensure every single coffee particle is fully saturated to allow for even extraction.
Use a long wooden spoon to gently stir the mixture, breaking up any dry clumps that might be hiding at the bottom of the container.
Once the mixture looks like a thick, dark slurry, cover the vessel tightly with a lid or plastic wrap to prevent any unwanted refrigerator odors from seeping into your precious caffeine concentrate.
Steeping times for room temperature vs fridge
The duration of the steeping process is the most critical variable in determining the final flavor profile of your drink. If you choose to leave your container on the kitchen counter at room temperature, the extraction process happens more rapidly, requiring a total time of 12 to 15 hours.
This method often highlights more of the acidic and floral notes of the bean. Conversely, placing your mixture in the refrigerator slows the extraction, resulting in a cleaner, mellow taste that typically takes 18 to 24 hours to reach its peak potential.
You should avoid letting the grounds steep for longer than twenty-four hours, as this can lead to the release of tannins that produce a harsh, woody aftertaste. To find your personal sweet spot, we recommend tasting the concentrate at the twelve-hour mark and then every few hours after that.
Once the coffee tastes rich, bold, and chocolatey without any lingering bitterness, you know it is time to move on to the final filtration stage.
How to properly strain the coffee concentrate
When the steeping time is complete, you must carefully separate the liquid from the grounds to stop the brewing process. Start by setting up a fine-mesh sieve over a clean carafe or pitcher, then line the sieve with a dampened paper coffee filter or a double layer of cheesecloth.
Moistening the filter beforehand ensures that the paper does not soak up your coffee and helps it stay in place.
Pour the mixture slowly into the filter, allowing gravity to do the work; never squeeze the grounds or the filter bag, as this forces fine sediments and bitter oils into your final brew, ruining the clarity.
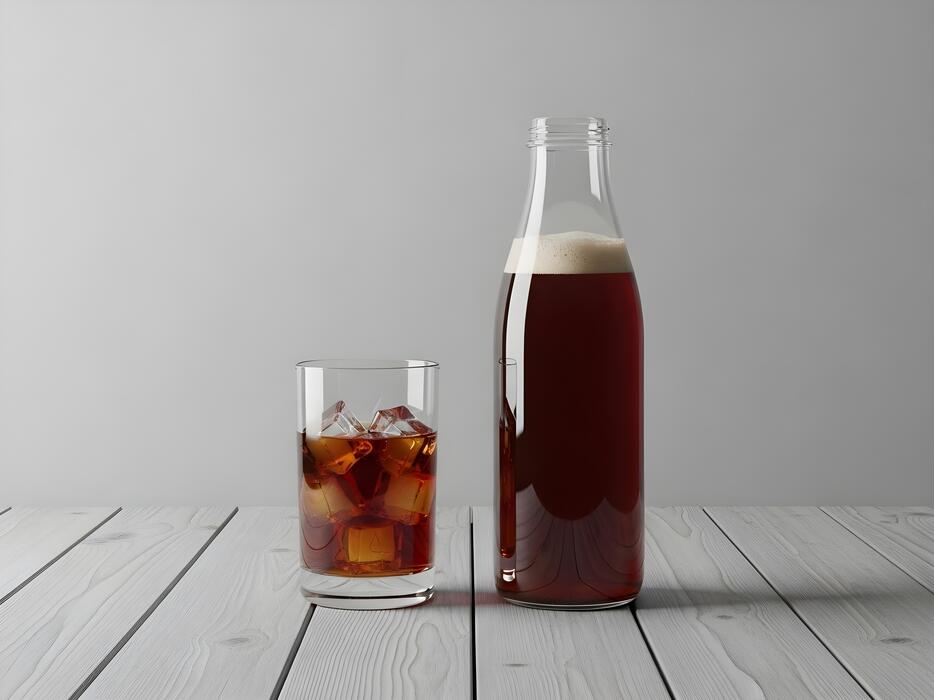
If you notice the flow slowing down significantly, you may need to replace the paper filter halfway through the process. Once all the liquid has passed through, you are left with a potent coffee concentrate that should be stored in a sealed glass bottle.
This concentrate is incredibly versatile and remains fresh in the refrigerator for up to two weeks, allowing you to dilute it with water or milk whenever you need a quick fix.
Common mistakes to avoid
Using fine grounds instead of coarse
One of the most frequent errors beginners make is using a fine grind setting similar to what you would use for drip coffee or espresso. When making cold brew, you must use a coarse, sandy grind to ensure proper extraction over a long period.
Fine grounds have a higher surface area, which leads to over-extraction and a resulting flavor that is unpleasantly bitter and astringent rather than smooth.
Furthermore, using fine particles makes the filtration process a total nightmare; they tend to clog your paper filters or mesh strainers, leaving you with a cloudy, silty mess in your cup.
To avoid this, set your grinder to its largest setting or ask your local barista for a coarse French press grind. This allows the water to flow freely around the coffee particles, extracting the deep chocolate and nutty notes without the harsh acidity.
Consistently using the right texture is the single most important step in mastering a clean and crisp homemade batch.
Steeping the coffee for too long
While cold brew is a slow process that requires patience, there is definitely such a thing as steeping for too long. Many people believe that leaving the grounds in the water for 48 hours will result in a stronger, better brew, but this actually leads to woody and bitter off-flavors.
The ideal sweet spot for room temperature steeping is generally between 12 and 18 hours. If you choose to brew your batch in the refrigerator, you can push that time up to 24 hours due to the slower extraction rate at colder temperatures.
Beyond these windows, the water begins to pull out organic compounds that are better left behind in the grounds. To ensure a consistent result every time, set a kitchen timer the moment you combine your water and coffee.
Once the time is up, strain the liquid immediately into a clean carafe. Monitoring your clock prevents the transition from a rich, velvety concentrate to a liquid that tastes like old, wet cardboard.
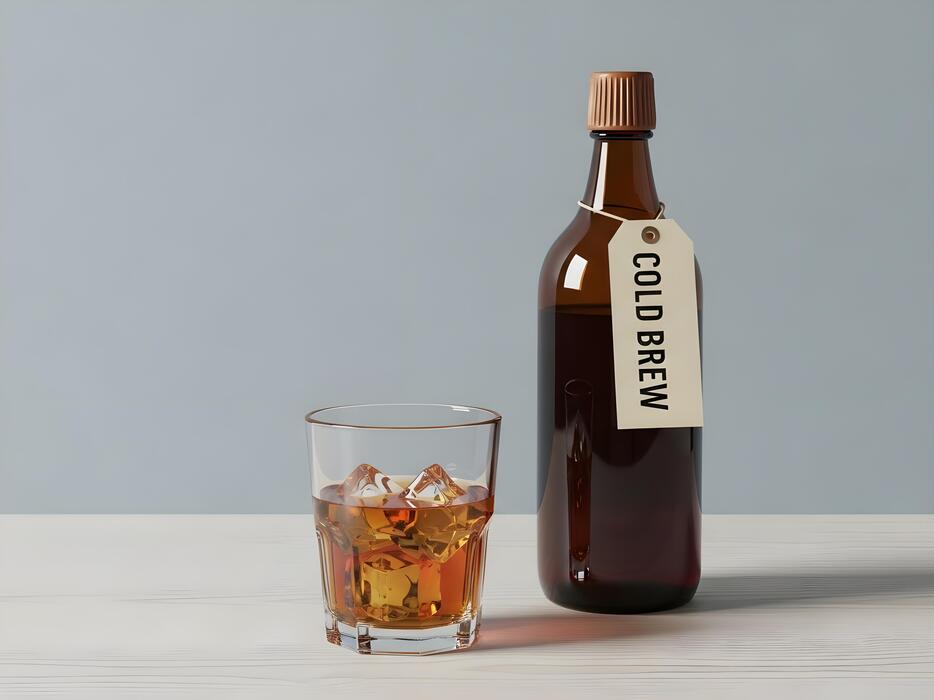
Forgetting to dilute the concentrate before drinking
Because the cold brew process uses a high coffee-to-water ratio, the resulting liquid is a highly potent concentrate rather than a standard cup of coffee.
A common mistake is pouring a full glass of this concentrate and drinking it straight, which can lead to an overwhelming caffeine jolt and a flavor that is far too intense. To enjoy a balanced beverage, you must dilute the brew with water, milk, or a dairy alternative.
A standard starting point is a one-to-one ratio, meaning you mix half a cup of concentrate with half a cup of your chosen liquid. You can adjust this based on your personal preference for strength and body.
Additionally, remember that if you are adding a significant amount of ice, it will eventually melt and further dilute the drink, so you may want to start with slightly less water.
Properly diluting your batch ensures you experience the subtle flavor profiles and smooth finish that make cold brew so popular among coffee enthusiasts worldwide.
How to serve and store your cold brew
How long cold brew stays fresh in the fridge
Once your brewing process is complete, storing your coffee correctly is vital for maintaining that signature smooth profile. For the best results, transfer your filtered coffee into an airtight glass carafe or mason jar immediately.
If you have prepared a concentrated brew, it can remain flavorful and safe to consume for up to two weeks when kept chilled in the refrigerator.
However, if you have already diluted the concentrate with water or milk, you should aim to finish it within two to three days to prevent the flavor from becoming flat or oxidized.
It is important to remember that cold brew does not contain preservatives, so keeping it sealed and cold is the only way to prevent it from absorbing unwanted odors from other food items in your fridge.
If you notice any sourness or a change in clarity, it is time to discard the batch. Always prioritize using clean containers to extend the shelf life of your homemade caffeine kick.
Creative ways to flavor your drink
One of the greatest benefits of learning how to make cold brew at home is the ability to customize your beverage without the premium price tag of a coffee shop.
To elevate your drink, consider adding natural sweeteners like simple syrup, honey, or agave, which dissolve much more easily in cold liquids than granulated sugar. For a sophisticated aromatic twist, you can stir in a few drops of pure vanilla extract or almond essence before serving.
If you prefer a spiced profile, try steeping a cinnamon stick or a few cardamom pods directly in the concentrate for a few hours.
For those who enjoy a creamy texture, experimenting with alternative milks like oat, coconut, or cashew can provide a rich mouthfeel that complements the low acidity of the coffee.
You can even create a ‘cold foam’ at home by frothing a bit of milk with a splash of maple syrup and layering it gently over the top of your chilled glass for a professional finish.
Making cold brew ice cubes
A common dilemma when enjoying chilled coffee is the dilution that occurs as standard ice melts, turning a bold drink into a watery mess. The ultimate solution is to freeze your cold brew concentrate into ice cubes using a silicone tray.
By using coffee cubes instead of water-based ones, your drink actually becomes richer and more intense as the ice melts. This technique is particularly effective if you enjoy sipping your coffee slowly over a long morning.
Simply pour your extra brew into the trays and freeze them for at least six hours until they are completely solid.
You can even get creative by placing a tiny dash of cocoa powder or a mint leaf inside each cube before freezing to add a subtle, evolving flavor profile to your glass.
These cubes are also a fantastic addition to blended coffee protein shakes or morning smoothies, providing a quick caffeine boost and a frosty texture without the need for extra liquid that might thin out your recipe’s consistency.
Frequently asked questions about home cold brew
Can you make cold brew with decaf beans?
You can absolutely use decaf beans to create a delicious, jitter-free batch of cold brew at home. Since the cold brewing process relies on time rather than heat to extract flavor, it is actually an excellent way to mask the slightly thinner body sometimes associated with decaf processing methods.
To get the best results, ensure you use a coarse grind size and a high-quality bean, preferably one that has been decaffeinated using the Swiss Water Process to preserve the most complex flavor notes.
The extended steeping time allows the water to pull out deep chocolate and nutty profiles without the bitterness often found in hot-brewed decaf. Simply follow your standard coffee-to-water ratio, typically 1:4 for a concentrate or 1:8 for ready-to-drink, and let it sit for 12 to 24 hours.
This method provides a smooth, low-acid beverage that is perfect for late-night enjoyment or for those who are sensitive to caffeine but still crave the rich, refreshing taste of a premium chilled coffee.
Do you have to refrigerate it while it steeps?
While you can steep your cold brew either on the counter or in the fridge, most experts recommend steeping at room temperature for a more efficient and flavorful extraction.
When coffee steeps at a warmer temperature, the water is more effective at pulling out the oils and aromatic compounds from the grounds, usually resulting in a fuller body and complex sweetness within 12 to 18 hours.
If you choose to steep it in the refrigerator, you must account for the cold slowing down the extraction process; this often requires a longer duration of 24 hours or more to achieve the same strength.
Regardless of where you let it sit, it is crucial to keep the container sealed to prevent the coffee from absorbing odors from your kitchen or fridge.
Once the steeping process is complete and you have filtered out the grounds, you should immediately transfer the liquid to the refrigerator to preserve its freshness and stop the oxidation process, ensuring your homemade brew stays crisp and delicious for up to two weeks.
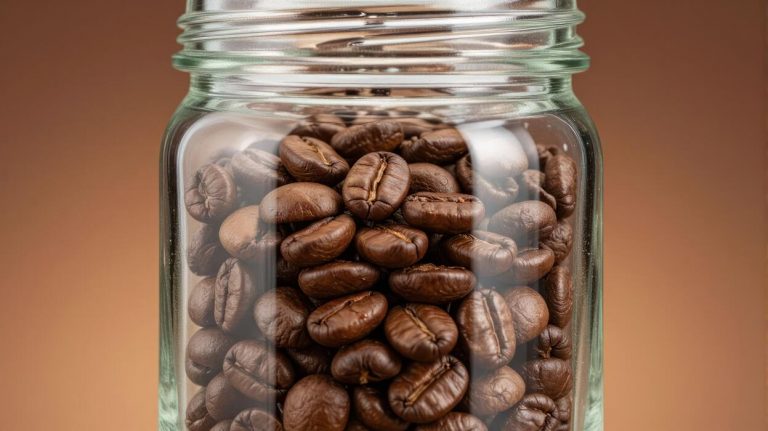
What are the best bean roasts for cold brewing?
The best bean roasts for cold brewing are generally medium to dark roasts, as they provide the classic chocolatey, bold, and smoky notes that people love in iced coffee.
Because the cold water extraction process naturally highlights sweetness and minimizes acidity, dark roasts lose their harsh carbonized edges and instead develop a rich, velvety profile that stands up well to milk or cream.
However, if you prefer a more adventurous and tea-like experience, you can experiment with light roasts, which can reveal surprising fruity and floral undertones when brewed cold.
No matter which roast level you choose, the most important factor for home success is the freshness of the beans and the consistency of the grind. Using a burr grinder to achieve a very coarse, sea salt consistency prevents the over-extraction and muddiness that often occurs with pre-ground coffee.
By choosing a high-quality dark roast with notes of cocoa or caramel, you ensure a consistent, cafe-quality result that remains smooth and refreshing even after being diluted with ice or water.
Frequently Asked Questions
What is the best coffee-to-water ratio for cold brew?
A standard ratio for cold brew concentrate is 1 part coarsely ground coffee to 4 parts water. If you prefer a ready-to-drink strength, use a ratio of 1:8 or 1:10.
What grind size should I use for cold brew?
You should use an extra-coarse grind, similar to the texture of sea salt or peppercorns. This prevents the coffee from becoming over-extracted and bitter during the long steeping process.
How long does cold brew need to steep?
Cold brew typically needs to steep for 12 to 24 hours at room temperature or in the refrigerator. Steeping for less than 12 hours may result in a weak flavor, while exceeding 24 hours can lead to bitterness.
Do I need special equipment to make cold brew at home?
No special equipment is required; you can simply use a glass jar and a fine-mesh strainer or cheesecloth. However, using a French press or a dedicated cold brew maker can make the filtration process much easier.
Should I steep cold brew on the counter or in the fridge?
You can do either, but room temperature steeping is generally faster and extracts flavor more efficiently. Steeping in the refrigerator is safer for longer durations and results in a slightly brighter, cleaner profile.
How long does homemade cold brew stay fresh?
Cold brew concentrate can stay fresh in the refrigerator for up to two weeks if kept in a sealed container. If you have already diluted the concentrate with water, it is best to consume it within 2-3 days.
How do I filter the coffee grounds properly?
After steeping, pour the mixture through a fine-mesh sieve to remove large grounds, then follow up with a paper coffee filter or several layers of cheesecloth. This ensures a smooth, sediment-free cup of coffee.
Conclusion
Making cold brew at home is a simple, cost-effective way to enjoy a smooth and flavorful caffeine kick. By mastering the right coffee-to-water ratio and allowing for a patient steep time, you can create a versatile concentrate that rivals any specialty cafe. Don’t be afraid to experiment with different beans and filtration methods to find your perfect blend. Now that you have the tools, it is time to start brewing your own refreshing batch today.