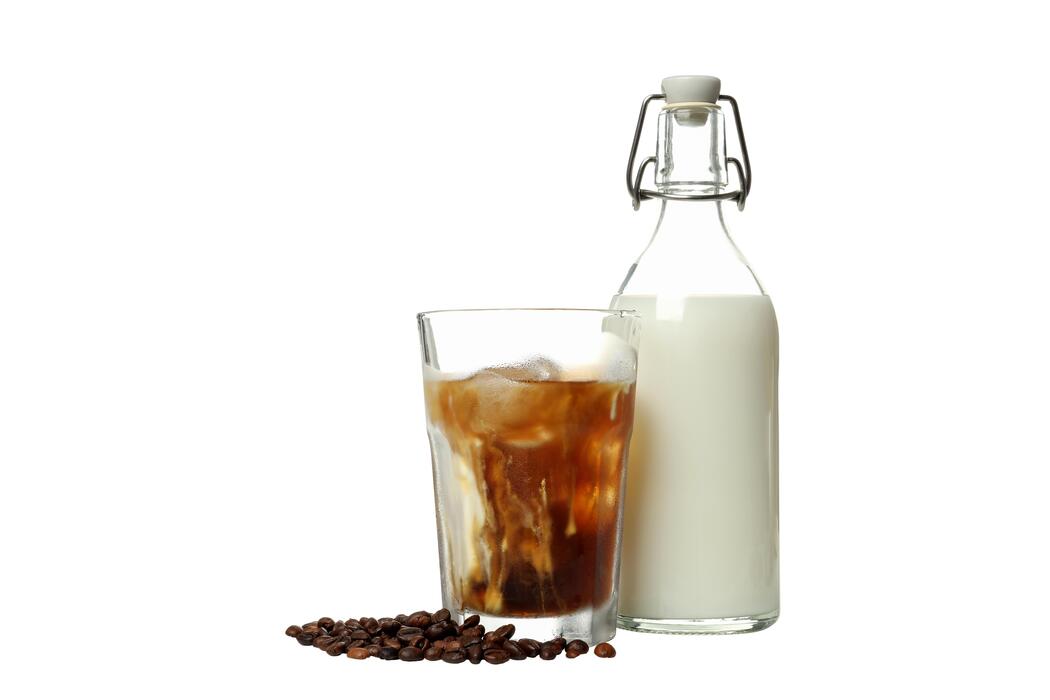
How Make A Cold Coffee
Craving a caffeine kick that is both refreshing and bold? Learning how to make a cold coffee at home is easier than you think, and it will save you a fortune at the local cafe. Whether you prefer a smooth cold brew, a frothy frappe, or a simple iced latte, we have you covered. This guide provides quick, foolproof methods to master your favorite chilled drinks in minutes. Let’s dive into the best techniques to satisfy your cold coffee cravings.
Best Coffee Beans and Roasts for Cold Coffee
Dark Roast vs Light Roast for Iced Drinks
Choosing the right profile is the first step in learning how make a cold coffee that satisfies your palate. For those who enjoy a traditional, bold flavor that stands up well to heavy cream and sweeteners, dark roasts are the gold standard.
These beans offer chocolatey, nutty, and smoky notes that remain distinct even when diluted by melting ice. Conversely, if you prefer a refreshing, tea-like consistency, light roasts are ideal for cold brew methods. These beans preserve the bright acidity and floral undertones that can be lost in hot brewing.
When you steep light roast grounds in cold water for 12 to 24 hours, you extract a complex sweetness without the bitterness often associated with high-heat extraction.
Ultimately, the best choice depends on your texture preference; choose dark roasts for creamy iced lattes and light roasts for crisp, black cold brews to achieve a professional-grade beverage right in your own kitchen.
Why Freshly Ground Beans Matter
The secret to a vibrant glass of cold coffee lies in the volatile oils trapped within the bean. To maximize flavor, you should grind your beans immediately before brewing to prevent oxidation, which can lead to a stale or sour taste.
For cold coffee methods, the grind size is just as critical as the timing. If you are making a cold brew concentrate, use a coarse, sea-salt consistency to ensure a slow, even extraction that avoids over-bitterness.
If you are brewing a flash-chilled iced coffee using a drip machine, a medium-fine grind is necessary to extract enough strength to withstand the immediate addition of ice. Investing in a burr grinder allows for the precision needed to maintain consistency across every batch.
By prioritizing freshness and correct particle size, you ensure that the natural sugars and aromatic compounds are fully realized, resulting in a smooth, cafe-quality drink that surpasses any pre-ground store-bought options available on the market today.
The Role of Water Quality in Your Brew
Since coffee is approximately 98% water, the quality of your tap can significantly alter the final outcome of your cold beverage. When researching how make a cold coffee, many beginners overlook the importance of using filtered or bottled spring water.
Hard water containing high levels of minerals like calcium can lead to a chalky mouthfeel and muted flavors, while highly chlorinated water will introduce a chemical aftertaste that ruins the delicate notes of premium beans. For the best results, use cold, filtered water to start your brewing process.
This provides a clean canvas that allows the specific characteristics of your chosen roast to shine through without interference. Additionally, consider the water-to-coffee ratio; a standard 1:8 ratio for cold brew concentrate ensures a robust base that can be diluted with water or milk later.
By focusing on pure, mineral-balanced water, you provide the necessary environment for optimal chemical extraction, ensuring your home-brewed cold coffee remains refreshing, clean, and perfectly balanced every time.
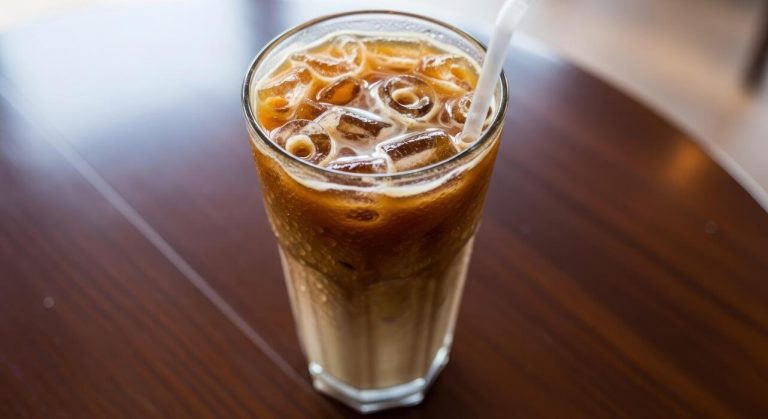
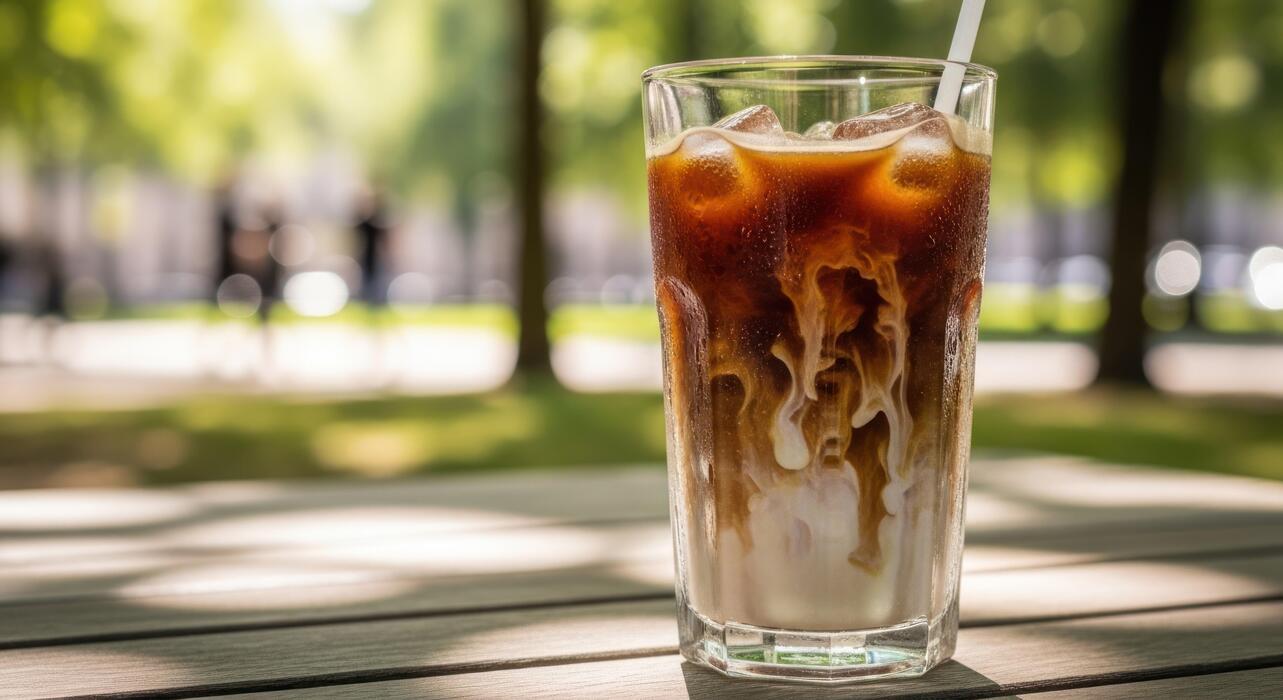
How to Make Classic Iced Coffee at Home

The Quick Drip Method Over Ice
To master the quick drip method, also known as flash brewing, start by brewing your favorite coffee at double strength. This technique ensures that the beverage maintains its robust profile even after the ice begins to melt.
Begin by filling a heat-resistant glass or a large carafe halfway with fresh ice cubes. Set up your standard drip machine or pour-over device as you normally would, but use half the amount of water typically required for your coffee grounds.
As the hot, concentrated liquid drips directly onto the ice, it undergoes instantaneous chilling, which locks in the bright acidity and delicate aromatic oils that are often lost during slow cooling processes.
This approach is superior to simply putting hot coffee in the fridge, as it prevents the oxidation that leads to a bitter or stale taste. Once the brewing cycle finishes, give the mixture a gentle stir to equalize the temperature.
You now have a refreshing, crisp base ready for your preferred milk or sweeteners.
How to Prevent Watered-Down Coffee
The biggest challenge when learning how to make a cold coffee is maintaining the structural integrity of the flavor against dilution. To solve this common issue, you should proactively create coffee ice cubes by freezing leftover brewed coffee in standard silicone trays.
When these specialized cubes melt, they actually add more coffee flavor to your drink instead of thinning it out with plain water. Additionally, always prioritize using a dark or medium-dark roast, as these beans possess the boldness necessary to stand up to melting ice and added dairy.
If you prefer using liquid sweeteners, opt for a simple syrup or agave rather than granulated sugar; these dissolve instantly in cold liquids, preventing a gritty texture at the bottom of your glass. Another professional tip is to pre-chill your glassware in the freezer for ten minutes before serving.
This small step creates a thermal barrier that keeps your beverage frosty for a much longer period, ensuring every sip is as intense and satisfying as the first.
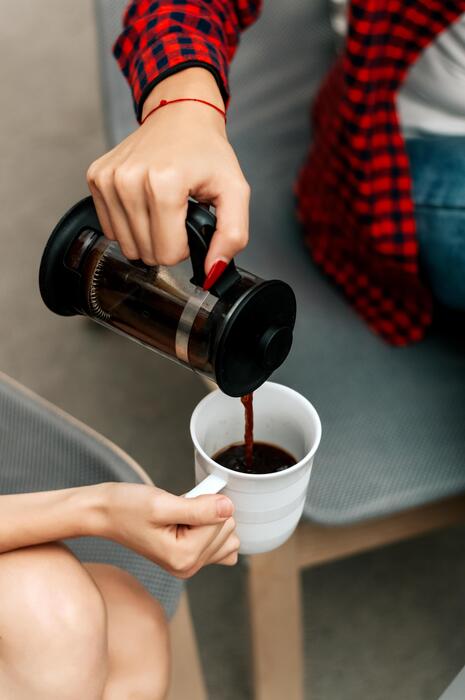
Using a French Press for Quick Chilling
A French press is an incredibly versatile tool for those who want a rich, full-bodied iced coffee without waiting for a traditional overnight cold brew. To begin, add your coarsely ground coffee to the carafe and pour in hot water that is just off the boil.
Allow the grounds to steep for approximately four minutes to extract the maximum depth of flavor. Once the timer is up, press the plunger down firmly to separate the grounds.
Instead of pouring the hot coffee directly into a cup, prepare a separate tall pitcher filled to the brim with large, dense ice blocks. Slowly pour the hot French press concentrate over the ice while stirring continuously with a long spoon.
This rapid agitation facilitates a rapid heat transfer, cooling the liquid to a refreshing temperature in under thirty seconds.
Because the French press retains the natural oils of the bean, the resulting drink will have a creamy mouthfeel that pairs perfectly with a splash of cream or an oat milk foam topper.
Step-by-Step Guide to Perfect Cold Brew
The Ideal Coffee-to-Water Ratio
To master the art of cold coffee, you must begin with the correct foundation of ingredients. Unlike hot coffee, cold brew is typically prepared as a concentrated liquid that you dilute later.
The most effective starting point for a balanced brew is a 1:5 ratio by weight, which means using one part coarsely ground coffee to five parts filtered water. For those who prefer a lighter, ready-to-drink beverage immediately after straining, a 1:8 or 1:10 ratio is more appropriate.
It is vital to use coarsely ground beans that resemble the texture of sea salt; fine grounds will result in an over-extracted, bitter mess that is difficult to filter. Always use filtered water at room temperature to ensure the purest flavor profile possible.
By measuring your ingredients with a digital scale rather than spoons, you ensure consistent strength every time you brew. This precise preparation sets the stage for a smooth, low-acid coffee experience that highlights the natural sweetness of the beans.
Steeping Times for Maximum Flavor
Time is the critical element that replaces heat in the cold brewing process. Once you have combined your coarse grounds and water in a jar, give it a gentle stir to ensure all grounds are fully saturated.
For the best results, let the mixture steep at room temperature for 12 to 18 hours.
If you prefer to steep your coffee in the refrigerator to keep it chilled from the start, you should extend the timing to 20 to 24 hours because the cold environment slows down the extraction process.
Avoid steeping for longer than 24 hours, as this can lead to woody or overly bitter notes that ruin the characteristic smoothness of the drink. Keeping the vessel in a cool, dark place during the extraction phase helps maintain a stable temperature.
This long, slow infusion gently draws out the caffeine and complex flavor compounds without the acidic oils that are typically released by boiling water, resulting in a velvety finish that is easy on the stomach.
How to Filter and Store Your Concentrate
After the steeping process is complete, the final step is achieving a clean, sediment-free liquid. Begin by pouring the mixture through a fine-mesh sieve to remove the largest grounds, then perform a second pass using a paper coffee filter or a nut milk bag.
This dual-filtration method ensures a crisp mouthfeel without any sludge at the bottom of your glass. Once filtered, you have a potent concentrate. To serve, simply dilute the concentrate with equal parts water or milk over ice.
If you have leftovers, pour the liquid into an airtight glass carafe or mason jar and store it in the back of your refrigerator. When sealed properly, the cold brew concentrate will stay fresh for up to two weeks, though it tastes best within the first seven days.
Having this batch ready allows you to enjoy a professional-quality cold coffee in seconds every morning. This convenience, combined with the superior flavor profile, makes the home-brewing process incredibly rewarding for any coffee enthusiast.
Easy Ways to Make Whipped Dalgona Coffee
Ingredients for the Perfect Foam
To create the signature thick foam that makes Dalgona coffee famous, you must start with the correct ratio of three core ingredients. You will need exactly two tablespoons of instant coffee, two tablespoons of granulated sugar, and two tablespoons of boiling water.
It is vital to use instant coffee rather than finely ground beans because the processed nature of instant granules allows them to dissolve fully and create the necessary surface tension for aeration.
While you can experiment with different types of sugar, white or brown sugar works best for stabilizing the air bubbles, ensuring your foam remains stiff and glossy for several minutes.
The boiling water is the secret catalyst that melts the crystals instantly, allowing the mixture to emulsify into a peanut-butter-like consistency before it eventually transforms into a light, airy meringue.
If you skip the sugar or use cold water, the mixture will fail to hold its shape, resulting in a runny liquid rather than the desired cloud-like topping that defines this popular cold coffee beverage.
Hand Whisking vs Electric Mixer
Choosing the right tool for aeration depends entirely on your patience and physical stamina. If you opt for hand whisking, prepare for a significant workout; it typically takes between five to ten minutes of vigorous, continuous movement to reach the stiff-peak stage.
You should use a balloon whisk and a medium-sized bowl to maximize the amount of air incorporated into the mixture with every stroke. Conversely, using an electric hand mixer or a milk frother is the most efficient method for those seeking a quick caffeine fix.
An electric mixer can achieve a thick, velvety texture in less than two minutes, providing consistent results without the manual effort. A small handheld milk frother also works exceptionally well for single servings, though you must be careful to keep the wand submerged to avoid splattering.
Regardless of the method you choose, the goal is to beat the mixture until it turns from a dark brown liquid into a pale, golden-tan foam that clings firmly to the whisk without dripping back into the bowl.
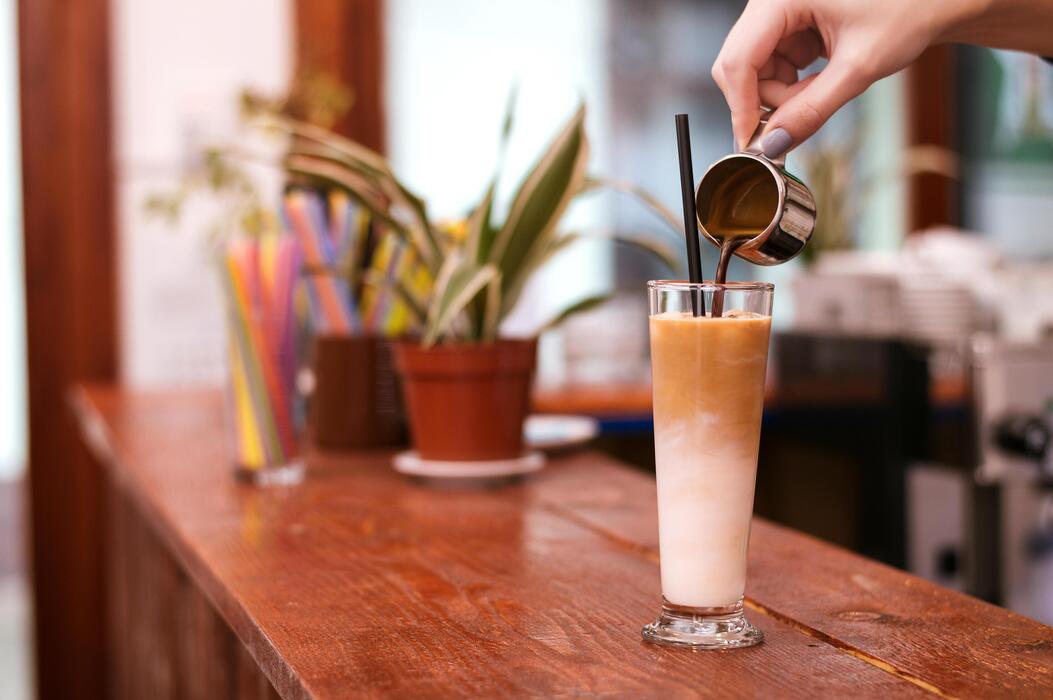
Serving Suggestions with Milk and Ice
The final step in mastering how to make a cold coffee with Dalgona foam is the assembly, which determines the overall flavor balance. Fill a tall glass about three-quarters full with fresh ice cubes to ensure the drink stays chilled as you sip.
Pour in your choice of cold milk, leaving enough room at the top for the whipped coffee layer. While whole milk provides the creamiest contrast to the intense coffee foam, dairy-free alternatives like oat milk or almond milk are excellent substitutes that complement the toasted sugar notes.
Gently spoon the thick coffee fluff over the milk, creating a beautiful layered effect that is visually stunning. To enjoy the drink properly, you can either sip the bitter foam directly or use a straw to swirl the layers together, creating a rich, marbled latte consistency.
For an extra touch of luxury, consider dusting the top with a pinch of cocoa powder or cinnamon, which adds an aromatic layer to the bold, sweet profile of your homemade whipped masterpiece.
How to Make a Blended Frozen Coffee
Choosing the Right Base and Thickener
To craft the perfect blended frozen coffee at home, you must start with a robust foundation. Using strong brewed coffee or double-strength espresso is essential because the ice will naturally dilute the flavor as it blends.
If you prefer a milder taste, cold brew concentrate works exceptionally well as a base. To achieve that signature creamy mouthfeel, you need a reliable thickener. Whole milk, heavy cream, or oat milk provide the necessary fat content to bind the ice crystals together.
For an even more indulgent consistency, many baristas recommend adding a tablespoon of sweetened condensed milk or a scoop of vanilla protein powder, which prevents the drink from separating into watery layers.
Always ensure your coffee base is completely chilled before it hits the blender; adding hot coffee will melt the ice prematurely, resulting in a thin, disappointing soup rather than a thick, frost-covered treat that holds its shape in the glass.
How to Get a Smooth Frappe Texture
The secret to a professional-grade frozen coffee lies in the ratio of liquid to ice and the blending technique used. For a single serving, start with roughly two cups of ice for every one cup of liquid base.
Using a high-powered blender is ideal, as it pulverizes the ice into tiny, uniform shards that create a velvety slush. If you notice your mixture is too chunky, add a splash more milk; if it is too runny, toss in a few more ice cubes.
A critical pro-tip for preventing separation is to use a tiny pinch of xanthan gum, which acts as a stabilizer to keep the drink emulsified. Start your blender on the lowest speed to break down the large chunks, then quickly ramp up to high speed for about thirty seconds.
This process incorporates air and ensures the texture remains smooth and consistent from the first sip to the very last drop without any gritty ice pieces.
Flavor Add-ins Like Chocolate and Caramel
Elevating your homemade blended coffee involves layering flavors that complement the natural bitterness of the beans. To create a mocha-style frappe, blend in two tablespoons of high-quality cocoa powder or chocolate syrup directly into the mixture.
For those who crave a buttery finish, drizzling salted caramel sauce along the inside of the glass before pouring creates a beautiful visual effect and a burst of sweetness in every mouthful.
You can also experiment with extracts; a half-teaspoon of pure vanilla, almond, or peppermint extract can transform the profile of your drink instantly. If you enjoy a bit of texture, consider pulsing in some chocolate chips or crushed coffee beans during the final few seconds of blending.
Finally, always top your creation with a generous swirl of whipped cream and an extra dusting of cinnamon or cocoa. These finishing touches not only enhance the aesthetic appeal but also provide a luxurious, cafe-quality experience that rivals any expensive coffee shop menu item.
Tips for Sweetening and Flavoring Cold Coffee
How to Make Simple Syrup at Home
One of the most common mistakes when learning how to make a cold coffee is adding granulated sugar directly to a chilled drink, which often results in a gritty texture at the bottom of your glass.
To avoid this, you should prepare a classic simple syrup by heating equal parts water and sugar in a small saucepan until the granules completely dissolve. Once the mixture reaches a clear consistency, remove it from the heat and allow it to cool before storing it in a glass jar.
This liquid sweetener integrates instantly into cold liquids, ensuring every sip is consistently sweet. For a richer flavor profile, you can experiment with using brown sugar or honey as your base instead of white sugar.
Having a batch of homemade syrup ready in your refrigerator makes the process of crafting a professional-quality iced coffee much faster and more enjoyable during busy mornings. It is the most effective way to achieve a perfectly balanced sweetness without any unwanted graininess.
Best Natural Sweeteners for Cold Drinks
If you are looking for healthier alternatives to processed sugars while mastering how to make a cold coffee, several natural options provide excellent flavor without the crash.
Maple syrup is a top choice because it dissolves easily in cold temperatures and adds a subtle, earthy sweetness that pairs beautifully with darker roasts.
Another great option is liquid stevia or monk fruit drops, which are highly concentrated and calorie-free; just a few drops are usually enough to transform a bitter brew into a smooth treat.
For those who enjoy a creamy texture, coconut sugar dissolved in a little warm water can offer a caramel-like depth that mimics expensive specialty syrups.
You might also consider agave nectar, which has a neutral taste and a low glycemic index, making it a versatile staple for any cold caffeine beverage.
Utilizing these natural sweeteners allows you to customize your drink’s nutritional profile while enhancing the inherent floral and nutty notes of your favorite coffee beans without relying on artificial additives.
Using Spices and Extracts for Extra Flavor
Beyond basic sweetness, the secret to elevating your home-brewed cold coffee lies in the creative use of pantry staples like spices and extracts. Adding a few drops of pure vanilla extract or almond extract can provide a sophisticated aroma and flavor that rivals any coffee shop menu.
If you prefer a warm, spiced undertone, try whisking a pinch of cinnamon or cardamom directly into your milk or cream before pouring it over the ice. For a more intensive infusion, you can even steep a cinnamon stick or vanilla bean inside your cold brew concentrate for several hours.
Another pro tip is to use a tiny pinch of sea salt, which neutralizes bitterness and enhances the natural sweetness of the coffee oils. These simple additions allow you to experiment with complex flavor profiles without adding extra calories or sugar.
By mastering the art of layering different extracts and dry spices, you can successfully replicate your favorite seasonal lattes and specialty drinks from the comfort of your own kitchen.
Common Mistakes When Making Cold Coffee
Why You Should Never Use Hot Coffee Directly
One of the most frequent errors beginners make when learning how to make a cold coffee is pouring freshly brewed hot liquid directly over ice. This immediate temperature shock causes the coffee to undergo a rapid chemical transformation that often results in a harsh, acidic, or metallic aftertaste.
Furthermore, the extreme heat instantly melts the ice, leading to a watery and flavorless beverage that lacks the body of a professional brew. To solve this, you should always allow your coffee to reach room temperature naturally or use a rapid-chilling vessel before adding ice.
Alternatively, adopting the cold brew method by steeping grounds in cool water for twelve to twenty-four hours eliminates the heat variable entirely.
This patient approach ensures that the delicate oils and sugars within the coffee beans are preserved, providing a smooth and velvety texture that remains consistent from the first sip to the last drop of your refreshing drink.
The Problem with Regular Ice Cubes
Standard ice cubes made from tap water are often the silent culprit behind a disappointing homemade cold coffee experience. As these cubes melt, they dilute the concentration of your brew, turning a bold drink into a pale, translucent liquid.
Moreover, tap water ice can introduce unwanted chlorine or mineral flavors that mask the high-quality notes of your beans. A highly effective solution is to create coffee ice cubes by freezing leftover brewed coffee in silicone trays.
This ensures that as the ice melts, it actually reinforces the strength of your beverage rather than weakening it. You should also consider using filtered water for your ice to maintain a clean and crisp profile.
By managing the dilution factor, you maintain the ideal coffee-to-water ratio throughout the entire drinking process. This simple adjustment transforms your kitchen setup into a high-end cafe experience, allowing you to enjoy a robust and flavorful cold coffee even on the hottest summer afternoons.
How to Fix Bitter or Sour Brews
Achieving the perfect balance of flavor in cold coffee requires a deep understanding of extraction and grind size. If your cold coffee tastes overly bitter, it is likely because your grounds were too fine or steeped for too long, leading to over-extraction.
Conversely, a sour or salty taste usually indicates under-extraction, often caused by using a grind that is too coarse for the brewing time. To fix this, you should utilize a consistent coarse grind specifically designed for cold immersion to ensure even water penetration.
If you find the final result is still too intense, try diluting the concentrate gradually with cold filtered water or milk until you reach your preferred strength. Additionally, adding a tiny pinch of salt can neutralize residual bitterness, while a splash of simple syrup can balance out excess acidity.
Mastering these small adjustments will help you fine-tune the extraction process, ensuring every glass you pour is perfectly balanced, refreshing, and tailored exactly to your unique personal palate preferences.
Frequently Asked Questions
What is the easiest way to make cold coffee at home?
The simplest method is to brew a strong cup of regular hot coffee, let it cool to room temperature, and then pour it over a glass filled with ice cubes. You can add milk, cream, or sweeteners to taste before serving.
How do I make cold brew coffee?
To make cold brew, combine coarsely ground coffee beans with cold water in a jar and let it steep for 12 to 24 hours. Strain the mixture through a coffee filter to create a smooth, low-acid concentrate that can be diluted with water or milk.
How can I prevent my cold coffee from becoming watery?
To avoid dilution, use coffee ice cubes made by freezing leftover coffee in an ice tray. Alternatively, brew your coffee at double strength so that when the regular ice melts, the beverage maintains a bold flavor.
What is the difference between iced coffee and cold brew?
Iced coffee is brewed hot and then chilled or poured over ice, resulting in a crisp, slightly acidic flavor. Cold brew is made by steeping grounds in cold water over a long period, producing a naturally sweeter and less acidic taste.
Can I make a frothy cold coffee without an espresso machine?
Yes, you can create a frothy ‘frappe’ style coffee by shaking instant coffee, sugar, and a little water in a jar or using a handheld milk frother. Once it becomes thick and foamy, simply pour it over ice and add milk.
How do I sweeten cold coffee effectively?
Granulated sugar does not dissolve well in cold liquids, so it is best to use simple syrup or liquid sweeteners like agave or honey. If you prefer granulated sugar, stir it into the coffee while it is still hot before chilling it.
Conclusion
Mastering cold coffee at home is a simple yet rewarding process that allows you to customize every cup to your liking. Whether you prefer the boldness of a quick iced pour or the smooth complexity of a slow-steeped cold brew, the possibilities are endless. Experiment with different beans, sweeteners, and milks to find your perfect blend. Now that you have the techniques, it is time to start brewing and enjoy your refreshing homemade creations.