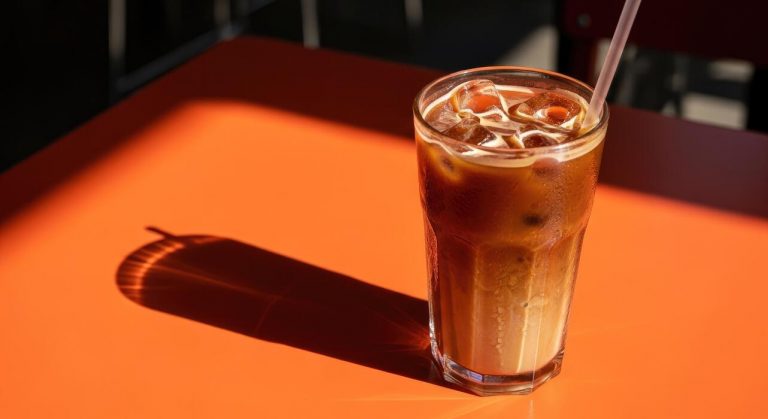
How To Homemade Cold Brew
Making cafe-quality coffee at home is easier than you think. If you are tired of spending five dollars every morning, learning how to homemade cold brew will change your routine forever. This guide provides a simple, foolproof method to create a smooth, low-acid concentrate using basic kitchen tools. We will show you the perfect coffee-to-water ratio and the exact steeping time required for bold results.
What is cold brew coffee?
The difference between cold brew and iced coffee
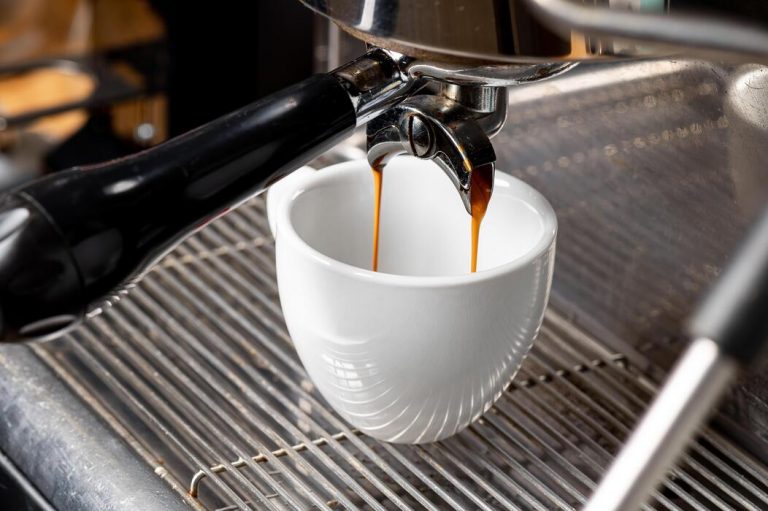
Understanding the fundamental distinction between these two beverages is essential for anyone learning how to homemade cold brew. Unlike standard iced coffee, which is simply hot-brewed coffee poured over ice, cold brew is never exposed to heat during the extraction process.
To make it at home, you steep coarsely ground coffee beans in room temperature or cold water for a duration of twelve to twenty-four hours. This prolonged immersion creates a concentrated syrup that you later dilute with water or milk.
In contrast, iced coffee is brewed quickly with hot water, which extracts oils and acids rapidly but can lead to a watery consistency as the ice melts. By choosing the cold brew method, you ensure a full-bodied texture and a robust flavor profile that remains consistent even after adding ice.
This patient approach results in a beverage that is naturally sweeter and significantly smoother than its heat-extracted counterpart, making it the superior choice for a refreshing caffeine kick.
Why cold brew tastes less acidic
One of the most appealing aspects of making cold brew at home is the significant reduction in perceived acidity and bitterness.
When you use hot water to brew coffee, it triggers a chemical reaction that releases specific solubilized oils and acidic compounds that can sometimes irritate the stomach or create a sharp, sour aftertaste.
Because cold brew relies on time rather than temperature, these high-acid components are never fully extracted from the grounds. Studies suggest that cold brew can be up to 60% less acidic than traditional drip coffee, which highlights the chocolatey, nutty, and fruity notes of the bean without the harsh bite.
For those with sensitive digestive systems, this method provides a much gentler experience.
When preparing your homemade batch, ensure you use a consistent coarse grind to prevent over-extraction, which further guarantees a mellow, velvety finish that highlights the natural sugars of the coffee bean, eliminating the need for heavy sweeteners or creamers to mask bitterness.
Caffeine content in cold brew vs drip coffee
There is a common misconception regarding the potency of cold brew, but the reality depends entirely on your dilution ratio. Because the process involves a high coffee-to-water ratio, the initial result is a potent concentrate that contains significantly more caffeine per ounce than standard drip coffee.
However, most homemade recipes suggest a one-to-one dilution with water, milk, or a dairy alternative before serving. When diluted properly, a glass of cold brew typically contains a caffeine level comparable to or slightly higher than a standard cup of drip coffee.
The extended steeping time allows for a slow and steady caffeine extraction, resulting in a drink that provides a sustained energy boost without the immediate jitters often associated with hot espresso drinks. To control your caffeine intake, you can easily adjust the strength of your concentrate during the filtration process.
This versatility makes cold brew an excellent tool for customizing your morning routine to fit your specific energy needs while enjoying a premium, cafe-quality beverage.
Essential tools for making cold brew at home

Best types of containers to use
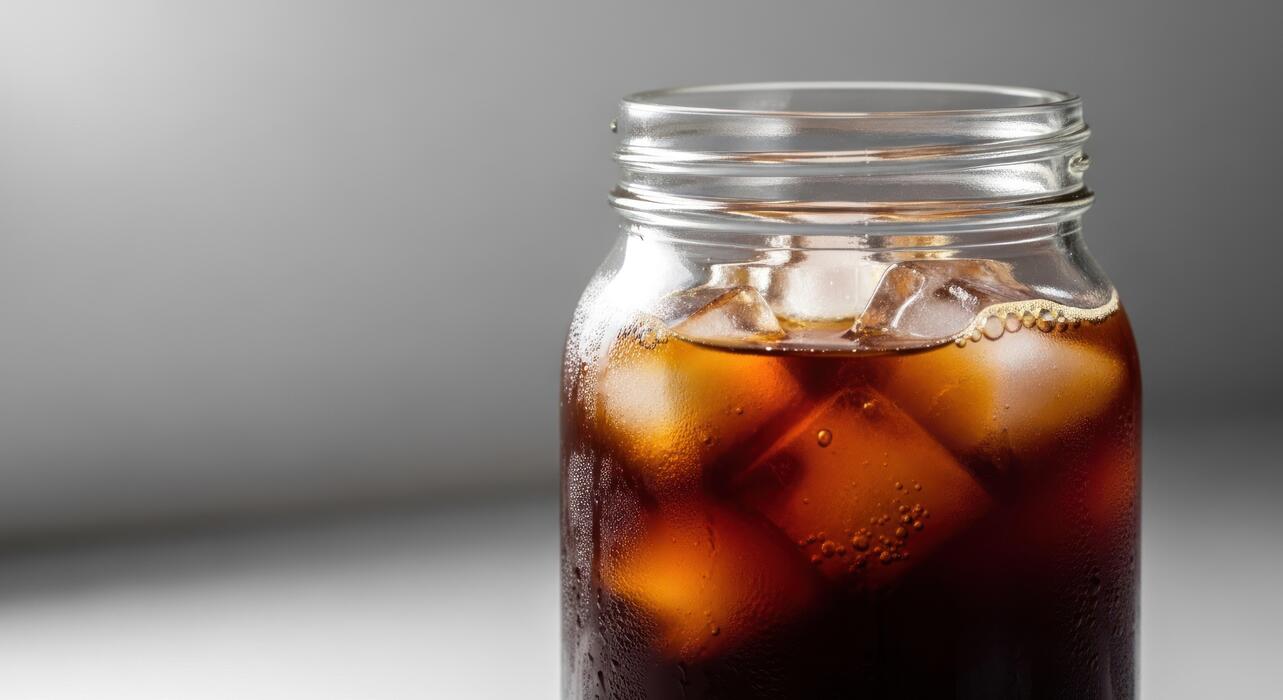
Selecting the right vessel is the foundational step in mastering how to homemade cold brew. While you can technically use any deep container, glass Mason jars or specialized borosilicate glass carafes are the gold standard because they are non-porous and do not retain odors from previous batches.
This ensures your coffee remains crisp and untainted by metallic or plastic aftertastes. If you are brewing large quantities, a stainless steel cold brew system is an excellent alternative due to its durability and light-blocking properties, which help maintain the stability of the coffee oils during the long extraction process.
Avoid using cheap plastic containers, as they can leach chemicals or absorb flavors over time. Ensure your chosen container has an airtight seal to prevent the coffee from absorbing odors from other foods in your refrigerator during the twelve to twenty-four hour steeping period.
A wide-mouth opening is also highly recommended to make adding grounds and cleaning the interior much easier after your concentrate is finished.
Filtering options: Cheesecloth vs paper filters
The filtration method you choose directly dictates the mouthfeel and clarity of your final beverage. Cheesecloth or nut milk bags are popular because they allow more of the natural coffee oils to pass through, resulting in a heavy, creamy body and a more robust flavor profile.
However, these require thorough cleaning and can sometimes let fine sediment pass into the cup. On the other hand, disposable paper filters or high-quality coffee socks provide a much cleaner, sediment-free result by capturing even the smallest particulates and excess oils.
This produces a bright, crisp profile that many enthusiasts prefer for refreshing iced drinks.
For the best of both worlds, many home brewers use a two-step process: initial straining with a metal mesh or cheesecloth to remove the bulk of the grounds, followed by a final pass through a paper filter to polish the concentrate.
Whichever you choose, ensure the material is food-grade and unbleached to avoid introducing unwanted chemical tastes into your meticulously steeped cold brew concentrate.
Why a burr grinder matters for coarse grounds
To achieve a smooth, sweet concentrate without bitterness, you must use a consistent coarse grind resembling sea salt. This is why a burr grinder is an essential tool for the home setup, as it uses two revolving abrasive surfaces to crush beans into uniform sizes.
In contrast, standard blade grinders chop beans unevenly, creating ‘fines’ or dust-like particles that over-extract quickly, leading to an unpleasant bitter taste. Because cold brew involves a long immersion time, these tiny particles can ruin the entire batch by releasing tannins too early.
A burr grinder allows you to dial in the exact setting needed to ensure the water saturates every grain equally, resulting in a balanced and low-acid extraction.
Investing in a quality grinder also allows you to use freshly roasted whole beans, which retain their aromatic oils much longer than pre-ground coffee.
By controlling the grind size with precision, you guarantee a reliable result every time you brew, moving from a hobbyist to a pro-level home barista with minimal effort.
How to choose the best coffee beans
Why dark roasts work best for cold extraction
When making homemade cold brew, selecting the right roast profile is the first step toward a smooth, flavorful result. For this specific method, dark roasts are highly recommended because the long, cold steeping process excels at extracting rich, chocolatey, and nutty notes without the harsh acidity found in hot brewing.
Light roasts often contain delicate floral and fruity acids that can taste sour or underdeveloped when brewed with cold water over twelve to twenty-four hours.
Darker beans have a more porous structure due to longer roasting times, allowing the water to penetrate and dissolve solubles more efficiently during the extended immersion period. This results in a bold, full-bodied concentrate that maintains its character even when diluted with milk or ice.
By opting for a dark roast, you ensure a low-acid profile that is gentle on the stomach while providing that classic, deep coffee flavor that enthusiasts crave in a refreshing glass of cold brew.
The importance of a coarse grind size
The most critical technical factor in successful cold brew extraction is the grind size, which must be consistently extra coarse, resembling sea salt or peppercorns. Using a fine or medium grind is a common mistake that leads to over-extraction, resulting in a bitter, astringent taste that ruins the beverage.
Because cold brew relies on time rather than heat, a larger surface area is necessary to allow for a slow, gentle flavor release. Furthermore, coarse grounds are much easier to filter out once the steeping process is complete.
If the particles are too small, they will clog your filter or pass through entirely, leaving you with a cloudy, silty texture in your final cup. For the best results, use a burr grinder to achieve a uniform consistency, ensuring that every particle extracts at the same rate.
This precision prevents the muddy flavors associated with uneven grinds and guarantees a clean, crisp finish that highlights the natural sweetness of your chosen coffee beans.
Freshness and storage tips for your beans
While cold brew is more forgiving than espresso, using fresh beans is still paramount for a high-quality homemade concentrate. Always look for a recent roast date on the packaging, ideally within the last two to four weeks, to ensure the oils and aromatic compounds are still vibrant.
To maintain this freshness, store your whole beans in an airtight, opaque container kept in a cool, dark place like a pantry. Avoid the refrigerator or freezer, as moisture and fluctuating temperatures can degrade the bean structure and introduce unwanted odors.
It is also vital to grind your beans immediately before you begin the steeping process; pre-ground coffee loses its aromatic complexity rapidly due to increased oxygen exposure. By prioritizing whole-bean freshness and proper storage, you preserve the volatile compounds that provide the nuanced flavor profile of your cold brew.
This attention to detail transforms a simple caffeine fix into a premium, cafe-quality experience that showcases the true potential of your carefully selected coffee beans.
Step-by-step guide to making cold brew
The ideal coffee-to-water ratio
To achieve a professional-grade homemade cold brew, you must start with the correct measurements to ensure the perfect strength. The gold standard for a versatile concentrate is a 1:4 ratio, which means using one cup of coarsely ground coffee for every four cups of filtered water.
If you prefer a milder, ready-to-drink version immediately after brewing, you can adjust this to a 1:8 ratio. Using a coarse grind is non-negotiable; fine grounds will result in an over-extracted, bitter flavor and a muddy texture that is difficult to filter.
High-quality filtered water is equally important since it makes up the bulk of your beverage. By sticking to these precise measurements, you create a robust base that holds up well when diluted with ice, milk, or water later.
Weighing your ingredients with a digital kitchen scale provides the most consistent results, allowing you to replicate your favorite batch every single time without any guesswork or flavor variations.
Mixing and steeping instructions
Once you have measured your ingredients, place the coarse grounds into a large glass jar or a dedicated cold brew carafe. Slowly pour the cold, filtered water over the grounds, ensuring every particle is fully saturated.
Use a long spoon to gently stir the mixture, but avoid over-agitation, which can lead to cloudiness. Once mixed, seal the container tightly to prevent the coffee from absorbing any stray odors from your refrigerator.
The magic happens during the long steeping process, which should last between 12 to 24 hours. For a brighter, more acidic profile, 12 hours at room temperature is often sufficient.
However, for a deeper, chocolatey, and more mellow flavor, let the container sit in the refrigerator for a full 24 hours.
This slow extraction process pulls the caffeine and flavor compounds from the beans without the harsh acidity found in hot-brewed coffee, resulting in a naturally sweet and incredibly smooth concentrate that serves as a perfect morning pick-me-up.
How to filter your concentrate for a smooth finish
The final step to mastering homemade cold brew is achieving a sediment-free finish through proper filtration. Begin by pouring the steeped mixture through a fine-mesh sieve to remove the largest coffee grounds.
To catch the smaller silty particles that cause bitterness, perform a second pass using a paper coffee filter, a clean flour sack towel, or a nut milk bag nested inside the strainer. This double-filtration method ensures a crystal-clear concentrate with a silky mouthfeel.
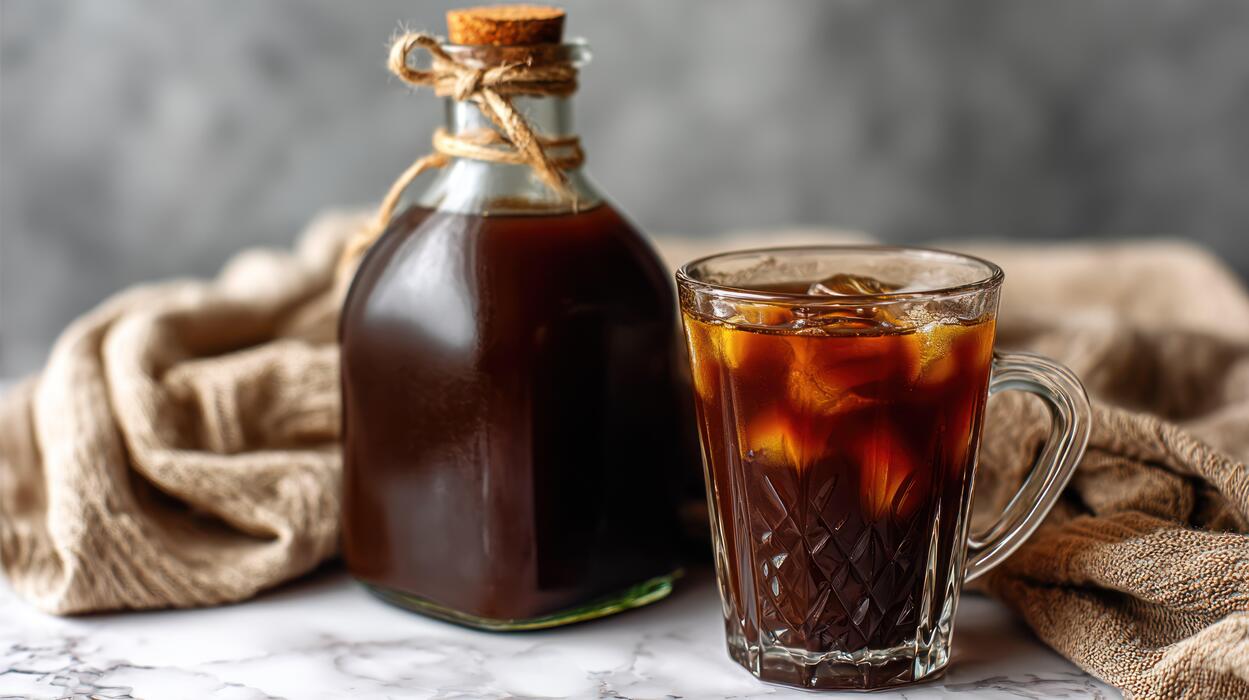
Avoid the temptation to squeeze the filter or press down on the grounds, as this forces fine sediment and bitter tannins into your drink. Once filtered, transfer your clean concentrate into a fresh glass bottle.
This liquid is highly potent, so it is best served diluted with equal parts water or milk. You can store this finished concentrate in the refrigerator for up to two weeks, allowing you to enjoy a quick, cafe-quality iced coffee at a moment’s notice whenever a caffeine craving strikes.
Best ways to store and serve your coffee
How long cold brew stays fresh in the fridge
To maintain the peak flavor and aromatic profile of your homemade beverage, you must understand that storage duration depends on concentration. A batch of undiluted cold brew concentrate can typically stay fresh in the refrigerator for up to two weeks when stored in an airtight glass container.
Glass is the preferred material because it does not leach odors or flavors into your coffee like some plastic containers might. However, if you have already added water or milk to your brew, the shelf life drops significantly to about two or three days.
To ensure the best experience, always keep the container tightly sealed to prevent the coffee from absorbing odors from other foods in your fridge like onions or leftovers. If you notice a sour smell or a visible change in clarity, it is time to discard the batch.
By tracking your brew date with a small label, you can consistently enjoy a smooth, low-acid caffeine boost without any degradation in quality.
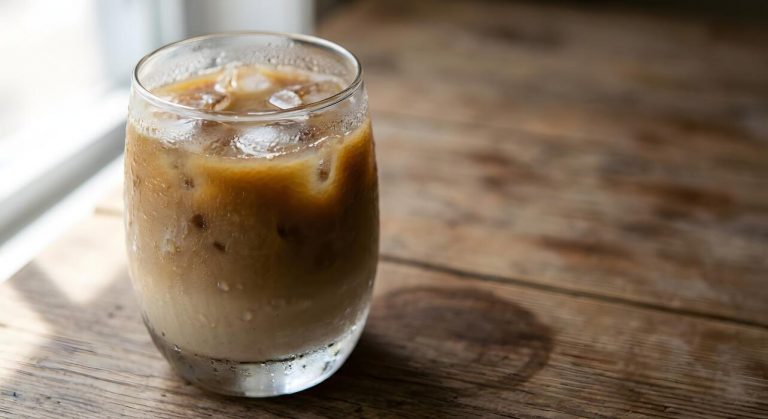
Diluting your concentrate with water or milk
Because the cold brewing process produces a very potent liquid, mastering the art of dilution is essential for achieving the perfect balance of flavor.
The standard recommendation for most home brewers is a one-to-one ratio of coffee concentrate to liquid, but this can be adjusted based on your personal strength preference.
If you enjoy a crisp and clean profile, dilute your concentrate with filtered water to allow the subtle chocolatey or nutty notes of the beans to shine through.
For those who prefer a richer, more indulgent texture, using whole milk, oat milk, or almond milk creates a creamy consistency that complements the natural sweetness of the cold brew process. Always remember to add your ice after mixing to prevent premature dilution.
If you find the brew too intense, simply increase the ratio of your mixer until the bitterness is minimized and the smoothness is highlighted. Experimenting with these ratios allows you to customize every single cup to your specific daily cravings.
Creative ways to use cold brew ice cubes
One of the most common complaints about iced coffee is that it becomes watery as the ice melts, but you can solve this by freezing leftover concentrate into ice cube trays. These coffee cubes are a game-changer for maintaining a consistent flavor profile from the first sip to the last.
Beyond just cooling your drink, you can get creative by dropping these cubes into a glass of milk for a slow-release latte that gets stronger as you drink it.
For a more decadent treat, try blending these frozen coffee blocks with a splash of vanilla syrup and cream to create a homemade frappe with a velvety texture.
You can even add a pinch of sea salt or cinnamon into the tray before freezing to infuse your beverage with extra layers of complexity.
Using cold brew ice cubes ensures that your caffeine kick remains potent and undiluted, transforming a standard morning routine into a professional-grade cafe experience right in your own kitchen without any extra waste.
Tips for better tasting cold brew
Using filtered water for a cleaner flavor
When making cold brew at home, the quality of your water is just as important as the quality of your coffee beans. Since cold brew consists of roughly ninety-eight percent water, any impurities or chemicals like chlorine found in tap water will be significantly amplified during the long extraction process.
To achieve a truly clean and crisp flavor profile, you should always use freshly filtered or bottled spring water rather than straight tap water. Filtered water removes harsh minerals and odors that can mask the delicate chocolatey or fruity notes of your coffee grounds.
By starting with a neutral base, you allow the natural oils and aromatic compounds to shine without interference. This simple adjustment prevents that common chemical aftertaste and ensures your final concentrate has a smooth, velvety mouthfeel.
Remember that distilled water can taste flat, so a standard carbon filter is usually the perfect middle ground for highlighting the intrinsic sweetness of your favorite medium or dark roast beans.
Adjusting steep times for room temperature vs fridge
Temperature plays a critical role in how quickly flavors are pulled from the coffee grounds, making it essential to adjust your clock based on where your jar sits.
If you prefer to steep your cold brew at room temperature on the counter, the process is much faster due to increased molecular kinetic energy; you should aim for a twelve to sixteen-hour window. Steeping longer than this at room temperature often leads to over-extraction and woody notes.
Conversely, if you choose the refrigerator method, the cold environment slows down the extraction significantly. In the fridge, you will need a full twenty to twenty-four hours to achieve the same strength and depth. This slower cold-steeping process often results in an even smoother finish with lower acidity.
Always test a small sample near the end of the time limit to see if the flavor has reached your desired intensity before straining, as consistent timing is the secret to a professional-grade homemade batch every single time.
Common mistakes that make coffee taste bitter
The most frequent culprit behind a bitter batch of cold brew is using a grind size that is far too fine. To avoid harshness, you must use a consistent extra-coarse grind, resembling sea salt or peppercorns, which allows for a slow and gentle saturation.
Fine grounds extract too quickly, releasing unpleasant tannins and bitter polyphenols that ruin the characteristic smoothness of the drink. Another common error is agitation; while it is tempting to stir the grounds frequently, you should only submerge the grounds once at the start.
Excessive stirring can lead to over-extraction and a cloudy appearance. Finally, ensure you are using a high-quality coffee-to-water ratio, typically one part coffee to four parts water for a concentrate. If your brew is too concentrated, it may taste deceptively bitter until properly diluted with water or milk.
By avoiding these pitfalls and focusing on coarse textures and minimal agitation, you can eliminate the bite and enjoy a naturally sweet caffeine kick without any lingering astringency.
Easy cold brew recipe variations
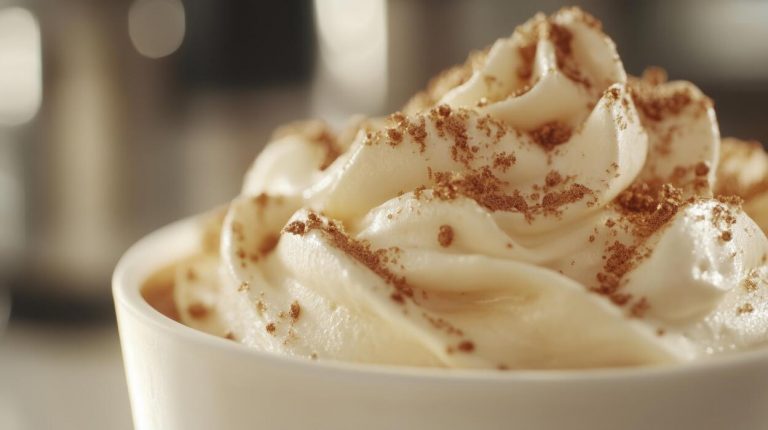
How to make vanilla sweet cream cold brew
To elevate your homemade cold brew, start by crafting a signature vanilla sweet cream that rivals any high-end cafe. Begin with your standard cold brew base, which you have steeped for at least twelve hours and filtered thoroughly.
In a separate small pitcher, whisk together heavy cream, 2% milk, and vanilla syrup until the mixture is slightly thickened but still pourable. For the best flavor profile, aim for a ratio of two parts heavy cream to one part milk to ensure a rich, velvety mouthfeel.
Pour your cold brew over a glass filled with fresh ice, leaving about two inches of space at the top for the dairy. Slowly drizzle the vanilla mixture over the back of a spoon to create a beautiful cascading effect as the cream settles into the coffee.
This simple variation adds a luxurious sweetness and a smooth texture that perfectly balances the natural acidity of the beans, making it a refreshing treat for any morning routine.
Adding spices like cinnamon or cardamom
One of the easiest ways to customize your homemade coffee is by infusing spices directly into the grounds before the steeping process begins. To achieve a warm, aromatic profile, add a teaspoon of ground cinnamon or crushed cardamom pods to your coarse coffee grounds.
By incorporating these dry ingredients at the start, the flavors have ample time to meld with the coffee oils during the long extraction period. This method ensures a subtle, integrated taste rather than the gritty texture often caused by stirring spices into a finished cold drink.
If you prefer a more intense kick, you can also experiment with star anise or a pinch of nutmeg for a seasonal twist. Once the brewing cycle is complete, filter the concentrate as usual to remove all sediment.
This technique produces a complex, spiced beverage that requires very little extra effort but provides a sophisticated flavor profile that stands out without the need for heavy sugars or artificial syrups.
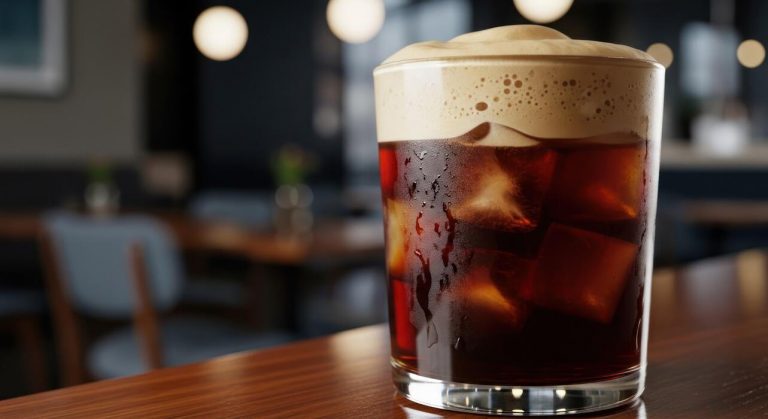
Making a nitrogen-style coffee at home
You can achieve a creamy, nitrogen-style texture at home without investing in expensive pressurized keg systems or specialized tap equipment. The secret to mimicking that signature micro-foam is using a standard French press or a handheld milk frother to aerate your cold brew concentrate.
Start by pouring your chilled coffee into a French press and rapidly pumping the plunger up and down for about thirty seconds. This action introduces tiny air bubbles into the liquid, creating a thick, frothy head and a silky mouthfeel that mimics the effects of nitrogen infusion.
Alternatively, using a battery-operated whisk can produce a similar velvety foam on the surface of your glass. For the most authentic experience, serve the aerated coffee immediately in a clear glass without ice to fully appreciate the tiny bubbles rising to the top.
This simple hack transforms a standard homemade brew into a sophisticated, bubbly delight that feels incredibly indulgent while remaining entirely dairy-free and cost-effective for daily consumption.
Frequently Asked Questions
What is the best coffee-to-water ratio for homemade cold brew?
A standard ratio for cold brew concentrate is 1:4 (one cup of coffee grounds to four cups of water). If you prefer a ready-to-drink brew that doesn’t require dilution, a ratio of 1:8 or 1:10 works best.
What grind size should I use for cold brew?
You should always use a coarse grind, similar to the consistency of sea salt or breadcrumbs. Finer grinds can lead to over-extraction, resulting in a bitter taste, and are much harder to filter out of the final liquid.
How long should I steep my cold brew?
For optimal flavor, let the coffee steep at room temperature or in the refrigerator for 12 to 18 hours. Steeping for longer than 24 hours can result in woody or overly bitter notes.
Do I need special equipment to make cold brew at home?
No special equipment is required; you can simply use a large glass jar or pitcher and a fine-mesh sieve lined with cheesecloth. A French press also works excellently as it has a built-in plunger for easy filtering.
Should I steep cold brew in the fridge or on the counter?
Both methods work well, but room temperature steeping is generally faster and extracts more floral notes. Steeping in the refrigerator takes longer but often produces a cleaner, more mellow flavor profile.
How long does homemade cold brew stay fresh?
Stored in an airtight container in the refrigerator, cold brew concentrate can last for up to two weeks. Once you dilute the concentrate with water or milk, it is best consumed within 2 to 3 days.
Why is my homemade cold brew bitter?
Bitterness is usually caused by using a grind that is too fine or steeping the coffee for too long. Ensure you are using a very coarse grind and aim to filter the coffee before the 20-hour mark.
Conclusion
Making homemade cold brew is a simple, rewarding process that saves money while delivering a smooth, low-acid caffeine kick. By mastering the right coffee-to-water ratio and allowing ample steeping time, you can create a versatile concentrate tailored to your taste. Whether you enjoy it black or with a splash of cream, the possibilities are endless. Now that you have the tools and techniques, grab your favorite beans and start brewing your own perfect batch today.