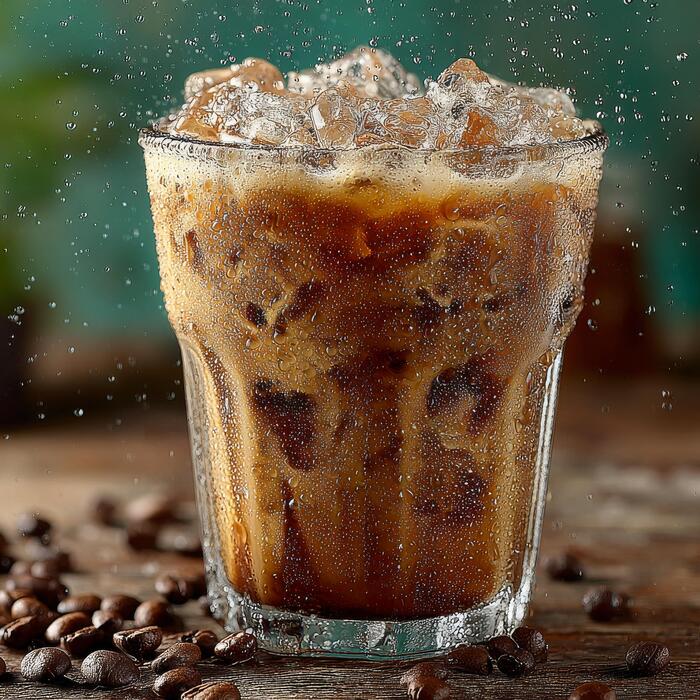
How To Make Dunkin Cold Brew
Craving that smooth, bold flavor of your favorite coffee shop drink without leaving the house? You are in luck because learning how to make Dunkin cold brew at home is surprisingly simple and cost-effective. Whether you use their official pre-packaged kits or your own coarse grounds, achieving that signature velvet texture is all about the right ratio and patience. This guide provides a quick, foolproof method to recreate the magic in your kitchen so you can start sipping sooner.
What makes Dunkin’ cold brew different?
The specific coffee bean blend
To replicate the signature taste of Dunkin’ cold brew at home, you must start with the right foundation. Dunkin’ utilizes a 100% Arabica bean blend that is specifically sourced and roasted for cold extraction.
Unlike their standard drip coffee, this blend is roasted darker to ensure the flavor holds up against ice and dairy. To achieve this in your kitchen, look for a medium-to-dark roast with low acidity.
The secret to the texture lies in the grind size; you must use a coarse, sand-like grind rather than a fine powder. This prevents over-extraction and bitterness during the long soaking process.
Using high-quality filtered water is also essential to let the nutty and chocolatey notes of the beans shine through.
By selecting a craft blend that mimics these characteristics, you can create a concentrate that serves as the perfect base for your morning beverage, providing that consistent and familiar coffee shop quality that fans of the brand expect with every single sip.
Steeping time vs. traditional iced coffee
The primary difference between Dunkin’ cold brew and standard iced coffee is the element of time. While traditional iced coffee is brewed hot and quickly cooled, Dunkin’ prepares their cold brew by steeping grounds in cold water for 12 hours.
This slow, heat-free process is what distinguishes the beverage’s body and potency. If you are learning how to make this at home, patience is your most important ingredient.
You should allow your coffee to sit at room temperature or in the fridge for at least half a day to fully extract the oils and caffeine. This extended duration ensures a high caffeine concentration without the watered-down taste often associated with pouring hot coffee directly over ice.
Using a large glass jar or a dedicated cold brew maker allows the water to fully saturate the coarse grounds. Once the twelve-hour mark is reached, straining the mixture through a fine mesh filter or cheesecloth will result in a smooth, velvety concentrate that is ready for dilution and enjoyment.
Flavor profile and acidity levels
One of the most appealing aspects of the Dunkin’ cold brew method is the resulting flavor profile, which is significantly smoother and less acidic than hot-brewed alternatives. Because the coffee grounds never touch boiling water, the bitter tannins and acidic oils are not released into the final drink.
This creates a naturally sweet, chocolate-forward taste that requires less sugar or creamer to be palatable. When making this yourself, you will notice that the cold extraction process highlights the mellow, earthy tones of the Arabica beans.
This low-acid characteristic makes it much gentler on the stomach, allowing coffee lovers with sensitivities to enjoy a bold cup without discomfort. To maintain this profile, always store your finished concentrate in a sealed container in the refrigerator, where it will stay fresh for up to a week.
This stability allows you to prep a large batch on the weekend, providing a convenient and delicious solution for busy mornings while maintaining that iconic, crisp finish that defines the Dunkin’ experience.
Ingredients and tools for the perfect copycat recipe
Choosing the right Dunkin’ coffee grounds
To replicate the signature taste of a Dunkin’ cold brew, you must start with the correct coffee profile. While you can use any medium roast, purchasing the official Dunkin’ Original Blend or their specific cold brew packs ensures the flavor notes are accurate.
The key to a smooth, non-bitter result is the grind size; you require a coarse, sandpaper-like grind rather than the fine powder used for drip machines. A coarse grind allows for a slow extraction process that pulls out the chocolatey and nutty undertones without releasing excess acidity or harsh tannins.
If you are grinding beans at home, set your burr grinder to its highest setting to maintain consistency. Using pre-ground coffee intended for standard brewers may lead to a cloudy, over-extracted beverage that lacks the crisp finish found in the restaurant version.
Aim for a high-quality medium roast to achieve that familiar, mellow profile that pairs perfectly with cream and sugar.
Water quality and filtration
Since cold brew is composed of approximately 98% water, the quality of your liquid base is just as important as the coffee beans themselves. Avoid using straight tap water, as chlorine and minerals can significantly alter the delicate chemical balance of the brew, leading to a metallic or chemical aftertaste.
Instead, utilize filtered or bottled spring water to provide a clean canvas for the coffee flavors to shine. The water should be at room temperature or slightly chilled when you begin the steeping process; never use hot water, as this initiates a different chemical reaction that increases bitterness.
Maintaining a consistent water-to-coffee ratio is also vital for success. Most experts recommend a 1:4 or 1:5 ratio for a concentrate, which you can later dilute to your preference.
By prioritizing purified water and precise measurements, you ensure that the natural sweetness of the Dunkin’ blend is highlighted, resulting in a refreshing, cafe-quality beverage that remains shelf-stable in your refrigerator for up to two weeks.
Essential equipment for home brewing
You do not need an expensive setup to make professional-grade cold brew, but having the right tools makes the process seamless and clean. An extra-large glass mason jar or a dedicated cold brew pitcher serves as the primary vessel for the long steeping period.
To manage the messy grounds, many home baristas prefer using disposable nut milk bags or fine mesh cold brew filters, which allow for easy removal once the 12 to 24-hour brewing cycle is complete.
If you prefer a cleaner cup with zero sediment, a secondary filtration step using a standard paper coffee filter or a French press can help clarify the liquid. Additionally, a long-handled spoon is necessary to ensure all grounds are fully saturated before sealing the container.
Having a reliable kitchen scale is also recommended to weigh your coffee and water accurately, ensuring every batch tastes identical to the last. With these basic tools, you can transform your kitchen into a personal coffee shop and enjoy a constant supply of chilled caffeine.
How to make Dunkin’ cold brew at home

Measuring the coffee-to-water ratio
To replicate the signature Dunkin’ taste at home, achieving the perfect concentration is your first priority. Start by selecting a coarse grind coffee, specifically using Dunkin’ Original Blend or their dedicated cold brew packs.
For a standard batch, use a 1:4 coffee-to-water ratio if you intend to create a potent concentrate, or a 1:8 ratio for a ready-to-drink beverage. Using a kitchen scale is the most accurate method; aim for approximately one cup of ground coffee for every four cups of filtered water.
The quality of your water significantly impacts the final profile, so always use cold, filtered water to avoid any mineral aftertaste. If you prefer a bolder, punchier kick that mirrors the in-store experience, slightly increase the coffee volume.
Remember that cold brew is naturally less acidic, so don’t be afraid to lean toward a stronger measurement. Proper calibration at this initial stage ensures your brew isn’t watery or overly bitter once diluted with ice.
The step-by-step steeping process
Once your grounds and water are measured, combine them in a large glass jar or a dedicated cold brew maker. Gently stir the mixture with a long spoon to ensure every coffee ground is fully saturated, but avoid over-agitating the sediment.
Secure the lid tightly to prevent the coffee from absorbing any stray refrigerator odors. For the authentic Dunkin’ flavor profile, let the mixture steep for 12 to 15 hours at room temperature, or up to 24 hours if steeping in the refrigerator.
A longer steep time results in a deeper, chocolatey richness, while a shorter window keeps the profile bright and mellow. Maintaining a consistent temperature environment throughout the duration is vital for a balanced extraction. Avoid placing the container in direct sunlight.
If you are using pre-portioned Dunkin’ cold brew packs, simply drop them into the water and let gravity do the work. Patience is essential here; the slow extraction process is what creates that iconic smooth, low-acid finish fans love.
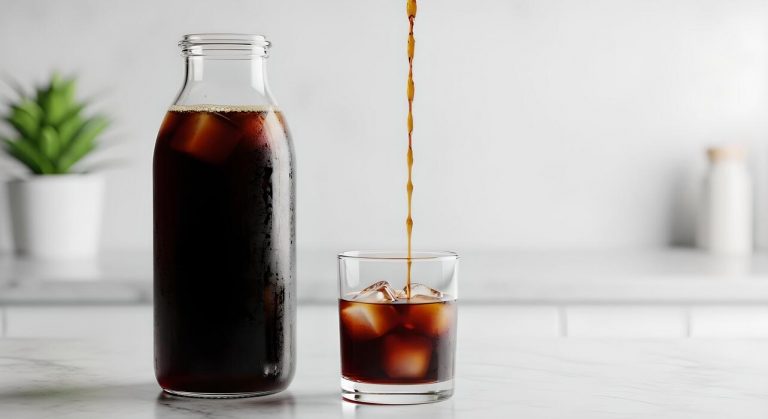
Straining and filtering for a smooth finish
After the steeping time has elapsed, the final step is removing the grounds to achieve a professional, sediment-free texture. If you didn’t use filter bags, pour the liquid through a fine-mesh sieve lined with a paper coffee filter or a cheesecloth.
Pour slowly to prevent the filter from clogging, and never squeeze the grounds, as this forces bitter tannins into your drink. For an ultra-clean finish, you may want to pass the liquid through a secondary filter.
Once strained, you are left with a rich cold brew concentrate that should be stored in the fridge for up to a week. To serve, fill a glass with fresh ice and combine equal parts concentrate and water, or customize it with milk and sugar to match your favorite order.
Adding a splash of cream or a pump of caramel syrup will perfectly mimic the Dunkin’ signature style. This careful filtration process ensures your homemade version is just as refreshing and crisp as the one from the drive-thru.
How to customize your cold brew flavor
Making DIY vanilla and caramel swirls
To replicate the iconic Dunkin’ flavor profile at home, you must master the art of the flavored swirl. Unlike thin syrups, these swirls are thick, creamy, and indulgent.
You can create a DIY vanilla swirl by simmering condensed milk with vanilla bean paste and a pinch of salt until it reaches a velvety consistency.
For the caramel swirl experience, melt high-quality buttery caramels with a splash of heavy cream and a hint of sea salt to mimic the savory-sweet balance found in the shop.
The secret to a perfect distribution is adding these thick sauces to the bottom of your glass before pouring the cold brew. Use a long spoon to vigorously stir the concentrate, ensuring the swirl integrates fully rather than settling at the base.
This method provides that rich, dessert-like mouthfeel that characterizes a professional brew. Experimenting with ratios allows you to control the sugar intensity and viscosity of your morning beverage precisely.
Choosing the right milk or cream
The dairy component is essential for achieving the smooth, pale tan color and mellow finish associated with a classic cold brew. To stay true to the original, use half-and-half or light cream, as these provide the necessary fat content to cut through the acidity of the coffee beans.
If you prefer a lighter version, whole milk offers a decent balance, while skim milk provides a thinner texture that highlights the coffee’s natural chocolate notes. For those seeking plant-based alternatives, extra-creamy oat milk is the superior choice because its natural sweetness and thick density closely resemble traditional dairy.
Always pour your chosen milk over the ice after the coffee is added to see the beautiful marbling effect. Remember that cold brew is a concentrate, so the ratio of milk to coffee is vital; typically, a one-to-three ratio ensures the beverage remains bold without becoming watery.
Using cold dairy prevents the ice from melting too quickly and diluting your drink.
Adding the signature Dunkin’ sweetener
Achieving the specific sweetness of a commercial cold brew requires more than just stirring in granulated sugar, which often fails to dissolve in cold liquids.
To get it right, prepare a simple syrup by boiling equal parts water and sugar until clear, which allows the sweetener to distribute evenly throughout the cold beverage.
If you want to match the specific ‘liquid cane sugar’ taste, use turbinado or raw sugar in your syrup base for a deeper, molasses-like undertone. Another tip is to sweeten your milk or cream before adding it to the coffee, creating a consistent flavor in every sip.
For those monitoring their intake, liquid stevia or monk fruit drops are excellent substitutes that blend seamlessly into the chilled concentrate without leaving a gritty residue. The goal is to enhance the smooth, low-acid profile of the cold brew rather than masking it.
Start with a small amount of sweetener and gradually increase it to find your perfect balance of bold coffee and sweet refreshment.
Tips for the best cold brew results
Why grind size matters
To replicate the smooth signature taste of Dunkin’ at home, you must prioritize the texture of your coffee beans. Achieving the perfect extraction starts with a coarse, sea salt-like grind rather than the fine powder used for standard drip machines.
If the particles are too small, the water will over-extract the oils, leading to a cloudy appearance and a harsh, muddy flavor profile. Conversely, using a consistent coarse grind allows for a slow, steady release of flavor during the long immersion process.
This specific texture ensures that the water can flow freely around the grounds, pulling out the natural sweetness and chocolate notes without the acidity. When preparing your beans, use a burr grinder instead of a blade grinder to ensure uniformity.
Consistent particle size is the secret to a professional-grade concentrate that remains crisp and clean. By mastering this physical foundation, you set the stage for a balanced brew that mirrors the quality of your favorite coffee shop experience.
Optimal fridge temperature for steeping
Temperature control is a critical variable that many home baristas overlook when trying to master the Dunkin’ style cold brew method. For the best results, you should steep your coffee in the refrigerator at a consistent temperature between 35°F and 40°F.
Steeping in a cold environment slows down the oxidation process significantly, which is what gives cold brew its famous low-acid and mellow finish.
While some recipes suggest room temperature brewing for speed, the refrigerator method produces a much cleaner and more refined taste that stays fresh for up to two weeks. Ensure your container is tightly sealed to prevent the coffee from absorbing odors from other foods like onions or leftovers.
A steady, cold environment allows for a gentle twelve to fifteen-hour extraction period. This patient approach ensures that the delicate aromatic compounds are preserved while the bitter tannins remain trapped in the grounds.
Maintaining this thermal stability throughout the entire duration is the key to achieving that refreshing, silky smooth mouthfeel every single time.
How to avoid bitter or weak coffee
The balance between a brew that is too harsh and one that tastes like tinted water comes down to the precise coffee-to-water ratio. To avoid a weak result, aim for a 1:4 or 1:5 ratio of coffee to filtered water, which creates a robust concentrate.
If your final cup tastes bitter, it is likely because you steeped the grounds for longer than eighteen hours; over-steeping pulls out woody, astringent flavors that ruin the profile. To fix this, always set a timer and filter the grounds promptly once the time is up.
If the coffee feels too strong after filtering, remember that it is a concentrate intended to be diluted with ice, water, or milk before serving. Using filtered water is also essential, as tap water minerals can interfere with the coffee’s natural oils and create off-flavors.
By carefully monitoring your steeping time and sticking to a measured ratio, you can eliminate the guesswork and ensure your homemade version is never thin or unpleasantly sharp, but perfectly bold and satisfying.
How to make Dunkin’ cold foam at home
Ingredients for sweet cream foam
To replicate the signature Dunkin’ experience, you must begin with a precise blend of dairy and sweeteners.
The foundation of a perfect cold foam is a mixture of heavy whipping cream and whole milk, typically using a two-to-one ratio to ensure the foam is thick enough to sit atop your coffee without immediately dissolving.
To match the specific sweetness profile of the original, incorporate granulated sugar or simple syrup along with a generous splash of pure vanilla extract. Some enthusiasts also recommend adding a tiny pinch of salt to enhance the creamy notes and balance the sugar.
For those seeking a dairy-free alternative that still mimics the richness of the chain’s version, full-fat oat milk or a barista-blend almond milk can be substituted, though the stability of the bubbles may vary.
Measuring these ingredients accurately while they are still chilled is the most critical step to achieving that velvety, pourable consistency that defines a high-quality cold brew topper at home.
Using a frother for the right texture
Achieving the ideal microbubble structure requires the right equipment and technique to transform your liquid base into a cloud-like topping. A handheld milk frother is the most efficient tool for this task, as it allows you to control the depth and angle of the aeration process.
Submerge the whisk head just below the surface of the cold cream mixture and turn it on, moving it slowly up and down for approximately thirty to forty-five seconds until the volume has nearly doubled. You are looking for a thick, pourable consistency rather than a stiff, whipped cream peak.
If you do not own a handheld wand, a French press serves as an excellent alternative; simply pump the plunger rapidly for thirty seconds to force air into the dairy.
Once the foam is dense and glossy, let it sit for a moment to stabilize before gently pouring it over your ice-cold brew coffee, allowing the cream to cascade beautifully down the sides of the glass.
Flavoring your foam with seasonal spices
The versatility of homemade cold foam allows you to customize your beverage with various seasonal profiles that rival the limited-time offerings at the drive-thru. To create a fall-inspired treat, whisk in a teaspoon of pumpkin pie spice and maple syrup before you begin the frothing process.
During the winter months, adding a drop of peppermint extract or a dusting of dark cocoa powder can transform your standard cold brew into a festive holiday drink.
For a classic salted caramel variation, drizzle caramel sauce into the cream and add a touch of sea salt, ensuring the flavors are fully integrated into the foam rather than just sitting at the bottom of the cup.
Experimenting with these infusions ensures that your homemade version is never boring and always tailored to your specific palate. Always remember to sift dry spices to prevent clumping, which ensures a smooth mouthfeel and a professional presentation that makes your kitchen feel like a high-end cafe every single morning.
Storing and serving your cold brew
How long cold brew stays fresh
To maintain that signature Dunkin smoothness, you must understand the shelf life of your concentrate. Once you have filtered out the grounds, your cold brew concentrate remains fresh for up to two weeks in the refrigerator, provided it is stored in an airtight glass container like a mason jar.
Keeping the air out prevents oxidation, which can lead to a bitter or stale flavor profile. If you have already diluted the coffee with water, you should aim to consume it within three to five days for the best quality.
Always perform a quick sniff test before pouring; if the aroma has shifted from chocolatey to acidic, it is time to brew a new batch. To maximize longevity, never leave the pitcher on the counter for extended periods during use.
Returning it immediately to the coldest part of the fridge ensures that every glass tastes as crisp and refreshing as the first pour you enjoyed on brewing day.
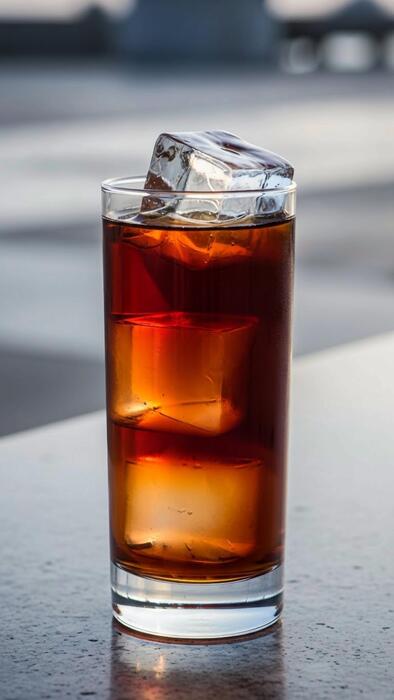
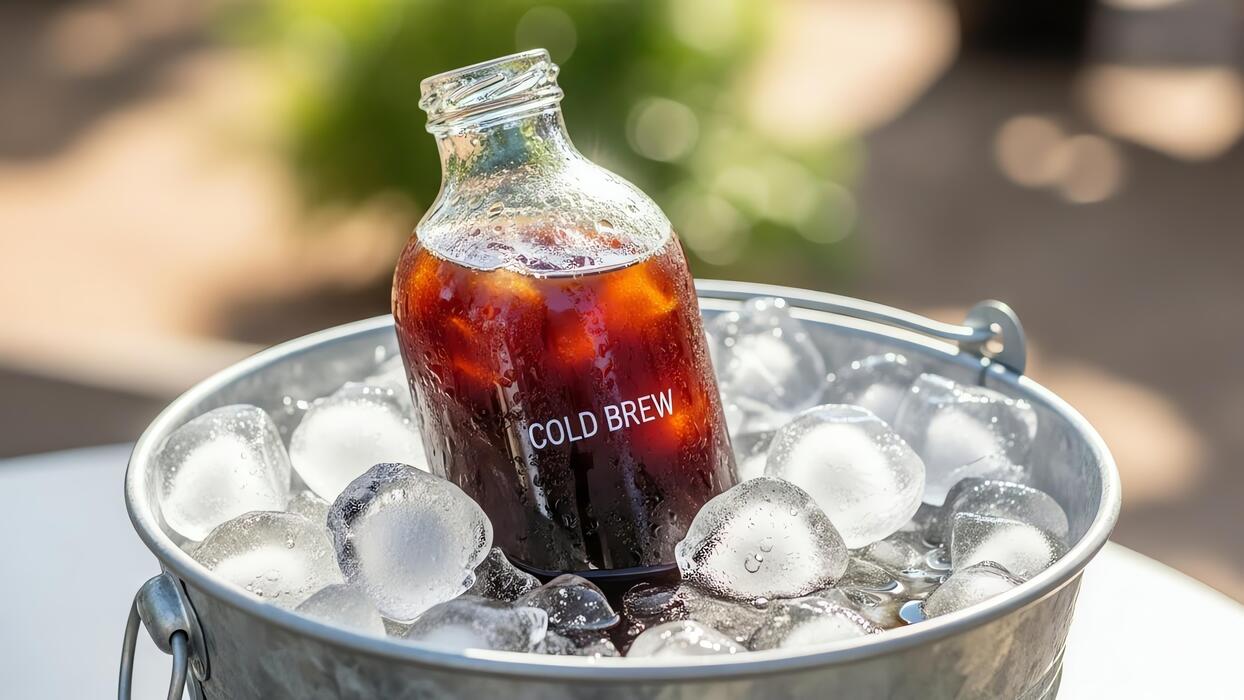
The best way to serve over ice
Serving your homemade cold brew correctly is the secret to achieving that authentic coffee shop experience at home. Start by filling a large glass with fresh, oversized ice cubes; larger cubes melt slower, preventing your drink from becoming watery too quickly.
For a true Dunkin-style finish, use a ratio of one part concentrate to one part water or milk. If you prefer a bolder kick, increase the concentrate ratio slightly.
Pour the coffee over the ice first, then add your sweeteners or syrups while the liquid is still moving to ensure they dissolve completely. For those who love a creamy texture, float your choice of cream or oat milk on top and watch it marble down through the dark coffee.
If you want to prevent any dilution at all, consider freezing some of your previous batch into coffee ice cubes. This pro tip ensures that as the ice melts, it only adds more caffeine and flavor to your refreshing beverage.
Batch brewing for the whole week
Efficiency is key when you want to enjoy Dunkin-style cold brew every morning without the daily cleanup. To prepare a full week of caffeine, utilize a large gallon-sized glass dispenser or several half-gallon jars to scale up your recipe.
Use a consistent ratio of twelve ounces of coarse grounds to seven cups of water for a powerful concentrate that lasts. Since the steeping process takes twelve to eighteen hours, plan your brew for Sunday evening so it is ready for the Monday morning rush.
Once the steeping is complete and the grounds are removed, you have a versatile base ready for any recipe. You can quickly pour a glass, add a splash of cold water, and be out the door in seconds.
This batch brewing strategy not only saves you significant money compared to daily drive-thru visits but also ensures you have a consistent, high-quality energy boost waiting for you. Simply keep the vessels sealed tightly to preserve the bold, low-acid flavor all week long.
Frequently Asked Questions
What is the best ratio for DIY Dunkin’ cold brew?
To mimic the signature Dunkin’ flavor, use a 1:4 ratio of coffee to water. For a standard pitcher, steep 1 cup of coarsely ground Dunkin’ Original Blend beans in 4 cups of cold, filtered water.
How long should I steep Dunkin’ cold brew?
For the best flavor extraction, let your coffee grounds steep in cold water for 12 to 18 hours at room temperature or in the refrigerator. Steeping longer than 24 hours can result in a bitter taste.
Can I use regular Dunkin’ ground coffee for cold brew?
Yes, you can use standard Dunkin’ Original Blend grounds, but for the smoothest results, it is better to buy whole beans and grind them to a coarse, breadcrumb-like consistency. This prevents the coffee from becoming cloudy or over-extracted.
How do I filter the cold brew at home?
After the steeping process is complete, pour the mixture through a fine-mesh sieve lined with a paper coffee filter or a cheesecloth. This ensures all fine sediment is removed, leaving you with a clean, smooth concentrate.
How should I serve my homemade Dunkin’ cold brew?
Since the result is a concentrate, dilute it by mixing equal parts coffee and water or milk over ice. To match the restaurant experience, add Dunkin’ brand swirls or simple syrup before stirring.
How long does homemade cold brew stay fresh?
Once filtered, your cold brew concentrate can be stored in an airtight container in the refrigerator for up to 7 to 10 days. For the freshest taste, try to consume it within the first week.
Conclusion
Mastering the art of Dunkin-style cold brew at home is both rewarding and cost-effective. By selecting the right roast, maintaining a coarse grind, and allowing for a slow steep, you can replicate that signature smooth, bold flavor in your own kitchen. Whether you enjoy it black or customized with your favorite swirls, the possibilities are endless. Now that you have the technique down, it is time to start brewing and enjoy your perfect homemade glass today.