How To Make Vanilla Cream Cold Foam
Craving that velvety, sweet topper for your morning brew? Learning how to make vanilla cream cold foam at home is surprisingly simple and much cheaper than the drive-thru. Whether you have a fancy frother or just a simple mason jar, you can achieve that cloud-like consistency in seconds. This guide provides the perfect three-ingredient recipe and foolproof techniques to guarantee professional results every time.
What is vanilla cream cold foam?
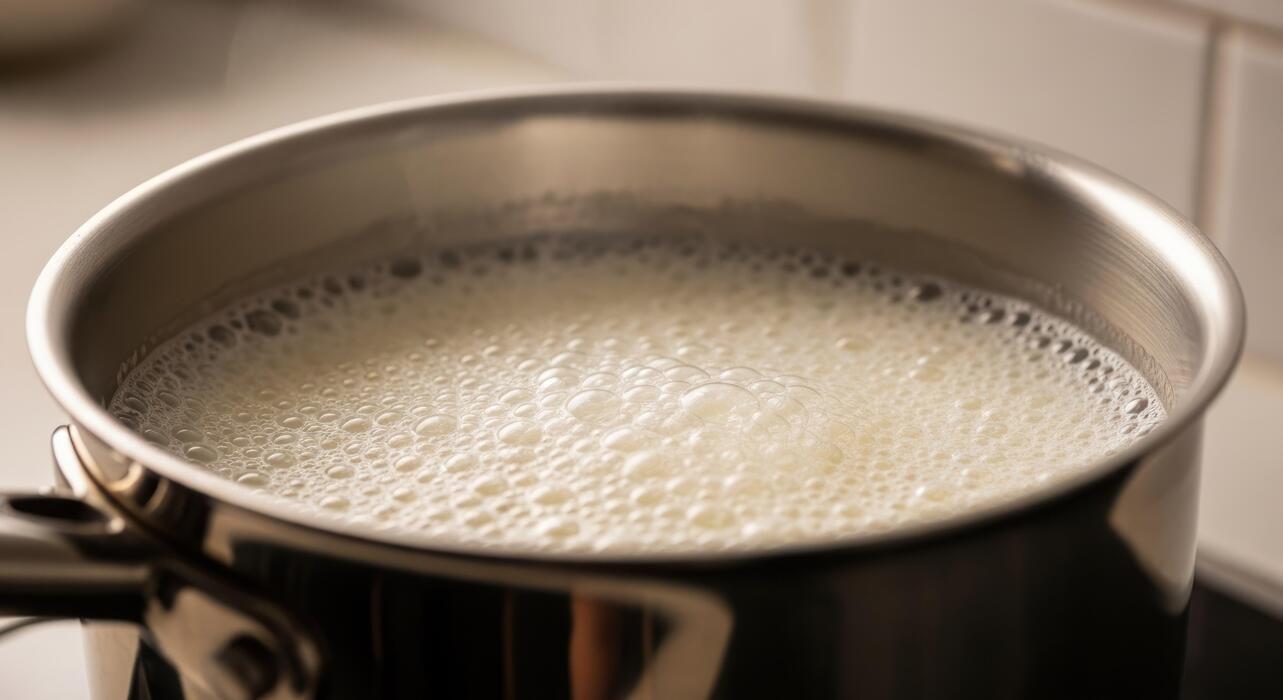
The difference between cold foam and steamed milk
Understanding the structural differences between these two toppings is essential for achieving the perfect café-style drink at home. Unlike traditional steamed milk, which relies on high heat to denature proteins and create a silky microfoam for hot lattes, vanilla cream cold foam is processed entirely while chilled.
To make it, you must use a high-speed frothing method—such as a handheld milk frother or a specialized cold setting on an electric aerator—to incorporate air into a mixture of heavy cream, milk, and syrup.
This process creates a thick, pillowy texture that sits gracefully on top of cold liquids without immediately melting.
While steamed milk is designed to blend and emulsify with hot espresso to create a uniform body, cold foam is intended to remain a distinct, aerated layer that slowly cascades into your iced coffee.
By keeping the ingredients cold, you maintain the fat stability required to hold those tiny air bubbles, resulting in a luxurious, velvet-like mouthfeel that hot milk simply cannot replicate in a cold beverage environment.
Why cold foam is better for iced coffee
When you are looking for the ultimate way to elevate your morning brew, cold foam is the superior choice over standard liquid creamer or hot foam. The primary benefit lies in its density and temperature compatibility, which prevents the unappealing separation that often happens when hot elements hit ice.
Because vanilla cream cold foam is whipped into a stable, airy state, it acts as a flavorful barrier that sits atop the ice cubes rather than sinking directly to the bottom of the glass.
This allows you to experience a sophisticated flavor profile where you sip the bold, crisp iced coffee through a sweet, creamy cloud. Furthermore, the aeration process enhances the aromatic qualities of the vanilla, making every sip feel more indulgent without needing to stir the drink.
Using this method ensures your beverage stays perfectly chilled and visually stunning, offering a professional aesthetic and a complex texture that transforms a basic caffeine fix into a gourmet treat that maintains its structural integrity until the very last drop.
Starbucks vs. homemade vanilla sweet cream
Recreating the iconic Starbucks experience at home is surprisingly simple once you master the ratio of their signature sweet cream.
The commercial version relies on a specific blend of heavy cream, 2% milk, and vanilla syrup, but the homemade advantage allows you to customize the sweetness and richness to your exact preference.
To achieve that professional consistency, use a ratio of two parts heavy cream to one part milk, ensuring the mixture is cold enough to hold a peak.
While the coffee chain uses industrial-grade blenders, you can achieve identical results using a simple handheld milk frother for about thirty seconds until the liquid doubles in volume.
Making it yourself is not only more cost-effective, but it also allows you to avoid preservatives and choose high-quality organic ingredients or natural sweeteners.
By whipping the cream just before serving, your homemade version will often taste fresher and have a more stable foam structure than the pre-made batches found in busy cafes, giving you a premium, customizable coffee house topping right in your own kitchen every morning.
Essential ingredients for the perfect recipe
Choosing the right milk and heavy cream
To achieve that signature velvety texture found in professional coffee shops, the ratio of your dairy components is absolutely vital. You should use a combination of heavy whipping cream and 2% milk, typically in a two-to-one ratio.
The heavy cream provides the necessary fat content to create thick, stable bubbles that sit on top of your cold brew without immediately dissolving, while the 2% milk thins the mixture just enough to make it pourable and frothy.
Avoid using skim milk as your primary base because it lacks the structural integrity needed to hold the air incorporated during the frothing process. For the most consistent results, ensure both liquids are chilled thoroughly before mixing, as cold proteins and fats bond more effectively to create a long-lasting foam.
Using a high-quality, fresh heavy cream ensures a rich mouthfeel that perfectly complements the bitterness of dark coffee roasts. Always measure your portions precisely to maintain the ideal density and sweetness levels across every batch you prepare at home.
Best vanilla syrups and extracts to use
The flavor profile of your cold foam depends heavily on the quality of your vanilla source. For a professional-grade taste, premium vanilla bean syrups are the gold standard because they offer a deep, aromatic sweetness that mimics the Starbucks experience.
If you prefer a more natural approach, you can create a DIY version using pure Madagascar vanilla extract mixed with a simple syrup made from cane sugar. This allows you to control the intensity and avoid the artificial aftertaste found in cheaper, imitation brands.
When adding the syrup, ensure it is fully integrated into the dairy mixture before you begin frothing to ensure an even distribution of flavor throughout every sip. For a more visual appeal, using a syrup that contains real vanilla bean flecks can add an artisanal touch to your beverage.
Remember that a little goes a long way; start with one to two tablespoons per half-cup of dairy and adjust according to your personal preference for sweetness and floral notes to achieve the perfect flavor balance.
Sugar-free and dairy-free alternatives
Creating a delicious vanilla cream cold foam is still possible even if you have specific dietary restrictions or are simply looking to reduce your caloric intake.
For a dairy-free alternative, oat milk is the superior choice because its natural starches allow it to froth much better than almond or soy milk. Pair full-fat oat milk with coconut cream to replicate the richness of heavy dairy cream while maintaining a plant-based profile.
If you are monitoring your sugar levels, swap traditional syrups for monk fruit or stevia-based vanilla drops, which provide high-intensity sweetness without the glycemic impact. Many brands now offer high-quality sugar-free vanilla syrups that use erythritol to provide a clean taste that doesn’t overwhelm the coffee.
When working with plant-based milks, you may need to froth for an additional thirty seconds to achieve the desired stiff peak consistency.
These substitutions ensure that everyone can enjoy a luxurious, cafe-style topping regardless of their nutritional goals or sensitivities, providing a customizable experience that satisfies cravings while staying healthy and conscious of ingredients.
Tools you need to froth cold milk

Using a handheld milk frother
A handheld electric frother, often called a milk wand, is the most efficient tool for creating that signature Starbucks-style texture at home. To begin, combine your heavy cream, milk, and vanilla syrup in a tall glass or pitcher, ensuring you leave enough room for the volume to double.
Submerge the frother whisk head just below the surface of the liquid and turn it on. Tilt the glass slightly to create a swirling vortex, which incorporates air while simultaneously breaking down large bubbles into a microfoam.
Continue frothing for approximately 20 to 30 seconds until the mixture reaches a thick, pourable consistency that resembles melted ice cream.
This tool is favored by baristas because it offers the highest level of control over the aeration process, allowing you to stop exactly when the foam is stable enough to sit atop your cold brew without immediately sinking.
It is also incredibly easy to clean, requiring only a quick rinse under hot soapy water after use.
Making cold foam in a French press
If you do not own an electric gadget, a standard French press is an exceptional manual tool for achieving dense, velvety vanilla cream cold foam. Pour your vanilla-flavored dairy base into the carafe, making sure the liquid covers the mesh filter screen entirely.
Insert the plunger and begin pumping it up and down vigorously. The key to success with this method is using short, rapid strokes at the bottom to build structure, followed by a few larger strokes to incorporate air.
Perform about 40 to 50 pumps until the volume has visibly expanded and the texture looks glossy and opaque. The fine mesh of the French press is highly effective at emulsifying the fats in the heavy cream, resulting in a foam that is often sturdier than what a wand produces.
Once finished, let the foam sit for a moment to stabilize before gently pouring it over your iced coffee. This method is perfect for making larger batches of foam to serve multiple people at once.
Blender and cocktail shaker methods
For those without specialized coffee equipment, common kitchen items like a high-speed blender or a cocktail shaker can yield impressive results. When using a blender, pour your vanilla cream mixture into the jar and pulse on a medium-high setting for roughly 15 seconds.
The fast-moving blades create a very uniform aeration that is ideal for a light, frothy topping. Alternatively, the cocktail shaker method provides a great workout and surprisingly good texture. Place your ingredients into the shaker with a single ice cube or a blender ball to act as an agitator.
Shake the container forcefully for at least 60 seconds. While the foam from a shaker may be slightly more aerated and less dense than other methods, it still provides that luxurious mouthfeel essential for a cold foam experience.
Both techniques rely on mechanical energy to trap air bubbles within the protein and fat structures of the milk, ensuring your homemade vanilla cream stays perched beautifully on your beverage until the very last sip.
How to make vanilla cream cold foam step-by-step
Mixing the vanilla sweet cream base
To begin your homemade cold foam, you must first create a rich and balanced base by combining three simple ingredients.
In a small pitcher or glass jar, whisk together half a cup of heavy whipping cream, two tablespoons of 2% milk, and one to two tablespoons of vanilla syrup depending on your sweetness preference.
Using heavy cream is essential because it provides the fat content necessary for a thick, velvety structure, while the milk lightens the mixture to ensure it pours smoothly.
If you want to mimic the popular coffee shop version, ensure your dairy is straight from the refrigerator, as cold liquids hold air bubbles much more effectively than room-temperature ones. Stir the mixture gently until the syrup is fully incorporated and the liquid looks uniform.
This base can be made in larger batches and stored in the fridge for up to three days, allowing you to save time during your morning routine while maintaining that signature gourmet flavor profile.
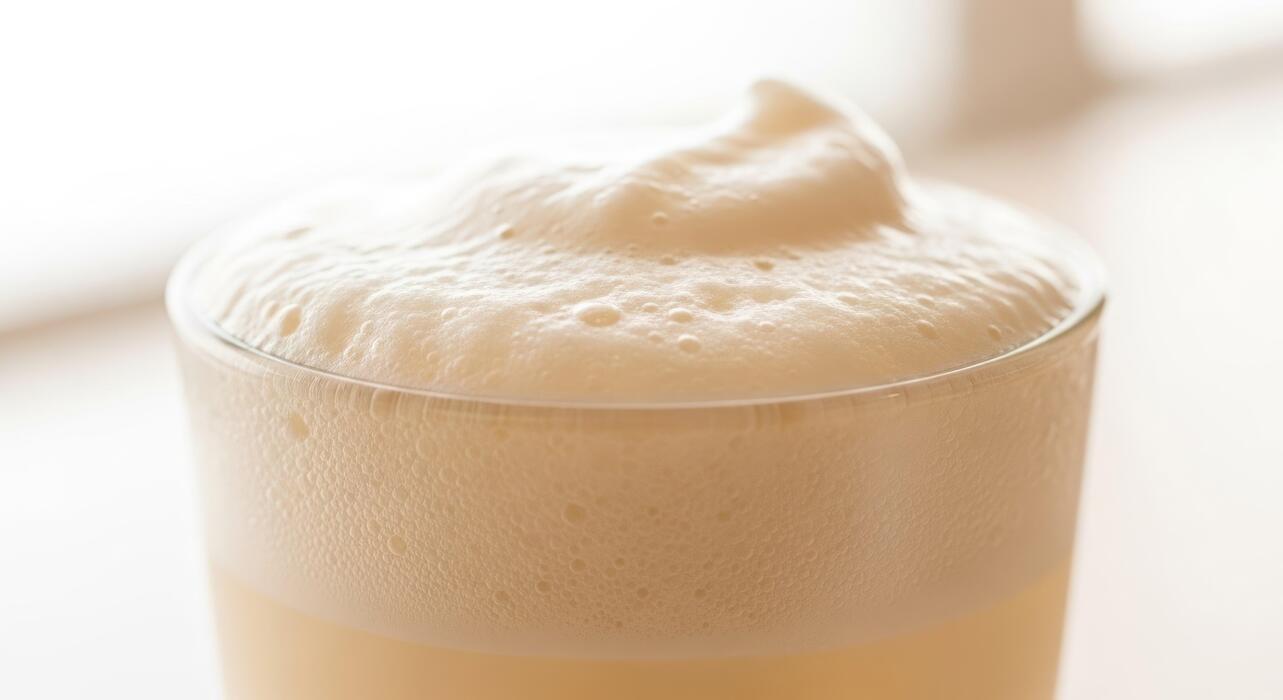
Frothing to the right consistency
Once your base is prepared, the next step is to introduce air to create that iconic cloud-like texture. Submerge a handheld milk frother just below the surface of the liquid and turn it on, moving the wand up and down slightly to aerate the cream.
You are looking for the mixture to double in volume and reach a consistency similar to wet paint or melted ice cream. It should be thick enough to hold its shape for a moment but still fluid enough to pour gracefully.
Avoid over-frothing, as this can turn your sweet cream into stiff whipped cream, which won’t blend as well with your coffee.
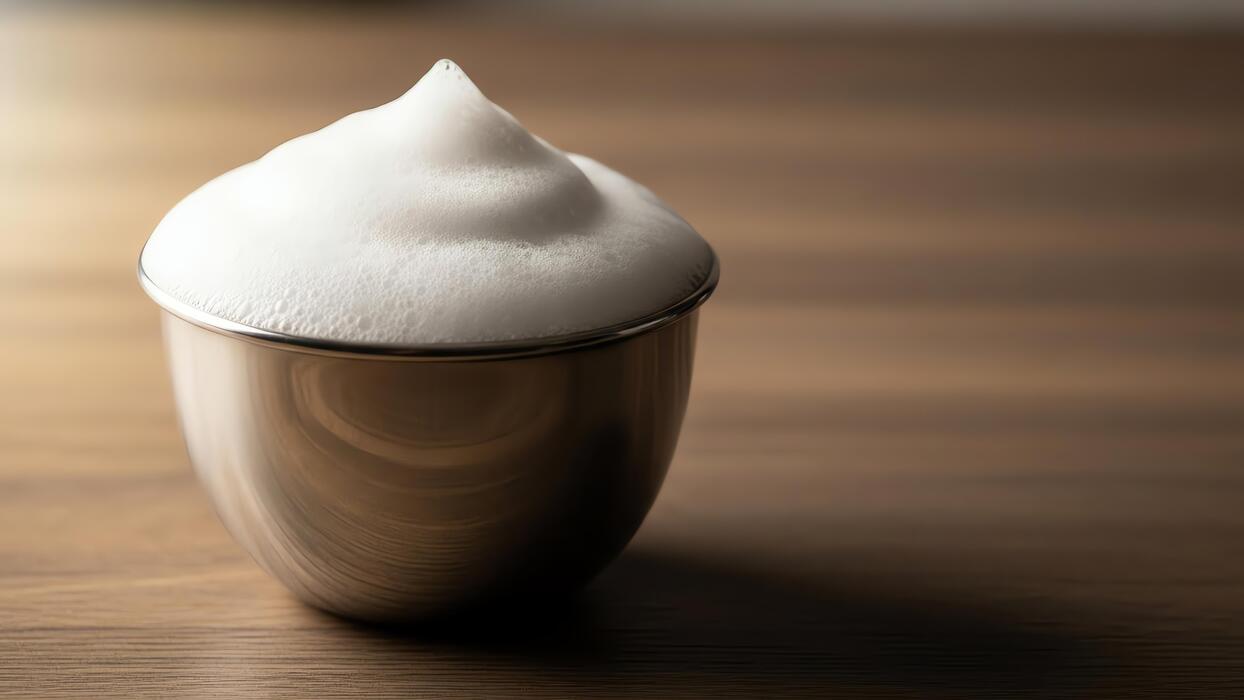
If you do not have an electric frother, you can achieve similar results by shaking the ingredients vigorously in a tightly sealed mason jar for about sixty seconds or pulsing them in a high-speed blender for ten seconds.
The goal is a silky, micro-foam finish that feels luxurious on the palate without being overly airy or bubbly.
How to layer the foam on your drink
The final step is the most rewarding, as it transforms your standard iced coffee into a professional-grade beverage. Start by filling a glass with fresh ice and your favorite cold brew or iced Americano, leaving about an inch of space at the top for the foam.
Slowly pour your frothed vanilla cream over the back of a spoon or directly onto the ice to create a distinct layer that sits beautifully on top of the dark coffee.
This layering technique ensures that as you take a sip, you first experience the sweet, creamy foam followed by the bold, crisp notes of the coffee underneath.
As the drink sits, the vanilla cream will gradually cascade down the sides of the glass in white streaks, naturally sweetening the brew without the need for additional stirring.
For an extra touch of elegance, you can garnish the top with a light dusting of cocoa powder or cinnamon, providing a sophisticated finish that rivals any premium cafe experience from your own kitchen.
Tips for thick and stable foam
The importance of using cold ingredients
For the most successful vanilla cream cold foam, temperature is the most critical variable you must control from start to finish. You should always ensure that your heavy cream, milk, and even your mixing vessel are thoroughly chilled in the refrigerator before you begin the frothing process.
Using cold ingredients is essential because the fat molecules in the cream stay firm and stable at lower temperatures, allowing them to trap air bubbles more effectively during aeration.
If the liquid is even slightly warm, the fat will soften, causing the bubbles to collapse almost instantly and resulting in a thin, watery mess. For the best results, try placing your metal frothing pitcher or glass jar in the freezer for five minutes before mixing.
This extra step ensures that the friction from your electric whisk doesn’t heat the mixture too quickly. Maintaining a chilled environment guarantees that your foam achieves that signature velvet-like texture that sits perfectly atop your cold brew without dissolving immediately into the coffee below.
Finding the ideal fat ratio
Achieving that iconic Starbucks-style consistency requires a precise balance of fats and proteins, which is why a specific ratio of dairy is necessary. The standard golden rule for vanilla cream cold foam is a two-to-one ratio of heavy whipping cream to 2% milk.
Heavy cream provides the necessary fat content to create a thick, stable structure, while the 2% milk thins it out just enough to make it pourable and light.
If you use only heavy cream, you might end up with something closer to stiff whipped cream, which won’t blend smoothly with your drink. Conversely, using only low-fat milk will result in a foam that is too airy and dissipates within seconds.
When you add your vanilla syrup, do so sparingly to avoid weighing down the proteins. Experimenting with this fat-to-liquid balance allows you to customize the density to your preference, ensuring the foam is sturdy enough to hold its shape while remaining silky enough to sip comfortably through a strawless lid.
How to fix runny or flat foam
If your vanilla cream cold foam turns out too runny or loses its volume quickly, there are several troubleshooting steps you can take to salvage the batch. First, check your mixing time; often, a flat foam is simply the result of under-frothing the mixture.
Continue using your handheld milk frother for at least thirty to forty-five seconds until you see the volume double and the bubbles become microscopic. If it still won’t thicken, you may need to increase the amount of heavy whipping cream in your ratio to provide more structural support.
Another common culprit is the type of sweetener used; heavy, honey-based syrups can sometimes weigh down the air bubbles, so switching to a standard simple syrup can help.
If you notice large, soapy bubbles forming, tap your container firmly on the counter to pop them and resume frothing at a slight angle. This texturizing technique helps create a micro-foam consistency that is much more stable and aesthetically pleasing for your homemade caffeinated beverages.
Best ways to serve vanilla cold foam
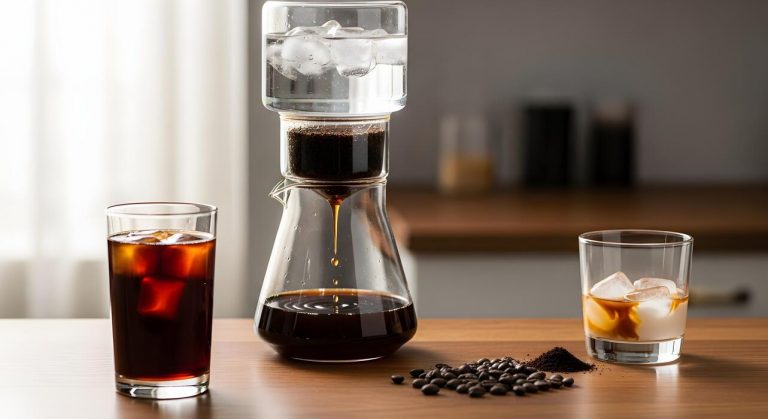
Classic vanilla sweet cream cold brew
The gold standard for enjoying your homemade vanilla cream cold foam is atop a glass of classic cold brew coffee.
To achieve the perfect cafe-style experience, fill a tall glass with ice and pour in your favorite cold brew concentrate, leaving about two inches of space at the top for the foam.
Slowly pour the aerated vanilla mixture over the back of a spoon to ensure it sits elegantly on the surface rather than mixing immediately. As you sip, the rich, velvety foam acts as a built-in creamer, slowly cascading into the dark coffee to create beautiful marbleized streaks of sweetness.
This method allows you to experience the distinct contrast between the bold, acidic notes of the cold brew and the silky, marshmallow-like texture of the vanilla cream.
For the best results, ensure your cold brew is thoroughly chilled before adding the foam to prevent the delicate bubbles from collapsing too quickly under heat.
Adding foam to iced lattes and americanos
Transform your standard espresso drinks into gourmet treats by using vanilla cold foam as a luxurious topping for iced lattes and americanos.
When preparing an iced latte, use slightly less milk than usual to account for the volume of the foam, then crown the drink with a generous dollop of the vanilla-infused cream.
For an iced americano, the foam provides a necessary creamy element that balances the intensity of the espresso shots without the heaviness of a traditional latte. The key is to use a hand frother or blender to reach a thick, pourable consistency that holds its shape against the ice cubes.
This technique is particularly effective for those who want to control their sugar intake, as the sweetened foam provides a concentrated burst of flavor at the beginning of every sip.
Experimenting with the ratio of foam to liquid ensures that every drink maintains a perfectly balanced profile from the first sip to the final drop.
Creative flavor pairings and toppings
Elevate your vanilla cream cold foam by incorporating creative flavor pairings and decorative toppings that enhance the visual appeal and taste.
While vanilla is a versatile base, you can add a pinch of sea salt to the cream before frothing to create a salted vanilla profile that cuts through the sweetness.
Once the foam is layered on your drink, consider dusting the top with cinnamon, cocoa powder, or pumpkin spice for an aromatic finish that hits your senses before the first sip.
For a more decadent dessert-like beverage, drizzle a small amount of caramel sauce or melted chocolate over the peaks of the foam. These additions not only make your homemade creations look professional but also allow you to customize the flavor to match the season.
Using high-quality pure vanilla bean paste instead of extract can also add beautiful black specks to the foam, indicating a premium, authentic taste that complements various syrup infusions and garnishes.
How to store leftover sweet cream
Safe refrigeration practices
To maintain the integrity of your vanilla sweet cream for cold foam, you must store it in an airtight glass container like a mason jar. Glass is superior to plastic because it does not retain odors that could alter the delicate floral notes of the vanilla bean or extract.
Before sealing the lid, ensure the container is completely clean and dry to prevent any premature spoilage of the heavy cream or milk components. Place the jar in the coldest part of your refrigerator, typically the back of the middle shelf, rather than the door where temperature fluctuations occur frequently.
Keeping the mixture at a consistent temperature below 40 degrees Fahrenheit is vital for food safety and for ensuring the proteins in the milk remain stable enough to froth later.
If you notice any separation, this is a natural occurrence as the denser syrups settle at the bottom of the dairy; simply swirl the container gently to reintegrate the ingredients without introducing excessive air bubbles before you are ready to use it.
How long homemade cold foam lasts
Your homemade vanilla sweet cream base will generally remain fresh and safe to consume for three to five days when refrigerated properly. However, the exact shelf life is heavily dependent on the expiration dates of the specific heavy cream and milk you used during the initial preparation.
It is a wise practice to label your storage container with the date you mixed the ingredients so you can track its freshness accurately. While the liquid base stays good for several days, you should ideally only froth the specific amount you need for your current drink.
Once the cream has been aerated into a foam, it will begin to lose its structural volume and deflate back into a liquid state within about thirty minutes. For the best flavor profile and texture, always check for any off-smells or changes in consistency before frothing.
If the mixture appears chunky or has a sour scent, discard it immediately. Using fresh ingredients ensures that your cold foam has that signature velvety, cloud-like topping that elevates your iced coffee experience.
Refreshing the foam before serving
If you find that your stored vanilla sweet cream has settled or lost its initial luster, you can easily revitalize it to achieve that perfect Starbucks-style finish.
Before pouring the cream over your iced coffee, give the container a vigorous shake or a quick stir to ensure the vanilla syrup and dairy fats are perfectly emulsified.
When you are ready to create the foam, use a high-speed handheld milk frother for approximately twenty to thirty seconds until the volume doubles and the texture becomes thick and glossy.
If the cream has been sitting for a couple of days, it might require a few extra seconds of aeration to stabilize the bubbles. Avoid over-frothing, as this can turn the heavy cream into butter, resulting in a grainy texture rather than a smooth pour.
For an extra touch of luxury, you can chill your glass before adding the cold brew and foam, which helps maintain the stiff peaks of the vanilla cream for a longer duration. This ensures every sip delivers a consistent balance of sweetness and creamy texture throughout your beverage.
Frequently Asked Questions
What are the basic ingredients for vanilla cream cold foam?
To make a standard vanilla cream cold foam, you need heavy whipping cream, 2% milk, and vanilla syrup. The combination of heavy cream and milk creates a stable, frothy texture that sits perfectly on top of iced coffee.
What is the best ratio for vanilla sweet cream cold foam?
The most popular ratio is 3 parts heavy whipping cream to 2 parts 2% milk, plus 1 part vanilla syrup. For a single serving, use 3 tablespoons of heavy cream, 2 tablespoons of milk, and 1 tablespoon of vanilla syrup.
How do I froth the cold foam without an electric frother?
If you don’t have a handheld milk frother, you can use a French press by pumping the plunger up and down rapidly for 30 seconds. Alternatively, you can shake the ingredients vigorously in a tightly sealed mason jar until the volume doubles.
Can I make vanilla cold foam dairy-free?
Yes, you can use full-fat oat milk or a combination of coconut cream and almond milk for a dairy-free version. Keep in mind that plant-based milks may yield a thinner foam compared to traditional dairy cream.
Why is my cold foam not thickening?
The most common reason for thin foam is using ingredients that are too warm; ensure your cream and milk are ice-cold. Additionally, ensure you are using a high enough fat content, as fat is essential for stabilizing the air bubbles.
How long does homemade vanilla cold foam last?
The un-frothed sweet cream mixture can be stored in the refrigerator for up to 5 days. However, once frothed, it should be served immediately as the bubbles will begin to dissipate after a few minutes.
Conclusion
Making vanilla cream cold foam at home is a simple yet rewarding way to elevate your daily coffee routine. By mastering the balance of heavy cream, milk, and vanilla syrup, you can achieve that signature velvety texture without a trip to the cafe. Experiment with different frothing tools to find your perfect consistency. Now that you have the secret to this luxurious topping, it is time to start brewing and enjoy your handcrafted masterpiece.