How Do You Make Sweet Cream Foam
Ever wondered how your favorite coffee shop gets that velvety, cloud-like topping on cold brews? Learning how do you make sweet cream foam is surprisingly simple and requires only three basic ingredients you likely have in your fridge. Whether you want a classic vanilla flavor or a seasonal twist, this guide provides the perfect ratio for achieving that thick, pourable consistency every time.
What is Sweet Cream Foam?
The Difference Between Cold Foam and Sweet Cream
Understanding the distinction between these two popular toppings is essential for any home barista looking to replicate the coffee shop experience. Standard cold foam is typically made using non-fat milk that is aerated quickly to create a light, meringue-like texture that sits high on top of the drink.
In contrast, sweet cream foam is a much richer, decadent addition because it utilizes a base of heavy whipping cream and 2% milk. This specific combination ensures the foam has enough fat content to remain velvety and thick without dissolving immediately into the iced coffee.
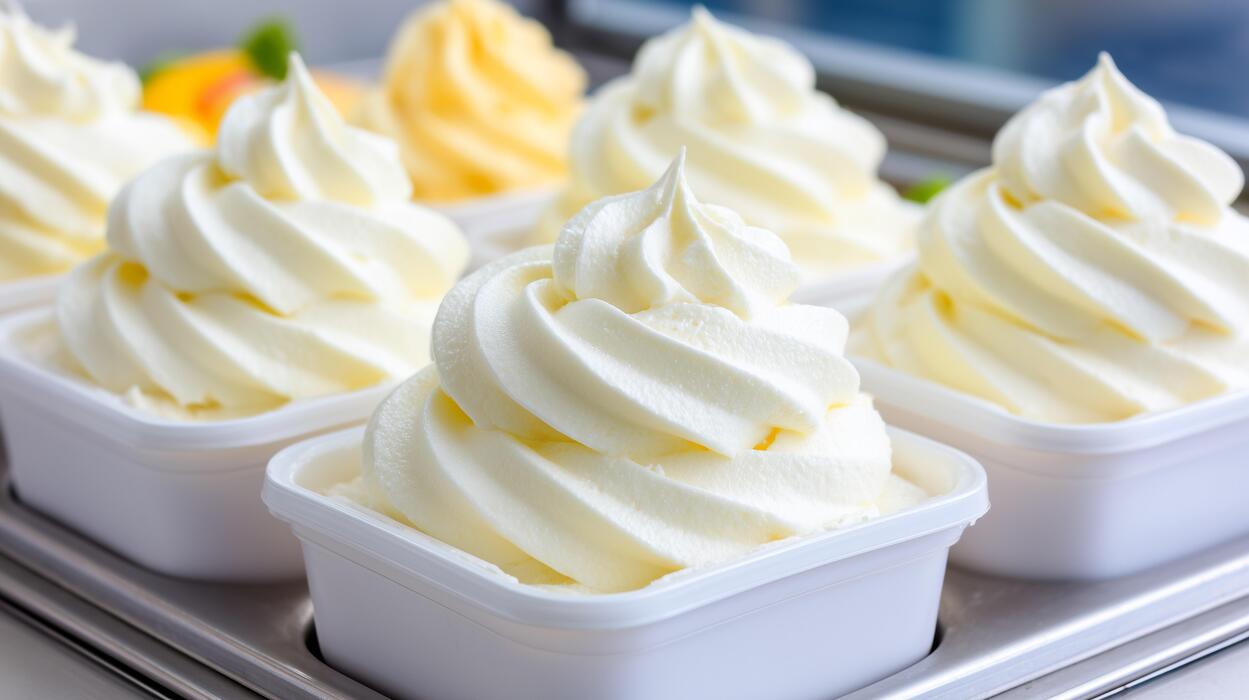
When you learn how to make sweet cream foam, you are essentially creating a pourable, aerated cream that mimics the consistency of melted ice cream.
While regular cold foam focuses on air bubbles and volume, sweet cream foam focuses on luxurious mouthfeel and sweetness, making it the superior choice for bold cold brews or iced lattes that require a creamy contrast to the acidity of the coffee beans.
Why This Topping is Popular in Coffee Shops
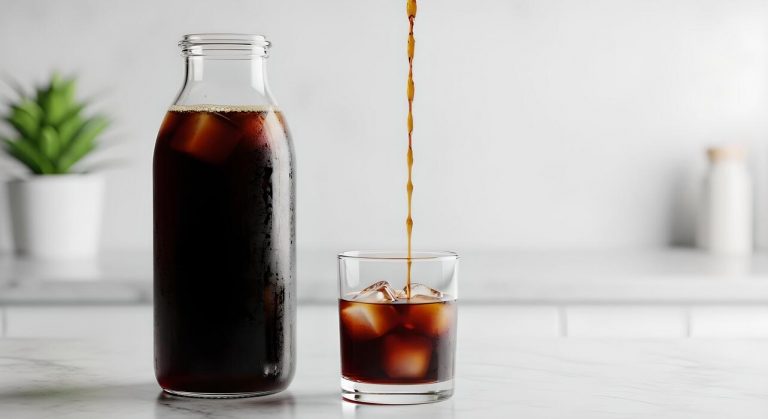
The rise of sweet cream foam in major coffee chains is driven by the visual appeal and the unique sensory experience it provides to customers. Unlike traditional liquid creamers that mix instantly, this foam creates a beautiful cascading effect as it slowly settles into the dark coffee below.
This aesthetic quality makes the beverage highly photogenic, but the functional benefits are even more significant for the palate. The foam acts as a flavor buffer, allowing the drinker to sip the sweet, aerated cream and the bitter coffee simultaneously.
This layered approach ensures that every sip is balanced, preventing the drink from becoming overly sugary while still providing a satisfying dessert-like quality. Additionally, the stability of the fat in the cream allows it to hold onto flavored syrups like vanilla or salted caramel much better than plain milk.
By mastering this at home, you can achieve that professional-grade customization and elevated texture that usually commands a premium price at high-end specialty cafes and local coffee houses.
Key Ingredients for the Perfect Texture
To achieve the iconic silky finish of a professional sweet cream foam, you must follow a specific ratio of three primary ingredients. The foundation is a mix of heavy cream and 2% milk, usually at a two-to-one ratio, which provides the necessary fat structure to hold air.
Without the heavy cream, the foam will be too thin; without the milk, it will turn into thick whipped cream too quickly. The third vital component is vanilla-flavored simple syrup, which adds the signature sweetness and helps emulsify the dairy.
To prepare it, combine these liquids and use a handheld milk frother for approximately twenty to thirty seconds. You are looking for a thickened, pourable consistency rather than stiff peaks. Using chilled ingredients is mandatory, as cold fat molecules trap air more efficiently than warm ones.
Once you master this balance, you can experiment with adding a pinch of sea salt or cocoa powder to the mixture to create unique flavor profiles that perfectly complement your favorite cold brew or iced espresso drinks.
Best Ingredients for Homemade Sweet Cream

Choosing the Right Heavy Cream and Milk Ratio
To achieve the perfect velvety texture that mimics professional coffee house toppings, you must balance fat content and fluidity. The gold standard for homemade sweet cream foam is a 2:1 ratio of heavy whipping cream to 2% or whole milk.
Using heavy cream alone creates a mixture that is too thick and heavy, while using only milk results in bubbles that dissipate quickly. When you combine the richness of heavy cream with the lightness of milk, you create a stable structure that holds its shape while remaining pourable.
For the best results, ensure your dairy products are chilled straight from the refrigerator before mixing. Cold fat globules bond more effectively during the frothing process, allowing you to create that signature microfoam layer that sits elegantly atop your cold brew or iced latte.
Experimenting with this specific ratio ensures your sweet cream has enough body to resist sinking immediately into your drink while maintaining a silky, luxurious mouthfeel.
Best Sweeteners for Smooth Results
The type of sweetener you choose significantly impacts the final consistency and clarity of your sweet cream foam. For a seamless, professional finish, vanilla simple syrup is the superior choice because it dissolves instantly into the cold dairy without leaving any grainy residue.
If you prefer using granulated sugar, it is essential to whisk it thoroughly or heat it into a syrup beforehand to prevent a gritty texture. Another excellent option is sweetened condensed milk, which adds a unique thickness and a caramelized depth of flavor that complements dark roasts perfectly.
For those watching their sugar intake, liquid stevia or monk fruit drops work well, provided they are mixed evenly. Avoid using powdered sugar if possible, as the added cornstarch can sometimes alter the clean dairy flavor profile.
By selecting a liquid-based sweetener, you guarantee a uniform sweetness throughout every sip, ensuring that your homemade foam remains stable and visually appealing throughout your entire coffee experience.
Vanilla Extract vs. Vanilla Bean Paste
Deciding between vanilla extract and vanilla bean paste depends on your desired aesthetic and flavor intensity. Pure vanilla extract is the most convenient and common choice, offering a classic, nostalgic flavor that blends perfectly into the cream without changing its bright white color.
It provides a reliable aromatic quality that enhances the natural sweetness of the dairy. On the other hand, vanilla bean paste offers a more gourmet experience, characterized by the visible black specks of real vanilla seeds. This option delivers a more complex, floral flavor profile that feels truly artisanal.
While the paste is slightly thicker, it incorporates easily into the heavy cream and milk mixture during the frothing stage. If you are serving guests or want a premium coffee shop look, the visual appeal of the vanilla seeds in the foam is unmatched.
Regardless of your choice, always opt for high-quality, pure products over imitation flavorings to ensure your sweet cream foam has a clean, sophisticated finish.
How to Make Sweet Cream Foam: Step-by-Step Guide
Mixing the Base Ingredients
To create the ultimate professional-grade sweet cream foam, you must start by combining three specific ingredients to achieve the correct fat ratio. Begin by pouring heavy whipping cream, 2% milk, and vanilla syrup into a small pitcher or glass jar.
The most effective ratio for that signature velvety texture is generally two parts heavy cream to one part milk, which ensures the foam is light enough to pour but thick enough to sit atop your coffee.
You can easily customize the sweetness level by adjusting the amount of vanilla syrup or using alternative sweeteners like maple syrup or honey.
It is critical to ensure that all your liquid ingredients are thoroughly chilled before mixing, as cold dairy molecules trap air bubbles much more efficiently than room-temperature liquids.
Stir the mixture gently with a spoon to incorporate the flavors without creating premature bubbles, ensuring a consistent and smooth base that is ready for the high-speed aeration process.
Frothing Methods for a Thick Consistency
Once your base is prepared, the next step is to introduce air to create that luxurious, cloud-like volume. The most efficient tool for this task is a handheld milk frother, which should be inserted at a slight angle just below the surface of the liquid.
Turn the device on and move it up and down for approximately thirty seconds until the volume has nearly doubled and the mixture reaches a thick, pillowy consistency.
If you do not have an electric frother, you can achieve similar results by using a French press or a tightly sealed mason jar. For the French press method, pump the plunger rapidly for twenty seconds to force air into the cream.
If using a jar, shake it vigorously until the liquid transforms into a stable foam. Regardless of the tool you choose, the goal is to create micro-bubbles rather than large suds, resulting in a decadent topping that mimics the high-end experience of your favorite local coffee shop.
How to Achieve the Perfect Pour
The final stage in making sweet cream foam is the application, which requires a steady hand to ensure the foam rests beautifully on your beverage. Start by filling your glass with cold brew or iced coffee, leaving about an inch of space at the top for the cream.
Instead of dumping the foam quickly, slowly pour it over the back of a spoon held just above the coffee’s surface. This technique breaks the fall of the liquid and allows the sweet cream to sit in a distinct, elegant layer rather than immediately sinking and mixing.
As you sip, the dense foam will gradually cascade downward, creating a beautiful marbling effect that enhances both the visual appeal and the flavor profile of the drink. For an extra touch of sophistication, you can garnish the top with a light dusting of cocoa powder, cinnamon, or sea salt.
This method ensures every sip contains a perfect balance of bold coffee and sweet, creamy texture for a professional finish.
Tools You Need for Frothing at Home
Using a Handheld Milk Frother
A handheld milk frother, or electric whisk, is the most efficient and popular tool for creating that signature Starbucks-style sweet cream at home. To achieve the perfect texture, combine your heavy cream, milk, and sweetener in a tall glass or pitcher.
Submerge the whisk tip just below the surface and turn it on, moving it up and down to incorporate air until the mixture thickens into a pourable, velvety consistency. This process typically takes about 30 to 45 seconds.
The key to success is using chilled ingredients, as fat molecules in cold heavy cream stabilize the bubbles much better than warm liquids. Unlike traditional latte foam, sweet cream should remain dense and silky rather than stiff and dry.
Once the volume has roughly doubled and the bubbles are microscopic, your foam is ready to be layered over cold brew or iced coffee. It is a cost-effective solution that offers professional results with minimal cleanup required.
How to Use a French Press for Foam
If you do not own an electric gadget, a French press is an incredible manual alternative for creating high-quality sweet cream foam. Pour your prepared sweet cream mixture into the carafe, ensuring it does not fill more than one-third of the glass to allow room for expansion.
Insert the plunger and use short, rapid pumps for about 30 seconds. The fine mesh screen acts as a powerful aerator, forcing air into the cream to create a very uniform, micro-foam texture that is often even smoother than what a whisk can produce.
After pumping, let the foam sit for a few seconds to stabilize, then give the carafe a gentle swirl and a firm tap on the counter to pop any large surface bubbles.
This method is highly effective because the double or triple mesh filters found in most presses break down the fat globules more consistently. It is the best way to achieve a luxurious mouthfeel without needing electricity or expensive kitchen machinery.
Making Foam in a Blender or Jar
For those without specialized coffee gear, a high-speed blender or a simple mason jar can yield great results. When using a blender, pour your sweet cream ingredients in and pulse on a medium setting for roughly 15 to 20 seconds.
Be careful not to over-process, or you might accidentally create whipped cream instead of pourable foam. If you prefer the mason jar method, simply fill a jar halfway with your cream mixture, seal the lid tightly, and shake vigorously for at least one minute.
While the jar method requires more physical effort and produces slightly larger bubbles, it is a foolproof way to get the job done using basic household items. Both methods rely on the mechanical agitation of proteins and fats to build structure.
For the best presentation, let the foam rest for a moment after shaking or blending so the dense cream settles at the bottom, allowing you to spoon the thickest, fluffiest portion directly onto your beverage for a beautiful finish.
Tips for Customizing Your Sweet Cream Flavors

How to Make Salted Caramel Sweet Cream
To elevate your homemade cold foam into a decadent salted caramel delight, start by whisking two tablespoons of high-quality caramel sauce into your heavy cream and milk base before frothing.
The secret to achieving that professional coffeehouse profile is the addition of a generous pinch of flaky sea salt, which cuts through the richness and enhances the buttery notes of the caramel.
For the best texture, use an electric milk frother on the cold setting until the mixture reaches a thick, pourable consistency that sits elegantly atop your iced coffee. If you prefer a more integrated flavor, you can also use a salted caramel-infused simple syrup.
Always ensure your ingredients are ice-cold before mixing, as this helps the proteins in the milk trap air more effectively, resulting in a stable foam that won’t dissipate quickly. This customization transforms a standard beverage into a gourmet experience by balancing sweet and savory elements perfectly for every single sip.
Adding Seasonal Spices and Syrups
Customizing your sweet cream foam for the holidays or changing seasons is incredibly simple with the right pantry staples. During autumn, try incorporating a teaspoon of pumpkin pie spice or ground cinnamon directly into the cream before frothing to create a warm, aromatic topping.
For a winter-inspired treat, a few drops of peppermint extract or white chocolate syrup can transform your morning brew into a festive celebration. It is essential to sift dry spices to avoid clumping, ensuring a smooth and velvety mouthfeel in every glass.
You can also experiment with floral notes like lavender or elderflower syrups during the spring months for a refreshing twist. The key is to start with small increments of flavorings to avoid overwhelming the delicate sweetness of the cream.
By mastering these additions, you can replicate expensive seasonal menu items at home while controlling the sugar content and intensity of the flavors to match your personal palate preferences perfectly.
Making a Dairy-Free or Vegan Version
Achieving a luxurious sweet cream foam without traditional dairy requires selecting the right plant-based alternatives that possess a high fat and protein content. The most effective combination for a thick and stable vegan foam is mixing full-fat coconut milk with a high-quality barista-style oat milk.
The coconut milk provides the necessary richness, while the oat milk contributes to a creamy, frothy texture that mimics cow’s cream remarkably well. Add a splash of vanilla extract and your choice of agave or maple syrup for sweetness.
When frothing, use a high-speed handheld wand to incorporate as much air as possible, as plant milks can be more temperamental than dairy. It is crucial to avoid thin almond milks for this specific application, as they often lack the structural integrity to hold a peak.
By using chilled barista-grade non-dairy milks, you can enjoy a sustainable and delicious foam that complements any cold brew or iced latte without sacrificing that signature velvety finish you love.
Common Mistakes When Making Sweet Cream Foam
Why Your Foam is Too Runny
One of the primary reasons your sweet cream foam might turn out too runny is an incorrect ratio of heavy whipping cream to milk. To achieve that signature thick, velvety texture, you must ensure you are using a high-fat content base.
If you use too much 2% milk or skim milk in an attempt to cut calories, the mixture will lack the structural integrity needed to hold air bubbles. The ideal ratio is generally two parts heavy cream to one part milk and one part syrup.
Another common culprit is the choice of sweetener; using heavy granulated sugar can sometimes weigh down the foam if it does not dissolve completely. Instead, opt for liquid vanilla syrup or simple syrup to maintain a smooth consistency.
If your foam remains liquid after frothing, try adding a splash more heavy cream and whisking again. Ensuring you have sufficient fat content is the most reliable way to prevent a watery mess that immediately sinks to the bottom of your coffee cup.
How to Avoid Over-Mixing Your Cream
While it may be tempting to froth your sweet cream until it is as stiff as possible, over-mixing is a frequent mistake that leads to a buttery, clumpy texture rather than a pourable foam.
The goal for cold foam is a ‘soft peak’ consistency that flows elegantly over your iced brew. If you use a handheld milk frother, stop the device as soon as the volume has doubled and the bubbles become microscopic.
Monitor the texture closely throughout the process; if it starts to look like whipped cream you would put on a pie, you have gone too far. To fix over-mixed cream, you can gently stir in a teaspoon of un-frothed milk to loosen the structure.
Using a pulsing motion with your frother rather than holding it down continuously allows you better control over the final aeration. Remember that the perfect sweet cream should be thick enough to sit on top of the drink but fluid enough to sip through a straw comfortably.
Temperature Tips for Better Stability
Temperature plays a critical role in the success of your sweet cream foam, yet it is often overlooked by home baristas. For the best results, your heavy cream, milk, and even your mixing pitcher should be as cold as possible.
Fat molecules in the cream bond together much more effectively when chilled, creating a stable network that traps air. If your cream has been sitting on the counter even for a few minutes, it may fail to aerate properly, resulting in a flat topping.
Keep your ingredients refrigerated until the very second you are ready to blend them. Additionally, if you are making a large batch, avoid letting the finished foam sit out; the heat from the room will cause the air bubbles to collapse quickly.
For those seeking professional results, try chilling your glass or frothing pitcher in the freezer for five minutes prior to use. This extra step ensures that the friction from the frother wand does not warm up the fats, keeping your foam stiff and stable for longer periods.
Best Ways to Serve Sweet Cream Foam
Pairing Foam with Cold Brew Coffee
To elevate your home barista game, the most popular way to serve sweet cream foam is atop a glass of bold cold brew coffee. Start by filling a glass with ice and pouring your cold brew until it is about three-quarters full.
To achieve the perfect layered look, slowly pour the sweet cream foam over the back of a spoon directly onto the surface of the coffee. This technique ensures the foam sits gracefully on top rather than immediately mixing into the liquid.
The contrast between the bitter, robust notes of the coffee and the velvety vanilla sweetness of the foam creates a professional cafe-style experience.
For the best results, ensure your foam is whipped to a soft-peak consistency so it holds its shape while slowly cascading down the sides of the glass in beautiful white streaks.
This method highlights the creamy texture and balanced flavor that makes sweet cream foam a favorite for iced coffee enthusiasts everywhere.
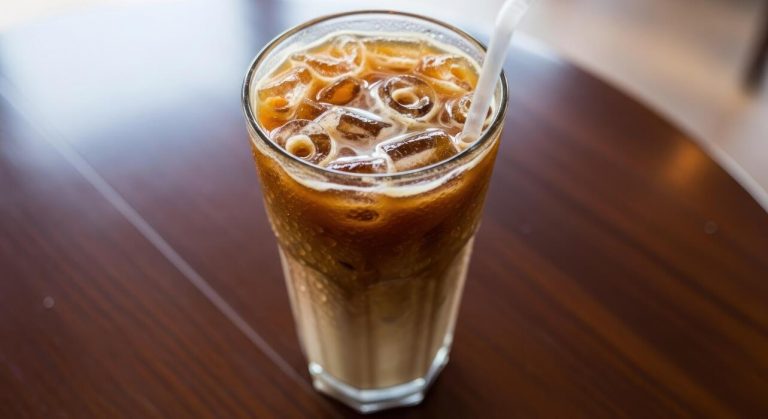
Using Sweet Cream on Iced Lattes
While traditional lattes use steamed milk, adding a cold sweet cream foam to an iced latte provides a unique textural contrast that is truly indulgent. Prepare your iced latte as usual with espresso and your choice of milk, but leave an inch of space at the top of the cup.
Spoon the thick, aerated sweet cream over the ice to create a luxurious cap. Unlike standard whipped cream, this foam integrates slightly with the espresso, offering a richer mouthfeel and consistent sweetness throughout the drink.
You can enhance this presentation by adding a dusting of cinnamon or cocoa powder on top of the foam. The key is to use high-fat heavy cream when making your foam to ensure it remains stable and does not dissolve instantly into the milk.
This serving style is perfect for those who enjoy a decadent, dessert-like coffee beverage that maintains its silky structure and cold temperature from the first sip to the very last drop.
Creative Uses for Desserts and Hot Drinks
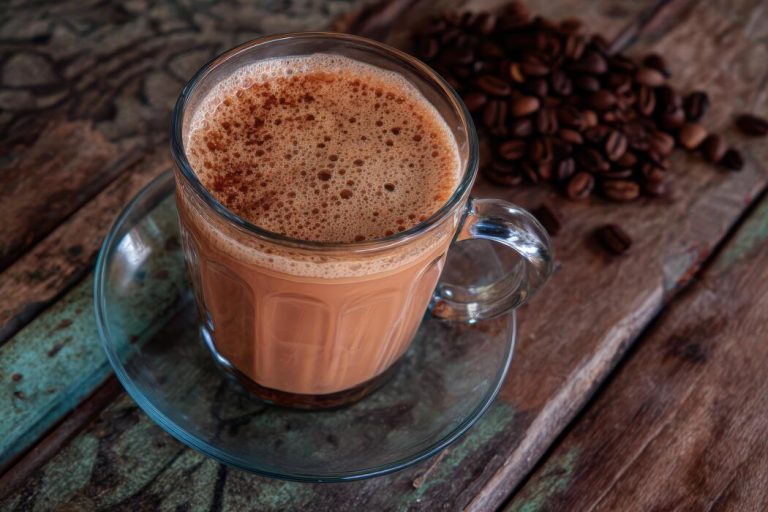
Beyond traditional cold caffeine fixes, sweet cream foam serves as a versatile topping for various hot beverages and decadent desserts. When added to a hot cocoa or a steaming mocha, the foam creates a delicate melting layer that is much lighter than heavy whipped cream.
It acts as a cooling agent, allowing you to enjoy your drink sooner while adding a punch of vanilla flavor. For a creative culinary twist, try dolloping the foam over a bowl of fresh summer berries or a warm fruit cobbler.
The airy texture of the foam complements the acidity of the fruit without being overly heavy. You can also use it as a garnish for pudding or even as a topping for iced tea varieties like Earl Grey or matcha.
By mastering the basic recipe of heavy cream, milk, and syrup, you unlock a multipurpose topping that enhances both the visual appeal and the flavor profile of almost any sweet treat or comforting beverage in your kitchen repertoire.
Frequently Asked Questions
What are the basic ingredients for sweet cream foam?
To make a standard sweet cream foam, you need heavy whipping cream, 2% milk, and a sweetener such as vanilla syrup. The traditional ratio is typically three parts heavy cream to two parts milk and one part syrup to achieve the perfect balance of richness and pourability.
How do you froth sweet cream foam at home?
The most effective way to froth the mixture is using a handheld milk frother or a dedicated electric frother on the cold setting. Simply submerge the whisk and froth for 20 to 30 seconds until the liquid thickens into a soft, velvety consistency that holds its shape on top of coffee.
Can I make sweet cream foam without a frother?
Yes, you can achieve similar results by shaking the ingredients vigorously in a tightly sealed mason jar for about 60 seconds. Alternatively, you can use a French press by pumping the plunger up and down rapidly until the cream doubles in volume.
What is the secret to making the foam thick like Starbucks?
The secret lies in using heavy whipping cream with a high fat content and ensuring all ingredients are ice-cold before frothing. If the mixture is too thin, increase the ratio of heavy cream; if it is too stiff, add a splash more milk to help it flow.
How can I customize the flavor of my sweet cream foam?
You can easily customize the foam by swapping vanilla syrup for other flavors like caramel, peppermint, or pumpkin spice. For a sugar-free version, use sugar-free syrups or a few drops of liquid stevia with a splash of vanilla extract.
How long does homemade sweet cream foam last in the fridge?
You can store the unfrothed liquid mixture in an airtight container in the refrigerator for up to five days. For the best texture, wait to froth the cream until immediately before serving, as the bubbles will eventually deflate if stored after frothing.
Conclusion
Mastering the art of sweet cream foam at home is simpler than you might imagine. By combining heavy cream, milk, and your favorite sweetener, you can elevate any coffee beverage to a cafe-quality experience. Experiment with different ratios and flavors to find your perfect blend. Now that you have the techniques and tips needed for success, it is time to grab your frother and start creating. Enjoy your delicious, velvety homemade creations today.