How Does Starbucks Make Sweet Cream
Have you ever wondered how Starbucks achieves that velvety, marshmallow-like topping on their cold brews? You are in the right place to find out. Making their signature sweet cream at home is surprisingly simple and requires only three everyday ingredients. In this guide, we will break down the exact ratio used behind the counter so you can recreate that professional coffeehouse flavor in your own kitchen.
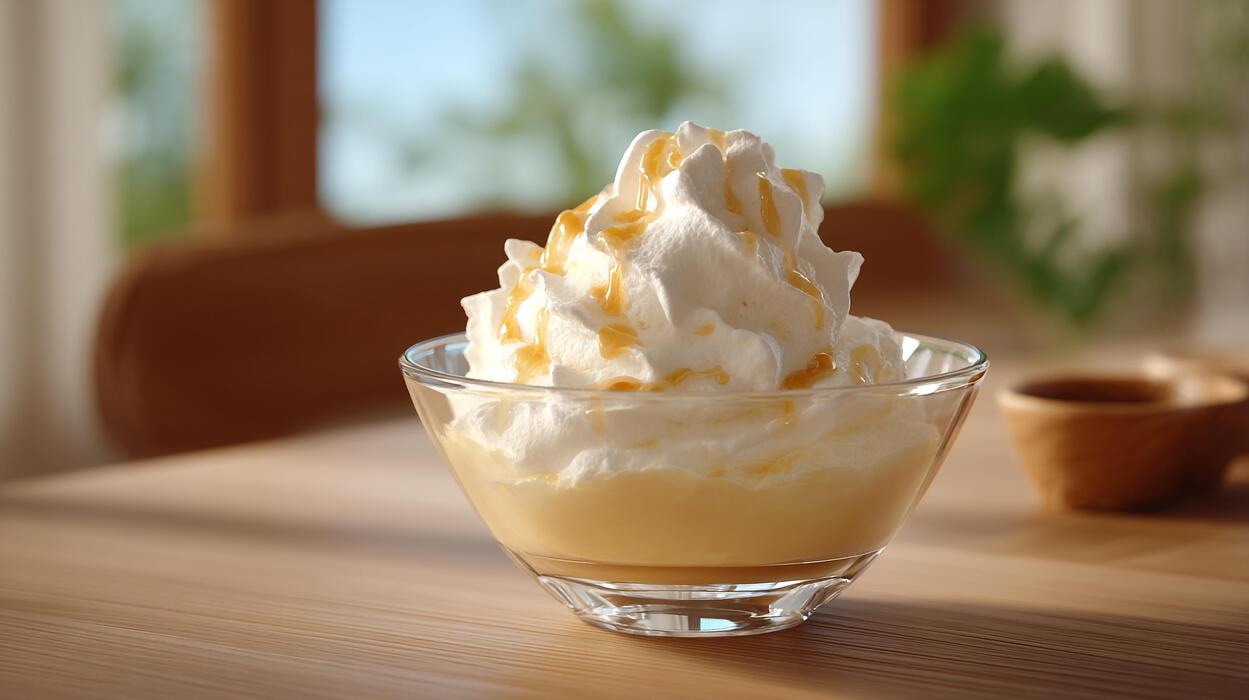
What is Starbucks Vanilla Sweet Cream?
The Difference Between Sweet Cream and Cold Foam
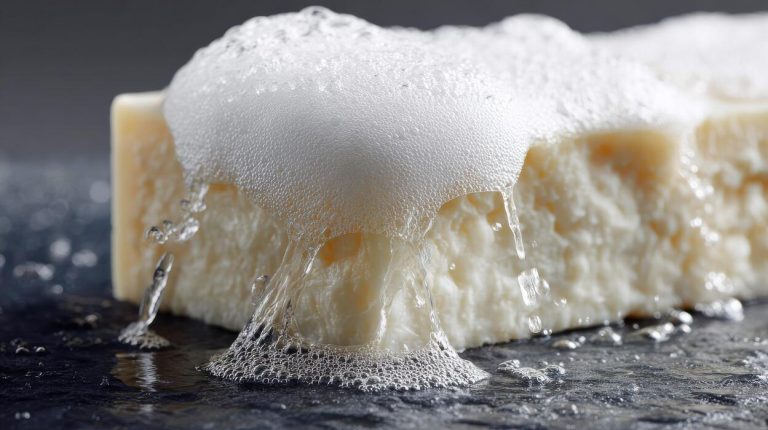
To understand how Starbucks makes sweet cream, you must first distinguish it from its aerated counterpart, cold foam. While both use similar base ingredients, the preparation method creates a distinct texture for each.
Standard sweet cream is a liquid creamer blend that is poured directly into the coffee, where it settles at the bottom and marbles through the drink for a consistent sweetness.
In contrast, cold foam is the same mixture but whipped in a high-speed blender to create a thick, meringue-like topping that sits on the surface. When you order a drink with sweet cream, you are getting a rich, heavy liquid that acts as a dairy enhancer throughout the entire beverage.
The liquid version is designed to embody a silky mouthfeel without the stiff peaks of foam.
Understanding this difference is essential for replicating the experience at home, as it dictates whether you simply stir your ingredients together or reach for a frother to change the physical state of the dairy into a cloud-like topper.
Key Ingredients in the Original Recipe
The secret to the Starbucks sweet cream recipe lies in a specific ratio of three core components: heavy whipping cream, 2% milk, and vanilla syrup. To recreate this at home, baristas combine these elements in a large pitcher to ensure the fats are properly emulsified.
The heavy cream provides the luxurious, buttery base, while the 2% milk thins the mixture just enough to make it pourable and prevent it from becoming too heavy. The vanilla syrup serves as the primary sweetener and aromatic agent, giving the cream its signature flavor profile.
For the most authentic results, it is vital to use cold ingredients and mix them gently to avoid premature thickening. Most professional recipes suggest a ratio that leans heavily on the cream to maintain that decadent texture that customers crave.
By whisking these three items until they are fully incorporated, you create a versatile creamer that is much more flavorful than standard half-and-half, offering a professional-grade finish to any iced coffee or cold brew beverage you prepare in your kitchen.
Why It Is the Most Popular Coffee Add-On
Starbucks vanilla sweet cream has become the gold standard for coffee additions because it perfectly balances the bitterness of cold brew. Unlike standard milk or sugar, this mixture provides a concentrated burst of flavor that doesn’t dilute the strength of the caffeine.
It is highly sought after because of its versatility across the menu, appearing in everything from the Nitro Cold Brew to custom iced espressos.
The high fat content in the heavy cream acts as a flavor carrier, allowing the vanilla notes to linger on the palate longer than traditional syrups alone.
Furthermore, the visual appeal of the ‘cascading effect’ when the cream hits the ice has made it a viral sensation on social media, driving its popularity among younger coffee drinkers. It offers a premium, dessert-like experience that transforms a basic caffeine fix into a sophisticated treat.
Because it is made fresh in-store daily, the quality remains superior to shelf-stable creamers, ensuring that every sip provides a consistent, velvety richness that keeps customers coming back for more every single day.
The Exact Starbucks Sweet Cream Recipe
The 2-3-6 Ratio Explained
To replicate the authentic flavor of Starbucks vanilla sweet cream at home, you must understand the industry-standard 2-3-6 ratio used by baristas daily.
This precise formula refers to the proportions of vanilla syrup, 2% milk, and heavy whipping cream required to achieve that signature velvety texture that sits perfectly atop cold brew.
While many assume the recipe is equal parts liquid, the secret lies in the heavy cream dominance, which provides the necessary fat content to create a thick, cascading effect when poured.
Following this ratio ensures your homemade version isn’t too thin like standard creamer or too sugary like a dessert topping. By adhering to these specific measurements, you create a balanced flavor profile where the floral notes of vanilla are supported by a rich, buttery mouthfeel.
Mastering this foundational ratio is the most critical step for anyone looking to ditch the coffee shop lines and enjoy a professional-grade cold foam experience from the comfort of their own kitchen.
Measuring Heavy Cream and 2% Milk
The structural integrity of the sweet cream depends entirely on the combination of heavy whipping cream and 2% milk. To follow the official recipe, you should measure out exactly six parts heavy cream to three parts 2% milk.
The heavy cream is the essential ingredient that allows the mixture to maintain its body, while the 2% milk acts as a thinning agent that prevents the cream from turning into butter during the whisking process.
For a standard batch, use six ounces of heavy cream and three ounces of milk. It is vital to use cold dairy products directly from the refrigerator, as temperature plays a massive role in how the fats emulsify.
If the liquids are too warm, the sweet cream will lose its ability to layer properly on top of your iced coffee.
Always whisk gently by hand or use a handheld frother on a low setting to incorporate these two dairy components until they are fully integrated and exhibit a smooth, uniform consistency without any visible separation.
Adding the Signature Vanilla Syrup
The final component that defines the Starbucks experience is the signature vanilla syrup, which provides both the sweetness and the aromatic finish. To complete the 2-3-6 ratio, you must incorporate two parts vanilla syrup into your dairy mixture.
For a single-serving batch, this typically equates to two ounces or approximately four pumps of syrup. For the most authentic taste, many enthusiasts recommend using Starbucks-branded vanilla syrup, though any high-quality Madagascar vanilla alternative will suffice.
Once the syrup is added to the milk and cream, give the mixture a thorough stir to ensure the sugar is evenly distributed and doesn’t settle at the bottom of the container.
This sweet cream can be stored in an airtight glass jar in the refrigerator for up to five days, making it a convenient option for your morning routine.
When you are ready to serve, simply pour the mixture slowly over the back of a spoon onto your iced coffee or cold brew to witness the iconic bleeding effect that characterizes a perfectly crafted Starbucks beverage.
Step-by-Step Instructions to Make It at Home
Mixing Your Ingredients Correctly
To replicate the authentic Starbucks flavor, you must follow the specific ratio used by baristas in the cafe. Begin by gathering heavy whipping cream, 2% milk, and vanilla syrup to create the base.
In a large mixing pitcher, combine exactly one part vanilla syrup with two parts 2% milk and three parts heavy cream. It is vital to use a high-quality vanilla simple syrup rather than just extract to ensure the sweetness is evenly distributed throughout the liquid.
Use a long-handled spoon or a whisk to stir the mixture gently until it is fully integrated. Avoid over-mixing or shaking the container at this stage, as you do not want to incorporate too much air or accidentally begin the process of turning the cream into butter.
Ensure all ingredients are thoroughly chilled before you start mixing to help the proteins and fats stabilize immediately. This specific three-ingredient combination provides the signature velvety mouthfeel that characterizes the popular Starbucks cold foam experience.
Storage Tips for Maximum Freshness
Proper storage is essential because the dairy components in sweet cream can absorb odors from your refrigerator quite easily. Once you have finished mixing your batch, transfer the liquid into an airtight glass carafe or a mason jar with a secure lid.
Plastic containers are generally discouraged as they can retain scents from previous meals that might taint the delicate vanilla profile. Always keep the mixture stored in the coldest part of your refrigerator, typically the back of the middle shelf, rather than the door where temperatures fluctuate frequently.
Your homemade sweet cream will stay fresh for approximately five to seven days, though you should always check the expiration dates on your original milk and cream cartons.
Before every use, give the container a gentle stir or a light swirl to reintegrate any ingredients that may have settled over time. Consistent refrigeration ensures that the fats remain stable, allowing the cream to pour smoothly over your favorite cold brew or iced coffee.
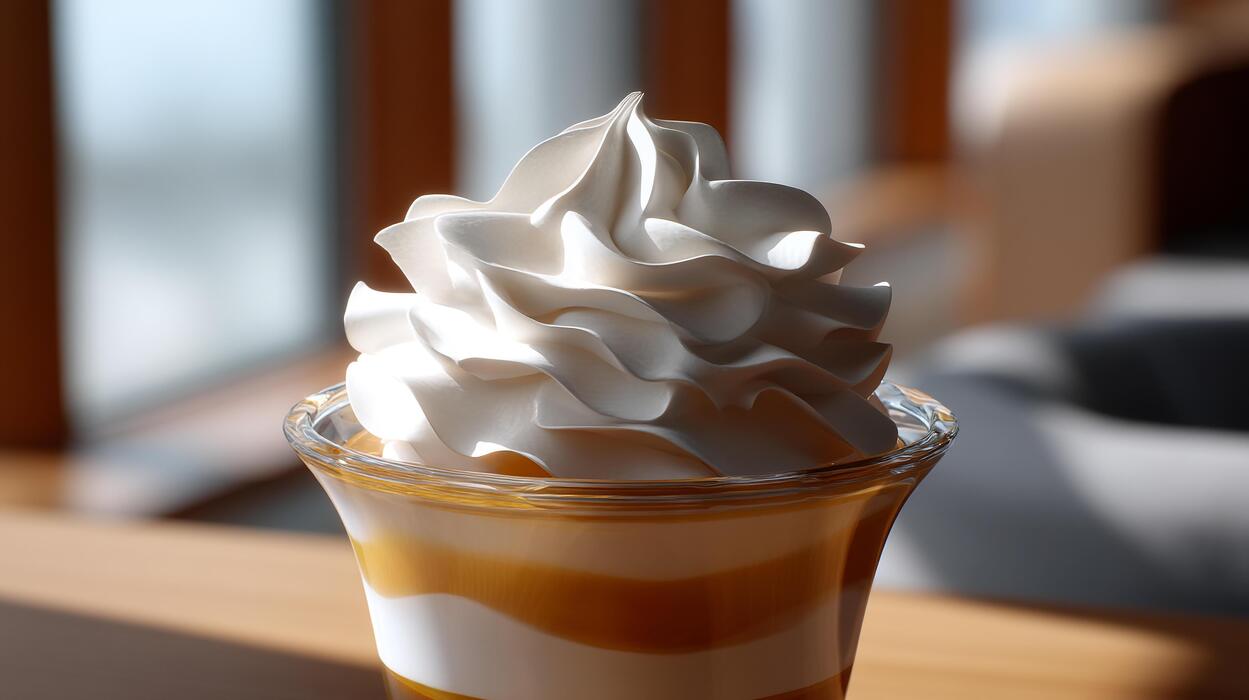
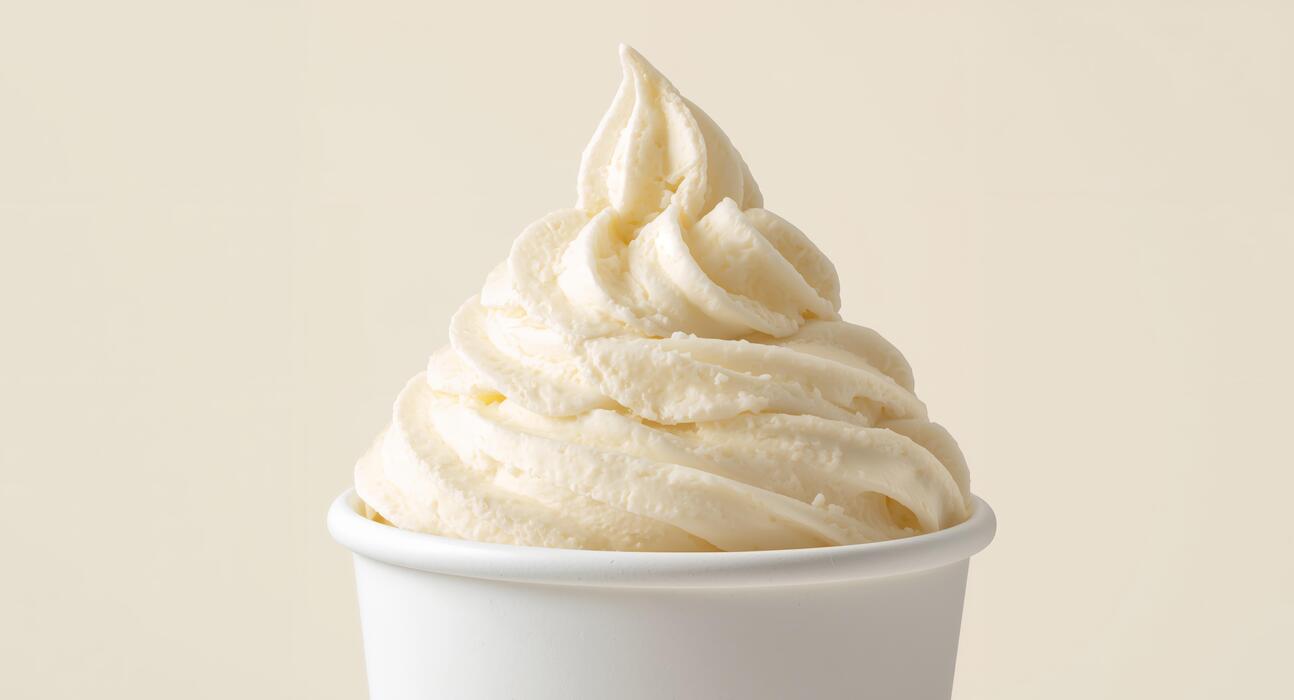
How to Get the Perfect Consistency
The secret to achieving that signature Starbucks texture lies in how you handle the cream right before serving. If you want a pourable sweet cream, simply add the mixture directly to your glass so it cascades beautifully through the ice.
However, if you are aiming for the thick, cloud-like cold foam topping, you must use a handheld milk frother or a high-speed blender.
Pour a small amount of the chilled mixture into a separate glass and aerate it for roughly fifteen to twenty seconds until it doubles in volume and reaches a soft-peak consistency.
Be careful not to over-froth, as the high fat content from the heavy cream can quickly become too stiff to pour. The goal is a micro-foam that sits gracefully on top of the coffee without immediately sinking to the bottom.
For the best results, always froth the cream while it is ice cold, as room-temperature dairy will not hold its structure or create the luxurious, silky bubbles required for a professional-grade beverage.
How to Turn Sweet Cream Into Cold Foam
Using a Handheld Milk Frother
To replicate the Starbucks experience at home, the handheld milk frother is your most efficient tool for turning vanilla sweet cream into a luxurious topper.
Start by pouring your chilled sweet cream mixture—traditionally a blend of heavy cream, 2% milk, and vanilla syrup—into a tall glass, filling it only about one-third of the way to allow for expansion.
Submerge the whisk head of the electric milk frother just below the surface of the liquid and turn it on. Hold the device at a slight angle to create a powerful vortex, which incorporates air into the fats.
As the volume increases, move the wand up and down to ensure all layers are aerated. This process should take approximately 20 to 30 seconds until the mixture reaches a soft-peak consistency that sits perfectly atop your cold brew.
Using a high-speed motor ensures the bubbles remain microscopic, resulting in that iconic velvety mouthfeel that defines the signature Starbucks cold foam experience every single time.
French Press Frothing Techniques
If you do not own an electric whisk, a standard French press is an incredible manual alternative for creating dense, stable cold foam from sweet cream. Pour your cold sweet cream base into the carafe, ensuring the liquid level is high enough for the mesh filter to reach.
Place the lid on and begin pumping the plunger up and down with rapid, short strokes. The key is to keep the filter submerged initially to build body, then lift it slightly higher to introduce more air. Continue this vigorous motion for about 15 to 25 seconds.
You will feel the resistance increase as the heavy cream emulsifies with the milk and syrup. Once the volume has nearly doubled, remove the lid and tap the carafe on the counter to pop any large bubbles.
This manual method creates a thicker, more stable foam than most automated tools, allowing the sweet cream to cascade slowly into your coffee rather than dissolving instantly, mimicking the professional barista aesthetic perfectly.
Blender Settings for Thick Foam
For those making larger batches or seeking the most consistent texture, a high-speed blender is the professional secret to perfect sweet cream foam. Starbucks uses specialized aerating blades, but you can achieve similar results by using the lowest speed setting on a standard home blender.
Pour your chilled sweet cream into the blender jar and pulse for only 5 to 10 seconds. It is crucial to avoid high speeds, as the high fat content in the heavy cream will quickly turn into whipped cream or butter if over-processed.
By using a gentle aeration cycle, you create a pourable, micro-foam texture that maintains its structure against the ice. Once the motor stops, pour the foam immediately over your drink.
This method is ideal for entertaining because it ensures the sugar and vanilla notes are evenly distributed throughout the airy matrix. The resulting foam should be thick enough to hold a straw upright briefly while remaining fluid enough to sip through a lid.
Best Ways to Use Sweet Cream in Your Coffee
Pairing with Cold Brew and Iced Coffee
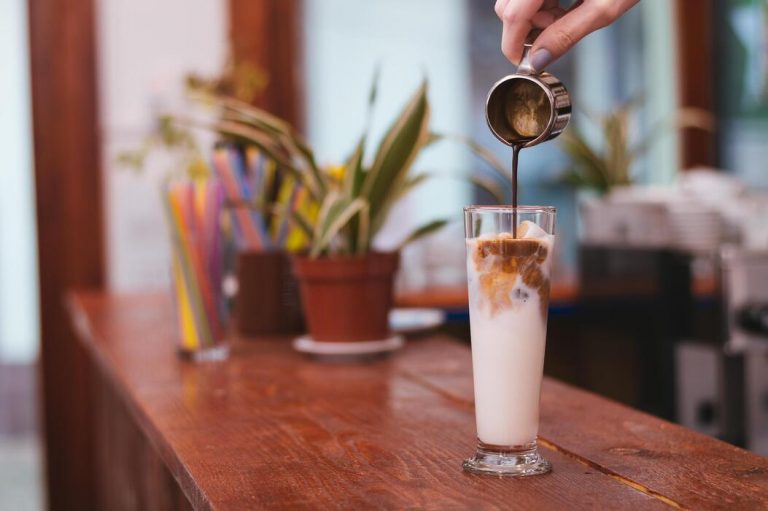
To replicate the signature Starbucks experience at home, the most effective method is pairing your sweet cream with a high-quality cold brew. Start by making your own vanilla sweet cream by whisking together heavy cream, 2% milk, and vanilla syrup in a 3:2:1 ratio, which mimics the professional recipe.
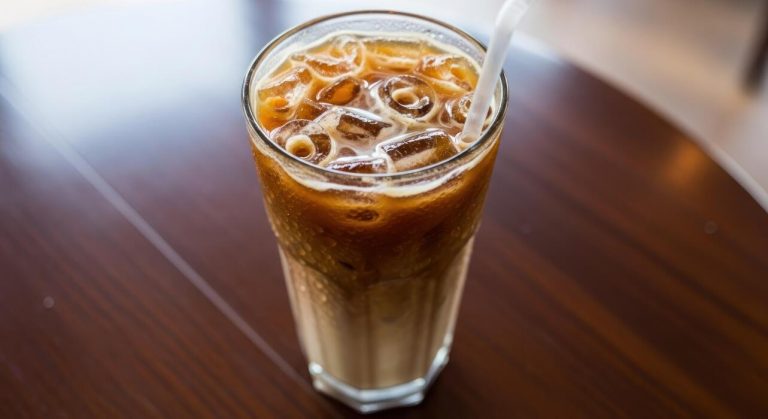
When using it with iced coffee, pour the cold brew over ice first, leaving about two inches of space at the top of the glass. Slowly drizzle the sweet cream over the surface; you will notice it creates a beautiful cascading effect as it marbles through the dark coffee.
This technique ensures every sip is perfectly balanced, providing a velvety mouthfeel that cuts through the acidity of the beans. For the best results, avoid stirring immediately to enjoy the transition from the rich, creamy top layer to the bold coffee base.
This method is the primary way to achieve that iconic vanilla sweet cream cold brew taste found in cafes.
Creating Custom Flavored Sweet Creams
While the classic Starbucks recipe relies on vanilla, you can elevate your coffee routine by experimenting with custom infusions using the same base ratio. To make a seasonal variation, try swapping the vanilla syrup for caramel, hazelnut, or peppermint to match your mood or the time of year.
If you want to replicate specialty menu items, adding a pinch of sea salt or a dash of cinnamon into the mixture before frothing can add incredible depth.
The key to a successful custom blend is ensuring the sweetener is fully dissolved in the milk before adding the heavy cream to maintain a consistent texture. Many enthusiasts also find that adding a teaspoon of cocoa powder creates a mocha-style cream that pairs beautifully with nutty roasts.
By mastering the basic three-ingredient foundation, you gain the flexibility to craft gourmet coffee toppers that rival any professional barista’s creations, allowing for a truly personalized caffeine experience right in your own kitchen every single morning.
Using It as a Topping for Hot Drinks
Although often associated with cold beverages, sweet cream is a fantastic addition to hot coffee, functioning as a superior alternative to standard liquid creamer.
To use it effectively in a hot latte or Americano, you should lightly froth the mixture until it reaches a thick, pourable consistency known as cold foam. When the chilled cream hits the hot liquid, it creates a unique temperature contrast that enhances the aromatic profile of the espresso.
For a more decadent treat, you can gently steam the sweet cream to create a micro-foam texture that is incredibly rich and stable. This approach allows the vanilla notes to bloom under the heat, providing a comforting and sophisticated sweetness that doesn’t overwhelm the natural flavors of the coffee beans.
Using sweet cream as a topping for hot drinks is an excellent way to emulate a caffe breve or a luxury macchiato, giving your standard morning cup a professional, velvety finish that stays creamy until the very last drop.
Tips for the Best Tasting Results
Choosing the Right Brand of Vanilla Syrup
To replicate the signature Starbucks flavor profile at home, the selection of your vanilla syrup is the most critical decision you will make. Starbucks uses their own proprietary brand, but you can achieve nearly identical results by opting for Fontana Vanilla Syrup, which is the official supplier for the company.
If that is unavailable, high-quality alternatives like Monin or Torani provide the necessary depth and aromatic complexity without a chemical aftertaste. Avoid using imitation vanilla extract or thin grocery store brands, as these lack the viscosity and concentrated sweetness required to balance the heavy cream.
The syrup serves as the primary sweetener and emulsifier, helping the dairy components bond together smoothly.
For the most authentic experience, ensure your syrup is clear and sugar-based rather than a sugar-free version, as the natural sugar molecules contribute significantly to the velvety mouthfeel that defines a true vanilla sweet cream cold brew topper or foam.
Why Temperature Matters for Texture
Temperature is the hidden variable that determines whether your sweet cream remains a liquid pour or transforms into a luxurious foam. Professional baristas emphasize that all ingredients—the heavy cream, 2% milk, and vanilla syrup—must be thoroughly chilled before mixing.
When the fats in the heavy cream are cold, they maintain a stable structure that allows for the incorporation of micro-bubbles if you choose to froth it. If the mixture is even slightly room temperature, the fats can break down or become greasy, leading to a thin, unappealing consistency.
Furthermore, storing your finished sweet cream in the coldest part of the refrigerator ensures that the flavors meld correctly over time. For the best tasting results, always use a chilled pitcher or frothing carafe to maintain a consistent thermal environment.
This thermal control prevents the cream from curdling and ensures a silky, uniform pour that cascades beautifully through your iced coffee or cold brew without immediate separation.
Common Mistakes to Avoid
One of the most frequent errors when attempting a DIY Starbucks sweet cream is using the wrong ratio of dairy. Many people mistakenly use only heavy cream, resulting in a mixture that is too thick to pour, or only milk, which lacks the richness and body of the original recipe.
The key is the precise 3-2-1 ratio: three parts heavy cream, two parts 2% milk, and one part vanilla syrup. Another common mistake is over-whisking the mixture; you want a smooth, pourable liquid, not stiff whipped cream.
If you are making cold foam, stop frothing as soon as it reaches a melted ice cream consistency. Additionally, do not skip the 2% milk; its lower fat content is essential for thinning the heavy cream just enough to create that iconic cascading effect in the glass.
Finally, ensure you are not using expired dairy, as the high fat content in cream can pick up refrigerator odors quickly, which will significantly compromise the delicate vanilla flavor profile.
Healthier and Dairy-Free Alternatives
How to Make Vegan Sweet Cream
To replicate the signature Starbucks texture without dairy, you must focus on achieving a specific fat content that mimics heavy cream. Start by blending full-fat canned coconut milk with an unsweetened barista-blend oat milk to create a rich, pourable base.
Unlike standard almond milk, which can be too thin, the coconut fat provides the necessary viscosity for a velvety mouthfeel. For the sweetener, use a vegan-friendly vanilla bean paste or a simple syrup made from organic cane sugar.
To ensure the mixture integrates perfectly into cold brew, use a handheld milk frother to emulsify the fats and liquids for approximately thirty seconds. This process creates a stable microfoam that doesn’t separate when hitting the acidic coffee.
For an even richer finish, some enthusiasts recommend adding a tablespoon of soaked and blended cashews, which provides an extra layer of creaminess that closely rivals the original dairy-based recipe used in professional coffee shops worldwide.
Low-Sugar and Keto-Friendly Options
Creating a healthier version of sweet cream requires swapping out the sugar-heavy vanilla syrup for low-glycemic alternatives while maintaining a high-fat profile. For a keto-compliant version, combine heavy whipping cream with unsweetened almond milk in a two-to-one ratio to reduce the overall carbohydrate count significantly.
Instead of traditional sugar, utilize monk fruit or erythritol-based vanilla drops, which provide sweetness without the insulin spike. To enhance the flavor profile without adding calories, consider adding a pinch of sea salt or a drop of high-quality almond extract, which deepens the perception of sweetness on the palate.
If you are tracking macros, this modification allows you to enjoy the luxurious texture of cold foam while keeping the net carb count under two grams per serving.
Always whisk the mixture cold, as chilled fats stabilize better when using sugar-free substitutes, ensuring your morning beverage remains both indulgent and aligned with your specific nutritional goals and dietary restrictions.
Comparing Homemade vs Store-Bought Creamers
When deciding between making your own sweet cream and purchasing a pre-mixed bottle, the primary factors are control over ingredients and the quality of the final texture.
Homemade versions allow you to avoid artificial thickeners like carrageenan or high-fructose corn syrup, which are common in many commercial creamers found on grocery store shelves. By crafting your own blend, you can customize the ratio of cream to milk to suit your personal preference for richness or lightness.
However, store-bought options offer unmatched convenience and a longer shelf life due to ultra-pasteurization techniques. While commercial creamers are engineered to be shelf-stable, they often lack the fresh, aromatic punch of real vanilla bean extract used in a DIY recipe.
For the most authentic Starbucks experience, the homemade approach is superior because it allows you to froth the cream fresh each time, resulting in a superior layer of foam that stays suspended atop your coffee much longer than processed alternatives.
Frequently Asked Questions
What are the core ingredients in Starbucks sweet cream?
Starbucks vanilla sweet cream is made using a specific ratio of three ingredients: heavy cream, 2% milk, and vanilla syrup. This combination creates a pourable, velvety texture that is sweeter and richer than standard creamer.
How do I make a DIY version of Starbucks sweet cream at home?
To replicate the recipe, mix 1/2 cup of heavy cream, 1/4 cup of 2% milk, and 2-3 tablespoons of vanilla syrup. Stir the ingredients gently until combined, ensuring you don’t over-mix or whip the cream.
What is the secret ratio Starbucks uses for sweet cream?
The official Starbucks batch recipe follows a 13-6-3 ratio: 13 pumps of vanilla syrup, heavy cream up to the 1-liter line, and 2% milk up to the 1.5-liter line. For home use, this translates to roughly 2 parts heavy cream to 1 part milk and vanilla to taste.
How does vanilla sweet cream differ from sweet cream cold foam?
While the liquid ingredients are identical, sweet cream is poured directly into the coffee as a liquid creamer. Sweet cream cold foam is the same mixture aerated in a high-speed blender to create a thick, frothy topping.
Can I make Starbucks sweet cream dairy-free?
Yes, you can substitute the dairy with a mix of full-fat oat milk or coconut milk and a non-dairy vanilla creamer. However, it may not achieve the exact same thickness as the heavy cream-based original.
How long does homemade Starbucks sweet cream stay fresh?
Once mixed, the sweet cream should be stored in an airtight container in the refrigerator and consumed within 3 to 5 days. Always check the expiration dates on your milk and cream before mixing.
Conclusion
Making Starbucks sweet cream at home is a simple process that requires only heavy cream, 2% milk, and vanilla syrup. By following the 13-count ratio, you can achieve that signature velvety texture and rich flavor without visiting a cafe. Whether you are topping a cold brew or enhancing an iced latte, this DIY recipe is a game changer. Grab your ingredients today and start crafting professional-quality coffee beverages from the comfort of your own kitchen.