How To Make Starbucks Vanilla Cold Brew
Craving that smooth, velvety Starbucks vanilla sweet cream cold brew but want to skip the long drive-thru line? You have come to the right place. Making this fan-favorite drink at home is surprisingly simple and much more budget-friendly. Whether you are looking for the perfect vanilla syrup recipe or that signature cloud-like cream topping, this guide covers it all. Get ready to master the process quickly so you can enjoy a professional-quality caffeine fix right from your own kitchen.
What is Starbucks Vanilla Cold Brew?
The difference between cold brew and iced coffee
To replicate the Starbucks experience at home, you must first understand that cold brew is not simply chilled coffee. While traditional iced coffee is brewed quickly with hot water and then poured over ice, Starbucks cold brew is made by steeping coarse grounds in cool, filtered water for twenty hours.
This extended, heat-free extraction process results in a significantly smoother profile with lower acidity and a naturally sweeter finish compared to its heat-brewed counterpart.
When you learn how to make Starbucks vanilla cold brew, starting with a true cold-steeped concentrate is essential because it provides the heavy body and caffeine punch required to stand up against sweet additives.
Standard iced coffee often becomes diluted and bitter when mixed with syrups, but the bold concentration of cold brew maintains its integrity.
By mastering this slow-steeping technique, you ensure your homemade version captures that signature velvety texture that defines the professional cafe standard and serves as the perfect foundation for vanilla infusion.
Key ingredients in the Starbucks recipe
The secret to a perfect copycat recipe lies in using the exact components found behind the counter. You will need a dark roast coffee blend, preferably with Latin American or African origins, to mimic the chocolatey notes of the Starbucks signature blend.
Coarsely grind your beans to the consistency of sea salt to prevent over-extraction and cloudiness during the long soak. The second vital component is a high-quality vanilla syrup; while store-bought versions work, making a simple syrup with real vanilla bean paste offers a more authentic flavor profile.
Do not forget the importance of filtered water, as the mineral content significantly impacts the final taste of a drink that is ninety-eight percent water. Finally, have plenty of ice and a splash of milk or cream ready if you prefer the ‘Vanilla Sweet Cream’ variation.
By assembling these specific, premium ingredients, you transform a basic caffeine fix into a sophisticated handcrafted beverage that tastes identical to the version served by your favorite barista every morning.
Why vanilla syrup and cold brew pair perfectly
The pairing of vanilla syrup and cold brew is a masterclass in flavor balancing, which is why it remains a top-selling menu item. Cold brew naturally possesses deep cocoa and earthy undertones that can sometimes feel heavy on the palate.
Introducing a high-quality vanilla syrup acts as a brightening agent, highlighting the subtle floral notes of the coffee beans while providing a silky sweetness that rounds out any lingering bitterness.
Because cold brew is less acidic than hot coffee, the vanilla flavor is allowed to shine through without being masked by sourness or sharp tannins. This combination creates a refreshing yet indulgent experience that satisfies both coffee purists and those who prefer a dessert-like treat.
When you mix them, the syrup dissolves seamlessly into the cold liquid, ensuring every sip is consistently flavored. This synergy is exactly why the Starbucks vanilla cold brew is the ultimate solution for those seeking a smooth, energized, and perfectly sweetened beverage to fuel their entire day.
Essential Equipment for Home Cold Brewing
Best cold brew makers and pitchers
To replicate the smooth profile of a Starbucks vanilla cold brew at home, investing in a dedicated cold brew maker is the most efficient starting point.
These specialized pitchers, such as the Toddy Cold Brew System or the Takeya Deluxe Cold Brew Maker, are designed specifically to handle long steeping times without introducing bitterness. When selecting a pitcher, look for BPA-free plastic or borosilicate glass to ensure the flavor remains clean and untainted by chemical leaching.
A high-quality brewer typically features an integrated mesh core that keeps the coarse grounds submerged while allowing water to circulate freely. This setup is crucial for extracting the nuanced chocolate and caramel notes found in the Starbucks Cold Brew Blend.
By using a dedicated system, you can easily prepare large batches of concentrate that stay fresh in the refrigerator for up to two weeks. Simply pour your concentrate over ice and add your homemade vanilla syrup and heavy cream for that signature finish.
Using a French press for cold brew
If you do not want to purchase a specialized pitcher, a standard French press is an excellent alternative for making a high-quality cold brew concentrate.
The French press method is highly effective because it uses immersion brewing, where the coffee grounds are completely saturated in cold filtered water for 12 to 24 hours.
To achieve the best results, use a coarse grind size similar to sea salt; this prevents over-extraction and ensures the plunger can move smoothly. After the steeping period is complete, slowly depress the plunger to separate the grounds from the liquid.
The stainless steel mesh filter in a French press allows essential oils to pass through, resulting in a rich, full-bodied texture that mimics the mouthfeel of professional cafe drinks.
This heavy body provides the perfect base for the vanilla sweet cream topping, as the coffee is strong enough to stand up against the sweetness of the syrup and the richness of the dairy.
Filters and straining tools for a smooth finish
Achieving the ultra-clean, sediment-free finish characteristic of a Starbucks cold brew requires meticulous filtration. While mesh filters catch large grounds, using a secondary paper filter or a fine nut milk bag is the secret to removing fine silts that cause cloudiness and bitterness.
If you are using a French press or a DIY jar method, pouring the finished concentrate through a chemex paper filter or a coffee dripper lined with a bleached filter will result in a crisp, bright flavor profile.
This extra step ensures that your vanilla cold brew remains smooth on the palate and visually appealing. Additionally, using high-quality filtered water is essential, as tap water minerals can interfere with the delicate vanilla notes.
By employing a double-filtration technique, you ensure that the vanilla syrup and cream integrate perfectly with the coffee without any gritty residue at the bottom of your glass. This professional touch elevates the home brewing experience to match the high standards of a coffeehouse beverage.
How to Choose the Best Coffee Beans
Why dark roast works best for cold brew
To replicate the signature Starbucks flavor profile at home, selecting a dark roast is essential because the long steeping process naturally highlights rich, chocolatey notes.
While lighter roasts offer bright acidity that can become sour during a twenty-hour soak, dark roasted beans provide the low acidity and heavy body required to stand up against sweet vanilla syrup and heavy cream.
This specific roasting level ensures that the coffee maintains its structural integrity even after significant dilution with ice. Look for beans that feature tasting notes of cacao, toasted nuts, or caramel, as these deep flavors harmonize perfectly with the floral sweetness of vanilla.
By choosing a dark roast, you create a bold, concentrated base that mimics the intensity of the commercial cold brew blend used in stores.
This robust foundation is the secret to ensuring your homemade beverage doesn’t taste watered down once the milk is added, providing a smooth, velvety finish that lingers pleasantly on the palate.
The importance of a coarse grind size
Achieving the perfect extraction for your vanilla cold brew depends entirely on using a coarse grind size, similar in texture to sea salt or breadcrumbs.
Because cold brew involves an extended immersion period, using a fine grind will lead to over-extraction, resulting in a bitter and muddy flavor that ruins the delicate balance of your vanilla cream.
A coarse grind allows water to flow freely around the large particles, gently extracting the flavorful oils and caffeine without pulling out the harsh tannins. Furthermore, using a consistent burr grinder ensures that your particles are uniform, which prevents sediment from passing through your filter and creating a gritty texture.
This coarse consistency is vital for a clean, crisp mouthfeel that allows the vanilla notes to shine through clearly.
When you prepare your beans with this specific texture, you ensure that the final concentrate is easy to filter and possesses the signature clarity and sweetness that makes the Starbucks version so popular among coffee enthusiasts worldwide.
Recommended coffee brands for a Starbucks taste
If you want the most authentic experience, the best choice is the Starbucks Cold Brew Pitcher Packs or their signature Guatemala Antigua beans, which offer the exact flavor profile used by baristas.
For those looking for high-quality alternatives that deliver a similar punch, Peet’s Coffee Major Dickason’s Blend is a fantastic option due to its world-class depth and spicy complexity.
Another excellent contender is Stumptown Coffee Roasters Holler Mountain, which provides a creamy, organic base that pairs exceptionally well with homemade vanilla bean syrup. For a budget-friendly yet effective result, Eight O’Clock Coffee The Original in whole bean form offers a surprisingly smooth profile when brewed cold.
Whichever brand you select, prioritize freshly roasted whole beans and grind them just before steeping to preserve the volatile aromatic compounds.
These specific brands are known for their bold intensity and chocolate-forward profiles, ensuring your DIY vanilla cold brew tastes like a professional craft beverage rather than a simple cup of chilled morning coffee.
Step-by-Step Guide to Making Cold Brew Concentrate
The ideal coffee-to-water ratio
To replicate the signature Starbucks profile at home, you must start with a precise 1:4 coffee-to-water ratio by weight. This specific concentration creates a robust foundation that can withstand the addition of heavy cream and vanilla syrup without becoming watery.
For a standard batch, use one cup of coarsely ground beans for every four cups of filtered water. Using filtered water is a non-negotiable step because it ensures the clean, crisp finish characteristic of professional brews.
Ensure your beans are ground to a texture resembling coarse sea salt; a grind that is too fine will result in over-extraction and a muddy texture that ruins the clarity of the vanilla notes. When combining the ingredients, gently submerge the grounds with a wooden spoon rather than stirring vigorously.
This careful saturation allows the water to penetrate the coffee evenly, setting the stage for a rich, syrupy concentrate that serves as the perfect canvas for your sweet vanilla additives and ice.
Steeping times for maximum flavor
Patience is the most critical ingredient when aiming for that smooth, low-acid Starbucks taste. For the ultimate cold brew concentrate, you should steep your mixture for 12 to 20 hours at room temperature.
If you prefer a brighter, slightly more acidic profile, aim for the 12-hour mark, but for that deep, chocolatey essence that pairs perfectly with vanilla, the 16-to-18-hour window is generally considered the sweet spot.
Avoid steeping for longer than 24 hours, as this can lead to the extraction of woody, bitter tannins that even the strongest vanilla syrup cannot hide. During this time, keep the container in a cool, dark place away from direct sunlight to maintain a consistent temperature.
Once the time is up, the chemical transformation is complete, resulting in a naturally sweet caffeine kick.
Remember that steeping in the refrigerator is an option, but it requires a longer duration of up to 24 hours because the cold temperature slows down the extraction process significantly compared to room temp.
Proper straining techniques to avoid bitterness
The final hurdle in achieving a professional-grade cold brew is the filtration process, which must be done slowly to keep the liquid sediment-free. Start by pouring the mixture through a fine-mesh sieve to remove the largest grounds, but do not stop there.
To get that polished Starbucks look, perform a second pass using a high-quality paper coffee filter or a double layer of cheesecloth. It is vital that you never squeeze or press the grounds during this step; let gravity do the work.
Squeezing the remaining sludge forces bitter oils and fine particles into your concentrate, which creates an unpleasant aftertaste. Once the liquid has fully drained, you are left with a pristine concentrate that can be stored in the refrigerator for up to two weeks.
To serve, mix equal parts concentrate and water or milk, then stir in your vanilla simple syrup and top with a splash of cream. This meticulous straining ensures every sip is velvety smooth and highlights the aromatic vanilla without any gritty residue.
How to Make Homemade Vanilla Syrup
Simple syrup base recipe
To replicate the signature sweetness of a Starbucks vanilla cold brew at home, you must first master the art of a perfectly balanced simple syrup base. The process begins by combining equal parts granulated white sugar and filtered water in a small saucepan over medium heat.
It is essential to stir the mixture continuously until the sugar crystals have completely dissolved and the liquid appears crystal clear, which typically takes about three to five minutes of gentle simmering.
Avoid letting the mixture reach a rolling boil, as excessive evaporation can lead to a syrup that is too thick or prone to crystallization once it cools down. This foundational 1:1 ratio ensures a consistent sweetness that mimics the professional grade syrups used by baristas.
Once the sugar is fully integrated, remove the pan from the heat immediately to prevent scorching. This neutral base serves as the critical vehicle for your vanilla flavoring, allowing the aromatic notes to shine without being overpowered by a heavy or syrupy texture in your finished coffee drink.
Adding real vanilla bean vs extract
The defining characteristic of a premium vanilla syrup lies in the quality of the flavoring agent you choose to incorporate into your cooled sugar base.
For a truly authentic and visually stunning result, using a whole vanilla bean is the gold standard; simply slice the pod lengthwise, scrape the seeds into the warm syrup, and let it steep for several hours to extract the deep, woody complexity.
If you prefer convenience without sacrificing quality, a high-quality pure vanilla extract or vanilla bean paste provides a robust flavor profile with less effort. When using extract, always wait until the syrup has cooled slightly before stirring it in to prevent the alcohol-based aromatics from evaporating.
While the bean offers a more nuanced and gourmet experience with beautiful black specks, the extract provides that familiar, punchy sweetness found in your favorite café.
Whichever method you select, ensure you use pure ingredients rather than imitation flavorings to achieve that smooth, professional finish that elevates a standard cold brew into a luxurious, coffee-house quality beverage right in your own kitchen.
Storage tips to keep syrup fresh
Once your homemade vanilla syrup has reached room temperature, proper storage is vital to maintaining its flavor integrity and preventing spoilage. Transfer the liquid into a clean, airtight glass bottle or mason jar to protect it from absorbing any lingering odors from your refrigerator.
When stored correctly in the fridge, your syrup will remain fresh and delicious for approximately two to three weeks.
To further extend the shelf life and ensure food safety, always use a completely clean spoon or a dedicated syrup pump when dispensing the sweetener into your cold brew to avoid introducing bacteria. If you notice any cloudiness, unusual odors, or mold growth, discard the batch immediately and start fresh.
For those who brew in large quantities, you can even add a small teaspoon of vodka to the mixture during the cooling phase; this acts as a natural preservative without altering the final taste.
Keeping your syrup chilled and tightly sealed ensures that every morning cup of vanilla cold brew tastes just as vibrant and sweet as the first day you prepared the batch.
Assembling Your Starbucks Style Vanilla Cold Brew
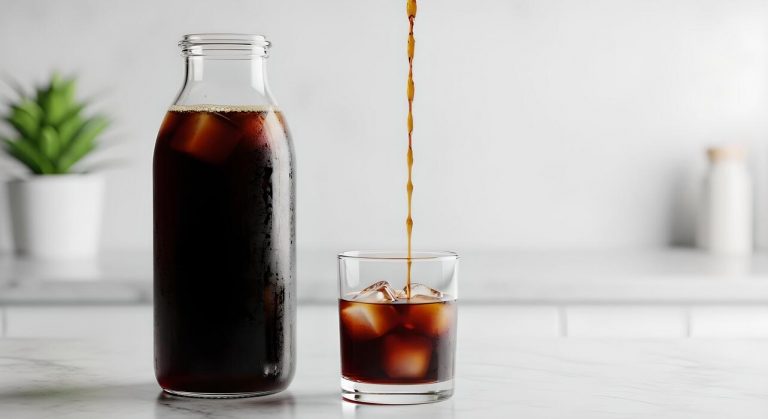
Diluting your concentrate correctly
To achieve that signature Starbucks smoothness, you must begin by diluting your cold brew concentrate with the right ratio of filtered water. Most homemade concentrates are quite potent, so a standard 1:1 ratio of coffee to water is recommended to mimic the commercial profile.
Pour your measured concentrate into a tall glass first, ensuring the liquid is chilled to preserve the nuanced chocolate and caramel notes. Using filtered water is essential for a clean taste, as tap water minerals can interfere with the delicate acidity of the beans.
If you prefer a bolder, more robust caffeine kick, you can slightly reduce the water, but remember that the ice will provide further dilution as it melts. Take a moment to stir the mixture gently before adding any sweeteners, ensuring the base is perfectly balanced.
This foundational step ensures your drink isn’t overly bitter or watery, providing the ideal canvas for the vanilla flavors to shine through in every single sip.
Mixing the vanilla syrup and ice
Once your base is prepared, it is time to introduce the sweetness by adding two to three pumps of vanilla syrup directly into the coffee mixture. For the most authentic Starbucks experience, use a high-quality Madagascar bourbon vanilla syrup that offers a rich, aromatic profile rather than a synthetic aftertaste.
Stir the syrup thoroughly into the diluted coffee while it is still at room temperature or slightly chilled to ensure it dissolves and distributes evenly throughout the glass. After the syrup is integrated, fill the glass to the brim with large, solid ice cubes.
Using larger cubes is a professional secret, as they have less surface area and melt slower than crushed ice, preventing your vanilla cold brew from becoming diluted too quickly. Give the drink another quick stir to chill the entire beverage instantly.
This specific sequence ensures that every mouthful has a consistent level of sweetness from the first refreshing drop to the very last bit of ice.
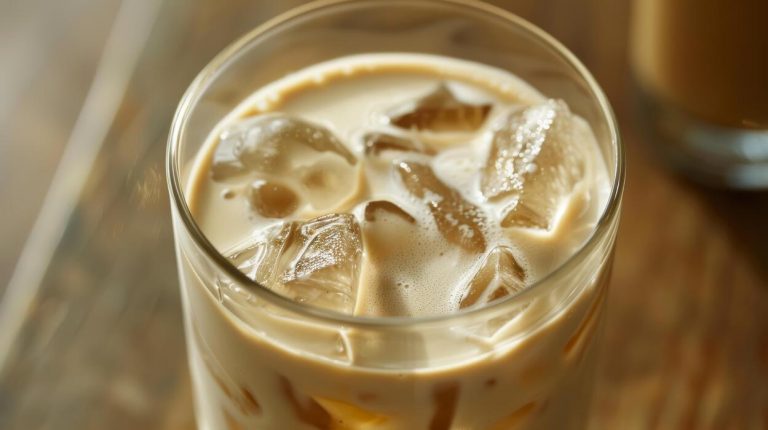
Adding milk or cream for a Vanilla Sweet Cream version
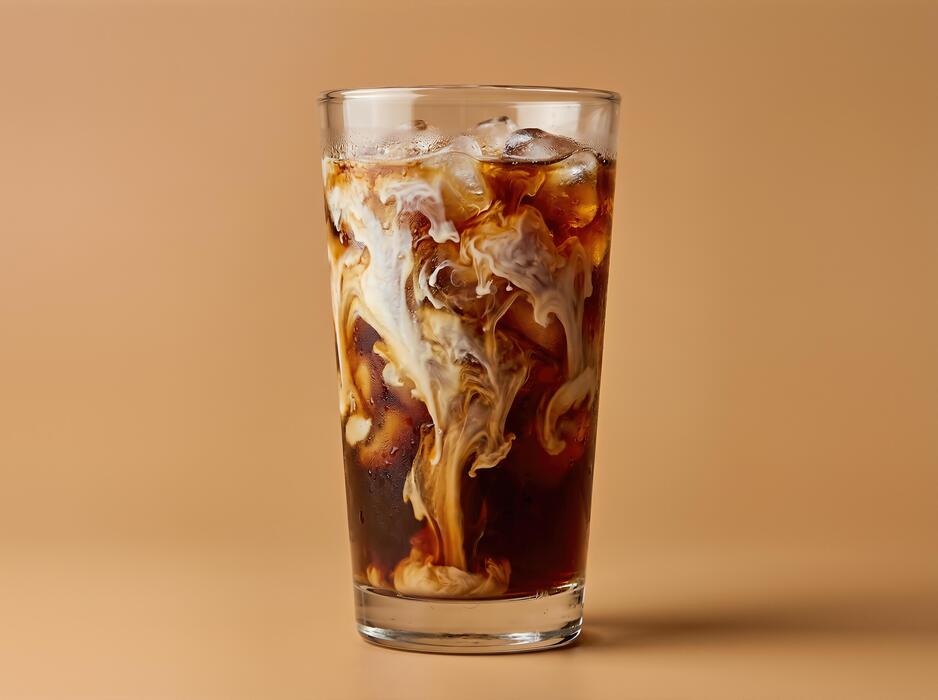
To transform your beverage into the iconic Vanilla Sweet Cream Cold Brew, you must focus on the final creamy layer added just before serving.
You can use a splash of half-and-half for simplicity, but for the true coffeehouse texture, create a quick mixture of heavy cream, 2% milk, and a touch of vanilla.
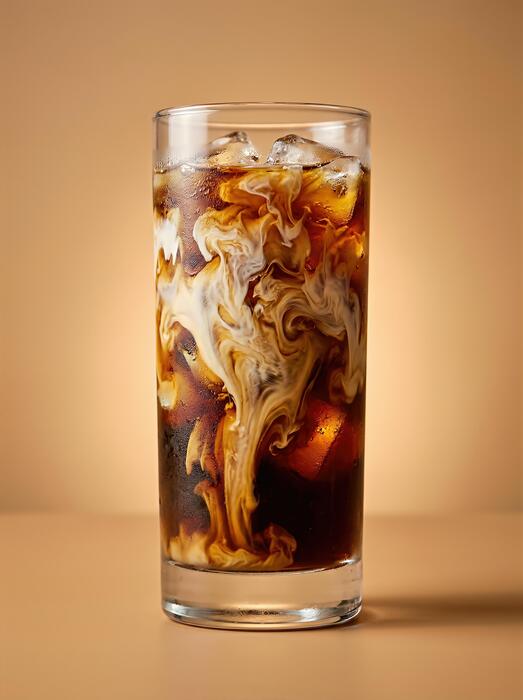
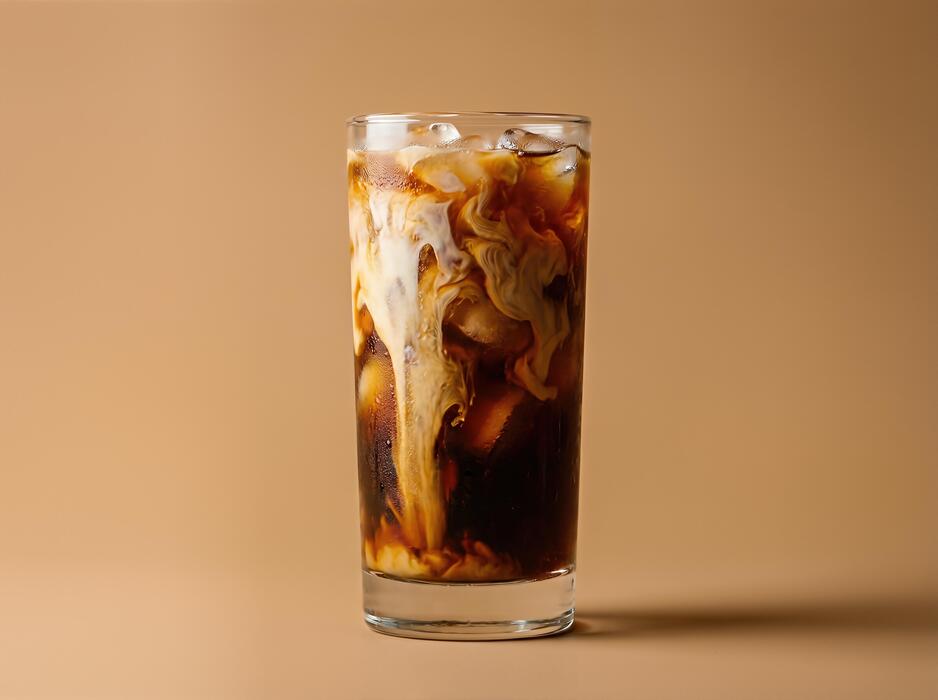
Pour this mixture slowly over the back of a spoon to create a beautiful cascading effect as the white cream marbles into the dark coffee.
The fat content in the cream is what carries the vanilla flavor across your palate, providing a luxurious mouthfeel that balances the natural bite of the cold brew. If you want a frothy finish, use a handheld milk frother to aerate the cream for thirty seconds before pouring.
This creates a dense, velvety foam that sits on top of the ice, mimicking the professional cold foam technology used in stores. This final touch completes the assembly, delivering a restaurant-quality caffeinated treat directly in your own kitchen.
Tips for the Perfect Cold Brew Every Time
Using filtered water for better taste
To replicate the clean and crisp profile of a professional Starbucks beverage, you must prioritize the quality of your water. Since cold brew consists of roughly ninety-eight percent water, any impurities or chlorine present in your tap will negatively impact the delicate notes of the coffee beans.
Professionals recommend using purified or bottled spring water to ensure that the natural sweetness of the medium roast shines through without a metallic or chemical aftertaste. When you use filtered water, you provide a neutral canvas that allows the vanilla syrup and cream to blend seamlessly with the coffee concentrate.
This simple adjustment prevents the bitterness often associated with hard water minerals. Additionally, ensure your water is at room temperature or slightly chilled before starting the steeping process.
By focusing on high-quality filtration, you create a smoother foundation that mimics the gold-standard extraction process used in high-end cafes, resulting in a refreshing and professional-grade cold brew experience every single time you brew at home.
How to store leftover cold brew
Proper storage is essential for maintaining the freshness and potency of your homemade concentrate. Once the steeping process is complete, transfer the strained liquid into an airtight glass carafe or mason jar.
Keeping the air out is vital because oxygen is the primary enemy of coffee flavor, leading to oxidation and a stale taste. Store your concentrate in the coldest part of the refrigerator for up to seven to ten days.
However, for the most vibrant flavor profile that pairs perfectly with vanilla, try to consume it within the first week. It is important to store the concentrate separately from any milk, cream, or vanilla syrup.
Adding dairy or sweeteners directly to the bulk container will significantly shorten the shelf life and can cause the mixture to spoil within just a few days. If you find yourself with an abundance of leftover brew, consider freezing it into coffee ice cubes.
This clever hack prevents your future drinks from becoming watered down as the ice melts, maintaining that bold Starbucks-style strength.
Ways to customize the sweetness and strength
The beauty of making your own vanilla cold brew lies in the ability to tailor the intensity to your specific palate. To adjust the strength, focus on your water-to-coffee ratio; a 1:4 ratio creates a bold concentrate, while a 1:8 ratio offers a lighter, ready-to-drink version.
If you prefer a drink that packs a punch similar to the original, keep the concentrate thick and dilute it sparingly with ice. When it comes to sweetness, you can easily swap standard sugar for sugar-free vanilla syrup or a homemade honey-vanilla blend to control the caloric intake.
For those who enjoy a velvety texture, experiment with the type of dairy used. While Starbucks typically uses a splash of heavy cream for their signature cold foam, you can achieve a lighter result using oat milk or almond milk.
To enhance the vanilla aroma without extra sugar, try adding a drop of pure vanilla extract or scraping a fresh vanilla bean into the grounds before brewing. These small tweaks allow you to achieve the perfect balance of sweetness and caffeine power.
Frequently Asked Questions
What are the main components of a Starbucks Vanilla Sweet Cream Cold Brew?
The drink consists of three primary parts: a slow-steeped cold brew coffee base, several pumps of vanilla syrup, and a homemade vanilla sweet cream topper. Unlike a standard splash of milk, the sweet cream is a specific blend of heavy cream, milk, and vanilla syrup.
How do I make the vanilla sweet cream at home?
Whisk together 1/2 cup heavy whipping cream, 1/4 cup 2% milk, and 2 tablespoons of vanilla syrup until slightly thickened but still pourable. For the best results, ensure the ingredients are cold and do not over-mix into whipped cream.
What is the best coffee to use for the cold brew base?
Starbucks uses a blend of Latin American and African beans, but you can achieve a similar taste using any coarsely ground dark or medium roast coffee. Steep the grounds in cold water for 12 to 20 hours to achieve that signature smooth, low-acid flavor profile.
Can I use store-bought cold brew to save time?
Yes, you can use a high-quality store-bought cold brew concentrate or ready-to-drink coffee to simplify the process. Just ensure it is unsweetened so you can control the sweetness level with your own vanilla syrup and sweet cream.
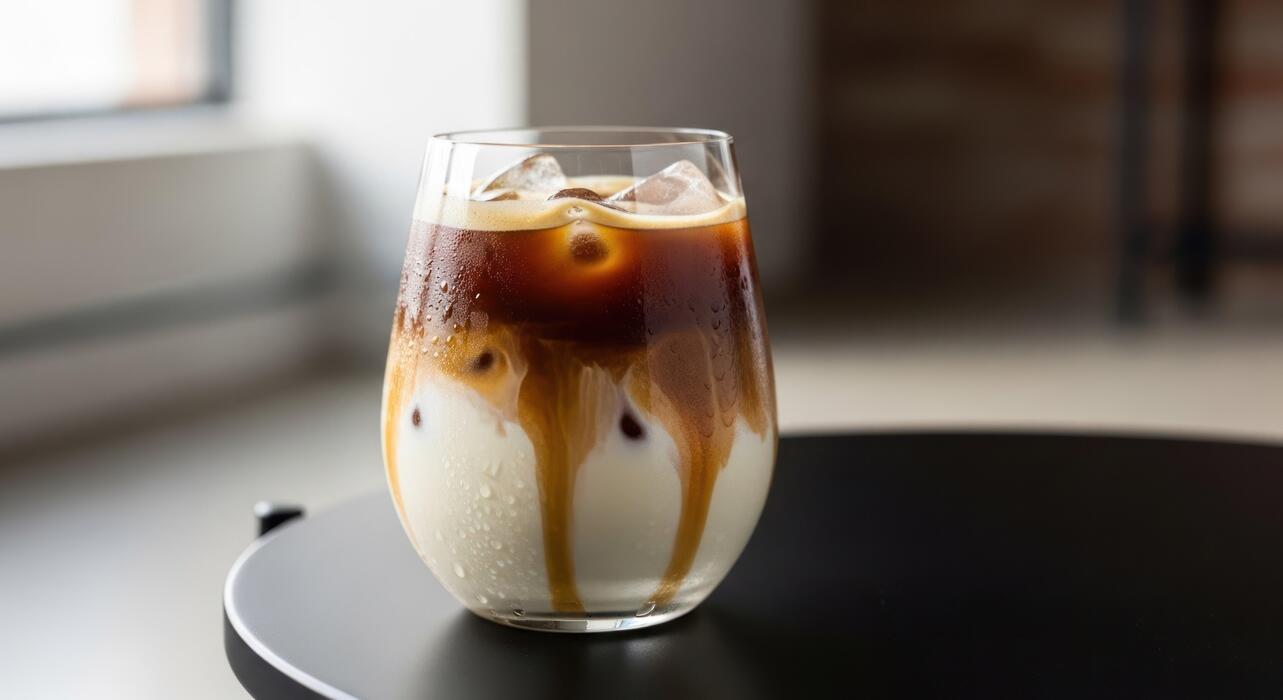
How do I layer the drink like a Starbucks barista?
Fill a tall glass with ice and pour in your cold brew coffee, leaving about two inches of space at the top. Stir in 1-2 tablespoons of vanilla syrup, then gently pour the vanilla sweet cream over the top so it cascades down into the coffee.
How can I make a dairy-free version of this drink?
To make it vegan, replace the heavy cream and milk with full-fat oat milk or a combination of coconut cream and almond milk. Use a handheld frother to give the dairy-free cream a bit of lift before pouring it over your cold brew.
How long does the homemade vanilla sweet cream last?
You can store the prepared vanilla sweet cream in an airtight container in the refrigerator for up to 5 days. Give it a quick stir or shake before using it to redistribute the vanilla syrup and ensure a consistent texture.
Conclusion
Mastering the Starbucks vanilla sweet cream cold brew at home is both simple and rewarding. By preparing your own cold brew concentrate and mixing a DIY vanilla syrup with heavy cream, you can enjoy a premium coffeehouse experience without the daily expense. This customizable recipe allows you to adjust the sweetness and strength to your exact preference. Now that you have the tools, start brewing today and elevate your morning routine with this refreshing, velvety treat.