How To Make Starbucks Sweet Cream
Have you ever wondered how Starbucks makes their vanilla sweet cream so velvety and addictive? You do not need a green apron to recreate that signature silky texture at home. Whether you are topping off a cold brew or leveling up your morning iced coffee, making this café-style topper is surprisingly simple. In this guide, we will show you exactly how to make Starbucks sweet cream using just three everyday ingredients and a quick mixing technique that takes seconds.
What is Starbucks Vanilla Sweet Cream?
The difference between sweet cream and cold foam
To understand how to make Starbucks sweet cream at home, you must first distinguish it from vanilla sweet cream cold foam. While they share the same base ingredients, the primary difference lies in the aeration and final consistency.
Standard sweet cream is a liquid creamer made by whisking together heavy cream, 2% milk, and vanilla syrup until combined but not thickened. It is designed to be poured directly into iced coffee, where it cascades to the bottom, creating a beautiful marbled effect and a silky mouthfeel.
In contrast, cold foam is this same mixture aerated in a high-speed blender to create a thick, pillowy topping that sits on top of the drink. When making your own, remember that sweet cream should remain a pourable liquid.
If you want the foam version, you simply need to froth your prepared sweet cream for about thirty seconds until it reaches a meringue-like density that resists sinking into your cold brew immediately.
Key flavor notes and texture
The hallmark of a perfect Starbucks-style sweet cream is its balanced profile of rich dairy and aromatic sweetness. The flavor is defined by high-quality vanilla bean notes that cut through the bitterness of dark roast coffee without being cloying.
Unlike shelf-stable creamers that often have an oily aftertaste, this homemade version relies on the high fat content of heavy cream to provide a luxurious, velvety texture that coats the palate.
The 2% milk acts as a thinning agent, ensuring the mixture isn’t too heavy or buttery, which allows the vanilla sweetness to remain the star of the show.
When you prepare this at home, the key is using a vanilla syrup with a strong scent to mimic the signature Starbucks aroma.
The result is a sophisticated topping that provides a smooth, cooling sensation with every sip, transforming a basic cup of iced coffee into a premium cafe experience that tastes exactly like the professional version found at the drive-thru.
Why this topping is popular for cold brew
Vanilla sweet cream has become the gold standard for cold brew enthusiasts because it complements the unique brewing process of cold-steeped coffee. Cold brew is naturally lower in acidity and features deep chocolate and nutty undertones, which are perfectly highlighted by the creamy, floral notes of vanilla.
Because sweet cream is a liquid, it integrates seamlessly into the dense body of the cold brew, mellowing the caffeine punch while preserving the coffee’s bold integrity.
It is especially popular because it offers a customizable level of sweetness; you can control the ratio of syrup to dairy to suit your personal preference. This topping provides a visual appeal and a consistent flavor profile that masks any lingering bitterness from the beans.
By mastering this simple recipe, you can enjoy a refreshing and indulgent beverage at a fraction of the cost, ensuring your morning routine feels like a luxury. It remains a fan favorite because it delivers a reliable, decadent finish that makes every glass of cold brew feel consistent and satisfying.
Ingredients You Need for the Copycat Recipe
Choosing the right heavy whipping cream
To replicate the luxurious mouthfeel of the original Starbucks version, selecting a high-quality heavy whipping cream with at least 36% milk fat is non-negotiable. This high fat content is what provides the signature thick, velvety texture that allows the cream to cascade beautifully into your cold brew.
When shopping, look for brands that list minimal additives like carrageenan to ensure the cleanest flavor profile possible. Avoid using light cream or half-and-half as your primary base, as these lack the structural integrity to hold that rich, lingering finish on the palate.
For the best results, ensure your cream is thoroughly chilled before mixing; cold fat molecules emulsify more effectively with the other ingredients, creating a stable pour that won’t immediately dissolve into the coffee.
If you prefer a richer experience, you can slightly increase the ratio of heavy cream, but sticking to the standard measurement ensures the perfect balance of sweetness and dairy richness that fans crave.
The best vanilla syrup brands to use
The specific flavor of the sweet cream comes almost entirely from the vanilla component, so choosing the right brand is essential for an authentic copycat.
For the most accurate taste, Starbucks brand vanilla syrup is occasionally available for purchase in-store, but Torani or Monin serve as exceptional professional-grade alternatives that provide that classic floral and sugary profile.
If you are looking for a more natural approach, select a syrup that utilizes pure vanilla extract rather than artificial vanillin, as this offers a deeper, more complex sweetness that mimics the high-end cafe experience.
Ensure the syrup is a clear liquid rather than a thick bean paste to maintain the smooth, liquid consistency required for effortless blending. Using a high-quality syrup prevents a chemical aftertaste and ensures the sweetness integrates seamlessly with the dairy.
Always measure your syrup precisely to avoid overpowering the delicate notes of your coffee, aiming for a balanced sweetness that enhances rather than masks the brew’s natural acidity.
Milk options for the perfect consistency
To achieve the exact pourable consistency of the famous sweet cream, 2% milk is the standard choice used by baristas to thin out the heavy cream.
This specific fat percentage provides enough body to keep the mixture from becoming too watery while ensuring it remains fluid enough to pour easily over ice. If you want to experiment, whole milk can be substituted for an even richer, more indulgent texture that feels closer to a melted milkshake.
However, avoid using non-fat milk, as it lacks the necessary proteins and fats to create that iconic marbling effect when it hits the dark coffee.
For those looking for dairy-free alternatives, barista-edition oat milk or soy milk can work, though they will slightly alter the flavor profile and may not layer as perfectly as traditional dairy.
The key is to maintain a strict ratio of two parts heavy cream to one part milk and syrup to ensure the mixture is thick enough to sit on top of the drink momentarily before slowly sinking.
How to Make Starbucks Sweet Cream at Home
Step-by-step mixing instructions
To replicate the signature Starbucks flavor profile, start by gathering high-quality heavy cream, 2% milk, and vanilla syrup. Begin by pouring the vanilla syrup into a clean glass carafe or mixing bowl. Next, add the 2% milk and whisk gently to combine the liquids without creating excessive bubbles.
The final and most crucial step is slowly pouring in the heavy cream while stirring continuously. This specific order ensures that the syrup is fully incorporated and the cream retains its luxurious, velvety texture.
Avoid using a high-speed blender, as this will introduce too much air and turn your sweet cream into whipped foam prematurely. Instead, use a hand whisk or a simple spoon for a smooth, pourable consistency that settles beautifully into iced coffee. For the best results, chill your mixing container beforehand.
This technique keeps the dairy cold and helps the vanilla syrup emulsify perfectly with the fat molecules, resulting in a consistent flavor profile that mimics the professional barista experience right in your own kitchen.
The exact ratio for a single serving
Creating a single serving requires precision to ensure the sweetness doesn’t overpower the coffee. The gold standard ratio for a single glass of cold brew is two tablespoons of heavy cream, one tablespoon of 2% milk, and two teaspoons of vanilla syrup.
This specific 2:1 ratio of cream to milk is the secret to achieving that iconic ‘cloud’ effect when the cream hits the dark coffee. By using 2% milk as a thinner, you allow the mixture to cascade through the ice cubes rather than sitting stubbornly on top.
If you prefer a less sweet version, you can reduce the vanilla syrup to one teaspoon without compromising the creamy mouthfeel. Always measure your ingredients using standard kitchen spoons rather than eyeing it, as even a small deviation can make the mixture too thin or overly cloying.
Stir the three ingredients in a small ramekin before pouring to ensure the heavy cream and milk are perfectly blended. This precise single-serving ratio provides a decadent, café-quality finish to any home-brewed beverage without any unnecessary leftover waste.
Making a large batch for the week
If you are a daily coffee drinker, preparing a bulk batch of sweet cream is a significant time-saver. To make a week’s worth of creamer, mix one cup of heavy cream with a half-cup of 2% milk and five tablespoons of vanilla syrup.
Scale these measurements up proportionally based on your consumption habits, keeping the fundamental ratio intact. Pour the mixture into an airtight glass mason jar or a dedicated creamer carafe to maintain freshness.
It is vital to check the expiration dates on your dairy cartons, as the homemade sweet cream will only stay fresh as long as the earliest expiring ingredient. Store the container in the coldest part of your refrigerator, typically the back of the middle shelf.
Before each use, give the jar a vigorous shake to reintegrate any settled syrup or separated fat.
This bulk preparation method ensures you have a ready-to-pour topping for your morning caffeine routine, allowing you to enjoy a professional-grade Starbucks experience every day of the week with minimal effort and significantly lower costs than the drive-thru.
Tips for the Perfect Creamy Consistency
Why you should use cold ingredients
To replicate the signature velvety texture of Starbucks sweet cream, it is essential to start with heavy cream and milk chilled to near-freezing temperatures. Cold fat molecules are more stable and emulsify far more effectively with the vanilla syrup than room-temperature alternatives.
When your ingredients are properly chilled, the mixture maintains a thicker, more luxurious mouthfeel that floats perfectly atop cold brew rather than sinking immediately to the bottom. If the cream is too warm, the proteins may not bind correctly, resulting in a thin, watery liquid that lacks that iconic richness.
Professional baristas always pull their dairy directly from the refrigerator right before mixing to ensure the optimal fat structure is preserved. For the absolute best results, you should even consider chilling your mixing pitcher or bowl beforehand.
This temperature control is the primary secret to achieving that professional, coffee-house finish that feels decadent and smooth on the palate with every single sip you take.
How to avoid over-mixing the cream
The goal of a perfect sweet cream is a pourable, silken consistency, not a stiff whipped topping. To achieve this, you must whisk the ingredients gently by hand or use a frother for only a few brief seconds.
If you over-mix the heavy cream, the fat globules will begin to trap too much air, eventually leading to thick peaks or a grainy texture that ruins the pour.
You are looking for a state where the syrup is fully incorporated and the liquid has slightly thickened, yet remains fluid enough to create beautiful white swirls when added to your iced coffee.
Always stop mixing the moment the vanilla syrup is integrated and the liquid feels slightly heavier than standard milk.
If you accidentally go too far and the mixture becomes too stiff, you can often save it by whisking in a splash more 2% milk to thin it back down to the correct, pourable consistency required for that authentic Starbucks experience.
Adjusting sweetness levels to your taste
The standard Starbucks recipe relies heavily on vanilla syrup, but the beauty of making it at home is the ability to customize the sugar content to your specific preference.
If you find the original version too cloying, start by reducing the syrup ratio and gradually adding more until you reach your ideal flavor balance.
For those who prefer a deeper, more complex sweetness, you might experiment with adding a tiny pinch of sea salt to enhance the vanilla notes and cut through the richness of the dairy.
Remember that the sweetness will be diluted once the cream hits the bitter coffee, so it should taste slightly more potent on its own than you might expect.
You can also swap traditional sugar-based syrups for sugar-free alternatives or natural maple syrup if you want to modify the nutritional profile without sacrificing that signature creamy texture.
Testing the mixture with a small spoonful before finalized mixing ensures you have the perfect level of sweetness to complement your favorite dark roast or cold brew blend.
Best Ways to Use Your Homemade Sweet Cream
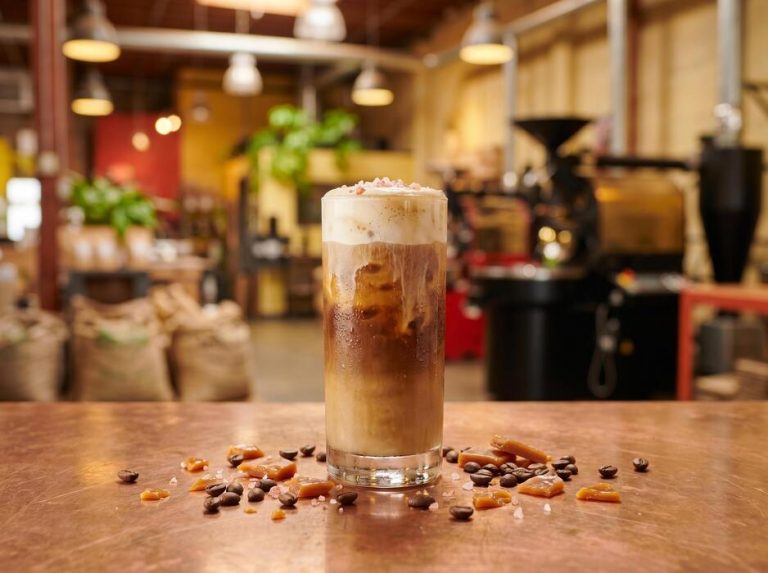
Pouring it over cold brew coffee
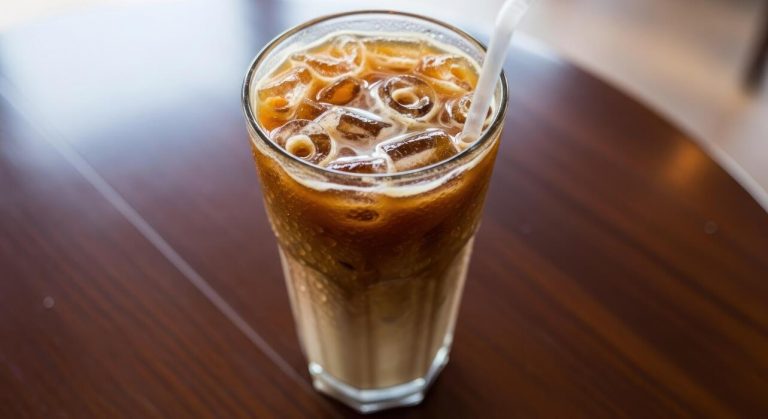
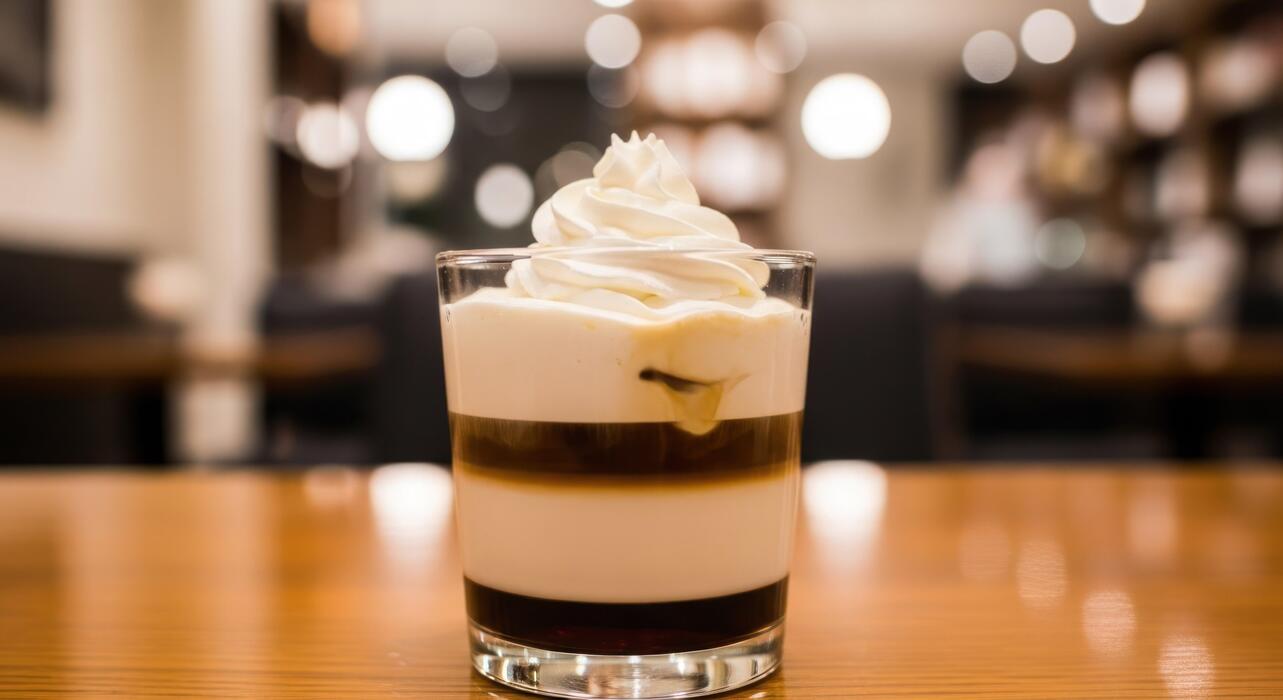
The most iconic way to enjoy your homemade vanilla sweet cream is by gently pouring it over a glass of freshly brewed cold brew coffee. To replicate the signature Starbucks experience at home, fill a tall glass with plenty of ice and your favorite dark roast cold brew concentrate.
Instead of stirring the cream in immediately, pour it slowly over the top of the ice. This creates a beautiful cascading effect where the thick, velvety cream marbles throughout the dark coffee.
Because the sweet cream is made with a specific ratio of heavy cream and milk, it maintains a luxurious mouthfeel that standard creamer simply cannot match. The hint of vanilla enhances the natural chocolatey notes of the cold brew without overpowering the caffeine kick.
For the best results, ensure your cream is thoroughly chilled before serving, as the temperature contrast between the icy coffee and the cold dairy is essential for that refreshing, professional-quality finish you crave.
Adding it to iced lattes and americanos
While cold brew is the traditional partner for this recipe, you can elevate your espresso-based beverages by swapping standard milk for this sweet cream mixture. When making an iced latte, use the sweet cream as your primary dairy component to create an ultra-rich dessert-like drink that feels incredibly indulgent.
If you prefer the boldness of an iced americano, adding a generous splash of sweet cream can help mellow the acidity of the espresso shots while providing just the right amount of sweetness. It acts as both a sweetener and a whitener, eliminating the need for extra sugar or syrups.
The heavy cream content adds a silky density to the water-based americano, transforming a simple black coffee into a gourmet treat.
Always remember to add your espresso and water to the ice first, then finish with the cream to watch it swirl and blend perfectly into the drink for a consistent flavor profile in every single sip.
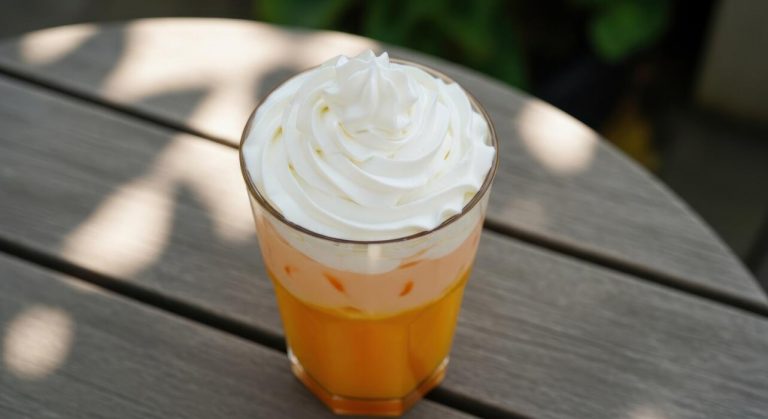
Using it as a base for flavored cold foams
One of the most versatile ways to utilize your homemade batch is by using it as a foundational base for cold foam.
To create that thick, aerated topping found on seasonal Starbucks drinks, simply pour a small amount of your sweet cream into a milk frother or use a handheld whisk.
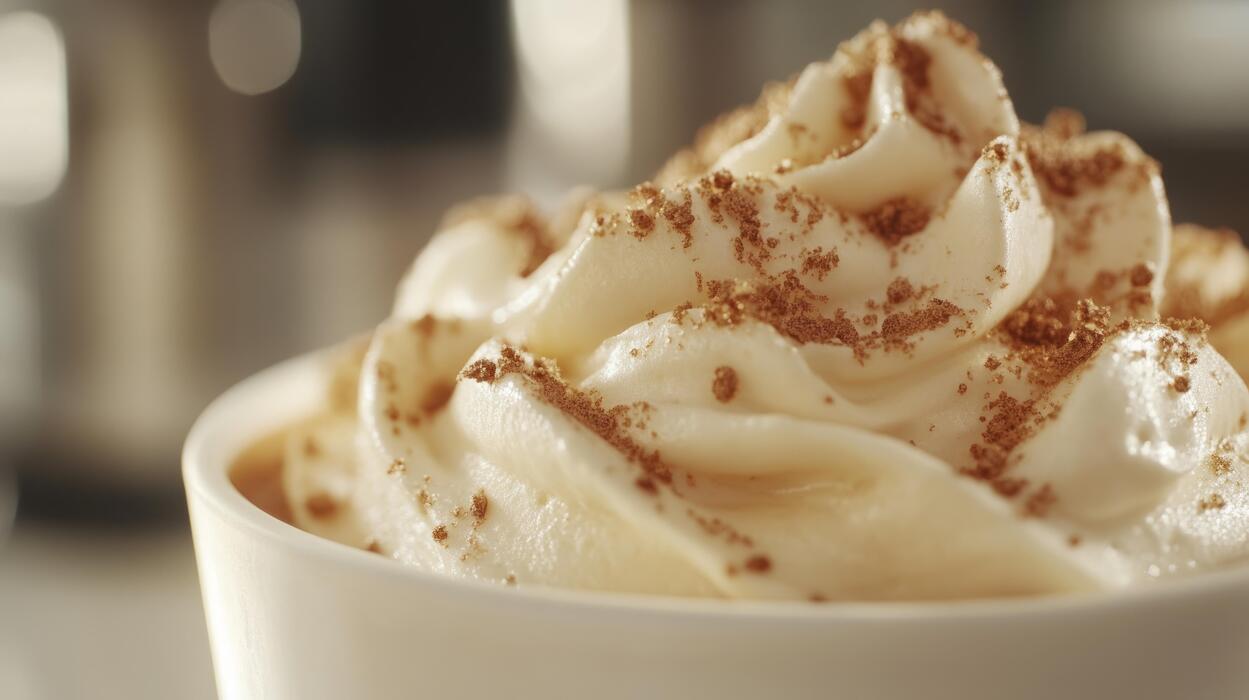
The high fat content from the heavy cream allows it to hold air bubbles efficiently, resulting in a stable, fluffy foam that sits perfectly on top of your beverage. You can easily customize this by whisking in seasonal flavor additives like pumpkin spice, cocoa powder, or a dash of cinnamon.
This technique allows you to create a layered drinking experience where you sip the bold coffee through a cloud of flavored sweetness. It is a fantastic way to impress guests or treat yourself to a professional-grade beverage at home.
Make sure to froth the cream while it is straight from the refrigerator, as cold fats aerate much better than those at room temperature.
How to Store Your Sweet Cream Safely
Recommended containers for freshness
To maintain the velvety texture of your homemade Starbucks sweet cream, selecting the right storage vessel is the most critical first step. You should always prioritize using airtight glass containers, such as a classic Mason jar or a dedicated glass milk carafe with a silicone seal.
Glass is superior to plastic because it does not leach chemicals or absorb lingering odors from other pungent foods in your refrigerator, ensuring your vanilla profile remains pure. Before pouring your freshly whisked mixture into the container, ensure it is completely sanitized and bone-dry to prevent any premature bacterial growth.
If you plan on making large batches, consider using a container that allows for a small amount of headspace at the top, which makes it easier to shake the mixture vigorously before each use.
This agitation is necessary because the heavy cream and 2% milk can slightly separate over time, and a quick shake restores that signature foamable consistency required for your cold brew topping.
How long it stays fresh in the fridge
When storing your DIY sweet cream, you must adhere strictly to the expiration dates of the individual dairy components used in your recipe. Generally, a fresh batch will remain at peak quality for five to seven days when kept in the coldest part of your refrigerator.
Never store the cream in the fridge door, as the frequent temperature fluctuations from opening and closing the unit can cause the dairy to spoil much faster than intended.
To stay organized, it is highly recommended to label your container with a ‘use-by’ date based on the earliest expiration date of either your heavy cream or your milk.
While the high sugar content from the vanilla syrup acts as a slight preservative, it will not extend the life of the dairy indefinitely.
For the best tasting experience, try to consume the batch within the first three days, as this is when the fat molecules are most stable and provide the best micro-foam when frothed for your morning coffee.
Signs that your cream has gone bad
Safety should always come first when consuming homemade dairy products, so you must perform a quick sensory check before every pour. The most obvious indicator of spoilage is a sour or tangy aroma that deviates from the sweet, floral scent of vanilla.
If you notice any clumping, curdling, or a chunky texture inside the jar that does not disappear after a gentle shake, the proteins have likely broken down and the cream is no longer safe to consume.
Additionally, look for any discoloration; fresh sweet cream should be a consistent off-white or pale ivory color. If you see any yellowish tinges or visible mold around the rim of the lid, discard the entire batch immediately and sanitize the container thoroughly.
If the cream tastes unusually bitter or has a ‘fizzy’ sensation on the tongue, these are clear signs of bacterial activity. When in doubt, it is always better to err on the side of caution and toss it out to avoid any potential digestive distress or foodborne illness.
Common Questions About DIY Sweet Cream
Can you make a dairy-free version?
You can definitely recreate the signature Starbucks flavor using plant-based alternatives, though achieving the exact velvety texture requires choosing the right ingredients. To mimic the heavy cream and 2% milk base, the best combination is full-fat oat milk and coconut cream.
Oat milk provides a natural sweetness and creamy body that holds up well against strong cold brew, while coconut cream adds the necessary fat content for that luxurious mouthfeel. Simply whisk together two parts oat milk with one part coconut cream and your choice of sweetener.
Avoid using thin options like almond or rice milk alone, as they tend to separate and lack the richness needed for a true sweet cream experience.
Adding a small splash of vanilla bean paste can also help mask any strong nutty or earthy undertones from the plant bases, ensuring your dairy-free version tastes remarkably close to the original coffee house recipe.
For the best results, ensure your alternative milks are thoroughly chilled before mixing to maintain a consistent emulsion.
How to turn sweet cream into foam
The main difference between standard sweet cream and the famous cold foam is the introduction of air to create a stable, cloud-like structure. To transform your homemade mixture into foam, you should use a high-speed handheld milk frother or a dedicated cold foam blender setting.
Pour about half a cup of your prepared sweet cream into a tall glass and aerate it for roughly twenty to thirty seconds until it doubles in volume and reaches a thick, pourable consistency.
The key to successful foam is the ratio of fats; the heavy cream provides the stability while the milk ensures it isn’t too heavy to froth. If your foam is too thin, try increasing the proportion of heavy cream slightly.
Always make sure the liquid is ice-cold before you begin frothing, as room-temperature fats will not hold air bubbles effectively. Once finished, gently pour the foam over the top of your iced coffee so it creates a beautifully layered effect before slowly cascading down into the drink.
Ways to make it without store-bought syrup
If you do not have a bottle of professional vanilla syrup on hand, you can easily craft a high-quality substitute using pantry staples that often tastes even better than the processed version.
The most effective method is to create a concentrated vanilla simple syrup by boiling equal parts water and granulated sugar until dissolved, then stirring in a generous tablespoon of pure vanilla extract once the liquid has cooled.
Alternatively, you can scrape a fresh vanilla bean directly into your cream and milk mixture for a gourmet look and intense flavor profile.
For those looking for a healthier or different sweetener, maple syrup or agave nectar can be used as a liquid base, though they will slightly alter the classic profile.
To achieve that specific Starbucks ‘birthday cake’ aroma without the official syrup, ensure you use a tiny pinch of salt to enhance the sweetness and a drop of almond extract alongside the vanilla.
This DIY approach allows you to control the sugar content while maintaining the authentic, creamy finish you crave.
Frequently Asked Questions
What are the ingredients in Starbucks sweet cream?
The authentic Starbucks vanilla sweet cream is made using a simple 1-2-3 ratio of heavy cream, 2% milk, and vanilla syrup. This combination creates a pourable, velvety consistency that sits between regular milk and whipped cream.
How do I make the 1-2-3 sweet cream ratio at home?
To mimic the professional recipe, mix 1 part vanilla syrup, 2 parts 2% milk, and 3 parts heavy whipping cream. For a standard batch, use 1/4 cup vanilla syrup, 1/2 cup 2% milk, and 3/4 cup heavy cream.
What is the difference between sweet cream and cold foam?
Sweet cream is a liquid creamer poured directly into iced coffee, while cold foam is sweet cream that has been frothed at high speed to create a thick, airy topping. You can turn any sweet cream into cold foam using a handheld milk frother or a blender.
How long does homemade sweet cream last in the fridge?
Homemade sweet cream can be stored in an airtight container or mason jar for up to 5 days. Be sure to check the expiration dates on your milk and cream containers, as the mixture will only stay fresh as long as its shortest-dated ingredient.
Can I make a sugar-free version of Starbucks sweet cream?
Yes, you can easily adapt the recipe by substituting the standard vanilla syrup with a sugar-free vanilla syrup or a few drops of vanilla extract and a keto-friendly sweetener. The heavy cream and milk remain the same to maintain the signature texture.
Do I need to whisk or froth the sweet cream?
If you want the standard ‘Vanilla Sweet Cream’ used in cold brews, you only need to stir the ingredients together until combined. If you want ‘Vanilla Sweet Cream Cold Foam,’ you must froth the chilled mixture for about 30 seconds until it reaches a thick, meringue-like consistency.
Conclusion
Creating Starbucks-style sweet cream at home is a simple way to elevate your coffee routine without the premium price tag. By mastering the golden ratio of heavy cream, milk, and vanilla syrup, you can achieve that signature velvety texture and rich flavor in minutes. Experimenting with different infusions allows you to customize every cup to your liking. Now that you have the secret recipe, start whisking and enjoy a cafe-quality experience from your own kitchen.