How To Make Coffee Cold Foam
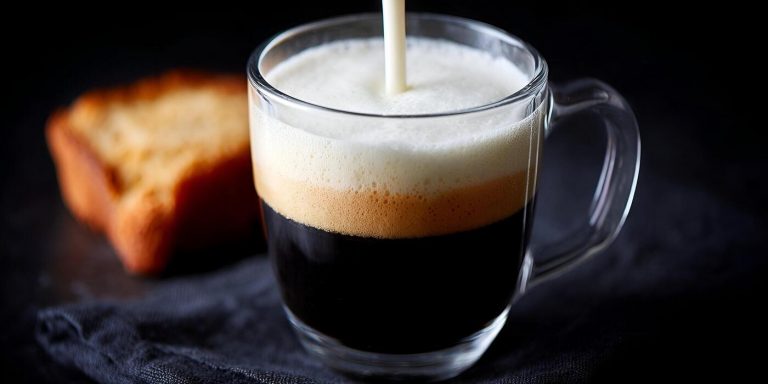
Ever wonder how coffee shops get that perfectly creamy, cloud-like layer on top of your cold brew? You do not need a fancy espresso machine to recreate it at home. Whether you crave a sweet vanilla topping or a dairy-free alternative, making coffee cold foam is surprisingly simple and takes less than two minutes. This guide will show you exactly how to make coffee cold foam using basic kitchen tools so you can enjoy professional-quality iced coffee right now.
What is cold foam and why it belongs on your coffee
The difference between hot froth and cold foam
Understanding the distinction between these two textures is vital for mastering your home barista skills. Traditional hot froth is created by injecting steam into milk, which simultaneously heats the liquid and introduces air to create large, airy bubbles.
In contrast, cold foam is produced by aerating milk at a chilled temperature using high-speed blending or frothing tools. This method creates a velvety, micro-bubble texture that is significantly denser and more stable than its hot counterpart.
Because the milk is never heated, the natural sugars remain intact without caramelizing, resulting in a crisp and refreshing sweetness that complements iced beverages perfectly. While hot foam is designed to blend into a latte, cold foam is engineered to sit elegantly on top of the liquid.
To achieve the perfect consistency, you must use a high-speed frother to ensure the air is evenly distributed throughout the cold fats, preventing the foam from dissipating too quickly into your cold brew or iced Americano.
Why cold foam is better than whipped cream
When deciding how to top your favorite iced coffee, cold foam offers several functional and nutritional advantages over traditional whipped cream. Whipped cream is heavy, high in calories, and often masks the nuanced profile of premium coffee beans with excessive sugar and fat.
Cold foam, however, provides a light and airy mouthfeel that enhances the coffee drinking experience without overwhelming the palate. It allows for a seamless flavor transition, as the subtle creaminess slowly melds with the dark coffee layers below.
Furthermore, cold foam is highly customizable; you can easily infuse it with vanilla, cinnamon, or sea salt to create a sophisticated flavor profile tailored to your specific taste.
From a practical standpoint, cold foam maintains its structural integrity better on cold liquids, whereas whipped cream can often become greasy or clumped when it hits ice.
By choosing cold foam, you enjoy a lower-calorie alternative that delivers a professional, cafe-quality finish to every single cup you brew in your own kitchen.
The science of how non-heated milk holds its shape
The ability of cold milk to maintain a stiff, cloud-like structure relies on the physical properties of proteins and fats. In cold foam, the whey and casein proteins act as stabilizers that encapsulate air bubbles, creating a resilient network that prevents the foam from collapsing.
Unlike hot frothing, which relies on heat to expand molecules, cold aeration uses mechanical sheer force to break down fat globules into smaller particles. These particles then coat the air bubbles, providing the structural support necessary for the foam to float.
For the best results, using non-fat or skim milk is often recommended because it contains a higher concentration of protein relative to fat, which leads to a stiffer, more voluminous foam. However, if you prefer a richer taste, heavy cream can be blended with milk to increase the lipid stability.
Understanding this molecular balance is the secret to achieving that perfect, pourable consistency that stays perched atop your drink until the very last sip, ensuring a consistent texture throughout your entire beverage.
Essential ingredients for the best cold foam

Choosing the right milk: Dairy vs. non-dairy options
Selecting the correct base is the most critical step when learning how to make coffee cold foam that rivals your favorite cafe. For traditional dairy enthusiasts, skim milk or 2% milk are actually superior to whole milk for creating volume because their protein structures trap air bubbles more efficiently.
However, if you prefer plant-based alternatives, you must be selective. Barista-edition oat milk is the gold standard for non-dairy foam because it contains added stabilizers and a higher protein content that mimics the stretch of cow’s milk.
While almond milk provides a pleasant nutty flavor, it often yields a thinner, more volatile foam that dissipates quickly unless combined with a bit of coconut cream.
When experimenting with different brands, always look for options with higher protein counts on the nutritional label, as protein provides the structural integrity needed to hold those tiny air bubbles in place. Start with cold liquid directly from the refrigerator to ensure the tightest possible microfoam texture.
Sweeteners and flavor syrups that work best
To achieve a professional-grade cold foam, the type of sweetener you use affects both the flavor profile and the final viscosity. Liquid sweeteners like simple syrup, agave nectar, or maple syrup are highly recommended because they integrate seamlessly into the cold milk without leaving a grainy residue.
If you are using classic coffee syrups like vanilla, caramel, or salted nut, add them to the milk before you begin frothing to ensure the flavor is evenly distributed throughout the foam.
Avoid using granulated white sugar or thick honey, as these heavy solids tend to sink to the bottom and can actually weigh down the foam, causing it to collapse prematurely. For those seeking a sugar-free alternative, liquid monk fruit or stevia drops work exceptionally well.
The key is to maintain a balance; a small amount of sugar actually helps stabilize the foam by increasing the liquid’s viscosity, which prevents the air bubbles from escaping. Always taste your mixture before frothing to ensure the sweetness complements your specific coffee roast.
The role of fat content in foam stability
While protein is responsible for creating the initial bubbles, the fat content determines the luxurious, velvety mouthfeel and the long-term stability of your cold foam. For the ultimate ‘cloud’ effect, many baristas use a combination of heavy cream and milk, often referred to as a sweet cream base.
The higher fat molecules in heavy cream coat the air bubbles, creating a dense, rich topping that sits perfectly atop your iced coffee without immediately melting into the drink.
If your foam feels too thin, increasing the ratio of heavy whipping cream will provide the necessary structure to support the weight of the foam. However, be careful not to over-froth high-fat mixtures, as they can quickly turn into whipped cream rather than pourable foam.
The ideal consistency should be thick enough to hold a soft peak but fluid enough to cascade gently down the sides of the glass. Understanding this balance between air, protein, and fat is the secret to mastering the art of the perfect, long-lasting cold foam at home.
How to make cold foam with a handheld milk frother
Step-by-step instructions for the wand method
To begin making coffee cold foam, combine half-and-half or heavy cream with your choice of sweetener and a dash of vanilla extract in a tall, narrow glass. Submerge the head of your handheld milk frother just below the surface of the liquid and turn it on.
Tilt the glass slightly to create a swirling vortex effect, which helps incorporate air evenly into the cream. Hold the wand at a slight angle for about twenty to thirty seconds, moving it slowly up and down to ensure all layers of the liquid are aerated.
You will notice the volume double as the mixture transforms into a thick, velvety topping. Once the foam reaches a sturdy consistency that holds its shape, turn off the frother before removing it from the glass to prevent splattering.
Gently pour the finished foam over your iced coffee or cold brew for a professional, café-style beverage experience right in your own kitchen.
How to get the perfect micro-bubble texture
Achieving the ideal micro-bubble texture requires focusing on the temperature and fat content of your ingredients. Always start with ice-cold dairy or plant-based milk, as cold fats trap air bubbles much more effectively than room-temperature liquids.
For the densest foam, use heavy cream or a specific barista-blend oat milk known for its high fat concentration. When using the wand, avoid keeping the whisk at the very top for too long, as this creates large, unstable bubbles that dissipate quickly.
Instead, aim for a smooth, glossy sheen by keeping the whisk submerged and focusing on a consistent circular motion. If you see large bubbles forming on the surface, gently tap the bottom of your glass on the counter to break them and encourage a uniform, silky structure.
This technique ensures your cold foam remains stable and sits beautifully on top of your drink without melting immediately into the coffee, providing a luxurious mouthfeel with every single sip.
Cleaning and maintenance tips for your frother
Properly maintaining your handheld frother is essential for ensuring it remains hygienic and functional for daily use. Immediately after frothing, rinse the metal whisk under warm running water to remove any milk residue before it has a chance to harden and become difficult to clean.
For a deeper clean, place the wand in a glass of warm water with a drop of mild dish soap and turn it on for several seconds to agitate the bristles. Never submerge the handle or the motor housing in water, as this can permanently damage the internal electronic components.
Ensure the device is completely dry before storing it in a drawer or on a stand to prevent rust or bacterial growth. Additionally, check the batteries regularly; a weakening motor will struggle to reach the high speeds necessary for creating thick, stable foam.
By following these simple maintenance steps, you protect the longevity of your tool and ensure every batch of homemade cold foam is fresh and delicious.
Ways to make cold foam without a frother
Using a French press for thick foam
A French press is one of the most effective tools for creating professional-quality cold foam at home without a dedicated frother. Start by pouring cold milk and your choice of sweetener into the glass carafe, filling it no more than one-third full to allow for expansion.
Insert the plunger and move it up and down rapidly for about thirty to forty-five seconds. This motion incorporates air into the milk through the fine mesh screen, resulting in a dense, velvety texture that mimics high-end coffee shop foam.
For the best results, use skim or non-fat milk because the higher protein-to-fat ratio helps the bubbles hold their structure longer. Once the volume has doubled, let it sit for a moment to stabilize before spooning it over your cold brew or iced latte.
This method is highly reliable because the manual aeration provides consistent microfoam that stays stable atop your drink, ensuring a luxurious experience with every single sip you take.
The mason jar shake method
If you are looking for the simplest approach with zero cleanup, the mason jar method is the perfect solution. Simply fill a clean glass jar halfway with cold milk, add a splash of vanilla syrup or a pinch of sugar, and seal the lid tightly to prevent leaks.
Shake the jar vigorously for at least sixty seconds or until the milk has significantly increased in volume and looks bubbly.
While the bubbles produced this way are slightly larger than those from a frother, you can achieve a smoother consistency by gently tapping the jar on the counter and swirling it after shaking. This technique is ideal for on-the-go coffee prep or minimal kitchens.
For a richer flavor profile, try using a heavy cream and milk blend which creates a more indulgent, stable topping.
The physical effort of shaking serves as a great substitute for mechanical agitation, allowing you to enjoy a creamy, frothy layer on your morning iced coffee using nothing more than basic household items.
Making cold foam in a high-speed blender
For those who need to make multiple servings at once, a high-speed blender is an excellent alternative to a handheld frother. Pour your cold milk, cream, and flavorings into the blender pitcher and secure the lid firmly.
Set the blender to a medium-high speed and pulse for about twenty to thirty seconds. The rapid rotation of the blades creates a powerful vortex that forces air into the liquid, resulting in a light and airy cold foam that is remarkably consistent.
This method works exceptionally well with plant-based milks like oat or almond, which often require more mechanical force to develop a stable froth. Be careful not to over-blend, as the heat from the motor can warm the milk and deflate the bubbles you are trying to create.
Once finished, pour the foam immediately over your beverage for a beautiful layered effect. Using a blender ensures that your sweeteners are perfectly emulsified, providing a balanced flavor throughout the creamy topping of your favorite homemade iced coffee drinks.
Popular cold foam recipes to try at home

Vanilla sweet cream cold foam recipe
To recreate the classic coffeehouse experience, start by whisking together heavy cream, 2% milk, and vanilla syrup in a ratio of 3:2:1 for the perfect density. This specific combination ensures the foam is thick enough to sit atop your iced coffee without immediately dissolving into the brew.
For the best results, use a handheld milk frother submerged just below the surface for about thirty seconds until the mixture doubles in volume and achieves a velvety, pourable texture.
If you prefer a dairy-free alternative, you can substitute the ingredients with full-fat oat milk and a touch of coconut cream to maintain that signature richness. Always ensure your ingredients are ice-cold before frothing, as room-temperature liquids will fail to hold the necessary air bubbles required for a stable peak.
Pour the finished vanilla sweet cream slowly over your favorite cold brew or iced latte to enjoy a professional-grade beverage that balances sweetness with a bold caffeine kick right in your own kitchen.
Salted caramel cold foam instructions
Elevate your morning routine by mastering the salted caramel cold foam, which adds a sophisticated sweet and savory profile to any iced drink. Begin by combining two tablespoons of heavy cream with one tablespoon of milk and a generous pump of caramel sauce or syrup.
The secret to this recipe is adding a pinch of fine sea salt, which cuts through the sugar and enhances the deep buttery notes of the caramel.
Use an electric aerator or a French press to whip the liquid; if using a French press, pump the plunger rapidly for twenty seconds to create a dense, micro-foam consistency.
This topping works exceptionally well on dark roast iced coffee or nitro cold brew, providing a luxurious mouthfeel that rivals expensive cafe orders. For an extra touch of indulgence, drizzle a small amount of extra caramel sauce over the foam once it is settled on the drink.
This method ensures every sip contains a balanced blend of salty, sweet, and robust coffee flavors that linger pleasantly.
Pumpkin spice and seasonal variations
When the weather turns cool, you can easily adapt your cold foam technique to include cozy, seasonal flavors like pumpkin spice or peppermint. For a festive autumn treat, whisk pumpkin puree, maple syrup, and pumpkin pie spice into your cream base before frothing.
It is essential to strain the mixture if using real puree to ensure the final foam remains silky and free of grainy textures. During the winter months, simply swap the pumpkin for peppermint extract and white chocolate mocha sauce to create a refreshing holiday topping.
You can also experiment with honey and cinnamon for a lighter, floral variation that pairs beautifully with blonde espresso.
Regardless of the flavor profile you choose, the key to success is maintaining the correct fat content in your liquid base, as this is what allows the air to stay trapped within the bubbles.
These seasonal adjustments allow you to enjoy a customized coffee experience year-round, utilizing basic pantry staples to transform a simple glass of iced coffee into a gourmet specialty drink.
Tips for perfect cold foam every time
Why you must use ice-cold milk
To achieve a professional, velvety texture, you must start with milk straight from the refrigerator. Temperature is the most critical factor because fat globules in dairy are more stable when cold, allowing them to trap air bubbles effectively without collapsing.
If your milk is even slightly room temperature, the proteins will struggle to create a structured network, resulting in large, soapy bubbles that dissipate almost instantly.
For the best results, use skim milk or 2% milk for a light, airy foam, or heavy cream and whole milk for a luxurious, thick topping. Many baristas even recommend chilling your frothing pitcher in the freezer for five minutes before you begin.
This extra step ensures that the friction from the frother’s motor doesn’t prematurely warm the liquid. By keeping everything ice-cold during the aeration process, you guarantee a microfoam that remains stiff and creamy, providing that signature cloud-like layer that defines a high-quality cold brew or iced latte experience at home.
How to prevent your foam from sinking
The secret to preventing your foam from immediately plunging to the bottom of your glass lies in both the density of the foam and the way you pour it.
First, you must ensure you have aerated the mixture long enough to reach a soft-peak consistency; it should look like slightly melted whipped cream rather than thin bubbles. If the foam is too liquid, it will naturally mix with the coffee.
To create a distinct layer, always pour your cold foam slowly over the back of a spoon or directly onto a large ice cube. This technique breaks the fall and allows the foam to sit gently on the surface tension of the coffee.
Additionally, using a base of heavy whipping cream mixed with a splash of milk creates a higher fat content that naturally floats better than thin non-dairy alternatives.
By mastering this layering technique and focusing on a high-viscosity texture, you can enjoy a beautiful, tiered beverage where the sweet cream stays perfectly perched atop your drink until the very last sip.
The ideal ratio of milk to sweetener
Achieving the perfect balance of flavor and stability requires a precise ratio of dairy to sugar. The gold standard for a classic vanilla cold foam is usually two parts heavy cream to one part milk, combined with one to two tablespoons of flavored syrup.
This specific combination provides enough fat to maintain a thick structure while the milk thins it out just enough to be pourable. When adding sweeteners, it is vital to use liquid syrups or condensed milk rather than granulated sugar.
Granulated sugar is abrasive and heavy, which can weigh down the air bubbles and cause the foam to deflate rapidly. If you prefer a sugar-free version, ensure your sugar-free syrup is compatible with dairy to avoid curdling.
Most experts suggest a ratio of 3:2:1—three tablespoons of heavy cream, two tablespoons of 2% milk, and one tablespoon of syrup—to create a balanced sweetness that enhances the coffee without overpowering it. This ratio ensures your topping is flavorful, stable, and has the perfect mouthfeel for any iced coffee creation.
Best ways to serve and enjoy cold foam
Pairing foam with cold brew and iced lattes
The true magic of learning how to make coffee cold foam lies in finding the perfect beverage base to highlight its velvety texture. For a classic experience, pour your freshly whipped topping over a glass of slow-steeped cold brew filled with ice.
The low acidity of the cold brew acts as a bold canvas for the sweetness of the foam, allowing the dairy or plant-based proteins to stand out. If you prefer a more indulgent treat, use the foam as a functional garnish for an iced latte.
Unlike traditional steamed milk, cold foam won’t immediately melt into the espresso, creating a distinct temperature contrast that feels professional. To elevate the flavor profile, try adding a dash of cinnamon or cocoa powder on top of the foam before serving.
This simple addition bridges the gap between the bitter coffee and the sweet topping, ensuring every sip is balanced. By matching the right foam density to your specific coffee type, you ensure a luxurious mouthfeel that rivals any high-end cafe offering.
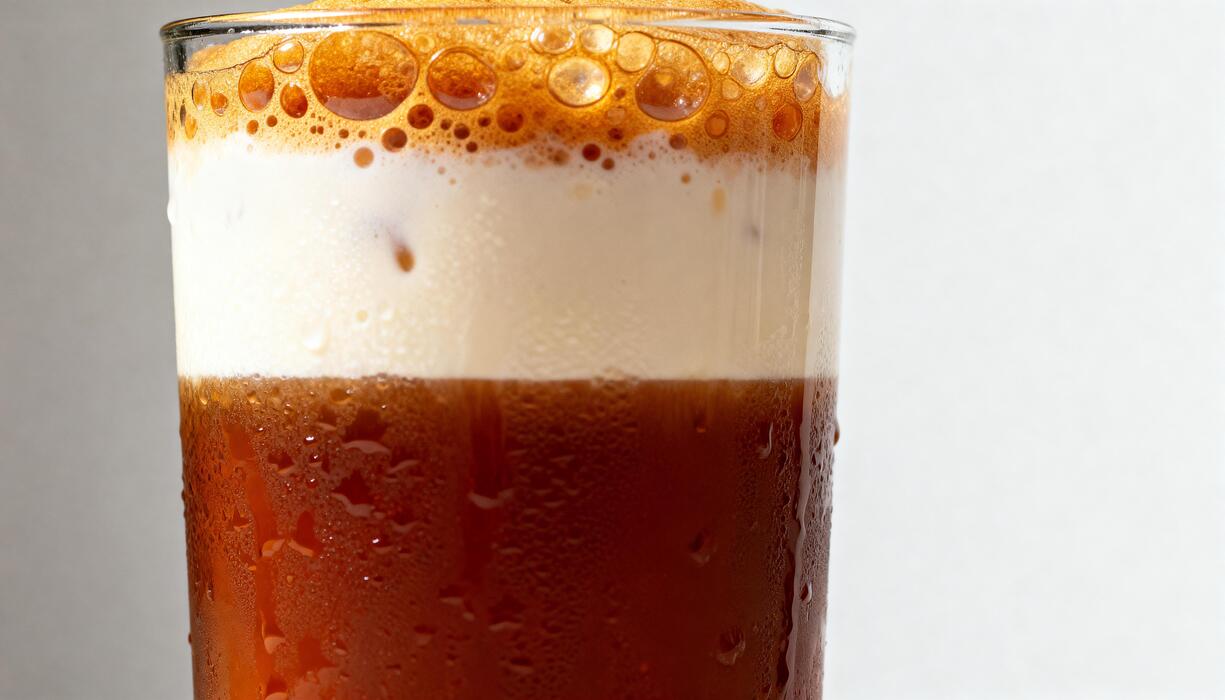
How to layer your drink for a coffee shop look
Achieving that iconic aesthetic where the white foam sits perfectly atop the dark coffee requires a specific pouring technique. Start by filling your glass with ice and your choice of chilled coffee, leaving about two inches of space at the top.
Once your foam is processed to a thick, pourable consistency, use the back of a large spoon to break the fall of the liquid.
Slowly pour the foam over the curved back of the spoon so it glides gently onto the surface of the coffee rather than sinking to the bottom. This method preserves the distinct horizontal layers and prevents premature mixing.
As the drink sits, you will notice beautiful ‘cascades’ where the foam slowly bleeds into the coffee, creating a stunning visual effect.
To maintain this look, avoid using a straw immediately; instead, sip directly from the rim of the glass to enjoy the rich creaminess of the foam followed by the sharp, refreshing hit of the cold coffee underneath for a truly professional drinking experience.
Storing leftover cold foam in the fridge
While cold foam is best enjoyed immediately after frothing, you can successfully store leftovers if you follow the right steps. Transfer any remaining mixture into an airtight glass jar or a sealed container to prevent it from absorbing common refrigerator odors.
It is important to note that the aerated structure will naturally begin to deflate over time as the air bubbles escape the liquid. You can keep the base mixture in the fridge for up to forty-eight hours safely.
When you are ready to use it again, you must re-froth the liquid for thirty seconds to restore its signature loft and volume. Avoid storing foam that has already been sitting at room temperature for an extended period, as this can affect both the food safety and the final texture.
For the best results, only store the un-whipped cream and milk base, then perform the final aeration step just seconds before you plan to serve your drink. This ensures your homemade cold foam remains light, stable, and consistently delicious for every single cup.
Frequently Asked Questions
What are the basic ingredients for coffee cold foam?
To make a standard vanilla cold foam, you need heavy cream, 2% milk, and a sweetener like simple syrup or vanilla syrup. The combination of heavy cream for thickness and milk for frothiness creates the perfect velvety texture.
What is the best ratio for making cold foam at home?
A popular and effective ratio is 3 parts heavy cream to 2 parts 2% milk, plus a splash of sweetener. This ensures the foam is stable enough to sit on top of your coffee without immediately sinking to the bottom.
How do I froth cold foam without a specialized machine?
You can easily make cold foam using a handheld milk frother (wand), a French press, or even a glass jar. Simply pump the French press plunger rapidly for 30 seconds or shake the ingredients in a jar until the volume doubles and becomes aerated.
Can I make dairy-free or vegan cold foam?
Yes, but it requires specific ingredients like full-fat oat milk or barista-blend almond milk to achieve a creamy consistency. Coconut cream can also be added to non-dairy milks to provide the fat content necessary for a stable, thick foam.
Why is my cold foam not thickening properly?
The most common reason for thin foam is using milk that isn’t cold enough or having too low a fat content. Ensure your cream and milk are pulled directly from the fridge, and avoid using skim milk, which produces large, unstable bubbles.
How do I flavor my cold foam?
You can customize your foam by whisking in flavored syrups, cocoa powder, cinnamon, or even a pinch of sea salt. For a seasonal twist, try adding pumpkin spice puree or maple syrup before frothing.
Can I store leftover cold foam in the refrigerator?
While cold foam is best enjoyed immediately, you can store it in an airtight container for up to 24 hours. However, the air bubbles will eventually deflate, so you will likely need to re-froth it briefly before serving.
Conclusion
Creating coffeehouse-quality cold foam at home is a simple way to elevate your morning routine without the premium price tag. By choosing the right milk and using tools like a handheld frother or French press, you can achieve that perfect, velvety texture in seconds. Experiment with different sweeteners and extracts to find your signature flavor. Now that you have mastered the basics, it is time to get creative and enjoy your professional-level brew.