How To Make Starbucks Sweet Vanilla Cold Foam
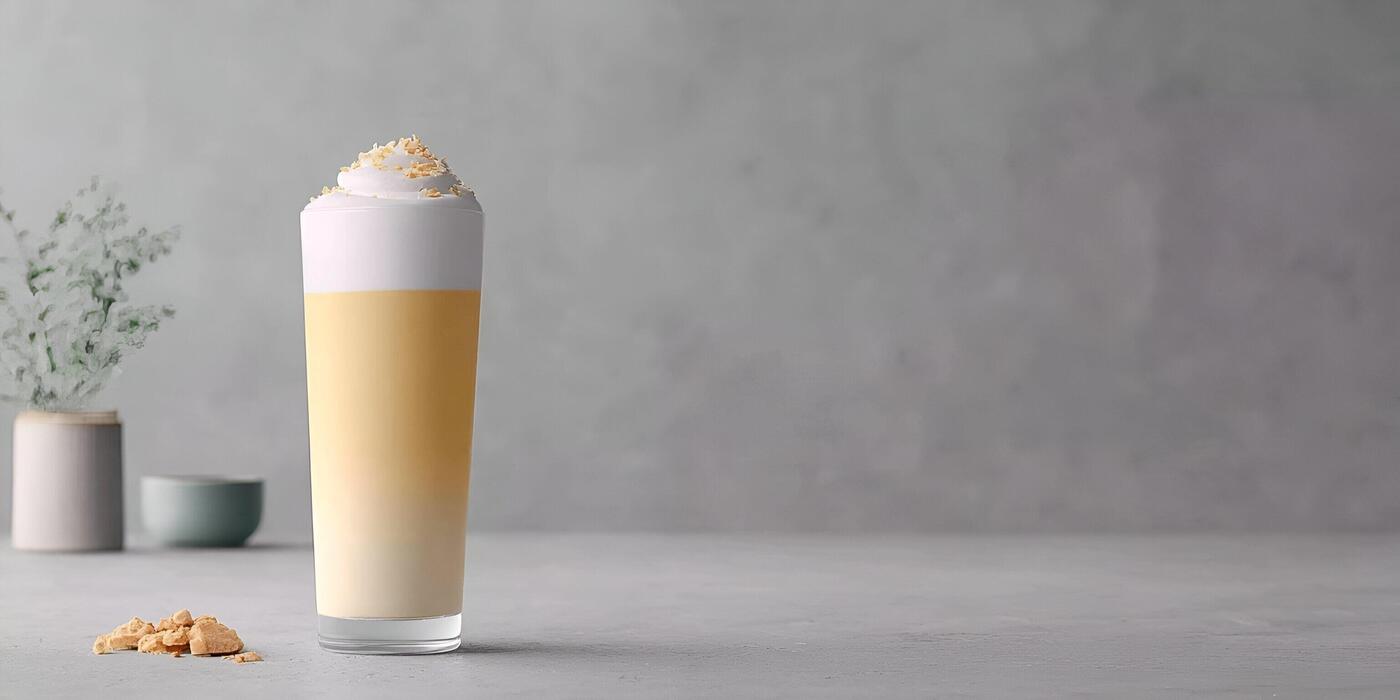
How to make Starbucks sweet vanilla cold foam is the perfect way to recreate that creamy, frothy topping at home without the drive-thru. The core challenge is getting the right texture—thick enough to float on cold brew but light as air. You’re in the right place: this method uses heavy cream, vanilla syrup, and a milk frother to nail the signature sweetness and silky consistency in under two minutes.
What Is Starbucks Sweet Vanilla Cold Foam?
Ingredients in the original recipe
To replicate Starbucks’ Sweet Vanilla Cold Foam at home, you need just three core ingredients: 2 tablespoons of vanilla syrup, 1/2 cup of cold heavy cream, and 2 tablespoons of 2% milk.
The vanilla syrup is the key sweetener—use Starbucks’ own vanilla syrup or a homemade simple syrup infused with vanilla extract. For the best texture, ensure all ingredients are very cold; chill your bowl and whisk attachment in the freezer for 10 minutes beforehand.
Pour the cream, milk, and vanilla syrup into a tall container or a French press. Use a handheld milk frother or a French press plunger to aerate the mixture for 30-60 seconds until it becomes thick, silky, and doubles in volume. Avoid over-whisking, which can turn it into butter.
The result is a smooth, pourable foam that sits lightly on top of your drink, not a stiff whipped cream. For a dairy-free version, substitute with coconut cream or oat milk, though the texture will be less stable.
How it differs from regular cold foam
While both are cold, aerated toppings, Sweet Vanilla Cold Foam is distinctly sweeter and more flavorful than standard cold foam. Regular cold foam at Starbucks is made simply with nonfat milk and a pump of vanilla syrup, resulting in a lighter, less creamy texture and a mild sweetness.
In contrast, the sweet vanilla version uses heavy cream as its base, which creates a richer, denser, and velvety-smooth consistency that holds its shape longer on top of iced drinks.
The heavy cream also allows for a more indulgent mouthfeel, similar to a milkshake top, whereas regular foam is airy and dissipates quickly. Additionally, the sweet vanilla variant has a pronounced vanilla flavor from extra syrup, making it a dessert-like addition.
This topping is designed to be savored slowly, blending into the drink over time, while regular cold foam is more of a subtle, functional froth. The fat content in heavy cream also makes it more stable when poured over ice, resisting melting and dilution better than milk-based foam.
Why this topping is so popular
The Sweet Vanilla Cold Foam’s popularity stems from its ability to elevate any iced coffee or cold brew into a luxurious, cafe-quality treat with minimal effort.
Its silky, creamy texture provides a satisfying contrast to the bold bitterness of coffee, creating a balanced, dessert-like experience that appeals to a wide range of palates.
The customizable sweetness—achieved by adjusting the vanilla syrup amount—lets users tailor it to their taste, from a subtle hint to a decadent vanilla blast. Social media has also fueled its fame, as the photogenic, layered look of white foam over dark coffee makes for shareable, visually appealing content.
Moreover, it’s incredibly easy to make at home, requiring no special equipment beyond a frother, and uses simple ingredients. This accessibility turns a typical morning coffee into a special indulgence, saving money compared to buying it daily.
The topping also works on hot drinks, iced lattes, or even as a stand-alone dessert foam, making it a versatile, guilt-free upgrade that feels both treat-like and practical.
Ingredients You Need to Make Sweet Vanilla Cold Foam
Best milk choice for thick foam
To replicate Starbucks’ thick, velvety cold foam, opt for heavy cream or whole milk as your base. Heavy cream creates the richest, most decadent foam with a luxurious mouthfeel, while whole milk offers a lighter yet still creamy texture.
For the best results, combine 2 tablespoons of heavy cream with ¼ cup of 2% milk—this ratio mimics Starbucks’ proprietary blend. Avoid skim or plant-based milks like almond or oat, as they lack the fat content needed for stable, frothy foam.
If you must use a dairy-free option, barista-edition oat milk works best due to its added stabilizers. Always use cold ingredients straight from the fridge; warm milk won’t froth properly. For extra thickness, chill your frothing container for 10 minutes beforehand.
Remember, the key is high fat content—the more fat, the thicker and more luxurious your foam will be. This simple swap ensures your cold foam rivals any coffee shop creation.
Vanilla syrup options: store-bought vs. homemade
For authentic sweet vanilla flavor, Starbucks uses their own vanilla syrup, but you have easy alternatives. Store-bought options like Torani or Monin vanilla syrups are widely available and provide consistent sweetness. Look for pure vanilla flavor rather than imitation extracts for the best taste.
Alternatively, homemade vanilla syrup is simple: combine 1 cup water, 1 cup sugar, and 1 tablespoon vanilla extract in a saucepan. Heat until sugar dissolves, then cool. For a richer flavor, split a vanilla bean and steep it in the syrup while cooling.
Homemade syrup allows you to control sweetness—use less sugar for a lighter taste. Both options work perfectly; just add 1-2 tablespoons per serving to your milk mixture before frothing. If you want to mimic Starbucks exactly, use their bottled syrup from grocery stores or online.
For a sugar-free version, substitute monk fruit sweetener or sugar-free vanilla syrup. Either choice delivers that signature sweet vanilla kick.
Optional add-ins for extra flavor
Elevate your sweet vanilla cold foam with creative add-ins that customize the taste. For a caramel twist, add 1 tablespoon of caramel sauce or syrup to the milk before frothing—this creates a salted caramel cold foam.
Cinnamon or pumpkin spice lovers can sprinkle in ¼ teaspoon of ground spice for a warm, seasonal flavor. For a coffee-inspired boost, stir in ½ teaspoon of instant espresso powder or a shot of cold brew concentrate. Vanilla bean paste (1 teaspoon) adds real vanilla specks and depth.
For a nutty note, try 1 tablespoon of hazelnut or toffee nut syrup. Health-conscious options include a dash of cinnamon (which may help stabilize blood sugar) or unsweetened cocoa powder for a mocha variation. Always add these before frothing to ensure even distribution.
Experiment with 1-2 add-ins at a time to avoid overpowering the vanilla base. These simple tweaks let you recreate Starbucks’ seasonal drinks or invent your own signature cold foam at home.
Step-by-Step Guide to Making Sweet Vanilla Cold Foam

Step 1: Chill your tools and ingredients
For the best results, start with everything cold. Place your metal frothing pitcher or a deep bowl in the freezer for at least 10 minutes. Also, chill your milk—2% or whole milk works best for that thick, creamy texture, but nonfat milk will foam higher.
A cold base ensures the foam whips up faster and holds its shape longer. While you wait, measure out 2 tablespoons of vanilla syrup (or make your own with equal parts sugar and water).
Keeping your tools cold mimics the commercial frothing process and prevents the foam from collapsing too quickly on your drink.
Step 2: Mix milk and vanilla syrup
Pour 1/4 cup of cold milk into your chilled pitcher. Add the 2 tablespoons of vanilla syrup—this sweetens the foam perfectly. If you prefer a less sweet version, start with 1 tablespoon and adjust to taste.
Stir gently to combine the syrup with the milk before frothing; this ensures even sweetness throughout the foam. For a dairy-free option, use oat milk or coconut milk, but note they may not get as thick.
The ratio of milk to syrup is crucial: too much syrup makes the foam heavy, while too little leaves it thin. Stick to the 4:1 milk-to-syrup ratio for that signature Starbucks-style balance.
Step 3: Froth until smooth and silky
Use a handheld milk frother, electric whisk, or French press to aerate the mixture. Submerge the frother just below the surface and turn it on, moving it in a circular motion for 30-60 seconds.
You’re looking for small, tight bubbles that create a velvety, pourable foam—not stiff peaks like whipped cream. The foam should double in volume and feel smooth when you tilt the pitcher. If using a French press, pump the plunger vigorously for 30 seconds.
Stop when the foam is thick enough to coat a spoon. Over-frothing can make it grainy, so watch for that glossy, silky finish.
Step 4: Spoon or pour over your drink
Once your foam is ready, immediately spoon it over your iced or hot coffee. For iced drinks, pour the cold foam over a full glass of ice and coffee—it will sit on top like a cloud. For hot coffee, spoon it gently to avoid dissolving the foam too quickly.
Use a large spoon to hold back the foam while pouring, then scoop the remaining foam on top. The foam should be thick enough to float without sinking. For a final touch, drizzle a little vanilla syrup over the foam or add a pinch of cinnamon.
Enjoy immediately, as the foam will start to settle after a few minutes.
Best Tools for Frothing Cold Foam at Home
Using a handheld milk frother
A handheld milk frother is the most direct way to recreate Starbucks’ sweet vanilla cold foam at home. Start with cold, low-fat or skim milk—this is critical for achieving that light, airy texture.
Pour 1/2 cup of milk into a tall, narrow container (like a protein shaker or a large cup). Add 1-2 tablespoons of vanilla syrup (store-bought or homemade). Submerge the frother’s whisk just below the milk’s surface, then turn it on.
Slowly move it up and down for 20-30 seconds until the milk doubles in volume and forms thick, pillowy foam. The key is to avoid over-frothing, which can create large bubbles. Once it’s creamy and holds its shape, spoon it directly over your iced coffee or cold brew.
This method is perfect for single servings and requires minimal cleanup. For best results, use a frother with a stainless steel whisk and a high RPM for dense, stable foam that lasts.
Using a French press for foam
Your French press isn’t just for coffee—it’s a powerful tool for making Starbucks-style vanilla cold foam. Use cold, nonfat milk for the best foam consistency. Pour 1/2 cup of milk into the French press and add your vanilla syrup (about 2 tablespoons).
Place the lid on and pump the plunger vigorously up and down for 30-45 seconds. The fine mesh screen aerates the milk, creating thick, velvety foam with tiny bubbles. The key is to pump quickly and consistently—slower movements yield larger, less stable foam.
After frothing, let it sit for 10 seconds to allow the foam to settle and thicken. Spoon the foam over your iced coffee, leaving the liquid milk behind if desired. This method excels at producing large batches and gives you full control over texture.
Clean the press immediately to prevent milk residue from sticking. A French press is a budget-friendly, no-electricity solution for creamy cold foam that rivals your favorite café.
Using a blender for quick results
For the fastest, most consistent cold foam, a countertop blender is your best bet. This method works especially well for larger batches or when you want a very thick, spoonable texture. Use cold, low-fat milk (2% or skim) and add 1-2 tablespoons of vanilla syrup per 1/2 cup of milk.
Pour into the blender, secure the lid, and blend on high for 20-30 seconds. The high-speed blades whip air into the milk, creating a dense, creamy foam that holds its shape for minutes. Avoid over-blending, which can turn the foam into butter or make it too runny.
For extra sweetness, add a pinch of salt to mimic the salty-sweet flavor of Starbucks’ vanilla sweet cream. Once blended, pour or spoon the foam directly over your iced coffee.
This method is perfect for meal prep—you can blend a larger batch and store it in the fridge for up to 2 days (just re-froth briefly). Clean the blender immediately for best results.
Tips for Getting the Perfect Consistency Every Time

Why cold milk is essential
Starting with ice-cold milk is non-negotiable for achieving that signature Starbucks-style cold foam texture. Cold milk froths better because the fat molecules remain stable and trap air more effectively, creating a thick, velvety foam rather than a thin, bubbly mess. Use milk straight from the refrigerator—ideally at 35-40°F (2-4°C).
For the best results, choose whole milk (3.25% fat) or a barista-blend oat milk, as these produce the richest foam. Skim or low-fat milk can work but will yield a lighter, less creamy foam.
Before frothing, chill your frothing pitcher or jar in the freezer for 5 minutes to keep the milk cold during the process. If your milk warms up even slightly, the foam will collapse quickly.
Remember: warm milk creates large, unstable bubbles that separate, while cold milk gives you that dense, spoonable cloud you see on Starbucks drinks. For an extra trick, use a cold frothing attachment on a handheld frother or a French press—both work wonders when the milk is properly chilled.
How to avoid over-frothing
Over-frothing is the fastest way to ruin your vanilla cold foam, turning it into a stiff, dry meringue or a watery mess. The goal is a smooth, pourable foam that sits on top of your drink, not a stiff peak.
For a handheld frother, froth for only 15-20 seconds—stop as soon as the milk doubles in volume and forms soft, glossy ribbons. For an electric frother, use the cold foam setting (if available) or stop after 30-45 seconds.
Watch for signs of over-frothing: the foam becomes chunky, separates into liquid and bubbles, or looks dry and grainy. If you see large, uneven bubbles, you’ve gone too far. A simple fix is to tap the container gently on the counter to pop large bubbles, then swirl to reincorporate.
To maintain consistency, always use a narrow, tall container (like a frothing pitcher) to concentrate the vortex action. Finally, let the foam rest for 10-15 seconds after frothing—this allows microfoam to stabilize, giving you that silky Starbucks texture without overworking the milk.
Adjusting sweetness to your taste
Starbucks sweet vanilla cold foam uses a vanilla syrup, but you can easily customize the sweetness level at home. Start with 1-2 tablespoons of vanilla syrup per 1/2 cup of milk, then adjust based on your preference.
For a less sugary option, use sugar-free vanilla syrup or a homemade simple syrup with half the sugar. If you want a richer flavor, add a splash of vanilla extract (1/4 teaspoon) along with your sweetener—this boosts the vanilla taste without extra calories.
For a natural sweetener, try maple syrup or honey, but note they may slightly alter the foam’s consistency. Always mix the sweetener into the milk before frothing to ensure even distribution.
Taste-test your foam before adding it to your drink: if it’s too sweet, dilute with a bit of cold milk; if not sweet enough, stir in a tiny bit more syrup.
Remember that the foam will sit on top of your coffee, so balance the sweetness with the bitterness of your brew. For a Starbucks copycat, use 2 tablespoons of vanilla syrup for a 16-ounce drink—adjust down for a lighter sweetness.
How to Use Sweet Vanilla Cold Foam on Different Drinks
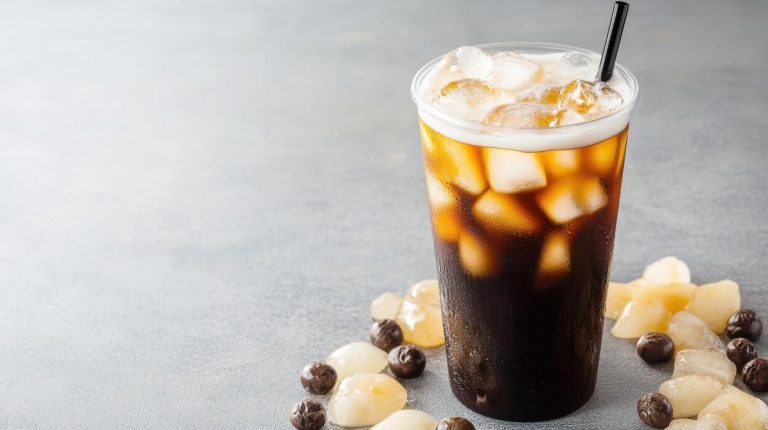
Iced coffee and cold brew combinations
To use sweet vanilla cold foam on iced coffee or cold brew, start by brewing a strong cold brew or iced coffee to stand up to the foam’s creamy sweetness. Fill a tall glass with ice and pour your coffee to about three-quarters full, leaving space for the foam.
Sweeten your coffee lightly if desired, as the vanilla foam adds significant sugar. Prepare your cold foam by blending cold heavy cream, vanilla syrup, and milk until thick and frothy. Gently spoon or pour the foam over the ice and coffee, allowing it to float on top.
For an extra treat, drizzle caramel or chocolate sauce over the foam. This pairing works best with unsweetened or lightly sweetened coffee because the foam provides a balanced, dessert-like finish without overwhelming bitterness.
The cold foam also acts as a natural sweetener and creamer, so you can skip additional syrups or sugar. For a twist, add a pinch of cinnamon or nutmeg to the foam before serving to enhance the vanilla flavor.
Hot coffee and latte pairings
Using sweet vanilla cold foam on hot coffee or lattes requires a careful approach to prevent the foam from melting too quickly. Brew your hot coffee or latte as usual, but allow it to cool slightly for about a minute to avoid dissolving the foam instantly.
Prepare the cold foam separately by blending cold heavy cream, vanilla syrup, and milk until it reaches a thick, airy consistency. Pour the hot coffee into a mug, leaving at least an inch of space at the top.
Gently spoon the cold foam over the hot beverage, creating a distinct layer. The contrast between the hot coffee and cool foam provides a unique sensory experience. For lattes, consider adding a shot of espresso for a stronger flavor that balances the foam’s sweetness.
You can also sprinkle a little cocoa powder or cinnamon on top for garnish. This method works especially well with medium or dark roast coffee, as their bold flavors cut through the creamy foam. Enjoy immediately to maintain the temperature contrast and texture.
Non-coffee drinks like iced tea or matcha
Sweet vanilla cold foam elevates non-coffee drinks like iced tea or matcha by adding a creamy, dessert-like element. For iced tea, choose a black or green tea base and sweeten it lightly to complement the vanilla flavor. Brew the tea, chill it, and serve over ice in a tall glass.
Prepare the cold foam by blending cold heavy cream, vanilla syrup, and milk until thick and frothy. Pour the foam over the tea, allowing it to sit on top. For matcha, whisk matcha powder with hot water until smooth, then pour over ice and milk.
The vanilla foam pairs beautifully with matcha’s earthy notes, creating a balanced and indulgent drink. You can also experiment with herbal teas like hibiscus or chamomile for a floral twist. To enhance the experience, add a sprinkle of matcha powder or a few tea leaves on top of the foam.
This combination works best with unsweetened or lightly sweetened bases, as the foam provides ample sweetness. Serve immediately to enjoy the contrasting temperatures and textures.
Frequently Asked Questions About Sweet Vanilla Cold Foam
Can I make it dairy-free or vegan?
Absolutely, you can create a delicious dairy-free or vegan version of Starbucks’ Sweet Vanilla Cold Foam with a few simple swaps. Use a barista-quality plant-based milk like oat milk, soy milk, or coconut milk, as these have a higher protein and fat content that froths better than standard alternatives.
For the best texture, choose an unsweetened vanilla oat milk to mimic the original’s flavor profile without added sugars.
To achieve the signature thick, creamy foam, you’ll need to use a cold frother or a handheld milk frother—simply pour the milk into a frothing pitcher, add 1-2 teaspoons of vanilla syrup (ensure it’s vegan-friendly), and froth on the cold setting until it doubles in volume.
If your milk doesn’t froth well, try adding a tiny pinch of xanthan gum to stabilize the foam. Pour the finished foam over iced coffee, cold brew, or any drink, and enjoy a fully plant-based treat that’s just as indulgent as the original.
How long does homemade cold foam last?
Homemade Sweet Vanilla Cold Foam is best enjoyed immediately after frothing for optimal texture and flavor. The foam’s airy structure begins to deflate within minutes, so it’s not suitable for long-term storage.
If you must prepare it ahead, you can refrigerate the unfrothed milk-vanilla mixture in an airtight container for up to 3 days. When ready to serve, simply give it a quick stir and froth it fresh.
For the most consistent results, never freeze cold foam—freezing will separate the milk’s components and ruin its creamy consistency. If you have leftover foam that’s already frothed, you can try to re-froth it, but it will likely lose its thick, silky quality.
A practical tip is to make only what you need for a single serving (about 1/4 cup of milk) to avoid waste. For the best Starbucks-like experience, froth your cold foam right before pouring it over your iced coffee.
What if my foam turns out watery?
A watery cold foam usually indicates an issue with the milk’s fat content or the frothing technique. Switch to a higher-fat milk such as whole milk (3.25% fat) or a barista-style oat milk—low-fat or skim milk produces thin, unstable foam.
Ensure your milk is ice-cold before frothing; warm milk won’t trap air effectively. If using a handheld frother, move it in a circular motion and keep the tip just below the surface to incorporate maximum air.
For a thicker foam, try adding 1-2 teaspoons of heavy cream or a splash of half-and-half to boost richness. Another fix is to use a French press: pour the milk in and pump the plunger vigorously for 30-60 seconds until the foam doubles.
If your syrup is too watery, use a thicker vanilla syrup or reduce the amount. Finally, let the foam rest for 10 seconds after frothing so larger bubbles settle. With these adjustments, you’ll achieve that velvety, cloud-like consistency every time.
Frequently Asked Questions
What is Starbucks sweet vanilla cold foam made of?
Starbucks sweet vanilla cold foam is made from a blend of heavy cream, 2% milk, and vanilla syrup. The key is using a non-dairy milk alternative like almond or oat milk for a lighter texture, or whole milk for richness, combined with vanilla syrup and cold milk.
How do I make Starbucks sweet vanilla cold foam at home?
To make it at home, combine 2 tablespoons of vanilla syrup (or homemade simple syrup with vanilla extract) with 1/4 cup of heavy cream and 1/4 cup of cold milk. Use a milk frother, French press, or blender to whip the mixture until it becomes thick and foamy, about 30-60 seconds.
What milk is best for cold foam to mimic Starbucks?
Starbucks uses a non-dairy milk blend (like almond or oat) for their cold foam, but at home, heavy cream mixed with 2% milk or whole milk works best for a rich, creamy texture. For a lighter version, use skim milk or a barista-edition oat milk.
Can I make sweet vanilla cold foam without a frother?
Yes, you can use a French press by pumping the plunger up and down for about 30 seconds, or a blender on low speed for 20-30 seconds. A whisk can also work if you whisk vigorously by hand for 2-3 minutes until frothy.
What vanilla syrup does Starbucks use for cold foam?
Starbucks uses their own vanilla syrup, which is a simple syrup with natural flavors. You can replicate it by mixing equal parts sugar and water (1:1 ratio) and adding 1 teaspoon of vanilla extract per cup of syrup.
How do I get the perfect thick consistency for cold foam?
Use cold milk and cream straight from the refrigerator, and froth just until the mixture doubles in volume and holds soft peaks. Over-frothing can make it too airy, while under-frothing leaves it runny. A 30-second froth usually achieves the ideal texture.
Can I make dairy-free sweet vanilla cold foam?
Absolutely, use a barista-grade oat milk or unsweetened almond milk, and add vanilla syrup to taste. For extra creaminess, mix in a splash of coconut cream. Froth as usual; oat milk tends to foam better than almond milk.
How do I sweeten cold foam without vanilla syrup?
Replace vanilla syrup with 1 tablespoon of maple syrup, agave nectar, or honey, and add 1/2 teaspoon of vanilla extract. Whisk or froth thoroughly to incorporate the sweetener evenly into the cold foam.
Conclusion
The key is using heavy cream, vanilla syrup, and a frother to achieve that silky, cloud-like texture. Remember to blend on low speed to avoid butter, and always pour it over ice for the perfect contrast. Experiment with dairy-free alternatives or extra cinnamon. Now, skip the drive-through and treat yourself to barista-quality bliss from your own kitchen.