How To Make Starbucks Sweet Foam
How to make Starbucks sweet foam is surprisingly simple once you know the key ingredient: vanilla syrup. Many home baristas struggle to get that thick, velvety texture without a commercial blender. The core problem is replicating the airy, stable foam that sits atop cold brew. You’re in the right place—we’ll show you the exact ratio of heavy cream, 2% milk, and vanilla syrup, plus the frothing technique, to nail that signature Starbucks sweetness and consistency every time.
What Is Starbucks Sweet Foam?
Ingredients in Starbucks sweet cream cold foam
To replicate Starbucks sweet cream cold foam at home, you need just three key ingredients: heavy cream, 2% milk, and vanilla syrup. The standard Starbucks recipe uses a 1:2 ratio of heavy cream to 2% milk, which creates the right balance of richness and pourability.
For the vanilla syrup, you can either purchase Starbucks’ own vanilla syrup or make a simple syrup by combining equal parts sugar and water with a teaspoon of vanilla extract. Some home baristas also add a pinch of salt to mimic the subtle savory note found in the original.
Avoid using whole milk or half-and-half, as they won’t whip into the same airy, velvety texture. The key is chilling all ingredients beforehand—cold dairy whips better and holds its structure longer. For a dairy-free version, substitute with coconut cream and oat milk, though the foam will be slightly less stable.
How Starbucks makes sweet foam in-store
Starbucks baristas prepare sweet cream cold foam using a specific method with a Vitamix blender set to the cold foam setting. They start by pouring a pre-made sweet cream mixture—made from vanilla syrup, heavy cream, and 2% milk—into a specialized blender pitcher.
The blender aerates the liquid for about 30 seconds, creating a thick, velvety foam with tiny bubbles. This foam is then poured directly over cold brew or iced coffee, where it gradually sinks and swirls. To achieve similar results at home, use a handheld milk frother or a French press.
Pour cold sweet cream into a narrow cup, insert the frother just below the surface, and blend for 20-30 seconds until the foam doubles in volume. Avoid over-blending, as it can turn the cream into butter.
For best texture, use a cold stainless steel container and chill the cream mixture for at least 15 minutes before frothing.
Difference between cold foam and sweet cream cold foam
The primary difference lies in ingredients and sweetness. Regular cold foam at Starbucks is made by frothing nonfat milk with vanilla syrup, resulting in a lighter, less rich foam with a subtle vanilla flavor. It’s often used on top of cold brew or iced lattes for a dairy-free-ish option.
In contrast, sweet cream cold foam uses a base of heavy cream and 2% milk, making it significantly creamier, denser, and sweeter. The sweet cream mixture is pre-made and stored cold, then frothed to a thick, silky texture that holds its shape longer.
Another key difference is application: regular cold foam is typically poured as a thin layer, while sweet cream cold foam is layered generously, creating a decadent, dessert-like finish.
For home use, choose sweet cream cold foam if you want a rich, indulgent topping that adds sweetness and body to your coffee. Regular cold foam works better for a lighter, calorie-conscious option.
Ingredients You Need for Starbucks Sweet Foam at Home
Heavy cream and 2% milk ratio for sweet foam
The secret to Starbucks’ signature velvety sweet foam lies in the perfect balance of heavy cream and 2% milk. For the most authentic texture, use a ratio of 3 parts heavy cream to 1 part 2% milk.
This combination provides the rich, creamy mouthfeel that floats beautifully on cold drinks without being too thick. Heavy cream gives the foam its stable structure and indulgent taste, while the 2% milk lightens it enough to pour smoothly.
If you prefer a lighter foam, adjust to a 2:1 ratio, but avoid skim milk as it won’t whip into the same dense, cloud-like consistency. For best results, ensure both ingredients are very cold before blending or frothing.
Use a milk frother, blender, or a jar with a tight lid to aerate the mixture until it doubles in volume and forms soft peaks. This ratio is your foundation for achieving that iconic Starbucks foam at home—consistent, stable, and deliciously sweet.
Vanilla syrup: store-bought vs. homemade
Vanilla syrup is the sweet heart of Starbucks sweet foam, and you have two reliable paths: store-bought or homemade. Store-bought syrups, like Torani or Monin, offer convenience and consistency—just a tablespoon per serving gives you that familiar flavor. They’re shelf-stable and perfect for quick prep.
However, for a more authentic Starbucks taste, homemade syrup is surprisingly easy and allows control over sweetness. Simply combine 1 cup water, 1 cup sugar, and 1 tablespoon vanilla extract in a saucepan. Heat until sugar dissolves, then cool. This yields a cleaner, less artificial flavor.
You can also adjust the sugar-to-vanilla ratio to match your preference—try using vanilla bean paste for a richer profile. Whether you choose store-bought for speed or homemade for purity, 1 to 2 tablespoons of syrup per cup of milk mixture is the sweet spot.
Both options work perfectly; the choice depends on your time and flavor priorities.
Optional add-ins for flavor variations
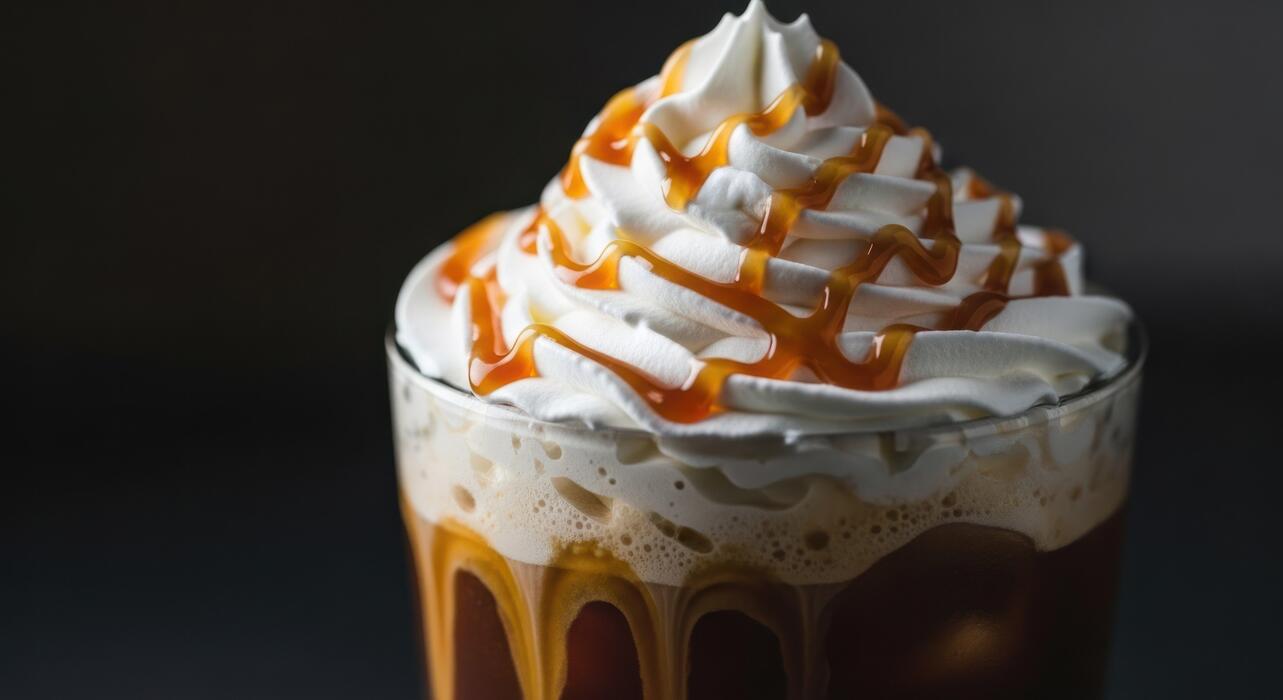
Once you’ve mastered the base foam, elevate it with optional add-ins for endless flavor variations. For a caramel twist, add 1 tablespoon of caramel sauce or syrup to the milk mixture before frothing—this creates a sweet, buttery foam perfect for iced coffees.
For a chocolate mocha version, stir in 1 tablespoon of chocolate syrup or a teaspoon of cocoa powder with a pinch of sugar. Cinnamon dolce lovers can add ½ teaspoon of cinnamon and 1 tablespoon of brown sugar for a warm, spicy note.
For a vanilla bean experience, scrape the seeds from half a vanilla bean into the cream. Peppermint extract (just a few drops) makes a festive holiday foam. Each add-in should be fully dissolved or blended before frothing to ensure even distribution. Start with small amounts and adjust to taste.
These variations let you customize your sweet foam to match any drink—from pumpkin spice to matcha lattes—without losing that signature creamy texture.
How to Make Starbucks Sweet Foam Without a Frother
Using a French press to create foam
A French press is an excellent tool for replicating Starbucks’ sweet foam without an electric frother. Start by preparing your milk or cream base—use 2% milk, heavy cream, or a barista blend oat milk for the richest texture.
Add 1-2 tablespoons of vanilla syrup or your preferred sweetener (like simple syrup or sugar-free vanilla) per ½ cup of milk. Pour the mixture into a clean French press, ensuring the plunger is fully raised.
Plunge the handle up and down vigorously for 30-60 seconds, until the liquid doubles in volume and becomes thick, airy foam. The key is to move the plunger quickly and consistently to incorporate maximum air.
Once foamed, let it sit for a minute to stabilize, then spoon the thick foam over your cold brew, iced coffee, or iced latte. This method yields a creamy, stable foam similar to Starbucks’ signature topping, and you can adjust sweetness to taste.
Clean the press immediately to prevent residue buildup.
Shaking method with a mason jar
If you don’t have a French press, a simple mason jar with a tight-fitting lid works wonders for making Starbucks-style sweet foam. Fill the jar halfway with your milk base—whole milk or half-and-half creates the best foam—and add your sweetener, such as vanilla syrup, caramel sauce, or a sugar-free alternative.
For extra stability, add a teaspoon of heavy cream or a pinch of xanthan gum. Secure the lid tightly and shake the jar as hard as you can for 45-60 seconds. The vigorous motion forces air into the liquid, creating a thick, frothy layer.
After shaking, remove the lid and microwave the jar for 15-20 seconds to help the foam set (optional but recommended). Let it rest for a minute, then scoop the foam over your drink. This method is portable and requires no special equipment—just a jar and some elbow grease.
For best results, use cold milk and shake immediately before serving. The foam will be slightly less dense than a frother but still deliciously sweet and airy.
Whisking by hand for a quick fix
When you need sweet foam in a hurry, a simple whisk and a bowl can save the day. Choose a sturdy metal or silicone whisk and a deep bowl to prevent splashing.
Combine ¼ cup of milk (2% or whole works best) with 1-2 teaspoons of vanilla syrup or honey in the bowl. For extra volume, add a splash of heavy cream or a drop of vanilla extract. Whisk vigorously in a circular motion, tilting the bowl slightly to incorporate air.
Continue for 2-3 minutes until the mixture becomes frothy and doubles in volume. You can also use a handheld milk frother if available, but a manual whisk works well. For a shortcut, microwave the milk for 10 seconds before whisking—this helps the foam form faster.
Once ready, spoon the foam over your iced coffee or cold brew. This method is ideal for small batches and requires zero gadgets. While the foam may be less stable than machine-made versions, it delivers a light, sweet topping that mimics the Starbucks experience.
Clean your whisk immediately to avoid sticky residue.
How to Make Starbucks Sweet Foam with a Frother
Steps for an electric milk frother
Start by selecting the right milk: whole milk or 2% milk creates the richest foam, while nonfat milk yields a lighter, airier texture. Pour cold milk into your electric frother, filling only to the maximum fill line to allow room for expansion.
Add 1 to 2 tablespoons of vanilla syrup or your preferred sweetener directly into the milk for even distribution. Secure the lid and select the cold foam setting if available, or use the regular frothing function for about 30–60 seconds until the foam is thick and velvety.
Avoid over-frothing, which can cause the foam to become too stiff or separate. Once done, gently swirl the frother to incorporate any separated liquid, then spoon the sweet foam onto your iced coffee or cold brew.
For a dairy-free option, oat milk or coconut milk works well but may produce slightly less stable foam.
Using a handheld frother for best results
For a handheld frother, choose a tall, narrow container like a glass measuring cup or a frothing pitcher to maximize foam volume. Pour about 1/3 cup of cold milk and add 1 tablespoon of simple syrup, vanilla syrup, or caramel sauce for sweetness.
Submerge the frother wand just below the milk’s surface, then turn it on and move it in a gentle up-and-down motion for 20–30 seconds. Keep the tip near the surface to incorporate air, but avoid splashing. For thicker foam, tilt the container slightly to create a whirlpool effect.
Once the foam reaches a thick, creamy consistency with small bubbles, stop frothing immediately to prevent it from becoming too airy. Let it rest for 10 seconds to stabilize, then spoon the foam over your iced drink. Clean the frother wand promptly under running water to prevent residue buildup.
Tips for getting the right foam consistency
The ideal Starbucks-style sweet foam is smooth, thick, and pourable, not stiff or bubbly. Use cold milk straight from the fridge—warm milk won’t foam properly and creates large, unstable bubbles.
For sweetness, liquid sweeteners like vanilla syrup or caramel sauce blend better than granulated sugar, which can weigh down the foam. If using a frother with a whisk attachment, pulse it in short bursts to control texture.
For a denser foam, froth for a shorter time (15–20 seconds); for a lighter, airier foam, extend to 30–40 seconds. Always skim off any large bubbles with a spoon before serving.
To mimic Starbucks’ signature foam, add a pinch of salt or a dash of vanilla extract for depth of flavor. Finally, pour the foam over ice slowly to keep it from sinking, and enjoy immediately for the best texture.
Best Drinks to Top with Starbucks Sweet Foam

Iced coffee and cold brew combinations
Iced coffee and cold brew are the classic foundations for Starbucks sweet foam because their bold, smooth flavors create a perfect contrast to the foam’s creamy sweetness.
To make your own, brew a strong batch of cold brew or iced coffee at home, then fill a glass with ice and pour the coffee over it, leaving about an inch of space at the top.
For the sweet foam, combine 2 tablespoons of vanilla syrup (or sugar-free vanilla) with 1/4 cup of heavy cream or whole milk in a jar, then shake vigorously for 30-60 seconds until it thickens into a frothy layer.
Spoon this foam over your iced coffee and stir gently for a balanced sip. For extra flavor, add a dash of cinnamon or a splash of caramel syrup to the coffee before topping.
This combination works best with dark roast cold brew, as the bitterness cuts through the sweetness, making it a refreshing and indulgent treat without being overly rich.
Matching sweet foam with iced lattes
Iced lattes are a fantastic match for sweet foam because the espresso’s intensity is softened by the milk, and the foam adds a luxurious, dessert-like finish.
To replicate this at home, pull a double shot of espresso or use strong brewed coffee, then pour it over ice in a tall glass. Add 1/2 cup of your preferred milk (oat, almond, or dairy) and stir.
For the sweet foam, whip 2 tablespoons of sweetened condensed milk or vanilla syrup with 1/4 cup of heavy cream using a milk frother or hand whisk until it forms soft peaks. Gently spoon this over the latte, creating a thick, cloud-like layer.
For a vanilla sweet cream version, mix vanilla extract into the foam. The key is to use full-fat cream for stability, as it holds its shape longer. This pairing enhances the latte’s creaminess, making each sip feel indulgent while still allowing the espresso to shine through.
Non-coffee drinks that pair well
Sweet foam isn’t just for coffee—it elevates non-coffee drinks like matcha lattes, chai teas, and even fruit-based beverages. For a matcha sweet foam drink, whisk 1 teaspoon of matcha powder with 2 tablespoons of hot water until smooth, then pour over ice and add 1 cup of oat milk.
Prepare the sweet foam by blending 2 tablespoons of vanilla syrup with 1/4 cup of heavy cream until frothy, then spoon it on top. For chai tea, brew a strong chai concentrate (or use store-bought), mix with milk and ice, then top with the same foam for a spicy-sweet contrast.
Even fruit teas like peach or hibiscus work—just make the foam slightly tangy by adding a squeeze of lemon. The foam’s creamy texture balances tart or earthy flavors, making these drinks feel like a special café treat.
Experiment with flavored syrups in the foam, such as caramel or hazelnut, to customize your non-coffee creation.
Tips for Making Sweet Foam Last Longer
Why foam collapses and how to prevent it
Sweet foam collapses primarily due to over-aeration or incorrect ingredient ratios. When you blend heavy cream, vanilla syrup, and 2% milk too long, you incorporate too much air, creating large, unstable bubbles that burst quickly. To prevent this, use cold ingredients (below 40°F) because warmer cream won’t hold structure.
Blend on low speed for only 20–30 seconds until you see thick, velvety ribbons—stop before it becomes stiff. Another key tip: use full-fat heavy cream (at least 36% milk fat) rather than half-and-half; the higher fat content stabilizes the foam.
If your foam starts separating, add one teaspoon of vanilla syrup per cup of cream mixture before blending—the sugar acts as a stabilizer. Finally, always pour foam over a cold drink; hot coffee will melt it instantly.
For iced drinks, add ice first, then milk, then slowly spoon foam on top to avoid dissolving it into the liquid. These adjustments ensure your sweet foam stays fluffy for 10–15 minutes instead of deflating in seconds.
Storing leftover sweet cream mixture
To extend the life of your sweet cream mixture, refrigerate it immediately in an airtight container (like a mason jar or deli cup). The mixture—heavy cream, 2% milk, and vanilla syrup—lasts 3–5 days if sealed properly. Before storing, pour off any liquid that has separated on top; this prevents dilution.
For best results, do not add the foam to the container—only store the un-blended liquid. When you’re ready to use it again, shake the container vigorously for 10 seconds to re-emulsify the cream and milk, as they naturally separate during chilling.
If you’ve already frothed the cream, you can store the foam alone for up to 24 hours in a sealed jar, but it will deflate significantly. For long-term storage, freeze the un-blended mixture in ice cube trays; thaw overnight in the fridge and re-blend.
Avoid storing at room temperature for more than 2 hours, as dairy spoils quickly. Label your container with the date to track freshness.
Re-frothing techniques for day-old cream
Day-old sweet cream mixture can be revived with the right technique. First, check for spoilage—if it smells sour or has clumps, discard it.
If it’s fine, pour the mixture into a cold metal bowl and whisk vigorously by hand for 1–2 minutes until soft peaks form; this re-incorporates air without overworking. For a faster method, use a handheld milk frother—immerse it just below the surface and pulse for 10–15 seconds until foam appears.
Avoid using a blender again, as it will break down the fat structure and create thin, watery foam. If the cream is too thin, add one tablespoon of fresh heavy cream per cup of day-old mixture to restore fat content.
Another trick: chill the bowl and whisk in the freezer for 10 minutes before frothing—cold equipment helps stabilize the foam. For iced drinks, re-froth directly over the drink by pouring the cream into a tall cup and using a frother right before serving.
This revives texture for one more use, but note that day-old foam won’t be as thick as fresh—enjoy it within 2 hours of re-frothing.
Common Mistakes When Making Sweet Foam at Home
Using the wrong milk fat content
The foundation of Starbucks-style sweet foam lies in the milk’s fat content. A common mistake is reaching for skim or 2% milk, which will never achieve the thick, cloud-like consistency you’re after.
You must use heavy cream or a blend of heavy cream and 2% milk (often a 50/50 ratio) to get that rich, velvety texture. Heavy cream contains enough butterfat to hold air and create stable microbubbles, while lower-fat options will result in a thin, watery foam that collapses almost instantly.
If you find your foam is too dense or buttery, try cutting the heavy cream with a splash of whole milk. Conversely, if it’s too runny, increase the heavy cream ratio.
Remember, the goal is a thick, pourable foam that sits on top of your cold brew like a cloud, not a liquid that mixes in. Stick to full-fat dairy for the most authentic results.
Over-frothing or under-frothing the cream
Achieving the perfect texture is a delicate balance, and getting the frothing time wrong is a frequent pitfall. Under-frothing leaves you with liquid cream that sinks to the bottom, while over-frothing creates a stiff, almost butter-like consistency that won’t pour smoothly.
The ideal sweet foam should have a smooth, thick, and slightly pourable consistency, similar to melted ice cream. Using a handheld milk frother, aim for 20-30 seconds of frothing, stopping as soon as the mixture doubles in volume and forms silky, small bubbles.
If you see large, airy bubbles, you’ve likely over-frothed it. A simple test: tilt the container; the foam should move slowly like lava, not drip like water. For best results, use a tall, narrow container to give the frother enough room to aerate the cream.
Practicing with small batches will help you nail the timing.
Skipping the vanilla syrup or sweetener
A critical error is forgetting to sweeten the cream before frothing. Starbucks sweet foam is not just about texture; its signature flavor comes from vanilla syrup blended directly into the heavy cream.
Always add 1-2 tablespoons of vanilla syrup (or your preferred sweetener) per ½ cup of cream before frothing. This ensures the sweetness is evenly distributed throughout the foam, not just sitting at the bottom.
If you skip this step, you’ll end up with bland, unsweetened foam that clashes with your coffee’s bitterness. For a closer copycat, use simple syrup or a sugar-free vanilla alternative, but don’t omit it entirely. The sweetener also helps stabilize the foam, contributing to its silky texture.
To enhance the flavor, consider a pinch of salt or a drop of vanilla extract. Remember, the sweetener is what makes it ‘sweet foam’—it’s non-negotiable for an authentic result.
Frequently Asked Questions
What is Starbucks sweet foam?
Starbucks sweet foam is a thick, creamy, lightly sweetened cold foam made from nonfat milk and vanilla syrup. It is typically used as a topping for cold brew or iced coffee drinks.
What ingredients do I need to make Starbucks sweet foam at home?
You need nonfat milk (or a low-fat milk like 2% for a richer texture), vanilla syrup (or homemade simple syrup with vanilla extract), and optionally a splash of heavy cream for extra thickness.
How do I make Starbucks sweet foam without a special machine?
Use a handheld milk frother, a French press, or a jar with a tight lid. Pour cold nonfat milk and vanilla syrup into the container, then froth or shake vigorously for 30-60 seconds until thick and foamy.
What is the exact recipe for Starbucks sweet foam?
Combine 1/4 cup cold nonfat milk with 1 tablespoon vanilla syrup (or 1/2 tablespoon simple syrup plus 1/4 teaspoon vanilla extract). Froth until thick and velvety, about 30 seconds, then spoon over iced coffee.
Can I make sweet foam with oat milk or almond milk?
Yes, but use barista-style oat milk (which froths better) or unsweetened almond milk. You may need to add a bit more vanilla syrup to achieve the same sweetness and thickness.
Why won’t my sweet foam get thick enough?
Ensure you use cold milk (not warm), nonfat or low-fat milk, and froth for at least 30 seconds. If using a blender, avoid over-blending, which can make it watery. Adding a teaspoon of heavy cream can help stabilize the foam.
How do I get the sweet foam to float on top of my drink?
Pour the foam gently over the back of a spoon onto the surface of your iced coffee or cold brew. This prevents it from mixing in and keeps the foam layer distinct.
Can I make sweet foam ahead of time and store it?
Sweet foam is best used immediately because it deflates quickly. If you must store it, keep it in the fridge for up to 2 hours in a sealed container, then re-froth briefly before using.
Conclusion
Making Starbucks-style sweet foam at home is simple: blend heavy cream, vanilla syrup, and a splash of milk until frothy, then pour over iced coffee. The key is using cold cream for the perfect thick, velvety texture. Now you can skip the drive-thru and customize your own café-worthy drink anytime. Experiment with different syrups for endless flavor variations. Enjoy your barista moment