How To Make Cold Brew
If you are tired of paying premium prices for your daily caffeine fix, learning how to make cold brew at home is a total game changer. This smooth, low-acid coffee is surprisingly simple to prepare using just two basic ingredients and a little bit of patience. Let’s dive in and master this refreshing DIY technique.
What is cold brew coffee?
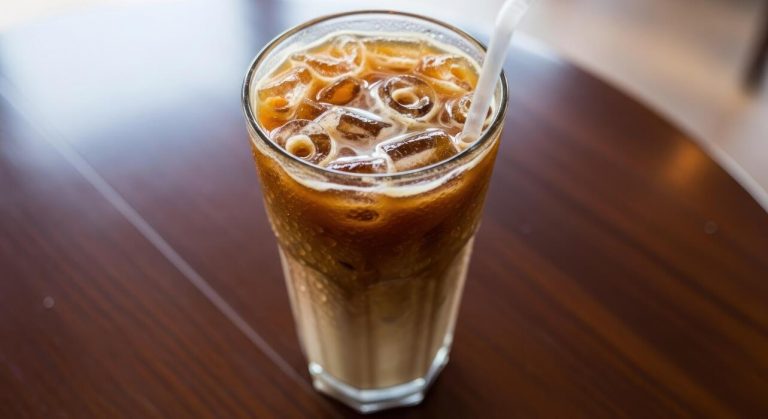
The difference between cold brew and iced coffee
Understanding the fundamental distinction between these two beverages is the first step in learning how to make cold brew effectively.
While iced coffee is simply standard drip coffee brewed with hot water and then chilled or poured over ice, cold brew is an entirely different extraction method that relies on time rather than heat.
To make cold brew, you must steep coarsely ground beans in filtered room-temperature water for 12 to 24 hours. This slow process creates a concentrated liquid that is naturally thicker and more syrup-like than traditional iced coffee.
Because hot water is never introduced, the volatile oils and chemical compounds react differently, resulting in a distinct flavor profile that lacks the bitterness often found in cooled drip coffee.
When you prepare cold brew at home, you are essentially creating a powerful base that can be diluted with water or milk to reach your preferred strength, offering a level of customization and versatility that standard iced coffee cannot provide.
Why cold brew tastes less acidic
One of the primary reasons enthusiasts choose to make cold brew is its remarkably smooth and mellow character. Scientific studies indicate that cold brew can be up to 60% less acidic than hot-brewed coffee.
This occurs because the high temperatures required for traditional brewing methods tend to release specific oils and acidic compounds that can cause stomach irritation or a sharp, biting aftertaste.
By using cool, filtered water, you bypass the extraction of these bitter elements, leaving behind the sweeter, chocolatey, and nutty notes of the bean. This makes it an ideal solution for individuals with acid reflux or sensitive stomachs who still want to enjoy a robust caffeine fix.
To achieve the best results, ensure you use a coarse grind size similar to sea salt; this prevents over-extraction and keeps the final product clean and crisp.
The result is a naturally sweet beverage that often requires less sugar or cream, highlighting the true essence of the coffee beans without the harsh acidic finish.
Caffeine content in cold brew vs drip coffee
When you make cold brew, you are producing a highly concentrated extract that typically contains a higher caffeine density than standard drip coffee. Because the brewing process involves a much higher coffee-to-water ratio—often 1:4 or 1:8 compared to the traditional 1:16—the resulting liquid is incredibly potent.
However, it is important to remember that cold brew is usually diluted before consumption, which balances the final caffeine intake. If you drink the concentrate straight, you will experience a significantly stronger buzz than a standard cup of joe.
Additionally, the extended steeping time allows for a steady migration of caffeine molecules from the grounds into the water, ensuring a high yield of energy-boosting properties. For a balanced experience, most experts recommend mixing your concentrate with equal parts water or milk.
This allows you to manage your caffeine consumption while enjoying the rich, full-bodied texture that only a long, cold extraction can provide, making it a powerful and efficient way to start your morning or fuel your afternoon.
Essential equipment for making cold brew at home
Choosing the right glass jar or pitcher
To begin your cold brew journey, you need a reliable vessel that can comfortably hold a high volume of liquid for an extended steeping period.
A large glass Mason jar or a dedicated glass pitcher is the most effective choice because glass is non-reactive and will not leach unwanted metallic or plastic flavors into your concentrate.
Aim for a container that holds at least 32 to 64 ounces to ensure you have enough room for both the bulky grounds and the water.
Using a vessel with a wide mouth is a critical design feature because it allows you to stir the grounds easily to ensure full saturation and makes the cleanup process much faster once the brewing is complete.
If you choose a container with an airtight lid, you can effectively prevent your coffee from absorbing any stray odors from the refrigerator during the long fourteen to twenty-four hour extraction process. This simple piece of hardware serves as the foundation for a consistent and delicious homemade brew.
Filters, cheesecloth, and mesh strainers
Achieving a smooth, sediment-free cup requires a strategic approach to filtration once the steeping time has concluded. Most home brewers find success using a multi-stage filtration method to remove every bit of silt. Start by pouring the mixture through a fine-mesh stainless steel strainer to catch the largest coarse grounds.
For the second pass, you should use high-quality cheesecloth or a paper coffee filter to capture the finer particles that contribute to a muddy texture.
If you prefer a lighter body with high clarity, a paper filter is the gold standard, whereas cheesecloth allows more natural oils to pass through for a creamier mouthfeel.
Some modern cold brew systems include built-in reusable nylon or metal mesh filters, which are environmentally friendly and streamline the entire separation process.
Regardless of the tool you choose, the goal is to ensure the final concentrate is perfectly clean, allowing the subtle chocolatey and nutty notes of the cold extraction to shine without any gritty residue at the bottom.
Why a burr grinder is better for cold brew
The secret to a successful batch of cold brew lies almost entirely in the uniformity of your coffee grounds. Using a burr grinder is essential because it crushes the beans into consistent, pebble-like pieces rather than hacking them into uneven shards like a standard blade grinder.
For cold brew, you must achieve an extra-coarse grind setting, similar in texture to kosher salt or heavy breadcrumbs. This specific texture is vital because it allows for a slow, even extraction over many hours without over-extracting the bitter compounds found deep within the bean.
If your grounds are too fine or inconsistent, you will likely end up with a cloudy, over-extracted, and unpleasantly bitter beverage. A conical or flat burr grinder gives you the precision required to maintain this coarse profile every time you brew.
Investing in this piece of equipment ensures that your water can flow freely around the particles, extracting the smooth sweetness that characterizes the best professional-grade cold brew while avoiding the harsh acidity associated with heat-based methods.
Best coffee beans and grind size for cold brew
Why you must use a coarse grind
When learning how to make cold brew, the most critical technical factor is your particle size. You must use a coarse grind, resembling sea salt or peppercorns, to ensure a clean and balanced extraction.
Because cold brew involves a long steep time—usually between 12 and 24 hours—using a fine grind will lead to over-extraction, resulting in a bitter, harsh flavor that ruins the smooth profile this method is known for.
Furthermore, coarse grounds act as a natural filter; fine particles often pass through mesh strainers or paper filters, leaving you with a cloudy, silty cup of coffee.
A consistent coarse setting allows water to flow freely around the beans, extracting the sweet oils and caffeine slowly without pulling out the astringent tannins.
If you find your concentrate is too intense or muddy, check your grinder setting first, as a uniform coarse texture is the secret to professional results at home.
Light roast vs dark roast for cold extraction
Choosing the right roast level significantly impacts the final taste profile of your cold brew concentrate. Most enthusiasts recommend a medium to dark roast because the low-acid immersion process highlights the chocolatey, nutty, and smoky notes inherent in darker beans.
These robust flavors stand up well to dilution with water or milk. On the other hand, using a light roast can yield a unique, tea-like result with floral and fruity nuances.
However, light roasts are denser and often require a longer steeping time to extract their full potential in cold water. If you prefer a traditional, bold coffee flavor with low acidity, reach for a dark roast.
If you enjoy experimenting with complex acidity and bright berry notes, a light roast can be rewarding, though it may lack the classic body of a darker bean. Ultimately, the immersion method mellows acidity, making even the darkest roasts taste incredibly smooth and naturally sweet compared to hot brewing.
Freshness and bean quality tips
While cold brew is often praised as a way to use up older beans, using high-quality, freshly roasted coffee will dramatically elevate your experience. For the best results, purchase whole beans and grind them immediately before steeping to preserve the volatile aromatic compounds that provide flavor depth.
Look for beans with a ‘roasted on’ date within the last two to four weeks. Since the cold brew process is a slow extraction, any stale or ‘off’ flavors in old beans will be amplified over the long steeping period.
We recommend using single-origin beans if you want to highlight specific regional characteristics, or high-quality blends for a more balanced and consistent daily cup.
Additionally, always use filtered water; since coffee is 98% water, the quality of your tap water can introduce unwanted minerals or chlorine tastes that mask the delicate notes of your premium beans. Investing in specialty-grade Arabica ensures a clean finish and a superior caffeine kick every time.
The perfect cold brew ratio and measurements
Standard coffee-to-water ratio for concentrate
To master the art of cold brew, you must start with a reliable foundation. The gold standard for creating a versatile cold brew concentrate is a 1:4 ratio of coffee to water.
This concentrated approach is highly recommended because it saves fridge space and provides a robust base that can be diluted later. For a standard batch, combine one cup of coarsely ground coffee with four cups of filtered water.
Using a coarse grind is essential; fine grounds will lead to over-extraction and a muddy, bitter flavor profile. Once the steeping process is complete, you will have a potent liquid that is meant to be mixed with equal parts water, milk, or ice.
This 1:4 ratio ensures a smooth, low-acid result that highlights the chocolatey and nutty notes of your beans.
By starting with a concentrate, you gain total control over the final serving strength while ensuring that your brew remains fresh and flavorful for up to two weeks when stored properly in a sealed glass container.
How to measure by weight vs volume
Precision is the secret to consistency in every batch of cold brew you prepare. While using measuring cups is convenient, measuring by weight using a digital scale is the most accurate method for high-quality results.
Because different coffee roasts have varying densities, a cup of dark roast may weigh significantly less than a cup of light roast. For a professional-grade 1:4 ratio, aim for 100 grams of coffee to 400 grams of water.
If you do not have a scale, you can use the volume method, but be sure to scoop your grounds loosely rather than packing them down.
A common volumetric guideline is one ounce of dry coffee grounds for every eight ounces of water for a ready-to-drink version, or doubling the coffee for a concentrate.
Always remember that water quality matters just as much as coffee quantity, so use filtered water to avoid any metallic or chlorine aftertastes. Consistently weighing your ingredients allows you to replicate your favorite flavor profile every single time without any guesswork involved.
Adjusting strength for your personal taste
The beauty of DIY cold brew lies in your ability to customize the intensity to your exact preference. If you find the standard 1:4 concentrate too powerful, you can easily adjust your ratio to 1:8 for a ready-to-drink brew that requires no dilution.
For those who prefer a lighter, tea-like consistency, increasing the water volume will highlight subtle floral and fruity notes. Conversely, if you enjoy a heavy-bodied cup that stands up well to heavy cream and syrups, stick to a stronger 1:3 ratio for maximum caffeine kick.
Steep time also plays a critical role in strength; while 12 to 18 hours is the sweet spot for most, you can extend the steep time to 24 hours for a deeper, more intense profile. Just be cautious not to exceed 24 hours, as this can introduce unwanted bitterness.
Once your brew is ready, perform a taste test. If it is too strong, simply add small increments of water or milk until it reaches your desired balance. Your perfect cup is a matter of personal trial and discovery.
Step-by-step guide to making cold brew

Mixing the grounds and water
To begin your cold brew journey, you must start with a coarse grind size that resembles sea salt or peppercorns. This texture is vital because it prevents over-extraction and keeps the final beverage from becoming overly bitter or cloudy.
Once your beans are ready, aim for a standard ratio of 1:4 or 1:5 depending on whether you want a concentrate or a ready-to-drink beverage. Place your grounds into a large glass jar or specialized cold brew carafe and slowly pour filtered water over them.
It is essential to ensure all grounds are fully saturated by using a long spoon to gently fold the mixture together. Do not shake the container vigorously; instead, focus on a light stir that breaks up any dry clumps.
This initial contact sets the stage for a smooth extraction process, allowing the water to slowly pull out the sweet chocolate and nutty notes without the acidic bite typically associated with hot brewing methods.
Steeping times for room temperature vs fridge
The duration of your steep depends largely on your environment and flavor preferences. If you choose to leave your container on the kitchen counter at room temperature, the extraction happens faster due to the slightly higher kinetic energy of the water molecules.
In this scenario, aim for a window of 12 to 15 hours to achieve a balanced profile. Conversely, if you prefer a slower, more controlled extraction, place your vessel in the refrigerator.
Cold temperatures require more time to break down the coffee solubles, so you should let it sit for 18 to 24 hours for the best results. Steeping beyond the 24-hour mark is generally discouraged as it can lead to unpleasant woody or earthy flavors that mask the bean’s natural profile.
Always remember to keep the container tightly sealed to prevent the coffee from absorbing any stray food odors, ensuring your final batch remains crisp, clean, and incredibly refreshing when served over ice.
How to filter your coffee for a clean cup
Once the steeping process is complete, achieving a sediment-free finish is the final step toward a professional-grade beverage. Start by using a fine-mesh sieve to remove the bulk of the saturated grounds from the liquid.
For a truly polished and clear result, perform a second pass by pouring the liquid through a dampened paper coffee filter or a clean flour sack towel.
Wetting the filter beforehand is a pro tip that prevents the paper from absorbing your precious coffee concentrate while also removing any papery taste.
Allow the coffee to flow through via gravity; never squeeze the filter or grounds, as this forces fine particulates and bitter tannins into your carafe, resulting in a muddy texture. The end product should be a translucent, mahogany-colored liquid that highlights the delicate nuances of your chosen beans.
Store this concentrate in a sealed glass bottle in the fridge for up to two weeks, diluting with water or milk whenever you need a smooth caffeine boost.
How to serve and store your cold brew
Diluting the concentrate with water or milk
Once your cold brew has finished steeping, you are left with a potent concentrate that requires proper dilution before consumption. To achieve the perfect balance, start with a standard ratio of one part concentrate to one part filtered water or milk.
If you prefer a bolder, more robust kick, reduce the liquid mixer slightly to maintain that intense caffeine profile. For those who enjoy a smoother, creamier experience, incorporating dairy or plant-based milks like oat or almond can beautifully complement the low acidity of the brew.
It is essential to remember that cold brew is significantly stronger than traditional drip coffee, so experimenting with small increments is the best way to find your personal sweet spot.
Always pour your concentrate over fresh ice first to ensure the drink remains chilled while you slowly stir in your chosen diluent. This method allows you to customize the strength and texture to your exact preference every single time.
Shelf life and storage tips in the refrigerator
To maintain the peak flavor and freshness of your homemade cold brew, you must store it correctly within your refrigerator. Transfer your strained concentrate into an airtight glass container or a specialized carafe to prevent it from absorbing any unwanted odors from other foods in the fridge.
When kept in its concentrated form, your cold brew will stay fresh and delicious for up to two weeks, though the flavor profile is most vibrant during the first seven days.
It is highly recommended to store the brew as a concentrate rather than pre-diluted, as adding water or milk can significantly shorten its shelf life to just a few days.
Before every serving, give the container a gentle shake to reintegrate any natural oils that may have settled at the bottom. If you notice any sour smells or a significant loss in aroma, it is time to discard the batch and start a fresh brew for the best quality.
Creative ways to use cold brew ice cubes
One of the most effective solutions to prevent a watered-down drink is to create cold brew ice cubes using your extra concentrate. Simply pour your freshly filtered coffee into standard silicone ice trays and let them freeze completely overnight.
As these cubes melt in your glass, they infuse your drink with more coffee flavor rather than diluting it with plain water, ensuring your beverage remains strong from the first sip to the very last drop.
Beyond standard iced coffee, you can drop these cubes into a glass of milk for a slow-release latte experience that evolves as you drink. For a more indulgent treat, try blending these frozen coffee cubes with a splash of cream and vanilla syrup to create a quick, restaurant-style frappe.
These versatile cubes are also excellent for cooling down hot coffee instantly or adding a subtle caffeine boost to chocolate-based smoothies, making them a must-have staple in any coffee lover’s freezer for daily convenience.
Common cold brew mistakes and how to fix them
How to avoid bitter or sour flavors
Achieving the perfect flavor balance in cold brew requires precise attention to your grind size and steeping duration. If your coffee tastes unpleasantly sharp or sour, it is likely under-extracted, meaning the grounds were too coarse or didn’t soak long enough.
Conversely, a harsh bitterness usually stems from over-extraction caused by a grind that is too fine. To fix this, always use a consistent extra-coarse grind that resembles sea salt. This allows water to flow through the grounds slowly without pulling out dry tannins.
Additionally, monitor your timing closely; most batches reach their peak profile between 12 to 18 hours at room temperature. If you prefer a fridge steep, extend that time to 24 hours.
If the final concentrate is still too intense, remember that cold brew is a concentrate intended to be diluted with water or milk before serving. Adjusting these variables ensures a smooth, chocolatey result every single time you brew.
Dealing with cloudy or muddy coffee
A common frustration for home baristas is a cup of cold brew that looks murky or feels gritty on the tongue. This sediment is usually the result of poor filtration or using a blade grinder that produces ‘fines’ or tiny dust-like particles.
To ensure a crystal-clear appearance, switch to a high-quality burr grinder which provides a uniform particle size. When the steeping process is complete, avoid the temptation to squeeze the coffee grounds or the filter bag, as this forces fine silt and bitter oils into your clean extract.
Instead, let gravity do the work. For the best results, implement a double-filtration method by passing your brewed coffee through a stainless steel mesh strainer first, followed by a secondary pass through a paper coffee filter or a fine cheesecloth.
This two-step approach effectively removes the smallest sediments, leaving you with a clean, crisp mouthfeel and a professional-looking beverage that stays fresh in the refrigerator for up to two weeks.
Why water quality matters for the final taste
Since cold brew is composed of approximately 98% water, the quality of your tap can make or break the final product. Using hard water containing high mineral levels can lead to a flat, metallic, or chalky flavor profile that masks the delicate notes of your coffee beans.
On the other hand, highly softened or distilled water lacks the necessary minerals to extract the full range of flavors, often resulting in a dull cup.
To optimize your brew, always start with filtered or bottled spring water to ensure a neutral base that allows the bean’s natural acidity and sweetness to shine.
Temperature also plays a vital role; while it is called ‘cold’ brew, starting with room temperature water can actually help kickstart the extraction process more effectively than ice-cold water.
By focusing on the purity and mineral balance of your water source, you provide a clean canvas for the coffee oils to emulsify, resulting in a significantly more vibrant and refreshing drink.
Frequently Asked Questions
What is the best coffee-to-water ratio for cold brew?
A standard ratio is 1:8 for a ready-to-drink beverage, or 1:4 if you are making a concentrated base. For example, use 1 cup of ground coffee to 4 cups of water for a concentrate that you can later dilute with milk or water.
What grind size should I use for cold brew?
You should use a coarse, even grind similar to the consistency of sea salt or breadcrumbs. Avoid fine grinds, as they can lead to over-extraction, bitterness, and difficulty filtering the sediment out of the final brew.
How long does cold brew need to steep?
Cold brew typically needs to steep for 12 to 24 hours at room temperature or in the refrigerator. Steeping for less than 12 hours may result in a weak flavor, while exceeding 24 hours can extract woody, bitter notes from the beans.
Do I need special equipment to make cold brew at home?
No special equipment is required; you can make cold brew using a simple glass jar and a fine-mesh sieve or cheesecloth. While dedicated cold brew makers and French presses make the process easier, any container that can hold coffee and water will work.
Should I steep cold brew in the fridge or on the counter?
You can do either, but room temperature steeping is generally faster and extracts more complex flavors. If you choose to steep in the refrigerator, it is recommended to lean toward the full 24-hour mark to ensure complete extraction.
How long does homemade cold brew stay fresh?
Cold brew concentrate can last up to two weeks in the refrigerator when stored in a sealed container. If you have already diluted the coffee with water or milk, it is best consumed within 2 to 3 days for optimal flavor.
Conclusion
Making smooth and refreshing cold brew at home is a simple process that anyone can master. By selecting quality beans, maintaining a coarse grind, and allowing for a slow steep, you can enjoy a versatile coffee concentrate that lasts all week. Don’t be afraid to experiment with different water ratios and steeping times to find your perfect flavor profile. Now that you have the tools and knowledge, it is time to start brewing your own.