How To Make Starbucks Cold Brew Concentrate Pods
To replicate Starbucks’ smooth, concentrated cold brew at home, you’re likely wondering how to make starbucks cold brew concentrate pods without a proprietary machine. The core challenge is achieving that signature low-acid, intensely caffeinated flavor using simple tools. You’re in the right place: we’ll show you how to use any pod-style brewer or even a DIY method with fine-ground coffee and a steeped-water technique to create a spot-on concentrate.
What Are Starbucks Cold Brew Concentrate Pods?
How they differ from regular coffee pods
Starbucks Cold Brew Concentrate Pods are not single-serve coffee pods like K-Cups. Instead, they are designed to produce a highly concentrated cold brew base that you dilute with water or milk.
Regular coffee pods brew a ready-to-drink cup immediately, whereas these pods require a 12-24 hour steep in cold water to extract a smooth, low-acid concentrate. The key difference lies in the grind size: cold brew pods use a coarse, uniform grind to prevent over-extraction and bitterness during the long steep.
Additionally, the pod itself is typically a resealable filter bag or a reusable container, not a single-use plastic cup. This method yields a concentrate that is 2-3 times stronger than regular brewed coffee, allowing you to customize your drink strength.
To use them, you simply submerge the pod in a pitcher of cold water, refrigerate, and then remove the pod after steeping—no heat or machines required.
Why homemade pods save money
Making your own Starbucks Cold Brew Concentrate Pods at home can cut costs by up to 70% compared to buying pre-made bottles or café drinks. A single bottle of Starbucks Cold Brew Concentrate costs around $6-$8 and yields about 4-5 servings.
In contrast, a homemade pod using Starbucks ground coffee (like their Cold Brew Blend) costs roughly $1.50 per batch of 8 servings, including the reusable filter bag. The savings come from buying whole bean or pre-ground coffee in bulk and avoiding packaging markup.
You also eliminate waste from disposable pods and plastic bottles. Over a month, making 4 batches at home can save $20-$30, especially if you drink cold brew daily. Plus, you control the strength and flavor by adjusting coffee-to-water ratios.
The initial investment in a reusable cold brew maker or filter bags (around $10-$15) pays off within 2-3 uses, making this a budget-friendly, eco-conscious choice for cold brew lovers.
Key ingredients you need
To replicate Starbucks Cold Brew Concentrate Pods at home, you need just three core ingredients: coarse-ground coffee, cold filtered water, and a steeping vessel.
Start with Starbucks Cold Brew Blend or a dark roast like Starbucks French Roast—these beans are specifically roasted to create a smooth, chocolatey concentrate with low acidity. Grind the beans coarsely (similar to sea salt) to avoid a muddy, over-extracted brew.
You’ll also need cold, filtered water to ensure clean flavor; tap water with chlorine can ruin the taste. For the pod itself, use reusable cold brew filter bags (like those from Takeya or CoffeeSock) or a French press if you don’t have bags.
Optional add-ins include a pinch of salt to reduce bitterness or cinnamon sticks for warmth. The ratio is key: 1 cup of coarse coffee to 4 cups of water for a concentrate. No sugar, cream, or additives are needed—just these basics for a café-quality base you can customize later.
Tools You Need to Make Cold Brew Pods at Home
Best coffee grind size for cold brew
For authentic Starbucks-style cold brew concentrate, grind your coffee beans to a coarse, uniform consistency, similar to breadcrumbs or kosher salt. This is crucial because cold brewing uses a long, slow steeping process—typically 12 to 24 hours—and a fine grind will over-extract, producing a bitter, muddy concentrate.
A coarse grind allows water to gently extract the rich, chocolatey and nutty flavors without drawing out harsh tannins. If you don’t have a burr grinder, ask your local roaster to grind for the French press or cold brew setting.
Avoid pre-ground coffee, as its fine texture will clog your pod filters and yield a cloudy, unbalanced brew. For the best results, use a medium-dark roast like Starbucks’ Komodo Dragon or Sumatra; their low acidity and heavy body shine in cold brew.
Remember: coarse grounds = smooth concentrate—this is the single most impactful step to mimic that signature Starbucks taste at home.
Choosing the right pod filters or bags
To make cold brew concentrate pods that rival Starbucks, you need high-quality, food-grade filter bags or reusable pods designed for immersion brewing. The best options are paper tea bags (like Fill-A-Bags) or reusable nylon/mesh cold brew bags with a fine weave.
Paper bags are disposable and convenient—simply fill, seal, and steep—but ensure they are unbleached and heat-sealable to avoid any off-flavors. Reusable mesh bags are eco-friendly and allow better water flow, but they must have a tight weave to prevent coffee sludge from escaping into your concentrate.
Avoid standard cheesecloth or thin nut milk bags; they let too many fines through, resulting in a gritty texture. For a true pod experience, consider pre-filled, compostable pods (like those from JavaPod) that fit your brewer, but if DIY-ing, use 4×6-inch paper filters with a heat sealer.
Whichever you choose, rinse the bag with hot water first to remove any paper taste and ensure a clean, Starbucks-quality concentrate.
Essential brewing equipment
To replicate Starbucks cold brew concentrate at home, you need a large glass jar or pitcher (64 oz or bigger) with a tight-fitting lid—glass is best because it won’t retain odors or leach chemicals.
A fine-mesh strainer or a dedicated cold brew maker (like the Takeya or OXO) simplifies filtering, but you can also use a standard French press.
A digital kitchen scale is non-negotiable for consistency: use a 1:4 coffee-to-water ratio (e.g., 1 cup coffee to 4 cups water) for a concentrate that mimics Starbucks’ bold strength. A burr grinder ensures uniform coarse grounds, while a long spoon helps stir the slurry.
Don’t forget a sealable container for storing the finished concentrate—a swing-top bottle works perfectly. Optional but helpful: a funnel for filling pods, a heat sealer if using paper bags, and a timer to track the 20-hour steep.
With these basics, you’ll consistently produce a smooth, non-acidic concentrate that tastes just like your favorite café’s.
How to Make Starbucks-Style Cold Brew Concentrate Pods
Step 1: Grind and fill the pods
Start by selecting high-quality, coarsely ground coffee beans to mimic Starbucks’ signature dark roast flavor. Use a ratio of 1 part coffee to 4 parts water for a strong concentrate. Grind the beans to a coarse consistency, similar to breadcrumbs, to avoid over-extraction and bitterness.
Fill resealable filter bags or reusable tea pods with the ground coffee, leaving room for water expansion. For a single serving, use about 2 tablespoons of coffee per pod. If using disposable pods, seal them tightly to prevent grounds from escaping.
For a bulk batch, prepare multiple pods at once and store them in an airtight container until ready to use. This step ensures a clean, sediment-free brew that captures the rich, smooth profile of Starbucks cold brew.
Step 2: Steep in cold water for 12-24 hours
Place the filled pods in a large pitcher or jar and cover with cold, filtered water at a 4:1 water-to-coffee ratio. Ensure the pods are fully submerged, using a weight if necessary. Seal the container and refrigerate immediately to maintain a consistent temperature.
Let the pods steep for 12-24 hours—the longer the steep, the stronger the concentrate. For a balanced flavor like Starbucks, aim for 18 hours. Avoid stirring or agitating during steeping, as this can release bitter compounds.
The cold extraction process slowly draws out smooth, low-acid flavors without heat, resulting in a concentrate that’s less acidic and more aromatic than hot-brewed coffee. Set a timer to track your steep time precisely.
Step 3: Remove pods and store concentrate
After steeping, carefully remove the pods from the water, allowing excess liquid to drip back into the container. Discard the used pods or compost the coffee grounds. For a clearer concentrate, strain the liquid through a fine-mesh sieve or cheesecloth to catch any remaining sediment.
Transfer the cold brew concentrate to a sealed glass bottle or jar and store it in the refrigerator. This concentrate can last up to two weeks when kept chilled. To serve, dilute with equal parts water or milk over ice, adjusting to taste.
For a Starbucks-style drink, add sweetener or vanilla syrup as desired. This method yields a smooth, versatile concentrate that replicates the bold, refreshing taste of store-bought pods without the cost.
Best Coffee Beans for Replicating Starbucks Flavor
Top Starbucks whole bean blends to use
To replicate Starbucks cold brew concentrate at home, start with their signature whole bean blends. Starbucks House Blend is a reliable choice, offering a balanced medium roast with notes of nuts and cocoa that create a smooth, familiar base.
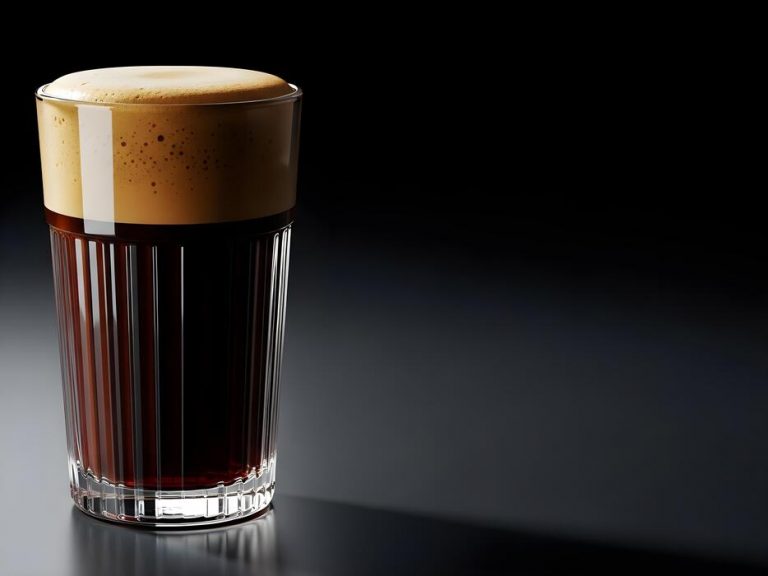
For a bolder, more intense concentrate similar to their Nitro Cold Brew, use Starbucks French Roast, which has a smoky, dark profile that holds up well to long steeping. Starbucks Veranda Blend is excellent for a lighter, subtly sweet concentrate with lower acidity.
If you want a classic Starbucks cold brew flavor, Starbucks Komodo Dragon Blend provides earthy, herbal notes that mimic their store-made version. Always buy whole beans and grind them yourself just before brewing to maximize freshness and extraction. Use a coarse grind (like sea salt) to avoid over-extraction and bitterness.
These blends are widely available at Starbucks stores, grocery chains, and online retailers. For best results, measure 1 cup of whole beans per 4 cups of cold water, steep for 20-24 hours at room temperature, then filter through a fine-mesh sieve or coffee filter.
Roast level tips for smooth concentrate
The roast level is critical for achieving Starbucks’ signature smooth, low-acidity cold brew concentrate. Dark roasts like Starbucks French Roast or Espresso Roast are ideal because they produce a rich, bold flavor with minimal bitterness when cold-brewed.
The cold extraction process naturally reduces acidity, so dark roasts yield a velvety, chocolatey concentrate without harshness. Medium roasts such as Starbucks House Blend or Guatemala Antigua offer a more nuanced flavor with subtle fruitiness, but they require careful steeping—aim for 20 hours to avoid sour notes.
Avoid light roasts entirely, as they can taste grassy and overly acidic in cold brew. For an extra-smooth result, use a coarse grind and steep at room temperature (not refrigerated) for 18-24 hours.
After steeping, filter twice: first through a fine-mesh sieve, then through a paper coffee filter to remove fine particles. This double filtration mimics the clarity of Starbucks’ concentrate. Always taste the concentrate before diluting; if it’s too strong, add water gradually.
Store the finished concentrate in an airtight container in the fridge for up to two weeks.
Where to buy similar beans
You can purchase Starbucks whole beans for cold brew concentrate at multiple convenient locations. Starbucks stores (both corporate and licensed) carry all their core blends year-round, including House Blend, French Roast, and Veranda Blend.
Grocery chains like Kroger, Safeway, and Publix stock Starbucks beans in the coffee aisle, often with frequent sales. Online retailers such as Amazon and Target offer bulk options (2-pound or 5-pound bags) for cost savings.
For a similar flavor profile without the Starbucks price tag, try Peet’s Major Dickason’s Blend (dark roast with deep chocolate notes) or Caribou Coffee Mahogany Blend (smooth with caramel undertones). Lavazza Super Crema is another excellent alternative, providing a creamy, low-acid concentrate.
For organic options, look for Equal Exchange Organic French Roast or Stumptown Hair Bender—both have the boldness and sweetness needed for cold brew. Always check the roast date; fresher beans (within 2-4 weeks) produce the best concentrate.
If buying in bulk, store beans in an airtight container in a cool, dark place to preserve flavor. Many local coffee roasters also offer custom dark roasts that can rival Starbucks’ taste.
Tips for Perfect Cold Brew Concentration Every Time

Water-to-coffee ratio for pods
To replicate Starbucks cold brew concentrate using their pods, start with the correct water-to-coffee ratio for a balanced, intense brew. Each Starbucks cold brew pod typically contains about 0.64 ounces (18 grams) of coarse-ground coffee.
For a standard concentrate, use 1 cup (8 fluid ounces) of cold, filtered water per pod. This yields a 1:4 ratio by volume, similar to Starbucks’ in-store concentrate, which is designed to be diluted with equal parts water or milk.
If you prefer a stronger base for iced drinks, reduce water to ¾ cup (6 ounces) per pod for a 1:3 ratio. For a milder concentrate, increase to 1¼ cups (10 ounces) for a 1:5 ratio. Always use cold water to prevent over-extraction and bitterness.
Stir the water and pod mixture gently to ensure saturation, then steep. This precise ratio ensures your final drink matches the bold, smooth flavor of Starbucks, whether you’re making iced coffee or lattes.
How to adjust steeping time
Steeping time is key to achieving the perfect concentration without bitterness. Starbucks recommends steeping their cold brew pods for 12 to 24 hours at room temperature or in the refrigerator. For a concentrate that mimics their café style, aim for 18 hours—this extracts rich, chocolatey notes without over-extracting bitter compounds.
If you prefer a lighter, more tea-like brew, steep for 12 to 14 hours. For an extra-strong concentrate that stands up to milk, extend to 20-24 hours, but check at 18 hours to avoid harshness.
Always use a timer and avoid steeping beyond 24 hours, as the coffee can become stale or overly acidic. To speed up, steep at room temperature for 14-16 hours (faster extraction) or refrigerate for 18-24 hours for a smoother result. After steeping, remove the pod immediately.
Adjust based on your taste: shorter for brighter notes, longer for deeper body. This flexibility lets you customize strength while maintaining Starbucks’ signature smoothness.
Filtration tips to avoid sediment
Even with Starbucks pods, fine sediment can sneak into your concentrate, causing a gritty texture. To ensure a clean, smooth brew, follow these filtration steps. First, after steeping, remove the pod carefully to avoid squeezing out sediment—gently lift it out with a spoon or tongs.
Then, pour the concentrate through a fine-mesh strainer lined with a coffee filter or a nut milk bag into a clean container. This double-filtration catches tiny particles that the pod’s mesh might miss.
For even clearer results, let the concentrate sit for 5-10 minutes after pouring, allowing any remaining sediment to settle at the bottom, then decant the clear liquid, leaving the dregs behind. If you’re using a French press, press slowly and avoid disturbing the grounds.
Alternatively, use a dedicated cold brew filter bag for zero sediment. Avoid stirring after steeping, as it re-suspends particles. These tips ensure your Starbucks-style concentrate is silky, not sandy, perfect for sipping or mixing into iced drinks without a grainy finish.
How to Use Your Homemade Cold Brew Concentrate
Serving over ice with water or milk
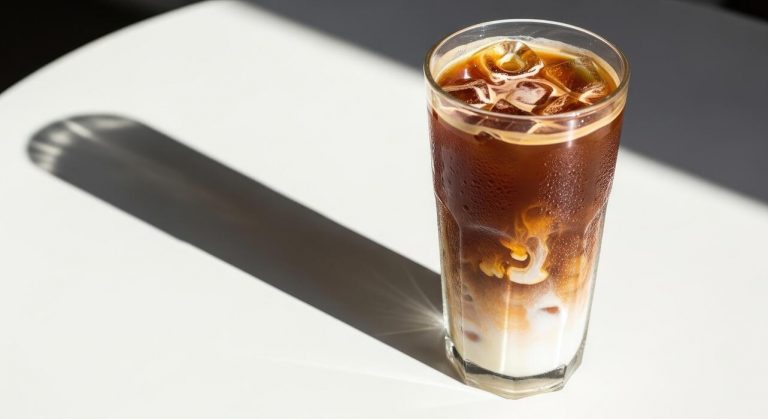
To enjoy your homemade cold brew concentrate like a Starbucks iced coffee, start by filling a tall glass with ice. The key is dilution: cold brew concentrate is strong, so mix one part concentrate with one part water or milk—or adjust to your taste.
For a classic black coffee, use filtered water; for creaminess, opt for whole milk, oat milk, or almond milk. Stir well to combine, as the concentrate settles. This ratio mimics the balanced strength of Starbucks cold brew, which is typically served over ice with a splash of water or milk.
If you prefer a bolder flavor, use less diluent; for a milder cup, add more. Remember, the ice will melt slightly, further mellowing the concentrate. For a quick morning boost, prepare your glass the night before and refrigerate—just stir before drinking.
Experiment with ratios until you find your perfect cup, and enjoy the smooth, low-acid taste of homemade concentrate that rivals your favorite café order.
Flavor add-ins like vanilla or caramel
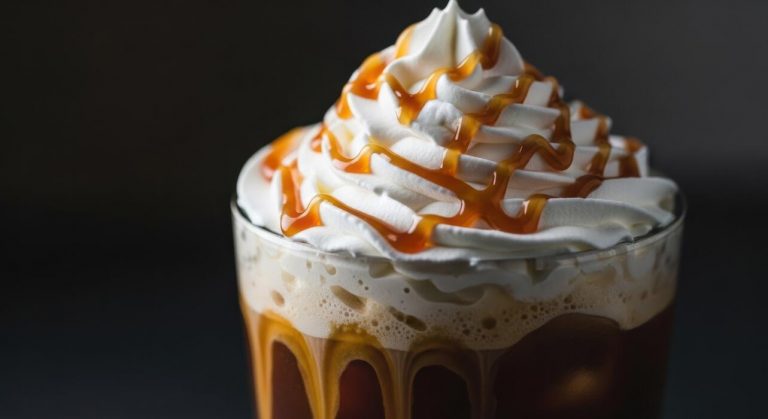
Elevate your homemade cold brew concentrate with Starbucks-inspired flavor add-ins. For a vanilla twist, stir in 1-2 teaspoons of vanilla syrup or a dash of vanilla extract along with your milk or water. Caramel lovers can add a tablespoon of caramel sauce or homemade caramel syrup, blending until smooth.
To mimic Starbucks’ sweet cream cold brew, mix heavy cream, vanilla syrup, and a pinch of salt, then pour over your concentrate and ice. For sugar-free options, use stevia-based vanilla or caramel drops. Spices like cinnamon or nutmeg can also add warmth without extra sugar.
Start with small amounts and taste as you go, since the concentrate’s boldness can mask flavors. Remember, these add-ins work best when stirred into the diluent first, ensuring even distribution. By customizing your cup, you can recreate your favorite café flavors at home, saving money while controlling sweetness and ingredients.
Storing concentrate for up to 2 weeks
Proper storage ensures your homemade cold brew concentrate stays fresh and flavorful for up to two weeks. After brewing, transfer the concentrate to a clean, airtight glass container—like a mason jar or a bottle with a tight lid.
Refrigerate immediately; do not leave it at room temperature, as this can encourage bacterial growth. For best quality, use within 10-14 days, though it remains safe to drink for longer if kept cold. Avoid storing in plastic, as it can absorb odors and affect taste.
Label the container with the date made to track freshness. If you notice any off smells or mold, discard the batch. For convenience, portion the concentrate into smaller jars to minimize air exposure each time you open one. Shake or stir before use, as sediment may settle.
This storage method mirrors how Starbucks handles their cold brew concentrate, ensuring you always have a ready-to-mix base for quick, café-quality iced coffee at home.
Common Mistakes When Making Cold Brew Pods
Using too fine a grind
A common mistake when replicating Starbucks cold brew concentrate pods is using a grind that is too fine, like espresso or drip coffee. Starbucks uses a coarse, uniform grind for their cold brew to ensure proper extraction without over-extracting bitter compounds.
Fine grinds increase surface area, leading to a muddy, over-extracted, and bitter concentrate because the water can’t flow evenly through the grounds. To fix this, aim for a grind consistency similar to raw sugar or coarse sea salt.
If your coffee tastes harsh or has a powdery sediment, your grind is likely too fine. Use a burr grinder set to a coarse setting, or buy pre-ground coffee labeled for cold brew. This simple adjustment ensures a smooth, balanced concentrate that mimics the clean, rich flavor of Starbucks.
Remember, coarser grounds also make filtering easier, preventing clogged filters and cloudy results.
Over-steeping or under-steeping
Timing is critical when making cold brew concentrate pods, and straying from the recommended steep time can ruin your batch. Starbucks typically steeps their cold brew for 20 to 24 hours at room temperature to achieve a balanced, non-bitter concentrate.
Over-steeping (beyond 24 hours) extracts too many tannins and bitter compounds, resulting in a harsh, unpleasant flavor that no amount of dilution can fix. Under-steeping (less than 16 hours) yields a weak, watery concentrate lacking the bold coffee punch you expect.
To avoid this, set a timer and use a consistent water-to-coffee ratio, such as 1:4 for a strong concentrate. Place your pods in a sealed container, cover with cool filtered water, and let them steep undisturbed. After steeping, remove the pods promptly.
This precise timing guarantees a smooth, full-bodied concentrate that tastes like the real thing.
Skipping the dilution step
Many people mistakenly drink cold brew concentrate straight from the pod, expecting it to taste like a regular iced coffee. Starbucks cold brew concentrate is designed to be diluted with water or milk at a 1:1 ratio (or to taste), as it is twice as strong as regular brewed coffee.
Skipping dilution results in an overpowering, syrupy, and overly caffeinated drink that can be unpleasant and even cause stomach upset. To enjoy a perfect cup, pour your concentrate over ice, then add equal parts cold water, milk, or a dairy-free alternative.
For a Starbucks-style iced coffee, use 1 part concentrate to 1 part water. If you prefer a creamier texture, try 1 part concentrate to 1 part oat milk. Always taste and adjust—the goal is a smooth, balanced beverage that highlights the coffee’s natural sweetness without bitterness.
This step transforms your concentrate into a refreshing, drinkable coffee.
Frequently Asked Questions
What are Starbucks cold brew concentrate pods?
Starbucks cold brew concentrate pods are single-serve packets of concentrated cold brew coffee. They are designed to be mixed with water or milk to quickly make a cold brew-style beverage without the traditional 20-hour steep time.
How do I use Starbucks cold brew concentrate pods to make a drink?
To use a pod, empty the contents into a glass. Add 1 cup (8 oz) of cold water or milk for a standard strength, or adjust to taste. Stir well, add ice, and enjoy. Each pod typically makes one 12-16 oz serving.
Can I make hot coffee with Starbucks cold brew concentrate pods?
Yes, you can make hot coffee by mixing the pod’s concentrate with hot water instead of cold. However, the flavor is optimized for cold brewing, so the result may be less smooth than traditional hot coffee.
How much water or milk should I add to a Starbucks cold brew concentrate pod?
For a standard strength, add 1 cup (8 oz) of cold water or milk per pod. For a stronger brew, use less liquid (e.g., 6 oz), or for a milder taste, use more (e.g., 10-12 oz). Adjust to your preference.
Can I use Starbucks cold brew concentrate pods in a SodaStream or with sparkling water?
Yes, you can mix the concentrate with cold sparkling water for a fizzy cold brew. Simply empty the pod into a glass, add sparkling water to taste, and stir gently to preserve carbonation.
Are Starbucks cold brew concentrate pods dairy-free?
Yes, the concentrate pods themselves are dairy-free. They contain only coffee and water. You can add any milk or milk alternative (e.g., almond, oat, soy) to create your preferred drink.
How should I store unused Starbucks cold brew concentrate pods?
Store unopened pods in a cool, dry place away from direct sunlight. Once opened, use the entire pod immediately, as the concentrate is not resealable. Do not refrigerate or freeze unopened pods.
Can I make a larger batch of cold brew using multiple Starbucks concentrate pods?
Yes, you can combine multiple pods to make a larger batch. For example, use 4 pods with 4 cups (32 oz) of water or milk to create a pitcher. Stir well and refrigerate for up to 3-4 days.
Conclusion
Mastering homemade Starbucks-style cold brew concentrate pods is simpler than you think—just portion coffee grounds into filter bags, steep in cold water for 16-24 hours, and store the concentrate for up to two weeks. The key takeaways are controlling strength, saving money, and reducing waste. Experiment with roast profiles to find your perfect balance. Enjoy café-quality cold brew anytime, right from your own kitchen.