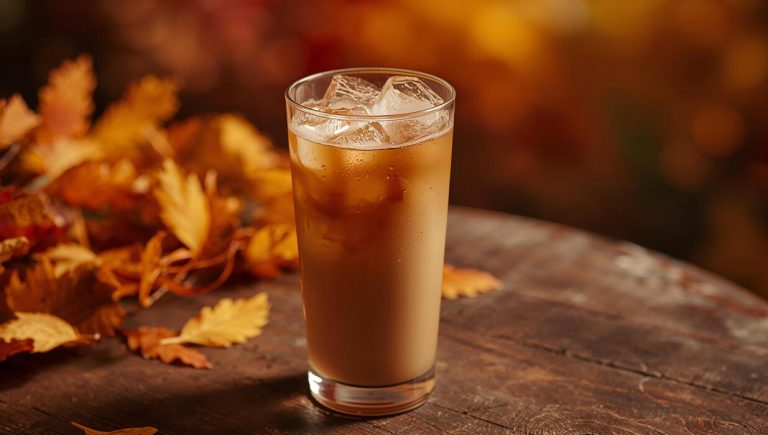
How To Make Chilled Coffee At Home
Craving a refreshing caffeine fix without the coffee shop price tag? Learning how to make chilled coffee at home is easier than you think, and you likely already have everything you need in your kitchen. Whether you prefer a lightning-fast iced pour or a smooth, overnight cold brew, this guide delivers the perfect solution. We will walk you through the simplest methods to achieve bold flavor and icy satisfaction in minutes.
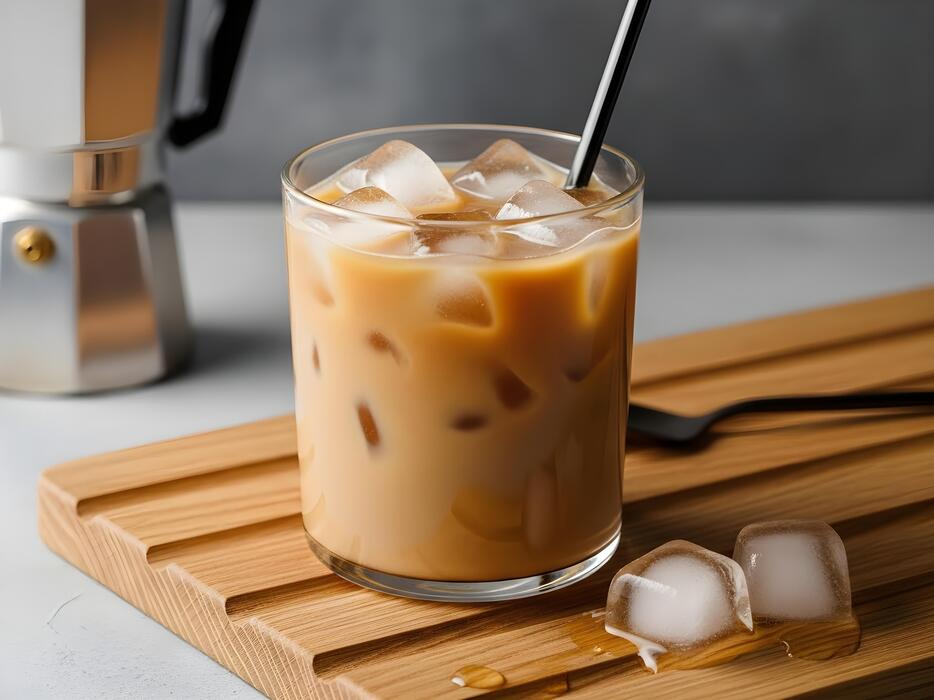
Different ways to make chilled coffee at home
The difference between iced coffee and cold brew
Understanding the distinction between these two methods is essential for mastering chilled coffee at home. Iced coffee is simply hot-brewed coffee that is cooled down and poured over ice, resulting in a familiar, bright flavor profile with noticeable acidity.
Because it is brewed quickly with hot water, the extraction happens fast, but you must brew it at double strength to prevent it from becoming watery when the ice melts.
In contrast, cold brew is never exposed to heat; instead, coarse grounds steep in room temperature water for up to twenty-four hours.
This slow process creates a concentrated syrup that is significantly lower in acidity and naturally sweeter, offering a velvety mouthfeel that lacks the bitterness often found in hot extractions. Choosing between them depends on your preference for a crisp, refreshing bite versus a smooth, chocolatey finish.
Both serve as excellent foundations, but their chemical compositions differ greatly due to the temperature of the water used during the initial brewing phase.
Quick methods for instant cravings
When you need a cold caffeine fix immediately, the flash chilling technique, also known as Japanese-style iced coffee, is your best solution. To execute this, replace half of your brewing water with ice cubes placed directly in the carafe or dripper.
Brew your coffee using a pour-over method with the remaining hot water; as the concentrated coffee drips onto the ice, it chills instantly while locking in the vibrant aromatic oils that are often lost during slow cooling.
This method ensures your drink is cold the moment it hits your glass without tasting diluted. Alternatively, for the fastest possible results, you can use high-quality instant coffee dissolved in a small amount of warm water, then topped with cold milk and plenty of ice.
This bypasses the brewing wait time entirely. Always remember to use large ice cubes if possible, as they have less surface area and melt slower than crushed ice, preserving the bold integrity of your homemade beverage throughout the entire drinking experience.
Slow-steeped techniques for better flavor
For those who prioritize depth and a mellow profile, the slow-steeping method is the gold standard for home preparation. Start by using a coarse grind size, similar to sea salt, to ensure the water can flow freely around the particles without over-extracting bitter tannins.
Combine your grounds and filtered water in a large glass jar or a French press using a one-to-eight ratio for a versatile concentrate. Let the mixture sit undisturbed on your counter or in the refrigerator for twelve to eighteen hours.
This patient approach allows the water to gently pull out the nuanced sugars and subtle notes from the beans. Once the time is up, filter the liquid through a fine-mesh sieve or a paper filter to achieve a crystal-clear consistency.
The resulting concentrate is incredibly potent and can be stored in the fridge for up to two weeks. When you are ready to serve, simply dilute your brew with water or your favorite creamy plant-based milk for a professional-quality chilled coffee experience.
How to make classic iced coffee with a drip brewer

Brewing a double-strength concentrate
To master how to make chilled coffee at home using a standard drip machine, you must start by brewing a double-strength concentrate. The primary challenge with iced coffee is that melting ice cubes will inevitably dilute your drink, turning a robust cup into a watery disappointment.
By using the same amount of coffee grounds but halving the amount of hot water in your reservoir, you create a potent base that maintains its structural integrity when poured over ice. Ensure your drip brewer is clean and uses a paper filter to achieve a crisp, sediment-free profile.
Once the brewing cycle finishes, you will have a rich, dark liquid that smells intense. This concentrated approach is the secret to a professional-grade beverage. It ensures that as the temperature drops and the ice melts, the flavor profile remains balanced, bold, and refreshing.
This method is the most efficient way to utilize your existing kitchen equipment for high-quality results every single morning without needing expensive specialized tools or gadgets.
The best ratio of coffee grounds to water
Precision is the key to success when determining the best ratio of coffee grounds to water for drip-style iced coffee. For a standard hot cup, most enthusiasts use a 1:16 ratio, but for a chilled version, you should aim for a 1:8 ratio of coffee to water.
This translates to roughly four rounded tablespoons of medium-ground coffee for every eight ounces of water. Using a kitchen scale for measurement is highly recommended to ensure consistency, as volume can vary based on the roast level and grind size.
If you prefer a bolder taste, you can slightly increase the grounds, but avoid grinding too fine, as this can lead to over-extraction and bitterness in your final cup. A medium-coarse grind works best for drip brewers, allowing the water to flow through the grounds at an optimal rate.
This specific ratio accounts for the volume of ice you will add later, ensuring that the final dilution results in a perfectly balanced, flavorful glass of coffee that tastes like it came from a cafe.
How to cool your coffee fast without losing flavor
The final step in the process is learning how to cool your coffee fast without losing flavor or aroma. Do not leave the hot carafe on the warming plate, as heat will continue to cook the oils and create a sour taste.
Instead, immediately transfer the hot concentrate into a glass pitcher or a cocktail shaker. If you are in a rush, a cocktail shaker filled with ice is the most effective tool; shaking the coffee for thirty seconds provides instant aeration and rapid cooling.
Alternatively, you can use ‘coffee ice cubes’ made from leftover brew to prevent any dilution whatsoever. If using regular ice, fill a tall glass to the brim with large cubes before pouring the hot liquid over them.
This thermal shock method locks in the bright acidity and floral notes that are often lost during slow cooling.
For the best experience, add your sweeteners or syrups while the coffee is still warm so they dissolve completely, then finish with a splash of milk or cream once the liquid is thoroughly chilled.
Step-by-step guide to DIY cold brew coffee
Choosing the right coarse grind size
The foundation of successful cold brew starts with the texture of your coffee beans. Unlike traditional hot drip coffee, you must use a consistent extra-coarse grind that resembles sea salt or peppercorns.
Using a fine grind will result in an over-extracted, bitter brew that is difficult to filter, often leading to a muddy texture. By selecting a coarse setting, you ensure that the water extracts the smooth chocolatey and nutty notes without pulling out the harsh acidity.
If you are grinding at home, a burr grinder is highly recommended over a blade grinder to achieve the uniformity required for slow extraction. If you buy pre-ground coffee, look specifically for bags labeled for cold brew or French press.
This specific surface area allows the water to saturate the grounds evenly over several hours, creating a concentrated syrup that serves as the perfect base for your chilled drinks. Remember, the quality of your grind directly dictates the clarity and sweetness of the final glass.
Steeping times for room temperature vs fridge
Time is the substitute for heat in the cold brewing process, and where you store your vessel determines your waiting period. If you choose to steep your coffee at room temperature on the counter, the extraction happens faster, typically requiring between 12 to 15 hours.
This method often yields a bolder profile with more pronounced aromatics. Conversely, steeping your coffee inside the refrigerator slows the molecular movement, requiring a longer duration of 18 to 24 hours to reach peak flavor.
The fridge method is often preferred for those seeking the mellowest possible taste with almost zero bitterness. It is crucial not to exceed the 24-hour mark, as over-steeping can introduce woody or vegetal flavors that ruin the profile.
Once your chosen time has elapsed, immediately separate the grounds from the liquid to stop the extraction process. This control over timing allows you to customize the strength and caffeine concentration of your DIY concentrate to suit your personal palate perfectly.
Filtering methods for a clean cup
Achieving a professional, sediment-free finish requires a diligent approach to filtration. Start by pouring your steeped mixture through a fine-mesh stainless steel sieve to remove the largest coffee particles.
For a truly crisp and polished result, perform a secondary strain using a high-quality paper filter or a clean nut milk bag. Paper filters are particularly effective because they trap the fine particulates and oils that can make chilled coffee look cloudy or taste heavy.
If you find the flow is too slow, avoid the urge to squeeze the filter, as this forces bitter sediment into your clean concentrate; instead, let gravity do the work.
Once filtered, you are left with a pure coffee concentrate that can be stored in an airtight glass jar for up to two weeks. This clean base ensures that when you finally dilute your brew with water or milk, the vibrant and refreshing flavors remain the star of the show.
Proper filtration is the final step in transforming a DIY project into a cafe-quality beverage.
How to make Japanese-style flash chilled coffee
Why brewing directly over ice works
The Japanese flash chilling method, often called Aiskohii, relies on the scientific principle of instantaneous temperature reduction to preserve delicate aromatic compounds.
Unlike cold brew, which steeps for hours and often loses its high-frequency acidity, brewing hot water directly over ice locks in volatile oils and bright floral notes before they can oxidize or dissipate.
As the concentrated hot coffee hits the ice, it undergoes a rapid phase change that results in a crisp, clean mouthfeel and a vibrant flavor profile.
This technique ensures that the beverage is served at its peak freshness, avoiding the stale, bitter aftertaste frequently associated with coffee that has been left to cool slowly at room temperature.
By utilizing a standard pour-over dripper, you can achieve a professional-grade result that highlights the complex characteristics of the bean, providing a refreshing and sophisticated alternative to traditional iced methods while maintaining the structural integrity of the coffee’s original flavor chemistry.
Calculating the ice-to-water weight ratio
Success in flash chilling depends entirely on the precision of your brewing ratio, as you must account for the dilution caused by the melting ice.
A standard starting point is the 60:40 rule, where 60% of your total liquid weight is hot water and 40% is ice placed directly in the carafe.
For example, if your target is 500g of total coffee, you would use 200g of ice and 300g of hot water while keeping your coffee grounds dose consistent with a 1:15 or 1:16 ratio.
This concentrated hot extraction ensures that even after the ice melts, the final drink maintains its optimal body and strength. Using a digital scale is essential for this process to ensure that the ice melts completely just as the final drop of coffee leaves the filter.
If your coffee tastes too weak, simply increase the ground coffee dose slightly or adjust the water-to-ice balance to favor a higher concentration of hot liquid during the initial extraction phase.
Best coffee beans for bright iced flavors
To maximize the potential of the flash chill method, you should select beans that possess inherent acidity and fruit-forward profiles. Light to medium roasts from high-altitude regions like Ethiopia, Kenya, or Colombia are ideal because their complex citrus and berry notes are amplified by the rapid cooling process.
These origins typically offer a tea-like clarity that shines when served cold, whereas darker roasts can sometimes taste overly charred or ashy when iced. Look for processing methods like washed or honey-processed, which contribute to a cleaner finish and more defined flavor separation.
When grinding your beans, aim for a slightly finer setting than you would use for a standard hot pour-over; this compensates for the reduced volume of hot water and ensures a full extraction within a shorter contact time.
By choosing high-quality, specialty-grade beans with vibrant flavor descriptors, you create a home-brewed chilled coffee that rivals the complexity of a fine wine, offering a refreshing experience that highlights the unique terroir of the coffee’s origin.
Essential tools for home coffee chilling
Must-have pitchers and storage containers
To master the art of chilled coffee, you need dedicated vessels that maintain freshness and prevent flavor contamination. Invest in a high-quality glass pitcher with an airtight seal to ensure your cold brew concentrate or iced coffee doesn’t absorb odors from your refrigerator.
Borosilicate glass is the gold standard here because it resists thermal shock, allowing you to pour warm coffee directly into the container without risk of cracking.
For those making large batches, a pitcher with a built-in fine mesh filter simplifies the process by allowing you to steep grounds and strain them in one single step. Beyond the brewing stage, consider the storage of your finished product.
Using dark-tinted or opaque containers can help protect the coffee from light exposure, which can degrade the delicate oils over time.
Keeping your coffee in a sealed environment ensures that the vibrant, chocolatey, or fruity notes remain intact for up to two weeks, providing you with a convenient, ready-to-drink caffeine source every single morning.
Why a burr grinder matters for cold coffee
The secret to a smooth, non-bitter chilled coffee lies in the consistency of your grind, which is why a conical burr grinder is an essential tool for your home setup.
Unlike blade grinders that hack beans into uneven shards, a burr grinder produces uniform particles that ensure an even extraction rate. For cold brewing specifically, you require a very coarse, pebble-like grind that allows water to flow freely around the surface area over an extended period.
If your particles are too fine, you will end up with a muddy, over-extracted liquid that tastes unpleasantly sharp. By controlling the grind size precisely, you can dial in the exact flavor profile you prefer, whether you want a heavy body or a light, tea-like finish.
Furthermore, grinding your beans immediately before brewing preserves the volatile aromatics that are often lost in pre-ground bags. This commitment to fresh, uniform grounds is the single most effective way to elevate your homemade chilled coffee from basic to professional cafe quality without needing expensive espresso machinery.
Using a cocktail shaker for frothy textures
If you want to replicate the luxurious mouthfeel of a nitro cold brew or a classic Italian shakerato, a standard stainless steel cocktail shaker is your best friend.
This tool allows you to rapidly chill hot coffee while aerating the liquid to create a thick, velvety micro-foam head on top of your drink. Simply fill the shaker with ice, add your coffee and any desired sweeteners or syrups, and shake vigorously for at least fifteen seconds.
The mechanical action of shaking breaks down the proteins in the coffee, resulting in a creamy texture without necessarily needing to add dairy.
This method is also the most efficient way to incorporate flavors and emulsify ingredients like simple syrup or coconut milk, ensuring every sip is perfectly blended and ice-cold. If you do not own a professional shaker, a sturdy mason jar with a tight lid can serve as a functional substitute.
Mastering this technique transforms a flat cup of cold coffee into a sophisticated, textured beverage that feels like a treat, proving that specialized barware has a vital place in the modern home coffee bar.
Tips for better tasting chilled coffee
How to make coffee ice cubes to prevent watering down
One of the most common frustrations when learning how to make chilled coffee at home is the dilution that occurs as standard ice melts. To maintain a robust flavor profile from the first sip to the last, you should brew an extra pot of coffee specifically for freezing.
Allow the liquid to cool to room temperature before pouring it into clean silicone ice cube trays, which make removal much easier. For an elevated twist, consider adding a splash of vanilla extract or a pinch of cinnamon to the brew before freezing.
These coffee cubes act as a flavor reservoir; as they melt, they actually strengthen your drink rather than weakening it. This technique is particularly effective for iced lattes or cold brews that you intend to sip slowly over an afternoon.
By using high-quality beans for your cubes, you ensure that the integrity of your beverage remains consistent. Store the finished cubes in a sealed freezer bag to prevent them from absorbing unwanted food odors from your freezer compartment.
Simple syrup recipes that dissolve in cold liquid
Granulated sugar often fails to dissolve in cold beverages, leaving a gritty residue at the bottom of your glass. The secret to a professional-grade chilled coffee is creating a liquid sweetener that integrates seamlessly.
To make a basic simple syrup, combine equal parts water and sugar in a small saucepan, heating gently until the mixture becomes clear. Once cooled, this syrup will mix instantly into cold liquids without any agitation required.
You can easily customize this base by steeping ingredients like lavender, mint, or cocoa powder during the heating process. For a richer, caramel-like depth, try using brown sugar or honey as your primary sweetener source.
Always store your homemade syrups in a glass bottle within the refrigerator to keep them fresh for up to two weeks. This method allows you to control the exact sweetness level of your drink, ensuring a perfectly balanced flavor every time you brew at home.
Having a pre-made batch ready in the fridge significantly speeds up your morning routine while providing a café-quality experience.
Choosing the right milk and dairy-free creamers
The texture of your chilled coffee is heavily influenced by the fat content and consistency of your chosen whitener. If you prefer traditional dairy, whole milk or half-and-half provides a creamy mouthfeel that stands up well to strong coffee concentrates.
For those exploring plant-based alternatives, oat milk is the gold standard for cold drinks because of its natural sweetness and thick, velvety texture that mimics dairy remarkably well.
Almond milk offers a lighter, nuttier finish but can sometimes separate in acidic brews, so look for ‘barista blend’ versions specifically formulated for stability. Coconut milk adds a tropical flair and a pleasant richness, though it may slightly alter the primary coffee notes.
When adding creamers to cold coffee, always pour the milk over the ice first before adding the coffee to help the liquids emulsify naturally. Experimenting with different fat percentages and plant sources allows you to customize the viscosity and richness of your drink.
Proper aeration, such as using a handheld frother, can also enhance the experience by creating a light foam layer on top of your chilled beverage.
Popular iced coffee recipes to try today
How to make a vanilla sweet cream cold brew
To replicate this cafe favorite at home, start by preparing a concentrated cold brew base by steeping coarse coffee grounds in cold filtered water for at least twelve to eighteen hours.
Once strained, fill a tall glass with ice and pour in your coffee, leaving about two inches of space at the top for the cream.
The secret to the signature flavor lies in the homemade vanilla sweet cream, which you can create by whisking together heavy cream, 2% milk, and a splash of vanilla syrup until slightly thickened but still pourable. Gradually pour this mixture over your chilled coffee to create a beautiful cascading effect.
Using high-quality vanilla bean paste can elevate the flavor profile significantly, providing those distinct tiny specks and a deep aromatic finish. For a healthier alternative, you can substitute the dairy with a creamy oat milk and agave nectar blend.
This method ensures a velvety texture and a perfectly balanced sweetness that rivals any professional barista’s creation while saving you money.
Easy homemade iced mocha recipe
Creating a decadent iced mocha starts with a strong foundation of freshly brewed espresso or double-strength coffee that has been allowed to cool slightly. In a heat-safe glass, whisk together your hot coffee with two tablespoons of premium cocoa powder or chocolate ganache until completely smooth and free of lumps.
This step is crucial because the heat helps the chocolate dissolve properly, preventing a grainy texture in your finished drink. Fill a separate glass to the brim with large ice cubes, which melt slower than crushed ice and prevent your drink from becoming watered down.
Pour your chocolate-coffee mixture over the ice and stir in your choice of chilled whole milk or almond milk for a creamy consistency. To enhance the richness, add a tiny pinch of sea salt or a drop of peppermint extract for a seasonal twist.
Finish your masterpiece with a dollop of whipped cream and a light dusting of cocoa powder to achieve a professional look and a truly indulgent home-brewed treat.
Refreshing mint and tonic coffee variations
For a sophisticated and bubbly twist on traditional chilled coffee, the coffee tonic is an exceptional choice that is surprisingly simple to master.
Begin by placing a handful of freshly slapped mint leaves at the bottom of a glass to release their essential oils, then fill the glass with plenty of ice.
Pour in four to six ounces of premium tonic water, leaving enough room for a double shot of espresso or a concentrated cold brew float. Slowly pour the coffee over the back of a spoon to create distinctive visual layers that will impress any guest.
The citrusy notes of the tonic water perfectly complement the natural acidity of a light-roast Ethiopian coffee, resulting in a complex flavor profile that is incredibly refreshing on a hot day.
You can further customize this drink by adding a squeeze of fresh lime or a sprig of rosemary for an earthy aroma. This effervescent beverage provides a crisp, caffeinated kick that serves as the perfect palate cleanser and a unique alternative to dairy-based iced coffees.
Frequently Asked Questions
What is the easiest way to make chilled coffee at home?
The simplest method is brewing a strong pot of regular coffee and letting it cool before pouring it over ice. To prevent dilution, brew the coffee at double strength to account for the melting ice cubes.
How do I make cold brew coffee?
Combine coarsely ground coffee beans with cold water in a jar using a 1:4 ratio and let it steep for 12 to 24 hours. Strain the mixture through a coffee filter or fine-mesh sieve to create a smooth, low-acid concentrate that can be stored in the fridge.
How can I prevent my iced coffee from becoming watery?
You can prevent watery coffee by using coffee ice cubes, which are made by freezing leftover coffee in an ice tray. Alternatively, using the flash-chilling method of brewing hot coffee directly over a large amount of ice helps lock in flavor quickly.
Can I make chilled coffee using an espresso machine?
Yes, you can make an Iced Americano by pulling a fresh double shot of espresso and immediately pouring it over a glass filled with ice and cold water. This provides a crisp, bold flavor profile compared to standard drip coffee.
What is the best way to sweeten cold coffee?
Granulated sugar does not dissolve well in cold liquids, so it is best to use simple syrup or flavored syrups. You can also stir sugar into the coffee while it is still hot before the chilling process begins.
How long does homemade chilled coffee stay fresh?
Stored in an airtight container in the refrigerator, brewed coffee stays fresh for about 3 to 4 days. Cold brew concentrate lasts longer, maintaining its peak flavor for up to two weeks when kept chilled.
Conclusion
Mastering chilled coffee at home is both simple and rewarding. By choosing the right brewing method—whether it is cold brew or a quick iced pour—and experimenting with syrups and milk, you can recreate your favorite cafe drinks in your own kitchen. Not only will you save money, but you will also enjoy a fresher, customized beverage. So, grab your beans, start brewing, and enjoy the refreshing satisfaction of your perfect homemade chilled coffee today.