Nitro Coffee How To Make
If you are craving that velvety, Guinness-like texture but want to skip the expensive cafe prices, you are in the right place. Learning nitro coffee how to make at home is surprisingly simple once you have the right tools. Whether you use a dedicated nitro infuser or a whipped cream dispenser, we will show you how to transform standard cold brew into a creamy masterpiece.
What is Nitro Coffee and Why You Should Make It
The Difference Between Cold Brew and Nitro
To understand nitro coffee, you must first recognize that it begins with a base of high-quality cold brew.
While standard cold brew is made by steeping coarse grounds in room temperature water for 12 to 24 hours, nitro coffee takes this process a step further by infusing the liquid with nitrogen gas.
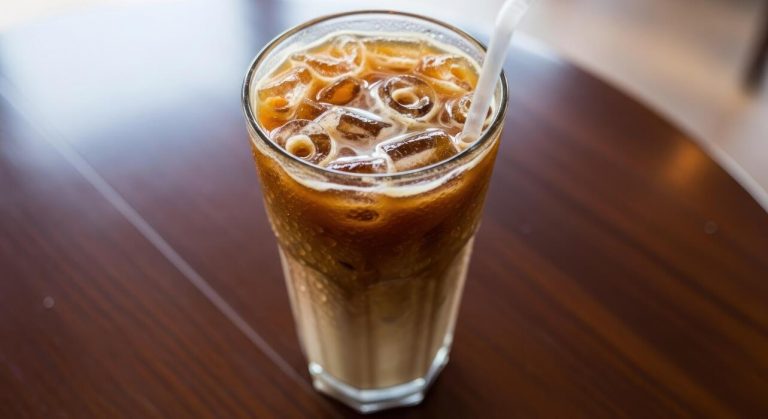
This transition from a simple chilled beverage to a pressurized masterpiece changes the physical state of the coffee entirely. Unlike regular cold brew, which is often served over ice and can become diluted, nitro coffee is typically served straight from a tap or a specialized dispenser.
The addition of nitrogen bubbles prevents the coffee from oxidizing as quickly, which helps maintain a fresher profile for a longer duration. When learning how to make it, you must start with a concentrated cold brew recipe to ensure the nitrogen has a robust foundation to interact with.
This distinction is vital because the gas requires a specific density to create the visual and textural effects that enthusiasts crave.
How Nitrogen Changes the Texture and Flavor
The primary reason people search for how to make nitro coffee is the unique sensory experience provided by the tiny nitrogen bubbles. Nitrogen is insoluble in liquid, meaning it creates a rich, velvety microfoam rather than the large, aggressive bubbles found in carbonated sodas.
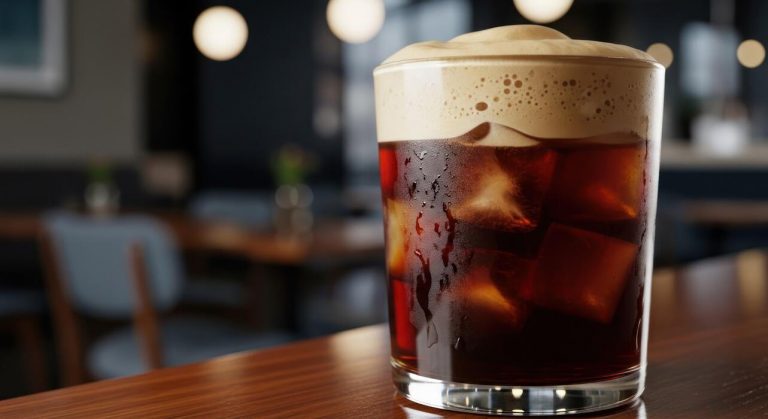
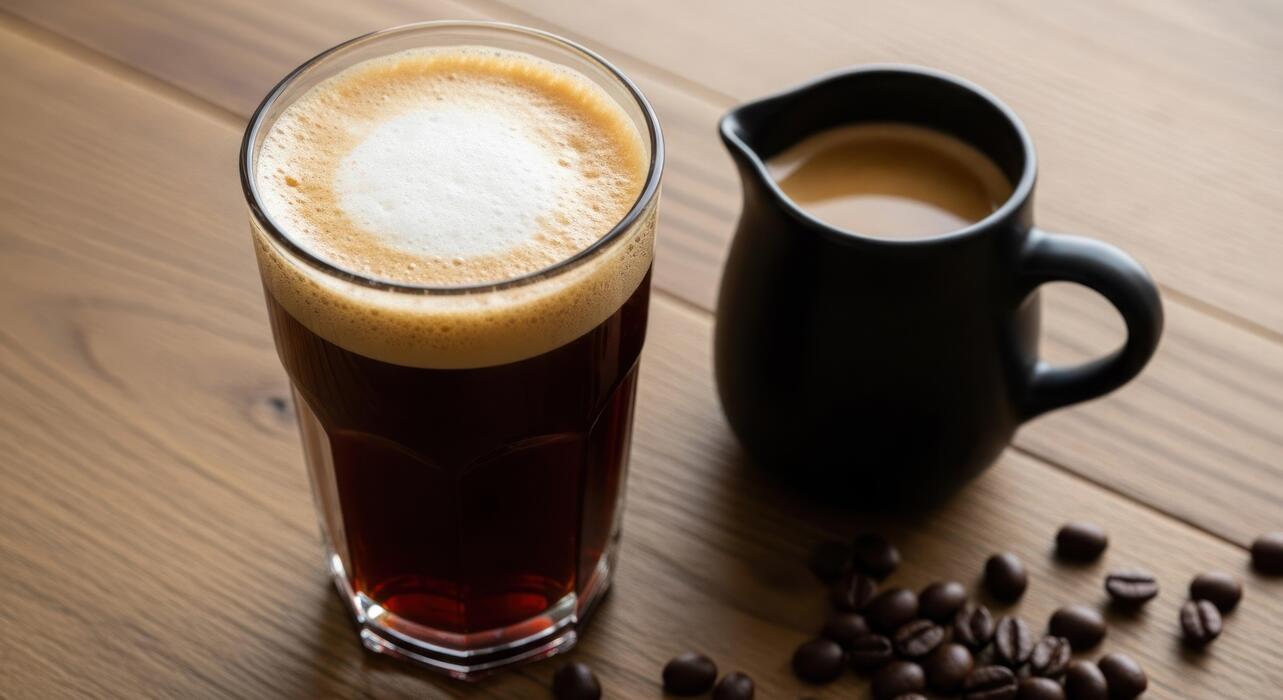
This process results in a stunning visual ‘cascade’ effect where the coffee settles into a dark body topped with a thick, creamy head similar to a stout beer. Beyond the aesthetics, the nitrogen naturally enhances the perceived sweetness of the coffee.
Because the tiny bubbles hit the tongue in a way that mimics the creaminess of milk, many drinkers find they no longer need to add sugar or dairy. Furthermore, the pressurized environment reduces the perceived acidity and bitterness of the beans, revealing hidden notes of chocolate and caramel.
By mastering the infusion process at home, you unlock a smoother mouthfeel that transforms a standard caffeine kick into a luxurious, dessert-like beverage that remains incredibly light and refreshing on the palate.
Benefits of Making Nitro Coffee at Home
Learning how to make nitro coffee at home offers significant advantages, ranging from long-term cost savings to total creative control.
Purchasing a daily nitro brew at a specialty cafe can be expensive, but investing in a home nitro keg or whipped cream dispenser allows you to enjoy premium quality for a fraction of the price.
When you brew your own, you have the power to select specific single-origin beans and adjust the steeping time to match your personal taste preferences perfectly. Additionally, having a pressurized system in your kitchen means you can enjoy a barista-quality beverage instantly without having to leave your house.
Homemade nitro coffee is also a healthier alternative for those looking to cut calories; the creamy texture provided by the nitrogen creates a satisfying drink that feels indulgent without the need for heavy creamers or artificial syrups.
By taking charge of the process, you ensure that every glass is served at the peak of freshness, guaranteeing a consistent, high-energy experience every single morning.
Essential Equipment for Home Nitro Coffee
Choosing a Whipped Cream Siphon or Nitro Dispenser
To start your journey into home nitro coffee, the most critical piece of equipment is a pressurized vessel. Most beginners opt for a standard whipped cream siphon, which is a cost-effective and versatile entry point.
These handheld units are designed to handle high pressure and allow you to infuse gas directly into the liquid. However, if you are serious about achieving that signature thick, cascading foam found in high-end cafes, you might consider a dedicated nitro coffee keg system.
These specialized dispensers often feature a stout faucet, which uses a restrictor plate to break the nitrogen bubbles into a much finer micro-foam. When selecting your hardware, prioritize stainless steel construction over aluminum for better durability and easier cleaning.
Ensure the unit has a pressure-sealed lid and a comfortable trigger mechanism to control the pour. Investing in a quality dispenser ensures that your coffee remains airtight, preventing oxidation while maintaining the perfect level of creamy carbonation for every single glass.
Nitrogen (N2) vs. Nitrous Oxide (N2O) Cartridges
Understanding the difference between gas types is essential for the correct texture and flavor profile. To achieve true nitro coffee, you must use pure Nitrogen (N2) cartridges. Nitrogen gas is relatively insoluble in water, which creates the tiny, velvety bubbles and the iconic ‘falling’ effect in the glass.
In contrast, many people mistakenly use Nitrous Oxide (N2O), which is the standard gas for whipped cream. While N2O is easier to find, it can impart a slightly sweet or chemical aftertaste and creates larger, soapy bubbles that lack the creamy mouthfeel of pure nitrogen.
Always check the packaging to confirm you are purchasing food-grade N2 chargers, which are usually smaller and require a specific charger holder. Using the correct gas ensures a neutral flavor profile that highlights the natural notes of your coffee beans.
By matching the right gas to your dispenser, you guarantee a professional-grade beverage that mimics the nitrogen-infused taps found at your favorite local specialty coffee shop.
Basic Tools for the Perfect Cold Brew Base
Before you can infuse your drink with gas, you need a high-quality cold brew concentrate as your foundation. Essential tools include a large glass steeping jar or a dedicated cold brew maker equipped with a fine-mesh stainless steel filter.
Because nitro coffee enhances the existing flavors of the brew, using a burr grinder is vital to achieve a consistent, coarse grind size, which prevents over-extraction and bitterness.
You will also need a high-precision digital scale to maintain a strict coffee-to-water ratio, typically around 1:4 or 1:5 for a concentrate that stands up well to nitrogen infusion.
Once the steeping process is complete, using a paper filter for a secondary pass is a pro tip; this removes fine sediment and oils that can clog your dispenser’s nozzle.
Having a clean, sediment-free base ensures the nitrogen can move freely through the liquid, resulting in a silky-smooth texture and a clean finish that makes the home-brewing experience truly rewarding and successful.
Step 1: How to Brew the Cold Brew Base
Best Coffee Beans for Nitro Infusion
To achieve the signature creamy mouthfeel of nitro coffee, start by selecting freshly roasted coffee beans with low acidity. Since the nitrogen infusion process enhances the natural sweetness and texture of the beverage, medium to dark roasts are generally preferred over light roasts.
Darker profiles often feature notes of chocolate, caramel, or nuts, which pair exceptionally well with the velvety micro-foam created by the nitrogen gas. Look for beans labeled as single-origin from regions like Brazil or Sumatra, or specifically formulated cold brew blends that can withstand long extraction times without becoming bitter.
Avoid beans with high citrus or floral acidity, as these can taste unpleasantly sharp when served cold and carbonated. For the best results, ensure you use a coarse grind size, similar to sea salt, to allow for a slow and even extraction.
This coarse texture prevents the over-extraction of tannins, ensuring your base remains smooth, bold, and perfectly balanced for the upcoming nitrogen injection process.
The Ideal Coffee-to-Water Ratio
A successful nitro coffee depends heavily on a concentrated cold brew base that can hold its own once diluted by ice or nitrogen bubbles. The industry standard for a robust nitro result is a 1:4 or 1:5 coffee-to-water ratio by weight.
For example, if you are using 250 grams of coarse coffee grounds, you should combine them with 1,000 to 1,250 grams of filtered water. Using filtered water is crucial because impurities in tap water can mask the delicate flavor profiles of your premium beans.
This high concentration is necessary because the nitrogen infusion process adds a perception of lightness; a weak base will result in a watery, unsatisfying drink.
By maintaining a stronger brewing ratio, you ensure that the final pour retains a deep, mahogany color and a rich body that mimics the experience of a stout beer.
Always measure your ingredients using a digital kitchen scale for precision, as volumetric measurements like cups can be inconsistent due to the varying density of different coffee roasts.
Steeping and Filtering for a Smooth Finish
Once your grounds and water are combined, allow the mixture to steep at room temperature for 12 to 18 hours. Avoid exceeding 24 hours, as this can lead to woody or bitter off-flavors that ruin the silkiness of the nitro.
After the steeping period is complete, the filtration process becomes the most critical step for a professional finish. You must filter the concentrate twice to remove all fine sediments and oils that could clog your nitro dispenser or keg system.
Start with a coarse mesh strainer to remove the bulk of the grounds, then pass the liquid through a high-quality paper filter or a fine cloth nut milk bag.
This secondary filtration ensures a crystal-clear liquid that allows the nitrogen to integrate perfectly, creating that iconic cascading effect and thick crema. Once filtered, store your cold brew in a sealed container in the refrigerator.
A clean, sediment-free base is the secret to achieving that ultra-smooth, dairy-free creaminess that enthusiasts love about high-end nitro coffee setups.
Step 2: How to Infuse Coffee with Nitrogen
Setting Up Your Nitro Siphon
To begin the infusion process, start by selecting a high-quality stainless steel whipped cream dispenser or a dedicated nitro coffee siphon. Ensure the canister is meticulously cleaned and dried to prevent any old residue from altering the flavor profile of your cold brew.
Pour your filtered cold brew concentrate or ready-to-drink coffee into the vessel, being careful to leave approximately two inches of headspace at the top. This empty space is critical because it allows the nitrogen gas to expand and circulate properly within the chamber.
If you overfill the container, the gas will not have enough room to integrate with the liquid, resulting in a flat pour rather than a velvety texture. Before sealing, check that the silicone gasket is seated firmly inside the lid to create an airtight seal.
Screw the head onto the canister tightly to ensure that no gas can escape during the pressurization phase. This foundational step ensures your equipment is primed for high-pressure infusion and safe operation throughout the process.
The Proper Way to Charge the Canister
Once your siphon is sealed, it is time to introduce the gas. Insert a single 8g nitrogen (N2) or nitrous oxide (N2O) charger into the holder and screw it onto the inlet valve until you hear a distinct hissing sound.
This sound indicates that the gas is being released from the cartridge into the coffee chamber. For the best results, use pure nitrogen (N2) cartridges if you want that classic, tiny-bubble microfoam found in professional cafes. While the gas flows in, keep the canister upright to maintain pressure stability.
After the gas has fully discharged, you can leave the charger attached or remove it depending on your specific siphon model instructions. The goal here is to force the gas into the liquid under high pressure, which creates the physical reaction necessary for a creamy mouthfeel.
Using high-quality food-grade chargers is essential to avoid any chemical aftertastes, ensuring that your nitro coffee remains clean, crisp, and refreshing with every single glass you pour from the pressurized system.
Shaking and Chilling for Maximum Creaminess
The final secret to achieving a professional-grade cascade is the mechanical agitation of the liquid. After charging, hold the canister firmly and shake vigorously for 30 to 60 seconds.
This physical movement forces the nitrogen molecules to bind with the coffee oils and water, creating the signature micro-bubbles that define the nitro experience. If you skip this step, the gas will simply sit on top of the liquid rather than becoming part of it.
For the most dramatic visual effect and a thicker head of foam, chill the charged canister in the refrigerator for at least ten minutes before serving. Cold liquids hold gases much more effectively than warm ones, so a chilled environment ensures the infusion stays stable.
When you are ready to serve, turn the siphon completely upside down and gently squeeze the trigger. Aim for the side of the glass to encourage a smooth, cascading settlement that results in a naturally sweet, creamy beverage without the need for added dairy or sugar.
Step 3: How to Pour the Perfect Glass
Techniques for a Cascading Visual Effect
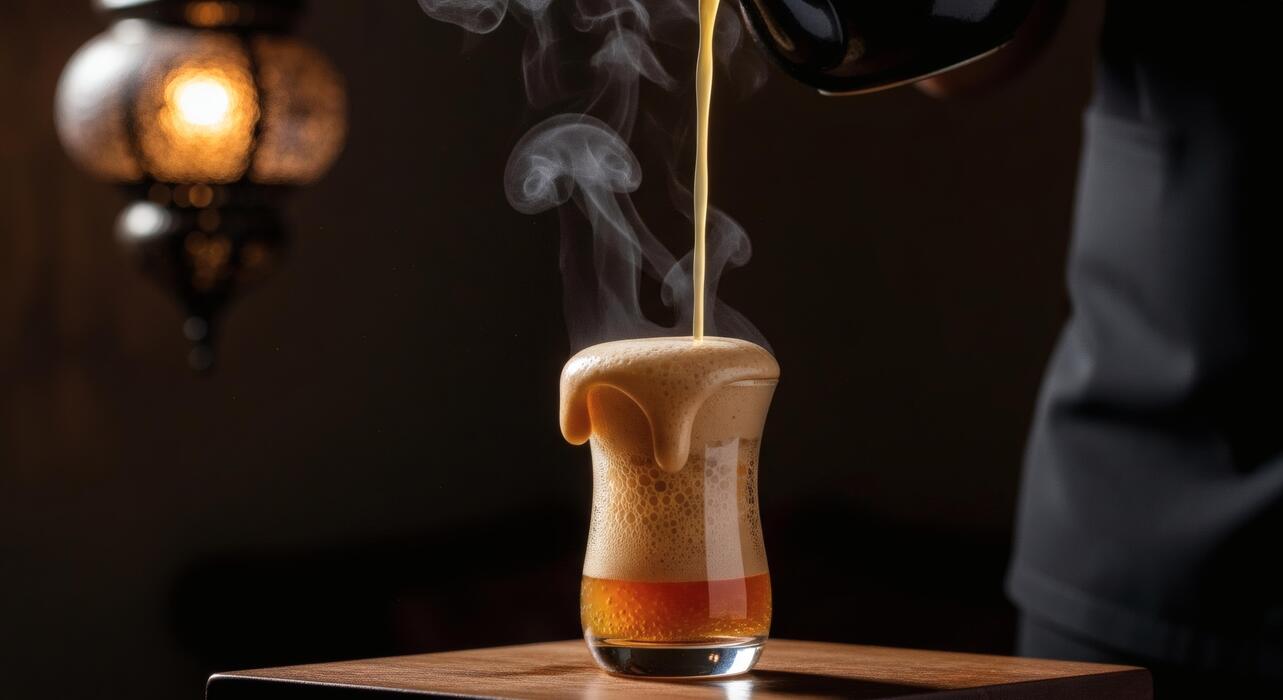
To achieve that mesmerizing, slow-motion waterfall effect inside your glass, you must master the angle of the pour. Start by holding your glass at a forty-five-degree angle directly beneath the tap or nitrogen dispenser.
As you begin to pour, allow the coffee to hit the side of the glass gently rather than dropping directly to the bottom, which prevents excessive splashing and preserves the delicate gas suspension.
Once the glass is about half full, slowly rotate it back to a vertical upright position while maintaining a steady flow. This specific transition creates the internal turbulence necessary to trigger the cascading nitrogen bubbles that nitro coffee is famous for.
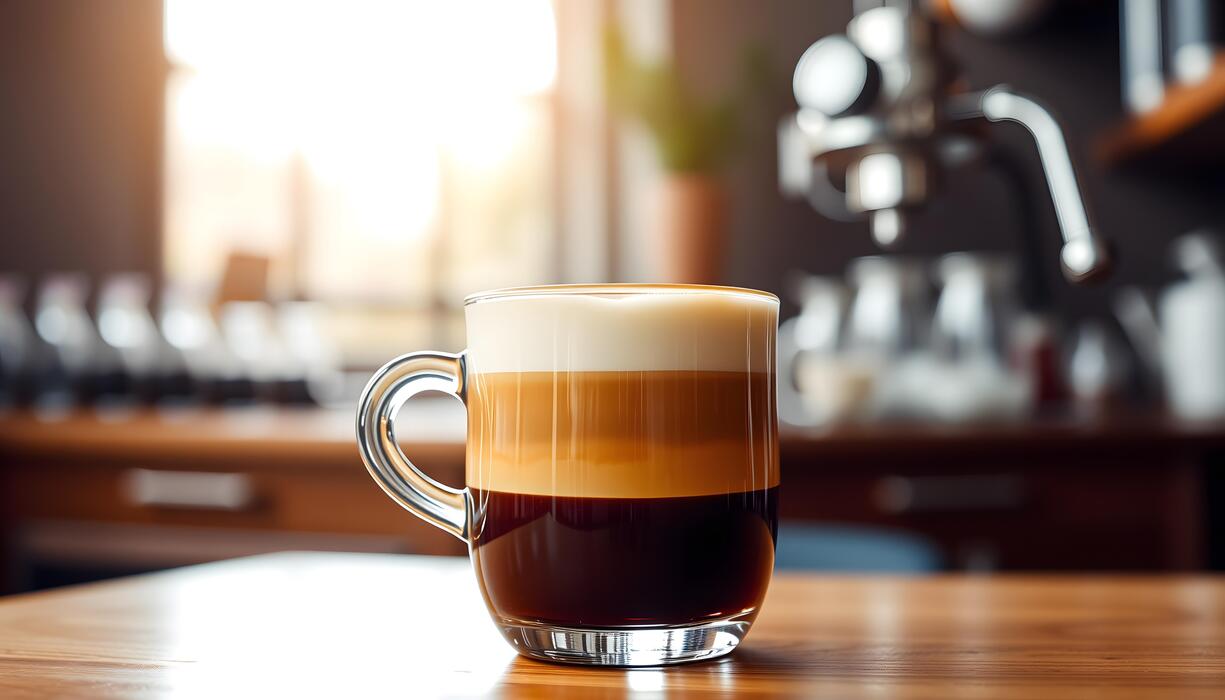
You should see the dark liquid at the top and a shimmering white cloud of nitrogen descending toward the base. Avoid stopping and starting the pour, as a single, continuous motion ensures the most consistent visual separation and a professional aesthetic that rivals your favorite high-end coffee shop experience.
Why Glassware Temperature Matters
The temperature of your glass is a critical variable that often determines whether your nitro coffee retains its creamy texture or falls flat within seconds. For the best results, always use chilled glassware that has been stored in the freezer or rinsed with ice-cold water immediately before serving.
A warm glass creates a thermal shock when it meets the cold coffee, causing the nitrogen bubbles to expand rapidly and escape into the air rather than staying integrated within the liquid. This premature degassing results in a thin, watery mouthfeel and a lackluster visual display.
By using a pre-cooled vessel, you minimize the heat transfer, which helps stabilize the nitrogen infusion and keeps the beverage at the optimal serving temperature of thirty-five to forty degrees Fahrenheit.
Furthermore, a cold surface encourages the bubbles to cling to the sides of the glass momentarily, enhancing the overall density of the drink and ensuring that every sip remains consistently velvety and refreshing from the first drop to the very last.
Achieving the Thick Foam Head
The hallmark of a perfectly made nitro cold brew is a thick, creamy head of foam that sits elegantly atop the dark coffee. To achieve this, you must ensure your nitrogen pressure is set correctly, typically between thirty and forty-five PSI, depending on your specific delivery system or keg setup.
As you reach the final inch of the glass, slightly increase the distance between the tap and the liquid surface to create a bit more aeration. This final burst of pressure builds a dense micro-foam layer that should be roughly half an inch thick.
This crown is not just for looks; it provides a silky sweetness and a distinct creamy texture that mimics the addition of dairy without any actual cream.
Ensure you are using a specialized stout faucet or a restrictor plate, as these tools are designed to break the nitrogen out of the solution to form those tiny, persistent bubbles. A well-executed foam head traps the aromatic compounds of the coffee, delivering a rich sensory profile with every taste.
Common Nitro Coffee Mistakes and Fixes
How to Fix Bitter or Sour Coffee
Achieving the perfect flavor balance in nitro coffee starts long before the nitrogen is added. If your coffee tastes unpleasantly bitter, it is likely due to over-extraction or using a roast that is too dark.
To fix this, try a slightly coarser grind or shorten your steeping time to roughly 12 to 16 hours. Conversely, if the brew tastes sour or weak, it is likely under-extracted, meaning you should extend the steeping time or use more coffee grounds to increase the concentration.
Since nitrogen gas naturally enhances the perception of sweetness and rounds out acidity, you want a smooth base that allows these subtle notes to shine. Always use filtered water to ensure that chlorine or mineral buildup doesn’t interfere with the delicate oils.
If the bitterness persists even with a perfect cold brew concentrate, check your serving temperature; nitro coffee is best served between 35 and 40 degrees Fahrenheit to maintain its signature creamy profile without harshness.
What to Do if the Coffee Isn’t Foaming
The most common frustration when learning how to make nitro coffee is a lack of the iconic cascading foam. This usually happens because the liquid is not cold enough or the pressure is too low.
Nitrogen dissolves much more effectively in ice-cold liquids, so ensure your coffee is chilled thoroughly before charging the canister.
If you are using a home nitro whipped cream dispenser, you may need to use two nitrogen (N2) chargers instead of one, shaking the canister vigorously for at least 30 seconds after each charge to integrate the gas.
For those using a keg system, ensure your regulator is set to approximately 30-40 PSI and that you are using a specific stout faucet with a restrictor plate.
If the pour is still flat, the restrictor plate might be clogged with coffee fines, preventing the agitation necessary to create tiny micro-bubbles. Always purge a small amount of gas first to ensure the pressure is stabilized before pouring your glass.
Cleaning and Maintaining Your Nitro Equipment
Proper maintenance is essential because coffee oils can quickly become rancid, ruining the flavor of future batches and clogging sensitive components. After every use, you must disassemble the faucet and the nozzle to soak them in warm, soapy water or a specialized beverage equipment cleaner.
Pay close attention to the small holes in the restrictor plate, as these are easily blocked by dried coffee residue or sediment.
For home canisters, use a soft bottle brush to scrub the interior and ensure the silicone gaskets are intact and free of cracks, as even a tiny air leak will prevent the system from pressurizing correctly.
Once a month, run a dedicated line cleaner through your keg system to prevent biofilm buildup. Always air-dry all parts completely before reassembling the unit to prevent mold growth.
Keeping your gear pristine ensures that every pour of nitro coffee is as fresh, creamy, and professional as the first one you ever made at your favorite local cafe.
Tips for Customizing Your Nitro Coffee
Adding Syrups and Flavors Without Ruining the Texture
When learning nitro coffee how to make at home, the most critical rule for flavoring is to add syrups to the glass first rather than mixing them into the keg or dispenser.
Because nitro coffee relies on a delicate suspension of tiny nitrogen bubbles to create its signature creamy mouthfeel, stirring vigorously after pouring can cause the gas to escape prematurely, leaving you with a flat drink.
To maintain that velvety head, use simple syrups or liquid concentrates instead of heavy sauces or granulated sugars, which can be difficult to dissolve and may clog your nitrogen infusion equipment.
If you prefer a consistent flavor throughout, try infusing your cold brew base with cinnamon sticks or vanilla beans during the 12-24 hour steeping process before you even charge it with nitrogen.
This ensures a deep, integrated flavor profile that complements the natural sweetness of the nitro pour without compromising the cascading visual effect or the silky texture that makes this specific brewing style so unique and satisfying.
Best Milk and Cream Options for Nitro Drinks
The beauty of nitro coffee is that the nitrogen infusion already creates a perceived creaminess, but adding dairy or alternatives can elevate the experience if done correctly.
For the best results, pour your milk of choice over the top of the finished pour to create a beautiful marbling effect, or place it in the bottom of the glass before dispensing.
Full-fat oat milk is widely considered the gold standard for nitro coffee because its high protein and fat content mimic dairy perfectly, supporting the nitrogen bubbles rather than breaking them down.
If you prefer traditional dairy, heavy cream or half-and-half provides a luxurious richness that pairs exceptionally well with the stout-like body of the coffee.
Avoid using thin, watery alternatives like skim milk or cashew milk, as they can dilute the body of the drink and cause the foam to dissipate rapidly.
By choosing higher-fat creamers, you enhance the structural integrity of the micro-foam, ensuring that every sip remains consistently thick and flavorful from the first drop to the very last.
Creative Nitro Coffee Recipes to Try
Once you have mastered the basics of nitro coffee how to make, you can experiment with sophisticated recipes that rival high-end cafes.
A fan favorite is the Salted Caramel Nitro Cold Brew, where you line the glass with a thin swirl of caramel and top the finished pour with a pinch of sea salt to enhance the coffee’s natural chocolate notes.
For a refreshing summer twist, try a Nitro Mint Mojito Coffee by muddling fresh mint leaves with a splash of simple syrup at the bottom of the glass before pouring the nitro coffee over the top.
If you want something more indulgent, create a Nitro Mocha Float by adding a single scoop of high-quality vanilla bean or chocolate gelato to your glass; the nitrogen bubbles react with the ice cream to create an incredibly dense, mousse-like foam.
These variations allow you to showcase the versatility of the nitrogen infusion, turning a standard caffeine fix into a gourmet beverage. Always remember to chill your glassware beforehand to ensure these creative additions don’t cause the nitrogen to expand and flatten too quickly.
Frequently Asked Questions
What is the basic method for making nitro coffee at home?
To make nitro coffee, you first need to brew a batch of cold brew concentrate and filter it thoroughly. Pour the cold brew into a whipped cream dispenser or a dedicated nitro keg system, charge it with a nitrogen (N2) or nitrous oxide (N2O) cartridge, shake well, and dispense into a glass.
Can I make nitro coffee without a specialized machine?
Yes, the most affordable way to make it at home is using a standard whipped cream dispenser. While professional setups use pure nitrogen, a whipped cream dispenser using N2O cartridges will mimic the creamy texture and cascading effect of draft nitro coffee.
What kind of coffee beans are best for nitro coffee?
Medium to dark roasts are generally preferred because they offer low acidity and chocolatey or nutty notes that pair well with the creamy mouthfeel. Ensure you use a coarse grind to make the initial cold brew base for the best flavor profile.
How long does it take to infuse the nitrogen into the coffee?
If using a handheld dispenser, the infusion is nearly instant once the gas is released and the canister is shaken for about 30 seconds. For larger keg systems, it can take anywhere from 24 to 48 hours to fully carbonate the liquid if you are not using a quick-infuse stone.
Do I need to add milk or sugar to nitro coffee?
Nitro coffee is unique because the tiny nitrogen bubbles create a natural perception of sweetness and a rich, creamy texture without any dairy. Most people enjoy it black to appreciate the velvety mouthfeel, but you can add sweeteners if desired.
Why is my homemade nitro coffee not cascading properly?
The ‘cascade’ effect requires the coffee to be very cold and the equipment to be properly pressurized. Ensure your cold brew is chilled before charging the canister, and make sure you are using a dedicated stout-style nozzle if you are using a keg system.
Conclusion
Making nitro coffee at home is a rewarding process that transforms your standard cold brew into a luxurious, pub-style treat. By mastering the balance of steeping time and nitrogen infusion, you can enjoy a velvety texture and natural sweetness without any added dairy or sugar. Experiment with different beans and pressures to craft your perfect energizing glass today.