How To Make Great Cold Coffee
If you’re wondering how to make great cold coffee, you’ve probably faced watery, bitter iced coffee that just misses the mark. The real secret isn’t pouring hot coffee over ice—it’s choosing the right brew method. You’re in the right spot to ditch the disappointment.
Why Cold Coffee Becomes Bitter and How to Fix It
The Science Behind Cold Coffee Bitterness
Bitterness in cold coffee often stems from over-extraction of tannins and chlorogenic acids, which are drawn out when coffee grounds steep too long or at too high a temperature.
Unlike hot brewing, cold coffee requires patience: the cold water extracts flavors slowly, but leaving grounds for over 24 hours can release harsh compounds.
To fix bitterness, limit steep time to 12-18 hours for cold brew, or use a flash-chill method for iced coffee by brewing hot coffee directly over ice. This rapid cooling locks in smoothness.
Additionally, filter your coffee twice—once through a fine-mesh sieve and again through a paper filter—to remove fine particles that contribute to astringency. Always start with a clean, glass container to avoid off-flavors, and stir your brew halfway through steeping for even extraction.
If bitterness persists, dilute with milk or a pinch of salt to mask harsh notes. Remember, cold coffee should be smooth, not sharp—taste at 12 hours and adjust future batches accordingly.
Choosing the Right Coffee Beans for Cold Brew
Bean selection is critical for avoiding bitterness and achieving a balanced cold coffee. Opt for medium to dark roast beans with low acidity, as light roasts can taste sour or grassy when cold-extracted.
Single-origin beans from Brazil, Sumatra, or Colombia offer natural chocolatey or nutty notes that complement cold brewing’s smooth profile. Avoid over-roasted, oily beans, which may produce a burnt, bitter taste. For best results, choose beans labeled ‘cold brew blend’ or those with tasting notes of caramel, cocoa, or dried fruit.
Freshness matters: use beans roasted within 2-4 weeks for optimal flavor. Grind just before brewing to preserve aromatic oils. If you prefer a less acidic cup, try a darker roast; for a brighter finish, add a pinch of cinnamon during steeping.
Remember, the right beans make cold coffee naturally sweet—no sugar needed. Experiment with small batches to find your perfect profile.
Grind Size Mistakes That Ruin Your Coffee
Grind size directly impacts extraction and bitterness in cold coffee. Use a coarse grind similar to breadcrumbs or sea salt—fine grounds over-extract, releasing bitter compounds and creating a muddy texture. A burr grinder ensures consistency, while blade grinders produce uneven particles that cause both over- and under-extraction.
For cold brew, aim for a 1:4 to 1:8 coffee-to-water ratio by weight, adjusting grind coarseness accordingly. If your coffee tastes bitter, grind coarser; if it’s weak, grind slightly finer but never to a powder. Steep for 12-18 hours at room temperature or in the fridge—longer steeping requires coarser grinds.
After brewing, filter through a paper filter or cheesecloth to remove sediment. Test your grind by checking if the coffee looks like rough sand before steeping. Fix a bitter batch by diluting with water or milk, then adjust grind size next time.
Precision here transforms your cold coffee from harsh to silky smooth.
Essential Equipment for Making Cold Coffee at Home
Best Cold Brew Makers and French Presses
To make great cold coffee at home, the best cold brew makers are designed for full extraction and easy cleanup. Look for models with a fine mesh filter, like the Takeya or Hario Mizudashi, which steep grounds for 12-24 hours in the fridge.
A French press is also an excellent choice: its plunger system allows you to steep coarse grounds, then press them out for a smooth, sediment-free concentrate.
For a faster method, consider a cold brew drip tower (like the Yama Glass) that slowly drips water over grounds, producing a bright, clean cup in just 2-4 hours. When choosing, prioritize glass or BPA-free plastic carafes to avoid metallic tastes.
The key is coarse grind and a 1:4 coffee-to-water ratio for concentrate. Always pre-wet your filter with hot water to remove paper taste. With these tools, you can batch-brew and enjoy cold coffee for days, adjusting strength by diluting with milk or water.
Simple Tools You Already Have in Your Kitchen
You don’t need fancy gear to make excellent cold coffee—your kitchen already holds the essentials. Use a large mason jar or pitcher as your brewing vessel; its airtight seal keeps flavors fresh. A fine-mesh strainer or cheesecloth works perfectly for filtering out grounds after steeping.
For the coffee itself, a coffee grinder (even a blade grinder) is fine, but aim for a coarse, sea-salt-like consistency to avoid bitterness. A wooden spoon or chopstick helps stir the grounds and water evenly.
If you have a kettle, boil water first to pre-rinse your filter or jar—this removes any residue. For serving, ice cube trays are crucial: freeze leftover coffee into cubes to avoid dilution.
Even a simple spoon can measure the ideal ratio: 1 cup of coarse grounds to 4 cups of cold water. Steep overnight in the fridge, then strain—this method requires zero special purchases and yields a smooth, low-acid brew every time.
Filters and Containers for Smooth Results
The right filters and containers eliminate grit and preserve clarity in your cold coffee. Start with a paper filter (like a Chemex or V60 filter) for a crisp, oil-free cup; line your strainer or French press with it to catch fine particles.
For a fuller body, use a metal mesh filter—it lets natural oils pass through, enhancing richness. Always choose glass or stainless steel containers over plastic, as they don’t absorb odors or leach flavors.
A wide-mouth mason jar is ideal for steeping, while a carafe with a tight lid stores concentrate for up to two weeks. For on-the-go, insulated bottles keep your cold coffee chilled without condensation.
Pro tip: double-filter your brew—first through a mesh strainer, then through a paper filter—to achieve a silky, sediment-free texture. Rinse filters with hot water before use to remove any papery taste. These simple upgrades ensure every sip is smooth, balanced, and refreshingly clean.
Step-by-Step Guide to Classic Cold Brew Coffee

How to Measure Coffee and Water Ratios
The foundation of great cold brew is the coffee-to-water ratio. For a classic concentrate, use a 1:4 or 1:5 ratio (e.g., 1 cup of coarsely ground coffee to 4 cups of water). This yields a strong base that you can dilute with milk or water later.
For a ready-to-drink brew, use a 1:8 ratio. Always use filtered water for the cleanest flavor. Weigh your coffee on a kitchen scale for precision—100 grams of coffee to 400 grams of water is ideal. Grind your beans coarse, like breadcrumbs, to avoid over-extraction and bitterness.
A finer grind can make your brew muddy. Place the grounds in a large jar or French press, then slowly pour the water over them, stirring gently to ensure all grounds are saturated. Cover and let it rest at room temperature for a few minutes before refrigerating.
Steeping Time and Temperature Tips
Cold brew relies on time, not heat, to extract flavor. The ideal steep is 12 to 24 hours at room temperature or in the refrigerator. Room temperature steeping (around 68-72°F) speeds extraction—12-16 hours is usually enough for a smooth, balanced cup.
Refrigerator steeping (35-40°F) takes longer, 18-24 hours, but yields a cleaner, less acidic brew. Avoid steeping beyond 24 hours, as it can turn bitter. Use a tightly sealed container to prevent absorbing fridge odors. If steeping at room temperature, place the jar in a cool, dark spot away from sunlight.
For consistent results, set a timer. After steeping, taste a small spoonful—it should be rich and chocolatey, not sour or harsh. Adjust future batches by adding or reducing steeping time by 2 hours.
Straining and Storing Your Cold Brew
After steeping, strain thoroughly to remove all grounds. Pour the mixture through a fine-mesh sieve lined with cheesecloth or a nut milk bag into a clean container. For ultra-smooth coffee, strain twice: first through a sieve, then through a paper coffee filter or a damp cloth.
Press gently on the grounds to extract every drop, but avoid squeezing too hard, which can push fine particles through. Transfer the strained concentrate to a glass or BPA-free plastic bottle with a tight lid.
Store it in the refrigerator for up to 2 weeks, though flavor peaks in the first 5 days. To serve, dilute 1 part concentrate with 1-2 parts water, milk, or ice—adjust to taste. For a quick iced coffee, pour over ice and add a splash of cream or sweetener.
Always shake or stir before pouring, as sediment may settle.
Quick Methods for Instant Cold Coffee in Minutes
Using Instant Coffee for Fast Cold Coffee
When time is tight, instant coffee is your best friend for a quick, great-tasting cold brew alternative. Start by mixing 2 teaspoons of instant coffee granules with 2 tablespoons of hot water (just off the boil) in a sturdy glass.
Stir vigorously until the granules are fully dissolved—this is crucial to avoid gritty texture. Add 1 cup of cold milk (dairy or plant-based) and 1-2 teaspoons of sugar or simple syrup to taste. For an extra boost, add a pinch of salt to reduce bitterness.
Fill the glass with ice cubes and stir well to chill evenly. The key is to dissolve the coffee completely before adding cold ingredients, ensuring a smooth, robust flavor without waiting hours. This method delivers a rich, bold cup in under 2 minutes, perfect for busy mornings or sudden cravings.
Adjust sweetness or milk ratio to your preference, and consider a dash of vanilla extract for depth. For a creamier version, use whole milk or a splash of heavy cream. This technique consistently yields a satisfying cold coffee without any special equipment.
Japanese-Style Iced Coffee Technique
For a bright, aromatic cold coffee that captures the essence of fresh brew, the Japanese method is unmatched. Start by filling a heatproof carafe or glass with ice cubes—use about half the volume you’d normally have for a full drink.
Brew double-strength hot coffee directly over the ice using a pour-over dripper or French press. Use a ratio of 2 tablespoons of medium-ground coffee per 6 ounces of water. As the hot coffee hits the ice, it rapidly chills, locking in volatile aromatics and preventing oxidation.
This creates a clean, complex flavor with subtle acidity and sweetness. Stir gently to melt some ice, then pour into a serving glass with fresh ice if desired. The process takes about 5 minutes total, from boiling water to final cup.
Customize by adjusting grind size—finer for more extraction, coarser for lighter notes. This method is ideal for single-origin beans, highlighting their unique profiles. Add milk or sweetener after brewing to preserve the coffee’s integrity. The result is a crisp, refreshing cold coffee that tastes freshly made.
Blender Method for Frothy Cold Coffee
Craving a café-style frothy cold coffee in minutes? The blender method delivers a creamy, indulgent drink with minimal effort.
Combine 1 cup of strong brewed coffee (cooled or room temperature), 1 cup of milk (whole milk works best for foam), 2 tablespoons of sugar or sweetener, and 1 cup of ice cubes in a blender.
For extra richness, add 1 tablespoon of heavy cream or a scoop of vanilla ice cream. Blend on high for 30-45 seconds until the ice is crushed and the mixture is smooth and frothy. The blending aerates the coffee, creating a thick, velvety foam that mimics a frappé.
Pour into a tall glass and top with optional whipped cream or a dusting of cocoa. This method takes under 2 minutes and allows endless variations: add a shot of chocolate syrup for a mocha, a pinch of cinnamon for spice, or a splash of almond extract for nuttiness.
Adjust the ice-to-liquid ratio for thicker or thinner consistency. The key is to blend until no ice chunks remain, ensuring a silky texture. This approach is perfect for hot days when you want a refreshing, dessert-like cold coffee without waiting.
Best Ways to Flavor Your Cold Coffee
Simple Syrups and Sweeteners That Work
For perfect sweetness that blends seamlessly into cold coffee, always use simple syrup instead of granulated sugar. Granulated sugar struggles to dissolve in cold liquid, leaving a gritty texture. To make basic simple syrup, combine equal parts water and sugar (1:1 ratio) in a saucepan, heat until dissolved, then cool.
For richer flavor, try a 2:1 ratio (rich simple syrup) for a thicker, sweeter result. Experiment with flavored syrups by infusing the syrup during heating: add vanilla beans, cinnamon sticks, or citrus zest.
Brown sugar simple syrup adds molasses depth, while honey or agave nectar can be used directly but may thicken when cold—dilute them slightly with warm water first. For a sugar-free option, use monk fruit sweetener or stevia-based syrups, which dissolve easily.
Store any syrup in a sealed jar in the refrigerator for up to a month. To sweeten your cold coffee, start with 1-2 tablespoons per cup and adjust to taste. This approach ensures every sip is evenly sweetened without clumps.
Adding Milk, Cream, or Non-Dairy Alternatives
The choice of dairy or non-dairy addition dramatically impacts your cold coffee’s texture and flavor. Whole milk or half-and-half provides a classic creamy mouthfeel that balances coffee’s bitterness. For a richer treat, use heavy cream but add sparingly—just a splash transforms the drink.
Among non-dairy options, oat milk is a top choice for its neutral flavor and creamy consistency that mimics dairy. Almond milk adds a subtle nutty note but can separate in acidic coffee; choose barista blends for better stability.
Coconut milk (from a carton, not canned) lends tropical sweetness, while soy milk offers protein-rich creaminess. For a frothy finish, warm your milk slightly (not hot) and shake it vigorously in a jar or use a handheld frother before pouring over coffee.
Flavored creamers are convenient but often contain added sugars and artificial flavors; try making your own by blending milk with vanilla extract and a pinch of salt. Start with a 1:3 ratio of milk to coffee, then adjust based on your preference for strength and creaminess.
Spices and Extracts for Unique Tastes
Elevate your cold coffee with a dash of spices or extracts to create complex, aromatic flavors. Cinnamon is a classic—add a pinch directly to ground coffee before brewing or stir a cinnamon stick into your cold brew as it steeps.
Vanilla extract (use pure, not imitation) adds warmth and sweetness; just 1/4 teaspoon per cup transforms the flavor. For a seasonal twist, try pumpkin pie spice (a blend of cinnamon, nutmeg, ginger, and cloves) or cardamom, which pairs beautifully with coffee’s bitterness.
Mint extract offers a refreshing note—use sparingly (a few drops) to avoid overpowering. Cocoa powder or unsweetened chocolate extract creates a mocha effect without added sugar; whisk into milk before adding to coffee. For a spicy kick, cayenne pepper or chipotle powder (a tiny pinch) can surprise and delight.
Lavender extract or rose water (1/8 teaspoon) lends floral elegance. Always start with less than you think—extracts are potent—and taste as you go. These additions turn simple cold coffee into a gourmet experience with minimal effort.
Tips for Serving Cold Coffee Like a Pro
Ice Cube Tricks to Avoid Watery Coffee
Prevent dilution by swapping regular ice for coffee ice cubes. Brew a strong batch of your favorite coffee, let it cool, and pour it into ice cube trays to freeze. Use these cubes in your cold coffee for a flavor boost that stays intense as they melt.
For a creamy twist, freeze milk or half-and-half into cubes to enrich your drink without watering it down. If you’re short on time, double-strength coffee works wonders—brew with half the water you normally use, then pour over regular ice; the extra concentration compensates for melting.
Another pro trick: chill your coffee completely before serving by refrigerating it for a few hours, then add just a few ice cubes for a quick chill. This minimizes the number of cubes needed, keeping your coffee robust.
Avoid using large, thin ice cubes that melt fast; opt for dense, slow-melting ice made from boiled water (which reduces air bubbles) or silicone molds for larger cubes. These simple adjustments ensure every sip is rich and flavorful, not watery.
Garnishes and Presentation Ideas
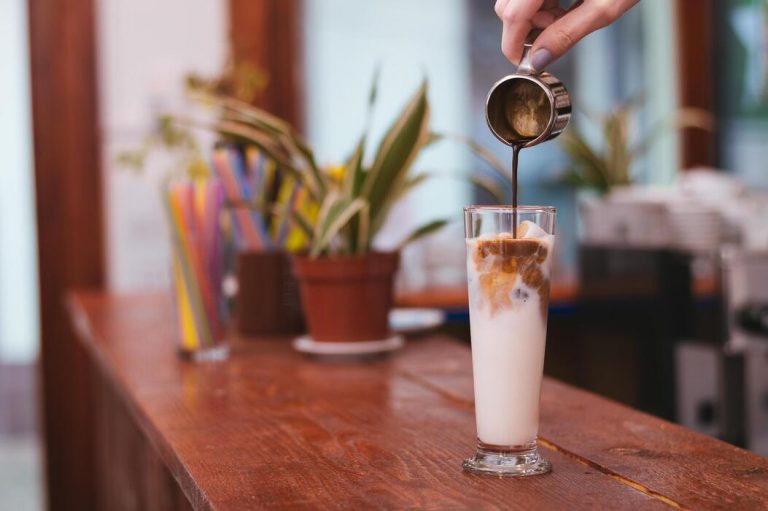
Elevate your cold coffee with thoughtful garnishes that enhance both flavor and visual appeal. Start with a drizzle of caramel or chocolate syrup inside the glass before pouring your coffee for a striking layered effect.
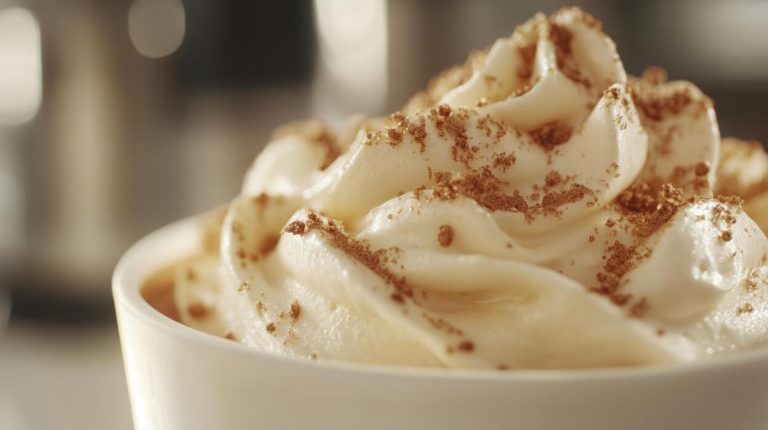
Top with a generous swirl of lightly whipped cream—add a pinch of cinnamon or cocoa powder on top for a fragrant finish.
For a refreshing twist, float a few coffee beans or a star anise pod on the cream, or use a thin slice of orange peel to brighten the aroma. Serve in clear glasses to showcase the coffee’s color and layers; consider chilling the glass beforehand for a frosted look.
Add a sprig of mint or edible flowers like lavender for an elegant touch. If you’re serving iced lattes, create latte art by slowly pouring cold milk over a spoon to create patterns.
These details transform a simple drink into a café-worthy experience that impresses guests and makes daily rituals feel special.
Storing Leftover Cold Coffee Properly
Preserve the freshness of leftover cold coffee by storing it in an airtight container in the refrigerator, ideally a glass bottle or jar with a tight seal. Avoid leaving it in the pot or a open cup, as exposure to air accelerates oxidation and dulls flavor.
For best quality, consume within 24 to 48 hours—after that, the taste can become bitter or stale. To extend shelf life, consider freezing portions in ice cube trays (as mentioned above) for later use in smoothies or iced drinks.
If you’ve added milk or cream, store separately and combine just before serving to prevent separation and spoilage. Always label your container with the date to track freshness.
For a quick refresh, pour the chilled coffee over fresh ice and add a splash of fresh milk or flavoring to revive it. Never reheat leftover cold coffee; instead, use it as a base for coffee cocktails or baking recipes like tiramisu to avoid waste.
Common Cold Coffee Mistakes and How to Avoid Them
Over-Extraction and Under-Extraction Problems
A common mistake is brewing cold coffee without controlling extraction, leading to bitterness or weakness. Over-extraction happens when coffee grounds steep too long or are ground too finely, pulling out harsh tannins.
To avoid this, use a coarse grind similar to breadcrumbs and steep for 12-24 hours at room temperature, then refrigerate. Under-extraction results from too short a steep or overly coarse grounds, creating sour, thin coffee. Stick to a 12-hour steep as a baseline, then adjust by taste.
For a quicker method like cold brew concentrate, steep 8-12 hours and dilute with water or milk. Always start with filtered water at 40-50°F if refrigerating immediately. Test your brew after 12 hours: if it’s too weak, steep longer; if bitter, reduce time or use a coarser grind.
This balance ensures a smooth, rich base for iced drinks.
Using the Wrong Coffee-to-Water Ratio
Another frequent error is ignoring the coffee-to-water ratio, resulting in watery or overly strong cold coffee. The ideal ratio is 1:8 (1 part coffee to 8 parts water) for a concentrate that stands up to ice and milk. For a ready-to-drink version, use 1:15 to avoid dilution.
Avoid guessing; use a kitchen scale for precision. A common pitfall is using too little coffee, producing a weak brew that gets lost in ice. Conversely, too much coffee creates an overpowering, muddy taste. Start with 1 cup of coarse grounds per 4 cups of water for concentrate.
Adjust to taste: if it’s too bold, dilute with water or milk; if weak, increase coffee by 10-15% next batch. Remember, room temperature water extracts best, and stirring grounds initially ensures even saturation. This ratio foundation prevents disappointment and guarantees a consistently delicious cold coffee.
Skipping the Filtering Step
Many skip proper filtering, leaving gritty sediment that ruins texture. Always filter your cold coffee through a fine-mesh sieve, cheesecloth, or a dedicated cold brew filter. After steeping, pour the mixture through a strainer lined with a paper filter or nut milk bag.
Double filtering is key: first through a sieve to remove large grounds, then through a paper filter to catch fines. Avoid using a French press alone, as it can let silt through. Let the coffee drip naturally without pressing or squeezing, which pushes bitterness.
For clarity, refrigerate the filtered brew for an hour to let sediment settle, then pour off the clear liquid. Skipping this step results in a cloudy, bitter drink. Invest in a reusable cold brew filter bag for easy cleanup.
Proper filtering yields a silky, smooth coffee that’s perfect over ice without the grit. This small step elevates your cold coffee from amateur to barista-quality.
Frequently Asked Questions
What is the best coffee-to-water ratio for cold coffee?
For a strong, flavorful cold brew, use a 1:4 or 1:5 ratio of coffee grounds to cold water (e.g., 1 cup coffee to 4 cups water). For iced coffee made with hot brew, use a double-strength ratio (2 tablespoons coffee per 6 oz water) since it will be diluted by ice.
Should I use coarse or fine grind for cold coffee?
For cold brew, use a coarse grind similar to breadcrumbs to prevent over-extraction and bitterness. For iced coffee made with hot brew, a medium grind is best to balance extraction speed and flavor, especially when pouring over ice.
How long should I steep cold brew coffee?
Steep cold brew in the refrigerator for 12 to 24 hours. A 12-hour steep yields a lighter, more tea-like flavor, while 18-24 hours gives a bolder, richer concentrate. Avoid steeping longer than 24 hours to prevent bitterness.
What’s the difference between cold brew and iced coffee?
Cold brew is made by steeping coarse grounds in cold water for 12-24 hours, resulting in a smooth, low-acid concentrate. Iced coffee is brewed hot (usually double-strength) and then chilled or poured over ice, giving a brighter, more acidic flavor.
How do I make creamy cold coffee at home?
Blend your cold coffee (cold brew or chilled strong coffee) with milk or a milk alternative, a splash of heavy cream or condensed milk, and ice cubes until frothy. For a café-style drink, add a touch of vanilla syrup or chocolate sauce.
Can I use instant coffee for cold coffee?
Yes, dissolve 2-3 teaspoons of instant coffee in a small amount of hot water (about 2 tablespoons), then stir into cold water or milk with ice. This creates a quick iced coffee without brewing. For extra creaminess, shake with milk and ice in a jar.
How do I prevent cold coffee from tasting bitter or watery?
Use freshly ground coffee, avoid over-steeping (cold brew) or over-extracting (hot brew), and chill the coffee before adding ice to prevent dilution. For iced coffee, brew double-strength and use large ice cubes that melt slower.
What are some simple flavor additions for cold coffee?
Add vanilla extract, cinnamon, or a pinch of salt to enhance flavor. Sweeten with simple syrup, honey, or flavored syrups like caramel or hazelnut. For a dairy-free twist, try oat milk or coconut milk, which add natural sweetness and creaminess.
Conclusion
Mastering great cold coffee is simple: use coarsely ground beans, steep them in cold water for 12-24 hours, then strain. The result is a smooth, less acidic brew that keeps for days. Experiment with ratios and add milk or sweeteners to taste. Now, ditch the hot brew and treat yourself to a refreshing, homemade iced coffee—your perfect summer sip awaits.