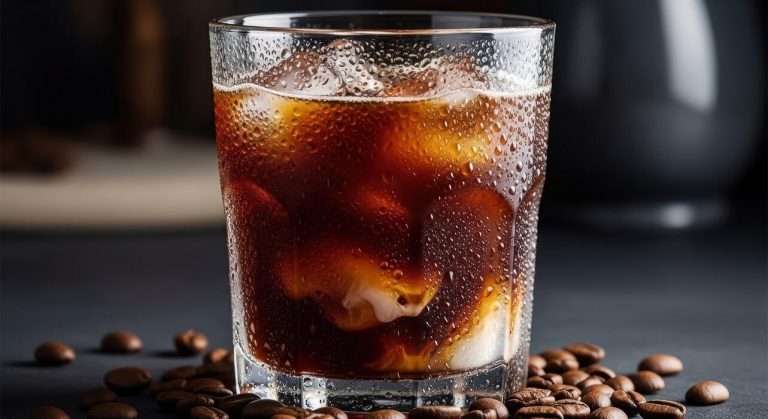
How To Make Starbucks Cold Brew Coffee
Craving that smooth, velvety Starbucks cold brew but want to skip the cafe line and the high price tag? You have come to the right place. Making your favorite signature brew at home is surprisingly simple and only requires two basic ingredients. In this guide, we will show you exactly how to recreate that bold, low-acid flavor using the right coffee-to-water ratio. Get ready to master the process quickly so you can enjoy professional-quality cold brew from your own kitchen.
What makes Starbucks cold brew different from regular coffee?
The specific Starbucks bean blend
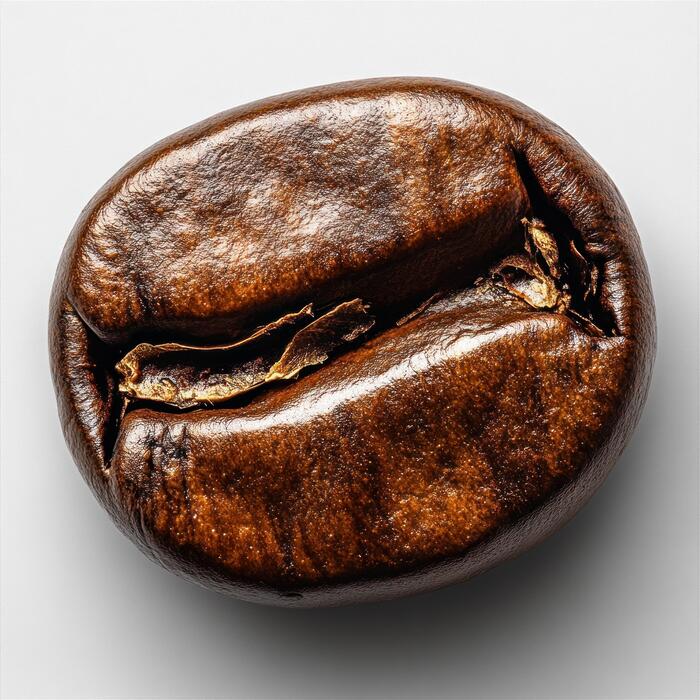
To replicate the Starbucks cold brew experience at home, you must start with the right foundation: a specific blend of beans. Unlike their standard drip coffee, the cold brew version uses a customized blend of Latin American and African beans.
This curated selection is designed specifically to withstand the long steeping process without becoming overly bitter. The Latin American beans provide a rich, chocolatey base, while the African beans contribute subtle citrus and floral notes that brighten the final cup.
When sourcing your own ingredients, look for a medium to dark roast with a coarse grind size similar to sea salt. Using a fine grind will lead to over-extraction and a cloudy appearance, which ruins the signature clarity.
By selecting a high-quality, dense bean that can handle a twenty-hour soak, you ensure that your homemade concentrate has the same deep, velvety body that customers expect from the professional barista version found in stores worldwide.
Cold water extraction vs. heat
The primary technical difference between regular coffee and cold brew lies in the temperature of the water used during the extraction process. Standard iced coffee is brewed hot and then cooled, which can often lead to a diluted or bitter taste.
In contrast, making Starbucks-style cold brew involves steeping coarse grounds in filtered, cold water for approximately 12 to 20 hours. This slow, patient method relies on time rather than heat to pull the oils, caffeine, and sugars from the coffee beans.
By avoiding high temperatures, you prevent the release of certain volatile acids that typically create a sharp or sour bite. To achieve this at home, combine your grounds and water in a large glass jar or a dedicated cold brew maker, ensuring every particle is fully saturated.
Let it sit at room temperature or in the fridge, then strain through a dual-filtration system to achieve that ultra-clean, concentrated finish that defines the authentic Starbucks cold brew methodology.
Lower acidity and smoother flavor profile
The most noticeable result of the cold brewing method is a dramatic shift in the chemical composition of the beverage, specifically regarding pH levels.
Because the coffee grounds never encounter boiling water, the solubility of acidic oils is significantly reduced, resulting in a drink that is roughly 60% less acidic than traditional hot-brewed coffee. This makes it an excellent choice for individuals with sensitive stomachs or those who find regular coffee too harsh.
This low-acid environment allows the natural sweetness of the bean to shine through, creating a naturally smooth and mellow flavor profile that rarely requires added sugar or heavy cream. When you make this at home, you will notice a distinct absence of the ‘burnt’ aftertaste often associated with dark roasts.
The result is a bold yet refreshing concentrate that maintains its integrity even when poured over ice, providing a sophisticated drinking experience that highlights the subtle nuances of the bean blend without any lingering bitterness.
Essential ingredients and tools for DIY cold brew
Choosing the right coarse ground coffee
To replicate the signature Starbucks flavor profile at home, you must start with a high-quality, dark roast bean that features notes of chocolate and citrus.
The most critical factor in the brewing process is the grind size; you must use extra-coarse grounds that resemble the texture of sea salt or raw sugar.
Using a fine grind will lead to over-extraction, resulting in a bitter, cloudy beverage that lacks the smooth finish characteristic of the professional version.
If you have a burr grinder, set it to the coarsest possible setting to ensure the water can flow freely around the particles during the long steeping period. Many enthusiasts prefer using 100% Arabica beans to capture that specific richness found in the cafe.
By selecting a fresh, dark roast and maintaining a strictly coarse consistency, you prevent the sediment from passing through your filter while ensuring the deep, bold flavors are extracted slowly and naturally over time for a perfect concentrate.
Filtered water ratios for the best taste
The quality of your water is just as important as the beans themselves, as cold brew is composed of nearly ninety-eight percent water. For a true Starbucks-style experience, always use freshly filtered water rather than tap water to avoid chlorine or mineral aftertastes that can mask the delicate coffee notes.
Achieving the perfect strength requires a specific ratio; a standard recommendation is a 1:4 coffee-to-water ratio by weight for a potent concentrate. For example, using one cup of coarse grounds with four cups of filtered water creates a versatile base that can be diluted later.
When you combine these elements, the cold water works to extract the sugars and caffeine without the acidic compounds that heat usually releases. Measuring your ingredients with a digital scale ensures consistency across every batch you make.
This precise balance allows the natural sweetness of the coffee to shine through, providing a velvety mouthfeel that serves as the ideal foundation for adding milk, syrups, or cold foam.
Pitchers, jars, and filtration equipment
You do not need an expensive commercial machine to produce high-quality cold brew, but having the right vessels makes the process much cleaner.
A large glass Mason jar or a dedicated cold brew pitcher with a built-in mesh core is ideal for the steeping phase, as glass does not retain odors or flavors from previous batches.
If you are using a simple jar, you will also need a reliable method for straining the mixture after the twenty-hour steep. A fine-mesh sieve lined with a paper coffee filter or a nut milk bag works exceptionally well to remove all fine particulates, ensuring a crystal-clear liquid.
Some home baristas prefer using a French press for its built-in plunger, though a secondary filtration step through a paper filter is often necessary to achieve that professional, sediment-free texture.
Investing in airtight storage containers is also wise, as it keeps your finished concentrate fresh in the refrigerator for up to two weeks, allowing you to enjoy a cafe-quality beverage whenever the craving strikes.
Step-by-step guide to making Starbucks style cold brew

Measuring your coffee-to-water ratio
To achieve that signature Starbucks smoothness, you must start with the correct brewing ratio of 1:4 or 1:5 for a concentrated base. For a standard batch, measure out 1 cup of coarsely ground coffee beans for every 4 cups of filtered water.
It is vital to use a coarse grind setting, similar to the texture of sea salt or breadcrumbs, to prevent the brew from becoming overly bitter or cloudy. Avoid using fine grounds, as they will over-extract and make the filtering process nearly impossible.
Using filtered water is a secret step that ensures the final profile is clean and free of mineral distractions. Simply combine the grounds and water in a large glass pitcher or specialized cold brew maker, ensuring every coffee particle is fully saturated.
This concentration allows you to dilute the final product with water, milk, or ice according to your specific taste preferences without losing the robust body and flavor associated with professional cafe standards.
The 12 to 24 hour steeping process
Patience is the most important ingredient when replicating the Starbucks method at home. Once your coffee and water are combined, let the mixture steep at room temperature or in the fridge for a minimum of 12 hours. For the boldest, most caffeine-rich profile, a 24-hour steep time is highly recommended.
Unlike traditional hot coffee, cold brew relies on time rather than heat to extract oils and caffeine, resulting in 60% less acidity and a much smoother finish. During this long immersion, keep the container covered to prevent any refrigerator odors from leaching into your beverage.
You do not need to stir the mixture repeatedly; a single gentle stir at the beginning is sufficient to ensure even extraction.
If you prefer a lighter, more floral note, aim for the 12-hour mark, but for that deep, chocolatey essence that characterizes a Starbucks Cold Brew, allow the grounds to remain in contact with the water for the full day before moving to the filtration stage.
How to strain and filter for a clean cup
Achieving a sediment-free, professional-grade cup requires a two-step filtration process. First, pour the mixture through a fine-mesh sieve to remove the largest coffee grounds. To get that ultra-clear Starbucks look, perform a second pass using a paper coffee filter or a cheesecloth lined over a funnel.
This secondary filtration removes the fine silty particles and excess oils that can make the coffee taste muddy or harsh over time. Do not squeeze the filter or the grounds, as this forces bitter tannins into your concentrate.
Once filtered, you are left with a potent cold brew concentrate that can be stored in the refrigerator for up to two weeks. When you are ready to serve, dilute the concentrate with equal parts water or milk and pour it over fresh ice.
This careful straining process ensures your homemade version is just as crisp and refreshing as the beverage you would order from a barista, providing a perfectly balanced and sophisticated caffeine kick every single morning.
How to create the perfect cold brew concentrate
The math for a 1:4 coffee ratio
To replicate that signature Starbucks smoothness at home, you must master the cold brew concentrate foundation using a strict 1:4 coffee-to-water ratio. This specific formula creates a dense, flavorful syrup that serves as the base for all your favorite iced drinks.
For a standard batch, measure out one cup of coarsely ground beans for every four cups of filtered room-temperature water. Using a coarse grind is non-negotiable, as fine particles will over-extract and lead to a bitter, muddy flavor profile.
Combine the ingredients in a large glass jar or a dedicated cold brew maker, ensuring all grounds are fully saturated without aggressive stirring. Allow the mixture to steep in a cool, dark place for exactly twenty hours.
This extended brewing time at a lower temperature allows the water to pull the natural sweetness and chocolate notes from the beans while leaving behind the harsh acidity found in hot-brewed coffee. Once finished, filter the liquid through a fine-mesh sieve or paper filter to yield a clean, velvety concentrate.
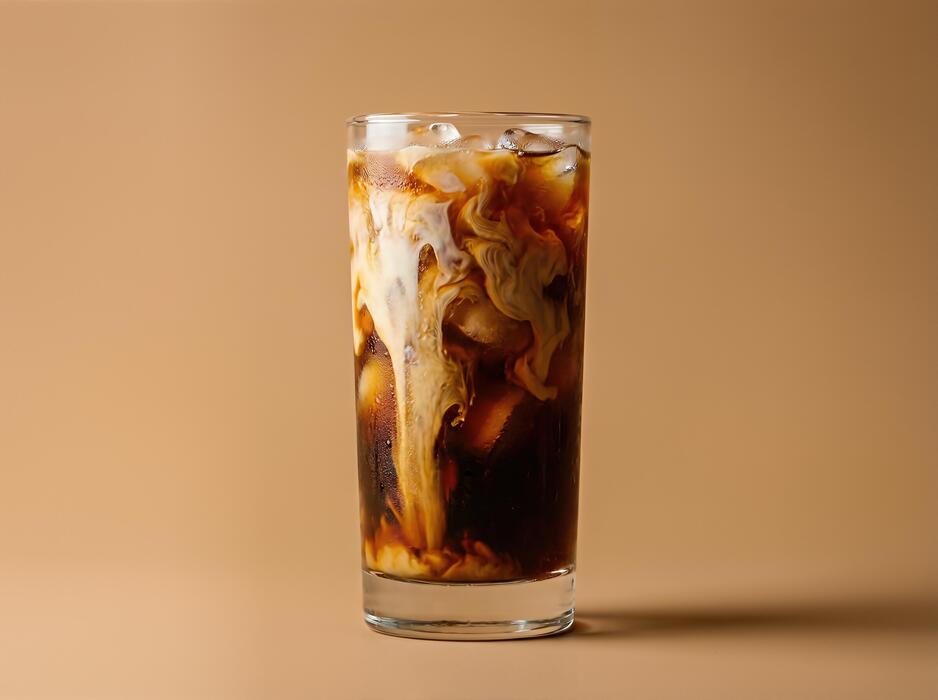
Diluting your concentrate with water or milk
The beauty of a cold brew concentrate is its versatility, allowing you to customize the strength of your beverage just like a professional barista. Because the 1:4 brewing ratio produces a very potent liquid, you should never drink it straight.
For a standard iced coffee that mirrors the Starbucks experience, use a one-to-one dilution ratio. Fill your glass with ice, pour in one part cold brew concentrate, and add one part filtered water.
If you prefer a creamier, latte-style drink, simply swap the water for your choice of whole milk, oat milk, or almond milk. The robust flavor of the concentrate is strong enough to stand up against heavy cream or sweet syrups without becoming diluted or losing its caffeine kick.
Always taste your mixture before adding sweeteners; the cold brewing process naturally reduces bitterness, so you may find you need less sugar than usual. Experimenting with these ratios allows you to find the perfect balance between bold coffee intensity and smooth, refreshing drinkability for your morning routine.
Storing your brew to keep it fresh
Once you have successfully filtered your concentrate, proper storage is essential to maintain that crisp, clean flavor profile for the entire week.
Transfer your cold brew into an airtight glass container, such as a mason jar or a swing-top bottle, to prevent it from absorbing any stray odors from your refrigerator.
Unlike hot coffee which oxidizes and turns sour within minutes, cold brew concentrate remains fresh and delicious for up to seven to ten days when kept chilled. It is vital to store the liquid in its undiluted concentrate form rather than mixing it with water or milk ahead of time.
Diluting the batch early can lead to faster flavor degradation and may cause the brew to taste flat after just forty-eight hours. If you notice any significant cloudiness or a change in the aroma, it is time to discard the batch and start fresh.
For an extra professional touch, consider freezing a small portion of your concentrate into coffee ice cubes to prevent your drinks from becoming watered down as the ice melts.
Tips for matching the signature Starbucks flavor
Why grind size is the most important factor
To replicate the smooth, low-acid profile of Starbucks cold brew, you must prioritize a consistent extra-coarse grind that resembles sea salt or peppercorns. Using a standard medium or fine grind will result in over-extraction, leading to a bitter, muddy cup that lacks the clean finish found in professional cafes.
A coarse texture ensures that water can flow freely around the particles during the long steeping process, extracting the deep chocolate and caramel notes without pulling out harsh tannins.
If you are grinding at home, avoid blade grinders which produce uneven dust; instead, opt for a burr grinder to achieve the uniformity required for cold immersion. This specific texture is the foundation of the brew because it allows for a slow, gentle extraction over 12 to 24 hours.
By mastering the grind size, you ensure that your homemade concentrate remains vibrant and clear, providing the perfect base for adding syrups, milk, or sweet cream while maintaining that robust, signature coffee backbone.
Using the right water temperature
One of the most common mistakes when making cold brew is using warm or hot water to speed up the process, which destroys the delicate flavor profile. For the authentic Starbucks experience, you should use filtered, room-temperature or cold water from the very beginning.
Using filtered water is non-negotiable because it removes impurities like chlorine that can distort the natural sweetness of the beans.
The science behind cold brew relies on time rather than heat to dissolve the coffee solids; therefore, keeping the mixture at a steady room temperature during the 20-hour steep is ideal for developing a rich body.
While some prefer to steep in the refrigerator, this often requires an even longer extraction time to reach full strength. For the best results, keep your brewing vessel in a cool, dark place on your counter to ensure a consistent thermal environment.
This controlled temperature approach prevents the oxidation and acidity associated with hot-brewed coffee, resulting in a velvety texture and a naturally sweet finish that defines the brand.
The secret to the Starbucks ‘Nariño’ blend taste
The specific flavor profile of Starbucks cold brew comes from their specialized blend of beans, historically sourced from the Nariño region of Colombia and East Africa. To mimic this at home, look for a medium-to-dark roast with distinct notes of cocoa and subtle citrus.
The Nariño beans are prized for their high-altitude growth, which creates a dense bean that holds up well during long immersion periods without becoming overly acidic. You should seek out beans that offer a nutty or chocolatey undertone rather than bright, floral, or fruity light roasts.
The ‘secret’ lies in the balance; the Colombian beans provide the smooth, earthy base, while the African beans add a touch of acidity and complexity to the finish.
To get even closer to the signature taste, ensure your beans are freshly roasted but have rested for at least three days to de-gas. Using this specific flavor profile allows your cold brew to stand up to heavy cream and sweeteners, mirroring the iconic depth of the retail version perfectly.
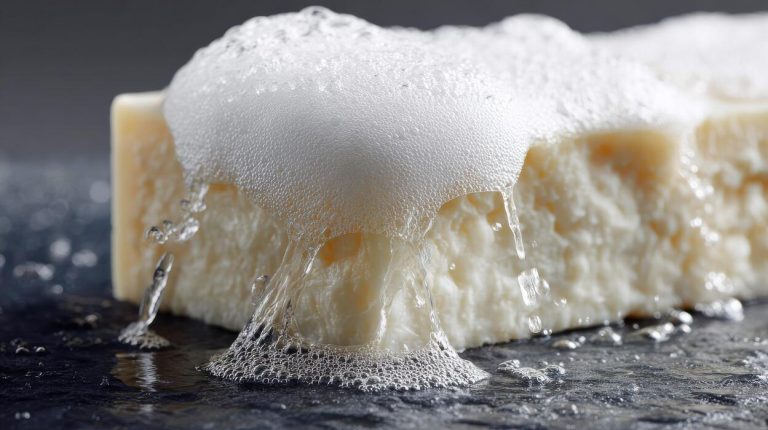
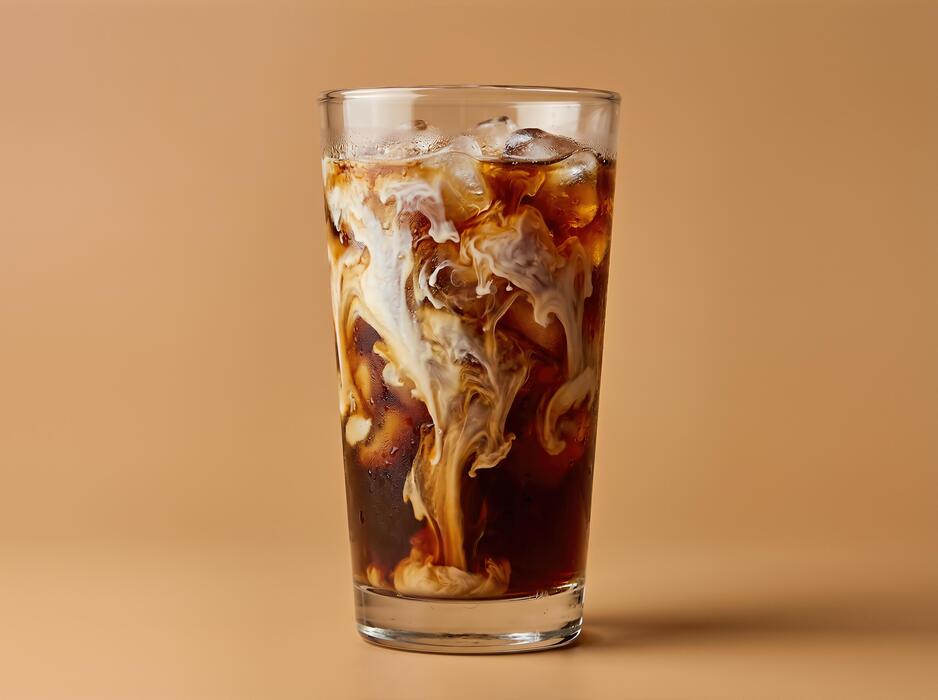
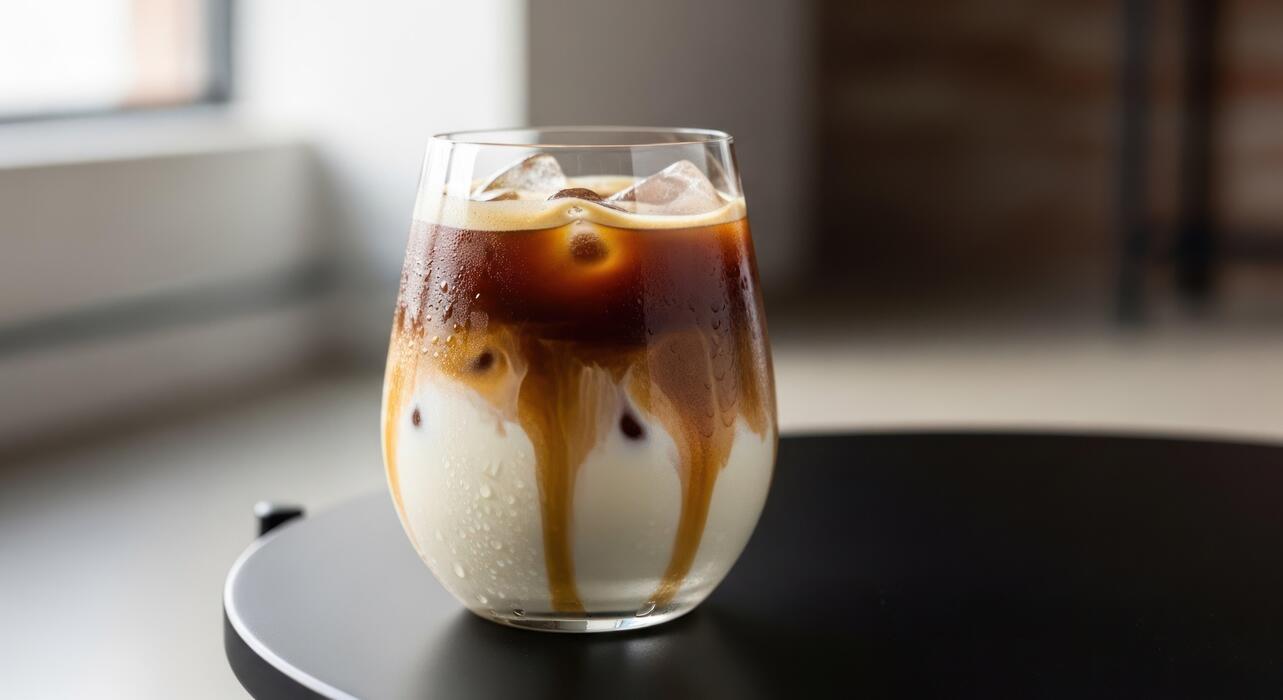
How to make Starbucks cold foam at home
Vanilla sweet cream cold foam recipe
To replicate the signature Starbucks flavor for your home-brewed cold brew, you must master the ratio of the vanilla sweet cream base. The professional secret lies in combining heavy whipping cream, 2% milk, and vanilla syrup in a specific 3:2:1 ratio.
Start by mixing half a cup of heavy cream with a third of a cup of 2% milk and two tablespoons of high-quality vanilla simple syrup.
This specific combination ensures the foam is heavy enough to sit atop your iced coffee without immediately dissolving into the brew, yet light enough to provide a velvety mouthfeel.
For the best results, ensure all ingredients are thoroughly chilled before you begin the mixing process, as cold proteins and fats bond more effectively to trap air.
This foundational recipe serves as the perfect creamy topper for a glass of smooth, slow-steeped cold brew, providing that iconic cascading effect as the cream slowly bleeds into the dark coffee below for a professional finish.
Tools for getting the perfect frothy texture
Achieving the ideal microbubble consistency requires the right mechanical agitation to transform liquid cream into a stiff, cloud-like foam.
The most efficient tool for home baristas is a handheld milk frother, which allows you to control the depth and angle of aeration; simply submerge the whisk and pulse for thirty seconds until the volume doubles.
If you do not own a wand, a French press serves as an excellent alternative. Pour your cold cream mixture into the carafe and pump the plunger rapidly for twenty seconds to create a dense, uniform texture that rivals commercial aerators.
For those who prefer a hands-off approach, an electric cold foam maker with a specific ‘cold stir’ setting can yield consistent results every time. Regardless of the tool you choose, the goal is to eliminate large bubbles in favor of a smooth, glossy sheen.
Once your foam reaches a thick, pourable consistency similar to melted ice cream, it is ready to be layered over your favorite cold brew coffee.
Salted caramel and seasonal foam variations
Once you have mastered the basic technique, you can easily customize your cold brew experience by experimenting with different flavor profiles and seasonal additives.
To create a salted caramel cold foam, simply substitute the vanilla syrup for caramel sauce and add a generous pinch of sea salt before frothing; this creates a sophisticated sweet-and-salty contrast that enhances the chocolatey notes of the coffee.
During autumn months, you can whisk in a spoonful of pumpkin spice sauce and a dash of cinnamon to recreate the famous seasonal topper at a fraction of the cafe price.
For a dairy-free alternative, utilize full-fat oat milk combined with a touch of coconut cream, as these plant-based options provide the necessary fat content to maintain a stable structure. Adding a drop of peppermint extract or cocoa powder can further elevate your beverage for winter themes.
These simple adjustments allow you to transform a standard glass of cold brew into a gourmet specialty drink that matches your specific cravings throughout the entire year.
Common mistakes to avoid when brewing at home
Why you should never use fine grounds
To replicate the smooth signature taste of Starbucks cold brew, you must prioritize the grind size above all else. Using fine grounds, such as those intended for espresso or standard drip machines, is a critical error that will ruin your batch.
Fine particles settle too densely at the bottom of your vessel, creating a muddy silt that is nearly impossible to filter out properly. This results in a cloudy, gritty texture that lacks the clean finish found in professional cold brews.
Furthermore, the increased surface area of fine grounds causes the water to extract flavors far too quickly, leading to an unbalanced and harsh profile. Instead, you should always use a coarse, pebble-like grind similar to sea salt.
This specific texture allows water to flow freely around the beans, ensuring a slow and steady flavor extraction over several hours. By investing in a quality burr grinder or selecting the coarsest setting at the store, you guarantee a crisp, sediment-free concentrate that mirrors the premium Starbucks experience at home.
Avoiding over-extraction and bitterness
Patience is a virtue when brewing cold coffee, but leaving your grounds to steep for too long is a common mistake that leads to extreme bitterness.
While heat usually extracts acids and oils quickly, the cold brew process relies on time; however, there is a definitive limit to this chemical reaction.
If you let your coffee steep beyond the twenty-four-hour mark, you begin to pull out woody, astringent tannins that mask the natural sweetness of the beans. To achieve that famous mellow Starbucks profile, you should aim for a steeping window of 12 to 20 hours at room temperature.
It is also vital to maintain a consistent coffee-to-water ratio, typically one part coffee to four parts water for a concentrate. If the brew becomes too strong, do not panic; you can simply dilute the final product with water or milk before serving.
Monitoring your brew time with a kitchen timer prevents the over-extraction of bitter compounds, ensuring your homemade beverage remains smooth, chocolatey, and refreshing every single time.
The dangers of using unfiltered tap water
Since cold brew is composed of approximately 98% water, the quality of your source is just as important as the beans themselves.
Many home brewers make the mistake of using unfiltered tap water, which often contains high levels of chlorine, fluoride, and various minerals that can produce a chemical or metallic aftertaste.
These impurities clash with the delicate aromatic oils of the coffee, preventing the nuanced flavors of the roast from shining through. Starbucks specifically uses triple-filtered water to ensure a neutral base that highlights the bean’s profile.
To replicate this level of quality, you should always use filtered or bottled spring water for your infusion. Avoid using distilled water, as it lacks the essential minerals needed to assist in the extraction process, often resulting in a flat or thin taste.
By starting with a clean, purified water base, you eliminate unwanted odors and flavors, allowing the rich, bold notes of your coffee to take center stage. This simple switch is the easiest way to elevate your home brewing setup to a professional standard.
Frequently Asked Questions
What coffee beans does Starbucks use for their cold brew?
Starbucks uses a specific Cold Brew Blend, which is a medium-roast mixture of African and Latin American beans. For the closest DIY version, use a dark or medium roast with low acidity and chocolatey notes, such as Starbucks Sumatra or Caffè Verona.
What is the correct coffee-to-water ratio for Starbucks cold brew?
To replicate the Starbucks strength, use a 1:4 or 1:5 ratio of coffee to water. For a standard batch, combine 1 cup of coarsely ground coffee with 4 cups of filtered cold water to create a concentrated base.
How long should I steep Starbucks cold brew at home?
Starbucks steeps their cold brew for 20 hours to achieve a smooth, full-bodied flavor. At home, you should aim for 12 to 20 hours at room temperature or in the refrigerator; steeping longer than 24 hours can result in a bitter taste.
Should I use a fine or coarse grind for cold brew?
You must use a very coarse grind, similar to the texture of sea salt or breadcrumbs. Fine grounds will over-extract, making the coffee bitter, and are difficult to filter out, resulting in a muddy texture.
How do I serve the cold brew to taste like the cafe version?
Because the homemade version is a concentrate, you should dilute it with equal parts water or milk. Fill a glass with ice, add the cold brew concentrate, and top it with water or your favorite creamer to match the Starbucks experience.
Can I make Starbucks cold brew in a French Press?
Yes, a French Press is one of the easiest ways to make it. Simply add the coarse grounds and water, let it steep for 20 hours with the plunger up, and then slowly press down to filter the coffee.
How long does homemade Starbucks cold brew stay fresh?
The cold brew concentrate can be stored in an airtight container in the refrigerator for up to 7 to 10 days. For the best flavor, do not dilute the entire batch until you are ready to serve it.
Conclusion
Making Starbucks cold brew at home is a simple, cost-effective way to enjoy a smooth and bold beverage. By selecting high-quality beans, using a coarse grind, and allowing the coffee to steep for twenty hours, you can replicate that signature cafe flavor in your own kitchen. Now that you have mastered the technique, feel free to experiment with different syrups and foams. Start brewing today and enjoy your handcrafted, refreshing masterpiece anytime.