Nespresso Milk Frother Latte Art
If you are wondering if your Nespresso milk frother can create beautiful latte art, the short answer is yes. While these machines are famous for thick foam, achieving that silky microfoam needed for hearts and rosettes just requires a simple technique shift. In this guide, we will show you exactly how to texture your milk perfectly and pour like a pro. Whether you have an Aeroccino or a Barista device, you will be crafting cafe-quality designs in no time at all.
Can you make latte art with a Nespresso milk frother?
The science of microfoam vs. airy foam
To achieve authentic latte art, you must understand the distinction between standard foam and true microfoam. Traditional Nespresso Aeroccino frothers often create a stiff, dry foam that sits on top of the coffee, which is excellent for cappuccinos but difficult for pouring designs.
True microfoam is a liquid emulsion where microscopic air bubbles are evenly integrated into the milk’s structure, giving it a glossy, wet paint appearance. When using a Nespresso device, the goal is to avoid the ‘sea foam’ texture by controlling the aeration process.
If your frother produces bubbles that are too large, the foam will lack the necessary elasticity to glide across the crema. Achieving this requires a delicate balance of temperature and agitation.
By swirling the milk immediately after the cycle finishes, you can manually break down larger bubbles and incorporate them back into the liquid, creating a silky consistency that is essential for drawing hearts or rosettas effectively in your morning cup.
Aeroccino vs. Barista Recipe Maker capabilities
The specific Nespresso hardware you own significantly impacts your latte art potential. The standard Aeroccino 3 and 4 models use a spinning whisk that tends to over-aerate the milk, making it slightly too thick for intricate pouring.
To compensate, many users remove the metal spring from the whisk to reduce air intake, resulting in a smoother liquid texture. In contrast, the Nespresso Barista Recipe Maker is a game-changer for enthusiasts.
It utilizes an induction heating system and customizable stirring speeds that can be controlled via an app, specifically designed to mimic the high-quality output of a professional steam wand. This device allows for precise temperature control, which prevents the milk proteins from breaking down too quickly.
If you are serious about mastering the pour, the Barista model offers the technical precision required for fluid movement. Regardless of the machine, always use fresh, cold milk to ensure the proteins have the best chance to form a stable, pourable structure.
Why texture matters more than bubbles
The secret to successful latte art with a Nespresso frother lies in the homogeneity of the milk. Many beginners focus on the volume of the foam, but volume actually works against you if the milk and foam have separated into two distinct layers.
For a successful pour, the milk needs to be a uniform, viscous liquid. After your Nespresso frother completes its cycle, you should notice a reflective, mirror-like sheen on the surface. If the surface looks matte or chunky, the texture is too dry.
You can fix this by tapping the jug on the counter to pop large bubbles and swirling it vigorously to ‘polish’ the milk. This process keeps the foam suspended within the liquid rather than letting it float to the top.
When you begin your pour, this integrated texture allows the white foam to dive under the crema and then resurface gracefully when you increase the flow rate. Mastering this tactile manipulation of the milk is the most critical step in turning a standard Nespresso coffee into a visual masterpiece.
Best Nespresso frother settings for latte art

How to use the Aeroccino whisk correctly
To achieve the silky microfoam necessary for latte art, you must ensure the whisk is correctly configured inside your Aeroccino. Most Nespresso models come with a whisk that includes a removable metal coil; for latte art, you should remove the wire coil and use the plastic whisk base only.
This prevents the machine from over-aerating the milk into a stiff, dry foam that sits on top of the coffee like a cloud. By using the base without the spring, you create a liquid, velvety texture that integrates perfectly with the espresso crema.
When you pour, the milk should have a glossy sheen similar to wet paint. If you find the milk is still too thin, try pulsing the whisking cycle by manually stopping it a few seconds before the automatic timer ends.
This technique ensures the milk remains pourable and fluid, allowing you to manipulate the flow for hearts or rosettas without the foam separating from the liquid prematurely.
Selecting the right temperature for stretching milk
Temperature plays a vital role in the stability of your foam, as overheating can break down the proteins required to hold a design. When using a Nespresso frother, aim for a temperature between 60°C and 65°C (140°F-150°F) to preserve the natural sweetness of the milk and maintain a flexible texture.
If your model has adjustable heat settings, avoid the highest heat option, as scalded milk loses its elasticity and becomes brittle.
To get the best results, always start with ice-cold milk directly from the refrigerator, which provides a longer window for the whisk to incorporate air before reaching the final temperature. This extra time is essential for ‘stretching’ the milk, a process that breaks large bubbles into tiny micro-bubbles.
If the milk feels too hot to the touch on the outside of the jug, it has likely passed the point of ideal texture. Consistency is key, so monitor the cycle closely to ensure the proteins remain intact for a smooth, high-contrast pour.
Using the Barista App for custom textures
For owners of the Nespresso Barista Recipe Maker, the companion app is the ultimate tool for fine-tuning milk density for latte art.
Navigate to the app and select the ‘Latte Art’ or ‘Cafe Latte’ preset, which is specifically programmed to spin the whisk at precise RPMs to create a uniform microfoam.
Unlike standard frothers, the Barista device allows you to synchronize specific whisking speeds with gradual temperature increases, ensuring the milk is never over-agitated. To achieve the best results, use the manual override feature to adjust foam thickness to the lowest possible setting.
This ensures the milk remains thin enough to flow under the crema while still being dense enough to leave a white mark on the surface. Once the cycle finishes, give the jug a firm tap on the counter and a vigorous swirl to polish the milk.
This step, combined with the app’s precision, eliminates large bubbles and ensures a professional-grade finish that mimics the steam wand of a commercial espresso machine.
How to prep your milk for a silky finish
Best types of milk for Nespresso frothers
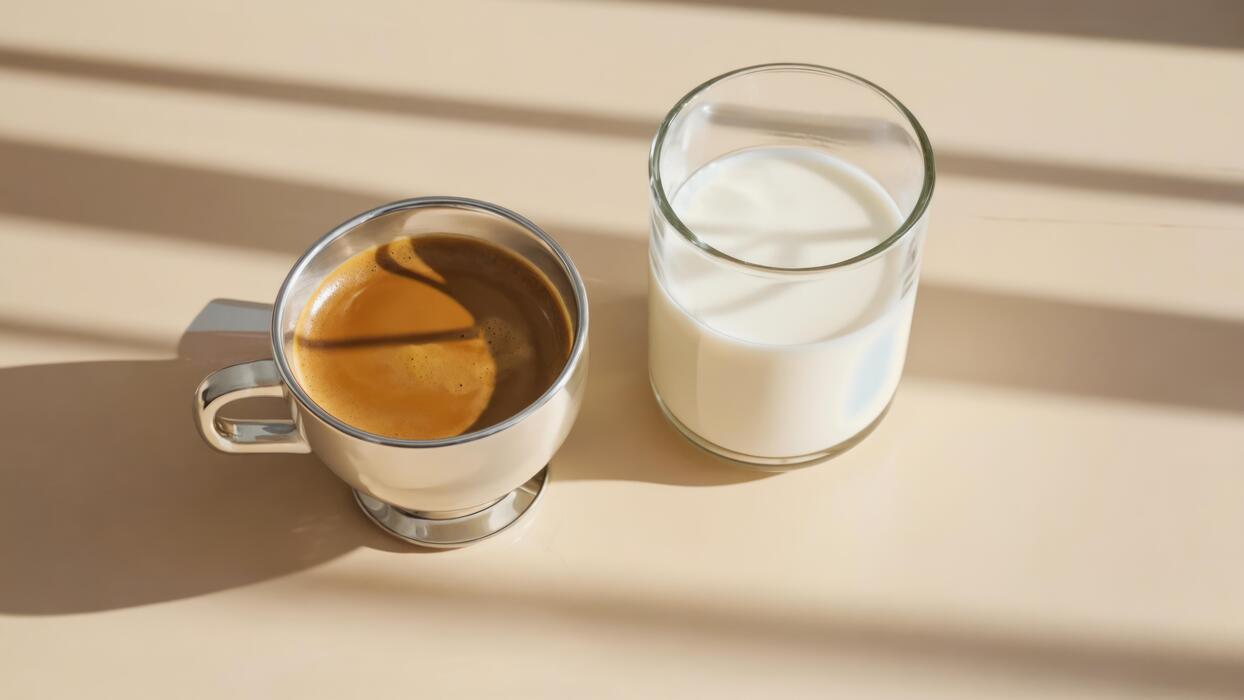
To achieve a professional latte art finish with your Nespresso Aeroccino or Barista machine, the foundation starts with your choice of milk. Whole dairy milk remains the gold standard because its high protein and fat content create a stable, elastic microfoam that holds its shape during the pour.
If you prefer plant-based alternatives, prioritize barista-edition oat or soy milk, as these are specifically formulated with added stabilizers to prevent curdling and mimic the creamy texture of cow’s milk.
Always ensure your milk is refrigerated and ice-cold before starting the frothing cycle; cold milk allows more time for the steam or whisk to incorporate air before reaching the final temperature, resulting in a much finer bubble structure.
Avoid using non-fat or skim milk if possible, as these often produce a ‘stiff’ or dry foam that sits on top of the coffee like a cloud rather than integrating smoothly for intricate designs. Selecting the right liquid determines whether you get a chunky texture or a pourable, velvet consistency.
The secret to removing large surface bubbles
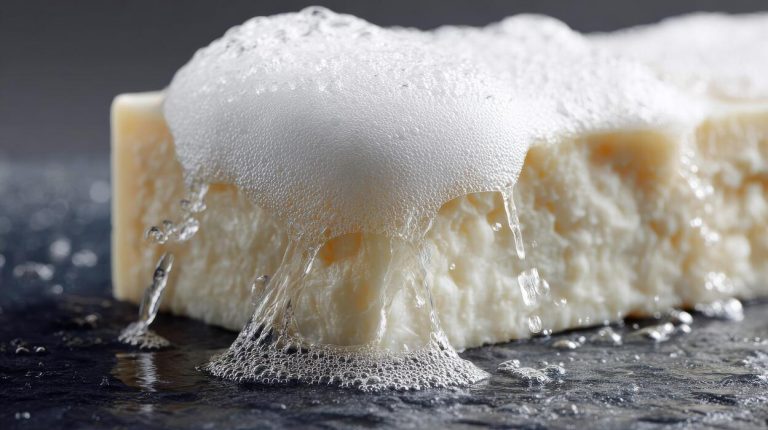
One of the most common hurdles when using an automated Nespresso frother is the formation of large, soapy ‘macro-bubbles’ at the top of the jug. These bubbles are the enemy of detailed latte art because they lack the structural integrity needed for crisp lines.
The secret to eliminating them is a two-step process performed immediately after the frothing cycle ends. First, tap the bottom of the milk jug firmly against a hard countertop or wooden board. This physical shock forces the larger, less stable air pockets to burst, leaving only the tiny micro-bubbles behind.
If the bubbles persist, continue to tap and groom the milk until the surface appears uniform. It is vital to perform this step quickly before the milk and foam have a chance to separate into distinct layers.
By aggressively addressing these surface imperfections, you ensure the texture is consistent throughout the entire pitcher, which is the primary requirement for creating high-quality patterns like hearts or rosettas in your morning espresso cup.
Swirling and tapping techniques for a glossy look
Once you have tapped out the large bubbles, the final step to achieving that ‘wet paint’ look is a continuous, vigorous swirling motion. Hold the pitcher by the handle or base and swirl the milk in a circular motion until the surface becomes reflective and glossy.
This technique effectively reintegrates the foam back into the liquid milk, preventing the dreaded separation that leads to a ‘clumpy’ pour. You want the mixture to look like melted marshmallows or shiny white paint before you begin your latte art attempt.
If the milk starts to look matte or dull, it means the foam is beginning to stiffen, so you must swirl again to loosen the texture. Maintaining this constant motion right until the moment of pouring is the professional secret to a silky finish.
A well-swirled pitcher allows the milk to flow under the espresso crema initially and then glide across the surface at the end, providing the fluid dynamics necessary for beautiful, high-contrast designs that look as good as they taste.
Step-by-step guide to pouring your first design
Setting the base with Nespresso capsules
To begin your latte art journey, start by brewing a concentrated shot using your Nespresso machine. For the best results, select a capsule with a high intensity rating and a rich crema, such as the Ispirazione Italiana range.
Brew the espresso into a wide-mouthed cup to provide a larger canvas for your design. While the machine is running, prepare your milk in the Aeroccino.
If you are using the Aeroccino 3, remove the wire whisk to create a silkier microfoam rather than stiff, dry foam which is impossible to pour. For the Aeroccino 4, select the second light setting specifically designed for latte art.
Once the milk is ready, give the jug a few firm taps on the counter and a gentle swirl to incorporate any bubbles. This ensures a glossy, paint-like consistency that will blend seamlessly with the coffee crema.
Pouring a small amount of milk from a height initially will help establish a stable brown base for your pattern.
The high-to-low pouring technique
Mastering the flow of milk requires a specific movement often referred to as the high-to-low transition. Start with your milk jug held about three inches above the cup.
Pour a thin, steady stream into the center of the espresso to pierce the crema and fill the bottom of the cup without disturbing the surface tension too much. This creates the depth needed for the design to sit on top later.
When the cup is approximately half full, bring the spout of the jug as close to the liquid surface as possible without touching it. This change in proximity is the critical turning point where the white microfoam will begin to stay on top of the coffee rather than sinking below.
Increase your pouring speed slightly and start a gentle side-to-side wrist wiggle. You will see white ripples begin to fan out across the surface, forming the foundational layers of a heart or a rosetta design as the foam glides over the espresso base.
How to finish with a clean cut-through
The final stage of your pour determines the clarity and symmetry of your latte art design. Once your pattern has filled most of the cup and you are nearing the rim, you must execute a clean finish to avoid a messy blob.
Gradually slow down your pouring speed and begin to lift the jug away from the surface of the coffee again. This creates a narrower stream of milk that acts like a pen.
While maintaining this thin stream, draw the jug forward through the center of your design in one continuous, fluid motion. This decisive cut-through pulls the edges of your ripples inward, transforming a simple circle into a defined heart or a series of stacked leaves.
Ensure you do not stop pouring mid-way, as this will cause the foam to collapse. Aim to finish the movement just as the milk reaches the very edge of the cup, resulting in a professional-looking finish that highlights the contrast between the dark Nespresso crema and the bright white microfoam.
Easy latte art patterns for beginners
How to pour a classic heart
To master the classic heart with your Nespresso milk frother, start by tilting your cup at a forty-five-degree angle. Begin your pour from a height of about three inches, aiming for the center of the espresso crema to create a solid base.
As the cup fills to the halfway mark, lower the frother pitcher as close to the liquid surface as possible without touching it. At this stage, you should see a white circle begin to form on top of the dark coffee. Maintain a steady flow while keeping the pitcher centered.
Once the white circle reaches the desired size, slightly lift the pitcher back up and draw a thin line of milk straight through the center of the circle toward the far edge of the cup.
This final movement pulls the top of the circle down into the iconic V-shape, completing the classic heart design. Using the Aeroccino on the light foam setting ensures the texture is fluid enough for this seamless pour technique.
Tips for creating a simple tulip
Creating a tulip with Nespresso frothed milk is essentially an evolution of the heart technique, requiring multiple controlled pours instead of one continuous motion.
Start by pouring from a distance to establish your base, then bring the pitcher close to the surface and pour a small amount of foam to create your first petal.
Quickly stop the flow, move the pitcher back slightly, and pour a second layer of foam directly behind the first one. Each subsequent pour should push the previous foam layers forward, creating the layered look of a flower.
The key to success with a Nespresso frother is to manually swirl the pitcher immediately after the frothing cycle ends to incorporate any stiff peaks back into the liquid. This creates the microfoam consistency necessary for defined layers.
Ensure you tilt the cup steeply at the start and gradually level it off as you stack your petals. Finish the design by lifting the pitcher high and cutting through the center to pull the petals into a tulip shape.
Using a latte art pen for etching designs
If you find free-pour patterns challenging with the thicker foam typically produced by Nespresso devices, etching with a latte art pen is a fantastic alternative for beginners. Start by pouring your frothed milk into the espresso to create a solid white surface or a simple blob of foam.
Once the surface is stable, dip your latte art etching tool or a simple wooden toothpick into the dark espresso crema or a drizzle of chocolate syrup. Use the tool to draw lines, swirls, or intricate geometric patterns directly onto the white foam.
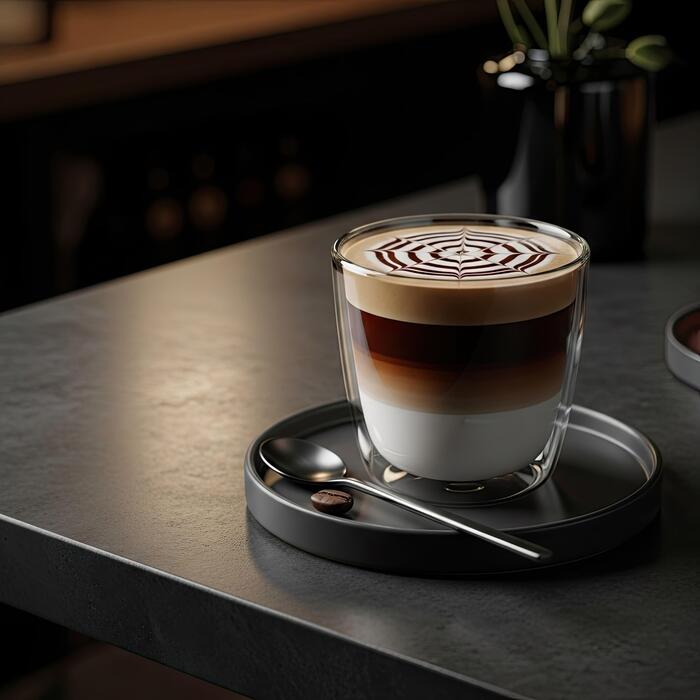
You can create a beautiful spiderweb by drawing concentric circles of syrup and dragging the pen from the center outward. This method is much more forgiving than pouring because it allows you to fix minor mistakes and add fine details that are impossible to achieve with a standard pitcher.
It works best with stiffer foam settings, as the thicker bubbles provide a sturdy canvas that prevents your designs from sinking or blurring into the coffee too quickly.
Common mistakes when using Nespresso frothers
How to fix stiff or dry foam
One of the most frequent hurdles for Nespresso users attempting latte art is the creation of stiff, ‘dry’ foam that sits on top of the coffee like a cloud rather than integrating smoothly.
This usually happens because the Aeroccino whisk is left to run its full cycle, incorporating too much air and creating large bubbles.
To achieve a silky microfoam texture suitable for pouring designs, you must manually stop the frothing process early, typically around the 30 to 40-second mark, before the milk becomes overly voluminous.
Additionally, ensure you are using the correct whisk attachment; for latte art, you often need the smooth ring rather than the spring coil to minimize excessive aeration.
After the cycle ends, immediately tap the pitcher on the counter and swirl it vigorously to incorporate any stray bubbles back into the liquid. This creates a glossy, wet-paint consistency that allows the milk to glide over the espresso crema instead of clumping in the center of your cup.
Dealing with milk that is too hot
Temperature plays a critical role in the structural integrity of your milk foam, and Nespresso frothers often heat milk beyond the ideal range for latte art.
When milk exceeds 155 degrees Fahrenheit, the proteins begin to break down, causing the microfoam to lose its elasticity and preventing it from holding complex shapes.
If you find your foam feels thin or lacks the necessary ‘stretch’ to form a heart or rosette, try starting with very cold milk straight from the refrigerator to give you more control over the heating window.
You can also try interrupting the heating cycle manually if you notice the pitcher becoming too hot to touch comfortably.
Using a dedicated thermometer can help you identify the sweet spot between 140 and 150 degrees, where the sweetness of the lactose is maximized and the foam remains stable enough for pouring.
Overheated milk not only ruins the texture but also masks the subtle flavor notes of your Nespresso capsule, leading to a flat-tasting beverage.
Why your foam is separating from the coffee
If your milk pours out as a thin liquid followed by a sudden ‘plop’ of thick foam, your milk has successfully separated, making latte art impossible. This common mistake occurs when the frothed milk is allowed to sit for too long before being poured into the espresso.
To prevent this, you must pour the milk immediately after the frother stops, maintaining a constant swirling motion in the pitcher until the very moment of the pour.
Another factor is the height of your pour; if you start too high, the milk dives under the crema without leaving a mark, whereas starting too low too early causes the foam to sit on top prematurely.
Focus on a low-and-slow pouring technique while keeping the milk and foam emulsified through consistent movement.
If separation has already occurred, you can try transferring the milk to a separate latte art pitcher to re-blend the layers, ensuring the liquid and microfoam remain a singular, homogenous mixture that flows gracefully into your coffee cup for a professional finish.
Essential tools to improve your latte art
Why you need a dedicated stainless steel pitcher
While your Nespresso milk frother is excellent at heating and aerating milk, you cannot pour intricate designs directly from the frother’s wide, circular rim. Transferring your frothed milk into a dedicated stainless steel pitcher is the most critical step for achieving professional results.
These pitchers allow for a temperature-stable environment, helping you maintain the milk’s creamy texture while you swirl it to remove unwanted bubbles.
Stainless steel also provides essential tactile feedback, allowing you to feel the temperature of the milk through the metal walls to ensure it hasn’t cooled too much during the transfer.
By using a pitcher, you gain the necessary ergonomics and control required to position the milk close to the espresso’s surface. This proximity is vital for creating the contrast needed for hearts or rosettas.
Without the specialized handle and shape of a pitcher, your Nespresso foam will likely land in a single clump rather than flowing into a beautiful, controlled pattern.
The benefits of using a narrow spout
The secret to fine-lining your latte art lies in the geometry of your pouring vessel, specifically the spout. Using a pitcher with a narrow, pointed spout allows for high-precision flow control that a standard Nespresso frother simply cannot provide.
This design enables you to break the surface tension of the crema gently and then ‘draw’ with the foam by manipulating the stream’s thickness. A narrow spout acts like a fine-tipped pen, giving you the ability to create delicate leaves or sharp points on a heart.
It helps in managing the flow rate and velocity, ensuring that the milk doesn’t rush out too quickly and wash away your design. When you use a narrow spout, you can achieve better symmetry and definition in your patterns.
This tool is especially helpful when working with the microfoam produced by Nespresso Aeroccinos, which can sometimes be thick; the spout helps refine that thickness into a workable stream for artistic expression and professional presentation.
Cleaning tips to maintain foam quality
To ensure your Nespresso milk frother consistently produces the silky microfoam required for latte art, rigorous cleaning is mandatory. Residual milk proteins and fats can quickly build up on the whisk and the non-stick interior, leading to burnt flavors and poor aeration in future batches.
After every single use, you should immediately rinse the frother with cool water and use a non-abrasive cloth to wipe the interior surfaces.
Pay close attention to the small spring whisk, as dried milk trapped in the coils will prevent it from spinning at the correct speed, resulting in thin, bubbly foam instead of velvet texture.
For a deeper clean, occasionally use a mild detergent or specialized milk cleaner to dissolve stubborn buildup that water alone cannot reach. Maintaining a pristine heating element ensures that the milk reaches the optimal temperature for sweetness and stability.
Consistent maintenance not only extends the lifespan of your Nespresso equipment but also guarantees that your milk texture remains predictable and perfect for pouring complex latte art designs.
Frequently Asked Questions
Can you make latte art with a Nespresso Aeroccino?
Yes, but it requires a specific technique because the Aeroccino often creates foam that is too stiff. To achieve a pourable microfoam, remove the wire coil from the whisk and pour the milk into a separate latte art pitcher immediately after frothing.
How do I get the right milk consistency for latte art using a Nespresso frother?
Stop the frothing cycle slightly early if possible, or swirl the milk vigorously in a metal pitcher to break down large bubbles. The goal is to create ‘wet paint’ consistency rather than a dry, stiff meringue-like foam.
Which Nespresso machine is best for practicing latte art?
The Nespresso Creatista series is the best for latte art because it features a built-in steam wand. Unlike the Aeroccino, the steam wand allows you to manually control aeration and texture, producing professional-grade microfoam.
Do I need a separate pitcher for Nespresso latte art?
Yes, transferring the milk from the Aeroccino to a stainless steel milk frothing pitcher with a narrow spout is essential. The spout provides the precision needed to control the flow and draw designs on the espresso.
What type of milk works best for latte art with Nespresso frothers?
Full-fat dairy milk (whole milk) produces the most stable microfoam and the smoothest texture for pouring designs. If using plant-based milk, ‘Barista Edition’ oat or soy milks are recommended for their higher fat and protein content.
Why is my Nespresso foam too thick for latte art?
The Aeroccino’s whisk with the spring attached is designed for cappuccinos, creating very airy foam. For latte art, remove the metal spring to use just the plastic whisk, which creates a thinner, more integrated texture suitable for pouring.
Conclusion
Mastering latte art with your Nespresso milk frother is a rewarding journey that blends technique with creativity. By focusing on milk temperature and achieving the perfect microfoam consistency, you can transform your daily caffeine fix into a visual masterpiece. Remember that consistency comes with practice, so do not be discouraged by early attempts. Keep experimenting with different pouring angles and designs. With patience, you will soon be crafting professional-quality lattes that taste as beautiful as they look.