How To Make Homemade Cold Brew Iced Coffee
How to make homemade cold brew iced coffee is simpler than you think—no fancy equipment or barista skills required. The core problem most people face is ending up with bitter, weak, or watery coffee. This guide delivers the foolproof method: coarse grounds, cold water, and patience. You’ve come to the right place for a smooth, concentrated brew that beats any store-bought version. Let’s fix your morning routine.
What Is Cold Brew Iced Coffee and How Is It Different?
Cold brew vs. iced coffee: key differences explained
Understanding the difference is your first step to mastering homemade cold brew. Iced coffee is simply hot-brewed coffee that is cooled down and poured over ice. This method can extract bitter compounds and acids due to the high heat, often resulting in a sharper taste.
Cold brew, on the other hand, is made by steeping coarsely ground coffee beans in cold or room-temperature water for 12 to 24 hours. No heat is involved, which fundamentally changes the flavor profile.
The long, gentle extraction pulls out the sweet, chocolatey, and nutty notes while leaving behind many of the harsh, bitter compounds. For your homemade version, use a ratio of 1 cup of coarsely ground coffee to 4 cups of cold, filtered water.
Steep it in the refrigerator for at least 12 hours, then strain through a fine-mesh sieve or a cheesecloth. This process yields a concentrated coffee that you can dilute with water or milk to your preference.
The result is a smoother, less acidic brew that tastes distinctly different from traditional iced coffee.
Why cold brew tastes smoother and less acidic
The secret to cold brew’s signature smoothness lies in its chemistry. Hot water is a more aggressive solvent, quickly extracting acids and bitter-tasting compounds like chlorogenic acid lactones from coffee grounds.
In contrast, cold water’s low temperature slows down this extraction, selectively pulling out the desirable oils and sugars while leaving behind up to 67% of the acids that cause bitterness and stomach irritation. This process creates a naturally sweeter, mellower concentrate that is less likely to upset sensitive stomachs.
To maximize this benefit in your homemade batch, use a coarse grind—similar to sea salt—to prevent over-extraction and a muddy taste. A longer steep time of 18 to 24 hours can further develop the smooth, rich body.
After straining, you’ll notice the concentrate has a silky texture with notes of cocoa or caramel, not the sharp, acidic bite of hot-brewed coffee. This makes cold brew an excellent base for adding milk, cream, or flavored syrups without the need for added sugar to mask bitterness.
The best coffee beans for homemade cold brew
Choosing the right beans is crucial for a successful homemade cold brew. Since the cold process mutes high-toned flavors, opt for a medium to dark roast for the richest, most balanced result.
Dark roasts like French or Italian have lower acidity and more pronounced caramel, chocolate, and nutty notes that shine in cold brew. Avoid light roasts, as they can taste flat or sour when brewed cold.
For bean origin, single-origin beans from Brazil, Colombia, or Sumatra are excellent choices because they offer natural sweetness and low acidity. Blends labeled “cold brew” are also a safe bet. Always buy whole beans and grind them yourself right before brewing to preserve freshness—a coarse grind is essential.
For a flavor twist, try beans with tasting notes of “chocolate,” “toffee,” or “stone fruit.” A good rule of thumb is to use a 1:4 coffee-to-water ratio by weight (e.g., 100g coffee to 400g water).
This ensures your concentrate is strong enough to hold up to ice or milk without becoming watery. Experiment with different beans to find your perfect smooth, low-acid brew.
Essential Equipment for Making Cold Brew at Home

Basic tools you already have in your kitchen
You likely already own everything needed to start making delicious cold brew at home. The most essential tool is a large glass jar or pitcher (a 64-ounce mason jar works perfectly) for steeping the coffee grounds.
You will also need a fine-mesh strainer or a cheesecloth to filter out the grounds after brewing. A wooden spoon or spatula is handy for stirring the coffee-water mixture. For measuring, a kitchen scale ensures consistent coffee-to-water ratios, but measuring cups work too.
Finally, a second container for storing the finished concentrate is helpful. These basic items are cost-effective and allow you to start cold brewing immediately without any specialized purchases. The key is ensuring your filter setup is fine enough to catch all grounds, preventing a gritty texture in your final brew.
Specialized cold brew makers vs. DIY setups
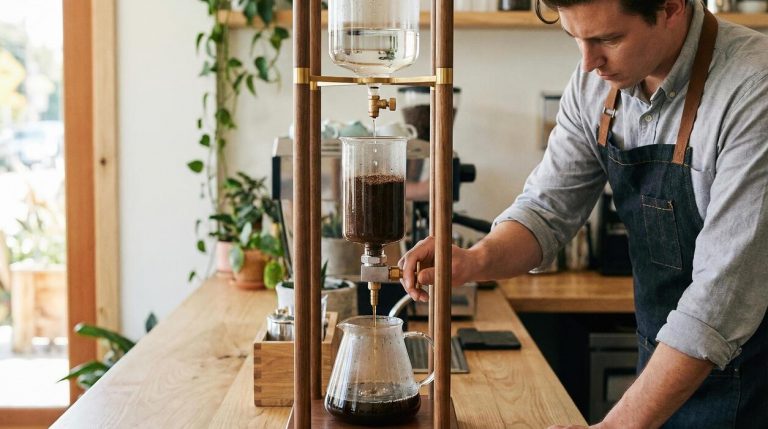
When choosing between a dedicated cold brew maker and a DIY setup, consider your budget and convenience preferences. Specialized makers like the Toddy system or OXO Cold Brew Maker feature built-in filters and spigots for easy dispensing, often producing a cleaner concentrate with less sediment.
They typically cost between $20 and $60 but simplify the process significantly. DIY setups, using a mason jar and a reusable cold brew filter bag or a nut milk bag, are cheaper and require minimal storage space.
The trade-off is that DIY methods may require more careful filtering and can yield slightly cloudier coffee. For occasional brewing, a DIY approach is perfectly effective. For frequent, large-batch brewing, a specialized maker saves time and cleanup effort.
Ultimately, both methods produce excellent cold brew; choose based on how often you plan to brew and your tolerance for extra steps.
Choosing the right jar or pitcher for brewing
The container you select directly impacts your cold brew’s success. Glass is ideal because it is non-reactive and won’t absorb flavors, unlike plastic which can retain odors. A wide-mouth mason jar (32-64 ounces) is a popular choice for easy cleaning and ground removal.
For larger batches, a glass beverage dispenser with a spigot simplifies serving. Ensure your container has a tight-fitting lid to prevent fridge odors from affecting the brew. Avoid metal containers unless they are stainless steel, as aluminum can impart a metallic taste.
The container should be tall enough to allow coffee grounds to steep without overflowing when water is added. A clear container helps you monitor the brew’s color and strength.
For beginners, a 64-ounce wide-mouth glass jar offers the best balance of affordability, visibility, and practicality for making a week’s worth of concentrate.
How to Make Cold Brew Iced Coffee: Step-by-Step Guide
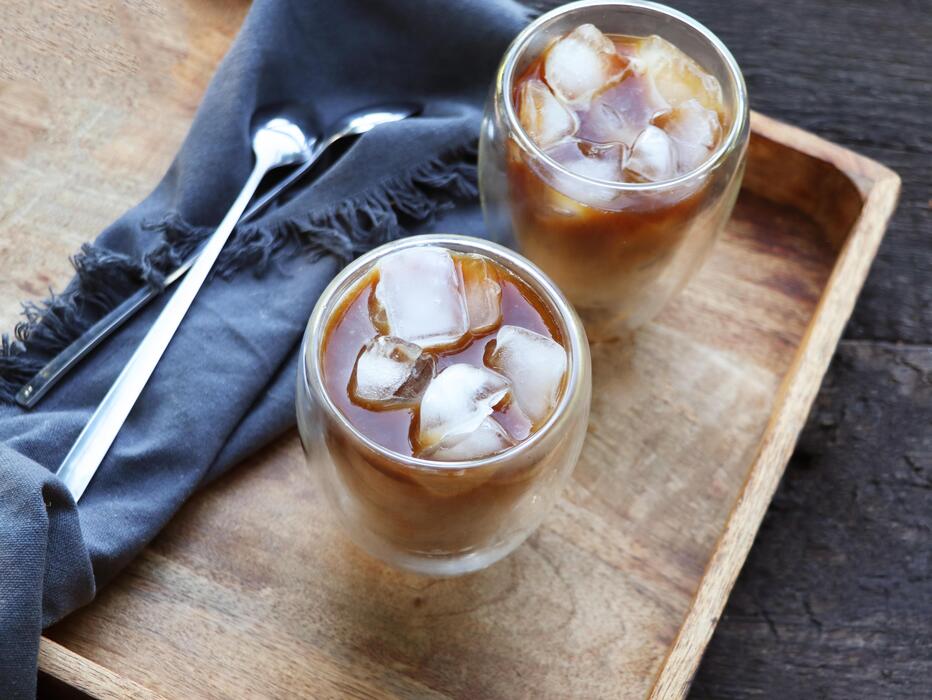
Step 1: Measure and grind your coffee beans
Start with high-quality, coarsely ground coffee beans for a smooth, non-bitter cold brew. Use a 1:8 coffee-to-water ratio by weight for a standard concentrate. For example, measure 1 cup (about 100 grams) of whole beans per 800 ml of water.
Grind them on a coarse setting—similar to breadcrumbs—using a burr grinder for consistency. Avoid fine grinds, as they can over-extract and make your brew muddy. Freshly grind just before brewing for the best flavor. If using pre-ground coffee, opt for a coarse grind labeled for cold brew.
Weighing your ingredients ensures repeatable results, but a kitchen scale isn’t mandatory—just adjust based on taste. Pro tip: Use a darker roast for a richer, chocolatey profile or a lighter roast for a brighter, fruitier note.
Step 2: Combine coffee and water in the right ratio
In a large glass jar or pitcher, add your ground coffee, then pour in cold, filtered water at the chosen ratio (e.g., 1:8 for concentrate). Stir gently with a long spoon to ensure all grounds are fully saturated—no dry clumps.
For a milder ready-to-drink brew, use a 1:5 ratio (less water) or 1:10 (more water) if you prefer a weaker cup. Seal the container with a lid or plastic wrap to keep out odors. Shake or stir once more after 10 minutes to redistribute grounds.
Avoid hot water; cold extraction is key to low acidity. This step takes just 2 minutes, but it sets the foundation for a perfectly balanced concentrate. Label your jar with the date and ratio for easy reference.
Step 3: Steep at room temperature or in the fridge
Steep your coffee mixture for 12–24 hours depending on your taste preference. For a smoother, less acidic brew, steep at room temperature for 12–18 hours. For a cleaner, milder flavor, refrigerate for 18–24 hours. Cover the jar to prevent contamination and place it out of direct sunlight.
Stir once after the first 6 hours to encourage even extraction. Shorter steeping (12 hours) yields a lighter body; longer (20+ hours) creates a bolder, more concentrated flavor. Test your brew after 12 hours by tasting a small spoonful—if it’s too weak, steep longer.
Pro tip: Set a timer to avoid over-steeping, which can make it bitter. The cold extraction process preserves delicate notes while reducing bitterness.
Step 4: Strain and store your cold brew concentrate
Line a fine-mesh sieve with a coffee filter or cheesecloth and place it over a clean pitcher or jar. Slowly pour the steeped mixture through, allowing the liquid to drip naturally.
Press gently on the grounds with a spoon to extract every drop, but avoid squeezing too hard to prevent sediment. For a super-smooth result, strain a second time. Transfer the concentrate to an airtight container and refrigerate. It keeps for up to two weeks—label it with the date.
To serve, dilute 1 part concentrate with 1 part water or milk (adjust to taste). Add ice and enjoy! Pro tip: Store in a glass bottle for easy pouring. Discard if it develops an off smell or mold—always use clean equipment.
Best Coffee-to-Water Ratio for Perfect Cold Brew
Standard ratio for a strong concentrate
For a robust cold brew concentrate that stands up to milk or ice, start with a 1:4 coffee-to-water ratio (e.g., 1 cup coffee to 4 cups water). Use coarsely ground beans to prevent over-extraction and bitterness.
Combine grounds and cold, filtered water in a jar, stir gently, and steep at room temperature for 12-24 hours. After steeping, strain through a fine-mesh sieve or cheesecloth. This concentrate yields a bold, smooth base perfect for diluting with equal parts water or milk.
Store in the fridge for up to two weeks. Always taste and adjust steeping time—longer yields stronger, slightly more intense flavor. For a cleaner cup, double-strain through a coffee filter.
Adjusting ratios for a milder brew
If you prefer a ready-to-drink cold brew without dilution, use a 1:8 coffee-to-water ratio (e.g., 1 cup coffee to 8 cups water). This creates a lighter, smoother brew that’s less intense. Grind beans coarsely and steep for 12-16 hours at room temperature—shorter times prevent over-extraction.
Strain thoroughly with a fine sieve or nut milk bag. The result is a gentle, low-acid coffee perfect for sipping over ice. For even milder flavor, reduce steeping to 10 hours or increase water to a 1:10 ratio.
Adjust based on your taste: start with 1:8, then tweak by adding water post-brew. This method avoids bitterness while preserving subtle notes.
How to scale ratios for larger batches
Scaling cold brew is simple: multiply your coffee and water volumes by the same factor to maintain the ratio. For a 1:4 concentrate batch, use 2 cups coffee to 8 cups water, or 4 cups to 16 cups (1 gallon).
Use a large container like a food-grade bucket or pitcher, and ensure grounds are fully submerged. Steep for 12-24 hours, stirring once halfway. For bigger batches, grind in stages to keep consistency. Strain using a fine-mesh strainer lined with cheesecloth or a cold brew bag.
Store concentrate in airtight containers—it keeps up to two weeks. Adjust steeping time if batch size changes; larger volumes may need 18-24 hours for full extraction. Always taste before bottling.
Tips for Grinding Coffee Beans for Cold Brew
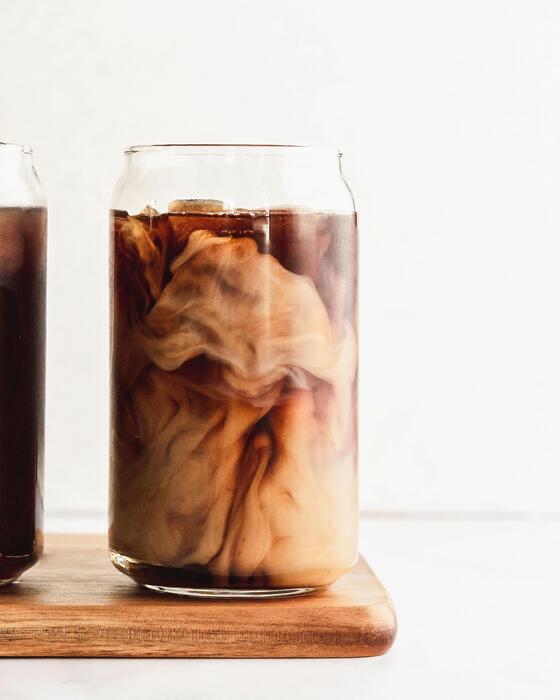
Why a coarse grind is essential
For a smooth, rich cold brew, always choose a coarse grind, similar to breadcrumbs or sea salt. Unlike hot brewing, cold water extracts flavor slowly, so fine grinds lead to muddy, bitter over-extraction because the large surface area releases too many tannins.
A coarse grind allows water to flow evenly through the grounds, pulling out sweet, chocolatey notes without bitterness. Aim for particles about the size of cracked peppercorns. This ensures your coffee steeps for 12–24 hours without becoming harsh. To test, pinch the grounds: they should feel gritty, not powdery.
If your grind is too fine, you’ll end up with a cloudy, astringent brew. Pro tip: If buying pre-ground, look for ‘cold brew grind’ or ask a roaster to grind for French press.
A consistent coarse grind is your best friend for achieving that silky, concentrate-like cold brew you can dilute with water or milk.
How to avoid over-extraction with fine grinds
If you accidentally use a fine grind (like for drip coffee), reduce steeping time to 8–12 hours to prevent bitterness. Fine particles extract quickly, so a full 24-hour steep will ruin your cold brew.
Use a tightly woven filter like a nut milk bag or a paper filter in your brewing vessel to catch silt. After steeping, strain twice: first through a fine-mesh sieve, then through a coffee filter or cheesecloth. This removes sludge that causes over-extraction.
Another trick: lower the coffee-to-water ratio to 1:5 (instead of 1:4) to dilute the intense extraction. You can also add a pinch of salt to balance bitterness. Remember, cold brew is forgiving—if your batch tastes harsh, serve it over ice with milk or sweetener.
Key takeaway: Fine grinds aren’t ideal, but with shorter steeping and extra filtration, you can still salvage a drinkable cold brew.
Grinding without a burr grinder: alternatives
No burr grinder? No problem. Use a blade grinder with a pulse technique for coarse results. Pulse 5–7 times for 1 second each, then shake the grinder to redistribute beans. Stop when you see uneven chunks—avoid a fine powder.
Alternatively, buy pre-ground cold brew coffee from reputable brands; many roasters sell specifically coarse grinds. For a DIY method, place beans in a zip-top bag and crush with a rolling pin or heavy skillet. This yields rustic, coarse bits perfect for cold brew.
If using a mortar and pestle, work in small batches to avoid overheating. Important: After grinding, sift out fine dust with a mesh strainer. Even with imperfect equipment, you can achieve a decent cold brew by prioritizing a consistent, chunky texture. The goal is to avoid fines that cause bitterness.
With practice, these hacks deliver a smooth concentrate without needing an expensive grinder.
How to Serve and Customize Your Cold Brew Iced Coffee
Diluting concentrate with water or milk
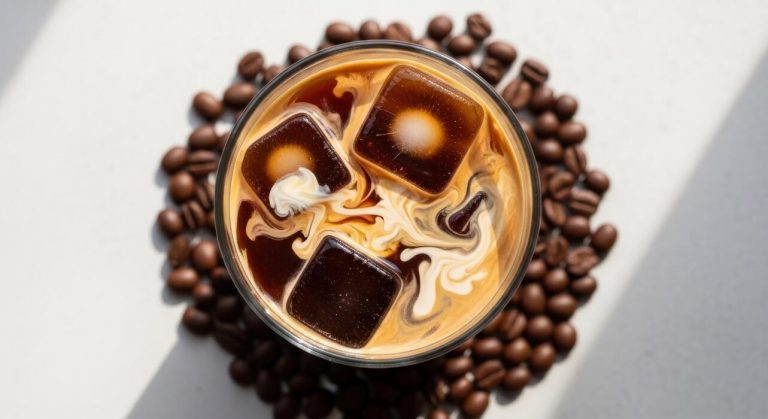
Start with a 1:1 ratio of cold brew concentrate to water or milk, then adjust to taste. For a classic iced coffee, pour equal parts concentrate and cold water over ice.
If you prefer a creamier texture, swap water for whole milk, oat milk, or almond milk—oat milk adds natural sweetness and a silky mouthfeel. For a stronger kick, use a 2:1 concentrate-to-diluent ratio; for a milder brew, go 1:2. Always add your liquid first, then the concentrate, and stir well.
To avoid dilution, use coffee ice cubes made from leftover concentrate or cold brew. Remember that homemade concentrate is typically double-strength, so never drink it undiluted unless you enjoy an intensely bold, almost syrupy flavor.
Experiment with ratios until you find your perfect balance—this is the foundation of a customizable cold brew experience.
Adding sweeteners, creamers, and flavor syrups
Sweeten your cold brew with simple syrup (equal parts sugar and water, dissolved) since granulated sugar won’t dissolve in cold liquid. For a richer taste, try honey, agave, or maple syrup—stir them into the concentrate before adding milk.
For creamers, use store-bought flavored creamers (vanilla, caramel) or make your own by blending heavy cream with sweetened condensed milk. Flavor syrups like vanilla, hazelnut, or cinnamon can be added directly—start with 1-2 tablespoons per serving. For a sugar-free option, use stevia or monk fruit sweetener.
To avoid a watery drink, mix sweeteners and syrups into the concentrate first, then add your diluent. You can also create a custom creamer by infusing milk with vanilla beans or cinnamon sticks overnight.
The key is to add flavors gradually, tasting as you go, because cold brew’s smooth profile can be easily overwhelmed.
Creative cold brew recipes: vanilla, mocha, and more
Elevate your cold brew with simple, delicious twists. For Vanilla Cold Brew, stir 1-2 teaspoons of vanilla extract or vanilla bean paste into your concentrate before diluting, then top with a splash of vanilla oat milk.
For Mocha Cold Brew, mix 1 tablespoon of unsweetened cocoa powder with 2 tablespoons of hot water to form a paste, then blend into your concentrate with a tablespoon of maple syrup—finish with chocolate oat milk.
Try a Salted Caramel version by adding 1 tablespoon of caramel syrup and a pinch of flaky sea salt to your glass. For a Coconut Cold Brew, use coconut milk as your diluent and add a dash of coconut extract. Feeling indulgent?
Make a Cold Brew Float by pouring concentrate over vanilla ice cream and topping with chocolate shavings. Each recipe starts with your base concentrate, so you can easily scale up for a pitcher. Experiment with spices like cinnamon or nutmeg for seasonal flair—the possibilities are endless!
Common Mistakes to Avoid When Making Cold Brew
Using the wrong grind size or coffee type
Avoid the mistake of using a fine espresso grind for cold brew, as it leads to over-extraction and bitter, muddy flavors. Instead, opt for a coarse, uniform grind resembling breadcrumbs, which allows for a slow, even extraction over 12-24 hours.
Additionally, choose fresh, whole-bean coffee with a medium to dark roast profile; light roasts can taste sour and acidic when brewed cold. Grind your beans just before steeping to preserve volatile oils. If you buy pre-ground, ensure it’s labeled for cold brew.
The right grind size and coffee type are your first defense against a weak or harsh final concentrate.
Steeping too long or too short
Steeping time directly impacts your cold brew’s balance. Too short (under 12 hours) yields a weak, watery, and under-extracted concentrate lacking depth. Too long (over 24 hours for room temperature, or 48 hours in the fridge) extracts bitter, woody tannins, creating a harsh, over-brewed flavor.
The sweet spot is 16-20 hours at room temperature for a smooth, full-bodied result. Adjust based on your roast: darker roasts can handle up to 20 hours, while lighter roasts may peak at 14-16.
Use a timer and taste test at intervals—once it’s rich and chocolatey without bitterness, strain immediately to halt extraction.
Straining improperly and ending up with sludge
Skipping proper straining leaves you with gritty sediment and a sludgy texture. After steeping, pour your cold brew through a fine-mesh strainer lined with a coffee filter, cheesecloth, or a nut milk bag to catch all fines.
For best clarity, double-strain: first through a sieve to remove large grounds, then through a paper filter or dampened cheesecloth into a clean container. Avoid pressing or squeezing the grounds, as this forces bitter silt into your brew.
If you use a French press, pour slowly and avoid agitating the bottom. A clear, sludge-free concentrate ensures a smooth iced coffee experience every time.
Frequently Asked Questions
What is the basic ratio of coffee to water for homemade cold brew?
A common starting ratio is 1 cup of coarsely ground coffee to 4 cups of cold, filtered water. Adjust to taste; a stronger ratio (1:3) works well for concentrate, while a milder one (1:5) is ready to drink.
How long should I steep cold brew coffee?
Steep the coffee grounds in cold water for 12 to 24 hours at room temperature or in the refrigerator. 12-16 hours usually yields a smooth, balanced flavor, while longer steeping can make it more bitter.
What grind size is best for cold brew?
Use a coarse grind, similar to breadcrumbs or sea salt. Fine grinds can over-extract and make the coffee muddy or bitter, while coarse grinds allow for a clean, smooth extraction over the long steeping time.
How do I strain cold brew without a special filter?
Pour the steeped mixture through a fine-mesh strainer lined with a coffee filter, cheesecloth, or a clean kitchen towel. You may need to strain twice for a clearer result.
Can I use pre-ground coffee for cold brew?
Yes, but choose a coarse grind labeled for cold brew or French press. Standard drip coffee grinds are too fine and can result in a gritty, over-extracted brew.
How do I serve homemade cold brew iced coffee?
Fill a glass with ice, pour the cold brew concentrate (or ready-to-drink brew) over the ice, and dilute with water or milk to taste. Add sweetener or flavored syrup if desired.
How long does homemade cold brew last in the fridge?
Stored in an airtight container, cold brew concentrate stays fresh for up to 2 weeks. Ready-to-drink cold brew should be consumed within 5-7 days for best flavor.
Why is my homemade cold brew bitter or sour?
Bitterness often comes from over-steeping (more than 24 hours) or using too fine a grind. Sourness can result from under-steeping (less than 12 hours) or a weak coffee-to-water ratio. Adjust steeping time and grind coarseness accordingly.
Conclusion
Making homemade cold brew is simple, requiring only coarse coffee grounds, cold water, and patience. The key takeaway is to steep for 12-24 hours for a smooth, less acidic concentrate. Once strained, you have a versatile base for perfect iced coffee. Ditch the expensive café versions and enjoy the satisfaction of crafting your own refreshing, customizable brew at home. Your perfect summer coffee awaits.