How To Use French Press To Froth Milk
If you want how to use french press to froth milk to make café-style drinks at home, the method is simple, fast, and effective. In this guide, you’ll learn the right milk temperature, how much to fill the press, and the pumping technique that creates creamy foam without special equipment using just a standard French press. If your milk usually turns flat or overflows, you’re in the right place.
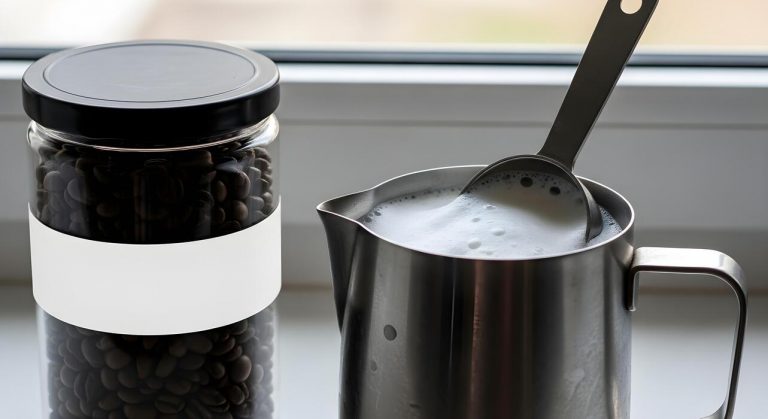
What You Need to Froth Milk in a French Press
Best type of milk for French press frothing
Choose a milk that can trap air and hold a stable foam. Whole milk is the easiest option because its fat and protein create a creamy, velvety texture that works well for lattes and cappuccinos.
2% milk also froths nicely if you want a lighter result with a bit less richness. If you prefer dairy-free options, look for barista-style oat, soy, or almond milk because they are formulated to foam better than standard versions.
For the best results, use cold milk straight from the fridge, since it gives you more time to build foam before the milk gets too warm. Avoid ultra-thin or highly sweetened milks if you want a stronger froth.
Start with about 1/3 to 1/2 cup of milk in the French press so there is enough room for the foam to expand without spilling over. The right milk makes the frothing process easier and improves the final texture.
French press size and plunger features
A French press with enough headroom is important when frothing milk because the volume can double or even triple as you pump the plunger.
A 12-ounce or larger press is usually the most practical choice for single drinks, while a 20-ounce or 32-ounce model gives you more flexibility for multiple servings. Make sure the glass or stainless-steel carafe is sturdy, since you will be moving the plunger rapidly.
The plunger screen should fit snugly and move smoothly; if it is loose or damaged, it will not create consistent foam. A fine mesh filter helps break up milk and incorporate air more evenly. Check that the lid seals well, but not so tightly that pumping becomes difficult.
If your press is too small, the milk may splash out during frothing. A well-sized French press with a reliable plunger gives you better control, cleaner results, and less mess when learning how to use a French press to froth milk.
Optional tools to make the process easier
You can froth milk with only a French press, but a few extra tools can make the process smoother and more consistent. A microwave-safe cup or small saucepan is useful if you want to warm the milk before frothing; warm milk usually creates a softer, more café-like texture.
A thermometer helps you stop heating at the ideal range, around 140°F to 150°F, so the milk stays sweet and does not scald. A kitchen towel or silicone mat can reduce slipping while you pump the plunger.
If you are making coffee drinks often, a small whisk or spoon can help stir the milk after frothing to blend the foam and liquid layers. A larger mug or heatproof pitcher is also handy for pouring without losing foam.
These tools are optional, but they make the process easier, especially if you are still learning how to use a French press to froth milk and want more control over texture and temperature.
How to Heat Milk for French Press Frothing

Ideal milk temperature for foam
For the best French press froth, heat your milk to about 150–155°F (65–68°C). This range is hot enough to create stable foam, but not so hot that the milk tastes cooked or loses sweetness.
If you do not have a thermometer, aim for milk that is steaming and warm to the touch but not bubbling. Whole milk usually froths with the richest, most stable microfoam, while 2% milk can still work well if you want a lighter texture.
Non-dairy options vary: barista-style oat, soy, and pea milks tend to perform best because they are formulated for foaming. Before frothing, warm only the amount you need, since milk expands once air is added in the French press.
Starting with properly heated milk makes the pumping process easier and helps you get a smoother, creamier foam for lattes, cappuccinos, or hot chocolate.
Stovetop, microwave, and thermometer options
To heat milk for French press frothing, you can use a stovetop, microwave, or thermometer-guided method. On the stovetop, pour milk into a small saucepan and heat it over low to medium-low heat, stirring gently so it warms evenly.
This gives you the most control and makes it easier to stop at the right temperature. In the microwave, heat milk in a microwave-safe container in short bursts of 20–30 seconds, stirring between rounds to prevent hot spots.
If you want consistency, use a digital thermometer and stop heating around 150–155°F. A thermometer is especially helpful if you are learning, because milk can go from perfectly warm to overheated very quickly.
Once heated, pour the milk into your French press right away and begin frothing while it is still hot. The goal is to warm the milk enough that it creates foam, but not so much that it loses body or flavor.
How to avoid scalding or boiling the milk
The key to avoiding scalded milk is to heat slowly and watch closely. Milk starts to develop a cooked flavor and weaker foam when it gets too hot, so never let it boil.
On the stovetop, keep the burner low and remove the pan as soon as you see small wisps of steam or tiny bubbles around the edges. In the microwave, use short heating intervals and stir each time to distribute the heat.
A thermometer helps you stay in the safe zone, but you can also use your senses: the milk should feel hot, not painfully hot, and it should smell sweet, not burnt. If a skin forms on top, the milk has likely been overheated.
To prevent this, swirl or stir the milk gently while warming and avoid leaving it unattended. Properly heated milk froths better in the French press, giving you a smoother texture without the bitter, scorched taste that can ruin your drink.
How to Froth Milk with a French Press Step by Step

Pour the heated milk into the French press
Start with cold or fresh milk and heat it until it is hot but not boiling, ideally around 140–150°F (60–65°C). If you do not have a thermometer, heat the milk until it is steaming and comfortable to touch briefly.
Pour the milk into the French press so it fills the container only one-third to one-half full. This gives the milk enough room to expand as it foams and helps prevent spills when you pump.
Use whole milk for the richest foam, or try oat or soy milk if you want a dairy-free option that still froths well. Before placing the lid on, gently tap the carafe on the counter to settle the milk and reduce large bubbles.
Make sure the plunger is assembled but do not press yet. A properly filled and heated French press is the foundation for getting smooth, café-style foam instead of thin, airy bubbles.
Pump the plunger to create foam
Hold the French press steady with one hand on the handle and use the other to move the plunger up and down quickly but smoothly. Begin with short, controlled strokes rather than forceful plunges. The goal is to whip air into the milk, not splash it around.
You should feel slight resistance as the foam starts to build. If the milk is splashing upward, slow down and check that the press is not too full. For best results, keep the plunger moving for about 20 to 30 seconds, depending on the milk type and temperature.
Whole milk usually foams faster and creates a creamier texture, while lower-fat milk may need a few extra pumps. If you want more volume, you can continue for another 10 seconds, but avoid over-pumping, which can make the foam too stiff and dry.
Stay consistent, and let the French press do the work of creating fine, velvety foam.
Check the texture and stop at the right point
Watch the milk closely as you pump and look for a texture that is light, glossy, and doubled in volume. The best foam for coffee should have very small bubbles and look like soft microfoam, not stiff meringue.
If the milk becomes too foamy and airy, stop immediately because it can separate quickly and pour unevenly. If it still looks thin, give it a few more pumps and check again.
A good test is to gently swirl the French press: the milk should move as one creamy layer with foam on top rather than watery liquid underneath. Once the texture looks right, stop pumping and tap the carafe lightly on the counter to settle any large bubbles.
Then swirl before pouring so the foam and milk stay blended. Pour slowly over your coffee or espresso, using a spoon to hold back foam if you want to control the topping. Stopping at the right point helps you get smooth, stable foam every time.
How to Get the Best Foam Consistency
How fast to pump the plunger
For the best foam consistency, use short, steady plunges instead of aggressive pumping. A good starting pace is about one pump per second: push the plunger down about halfway, then pull it back up smoothly, repeating in a controlled rhythm.
This creates enough air incorporation without making the bubbles too large. If you move too fast, you’ll whip in excess air and get dry, unstable foam; if you go too slowly, the milk may warm without frothing enough.
Keep the plunger near the surface at first to introduce air, then gradually lower it as the milk starts to expand. Use whole milk for richer foam, or a barista-style oat milk for better stability.
Hold the frother with one hand and keep the lid steady with the other so the mesh stays aligned and the texture stays even from top to bottom.
How long to froth for different foam styles
The ideal frothing time depends on the foam style you want. For light foam for cappuccinos or hot chocolate, froth for about 15–20 seconds after you begin pumping, or until the milk has roughly doubled in volume.
For medium foam that works well in lattes and macchiatos, aim for 20–30 seconds with a slightly slower finish to tighten the texture. If you want very airy foam for a topping layer, you can go up to 30–45 seconds, but stop before the milk becomes too stiff or bubbly.
Watch for visual cues: the milk should look glossy, thicker, and expanded, not dry or foamy on top with liquid underneath. If the foam starts separating quickly, you likely over-frothed it. For consistency, always heat the milk first to about 140–150°F (60–65°C), then froth immediately so the texture sets evenly.
How to make microfoam for lattes
To make microfoam for lattes with a French press, focus on creating tiny, paint-like bubbles rather than big foam. Start with milk that is warmed but not boiling—around 140°F (60°C) is ideal. Pour it into the French press no more than one-third full so there’s room for expansion.
Begin with a few quick pumps near the surface to add a little air, then lower the plunger and continue with smooth, consistent strokes to blend the air into the milk. The goal is a silky, velvety texture that looks shiny and pours like wet paint.
After frothing, tap the carafe gently on the counter and swirl it to break any larger bubbles. If needed, let it sit for 10–15 seconds so the foam integrates.
For the smoothest pour, immediately tilt and swirl the milk before adding it to espresso, which helps the microfoam and liquid milk stay unified.
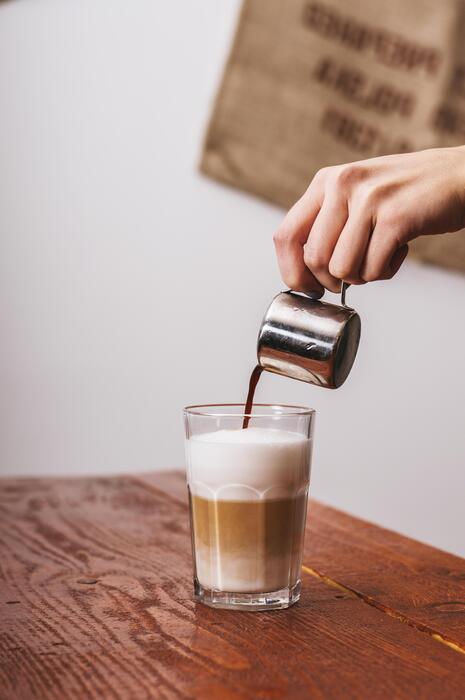
How to Pour and Serve Frothed Milk
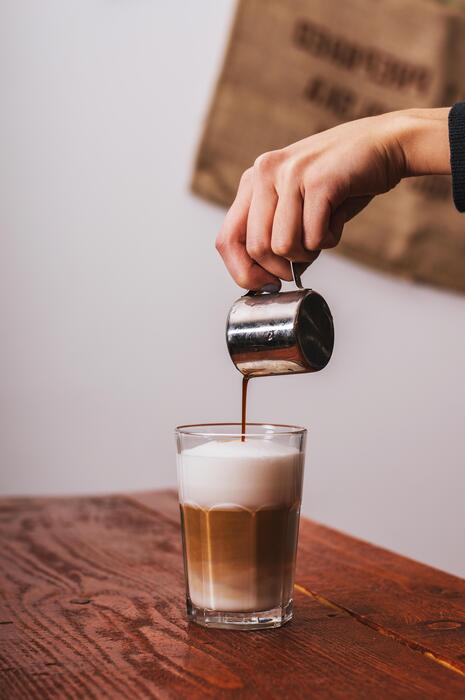
How to separate foam from steamed milk
After frothing milk in a French press, let it rest for 20–30 seconds so the larger bubbles rise and the texture settles. The top layer will usually become thicker foam, while the lower layer stays silkier and more pourable.
If you want a cappuccino-style topping, hold back the foam with a spoon and pour the warmer liquid milk first. Then spoon the foam on top. For drinks that need more body, swirl the French press gently before pouring to recombine the layers just enough for a uniform microfoam.
If the foam is too stiff, tap the container lightly on the counter once or twice to break up overly large bubbles. For the smoothest result, use warm milk, not boiling milk, and stop plunging when the milk has doubled in volume.
That gives you a better balance of foam and liquid for topping coffee drinks cleanly.
Best drinks to top with French press frothed milk
French press frothed milk works especially well on drinks that benefit from a creamy finish but do not require professional espresso-level texture. Try it on drip coffee, Americano, mocha, chai, matcha, and hot chocolate.
For coffee, add the milk slowly so the foam sits on top instead of disappearing into the cup. In lattes and cappuccino-style drinks, use the French press milk as a quick at-home substitute when you do not have a steam wand.
It is also great for flavored drinks because the foam helps carry cinnamon, cocoa, vanilla, or nutmeg on the surface. If you are serving iced drinks, let the frothed milk cool slightly first so it does not melt the ice too quickly.
For the best flavor and texture, use whole milk or a barista-style oat milk, since both create richer foam and a smoother mouthfeel than low-fat milk.
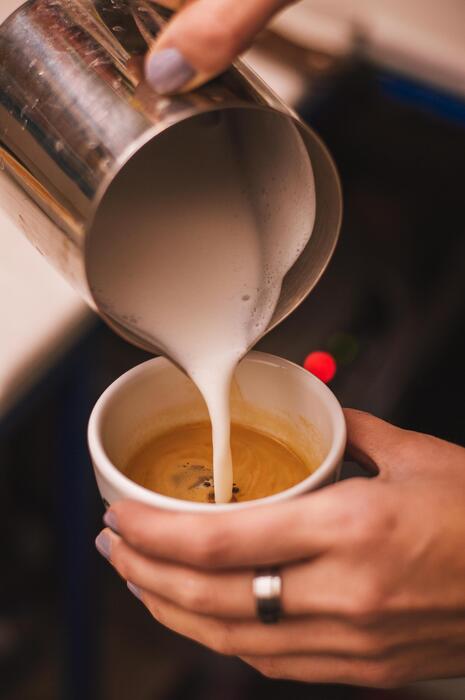
How to pour latte art-friendly milk
To make French press milk more latte-art-friendly, aim for a texture that is shiny, smooth, and only lightly foamy. After frothing, tap the French press or pitcher firmly on the counter to pop large bubbles, then swirl in a tight circle until the milk looks glossy and uniform.
Pour from a low height at first to blend the milk into the coffee, then bring the spout closer to the surface as the cup fills. This helps the foam rise in a controlled way, making simple patterns like hearts or tulips more achievable.
If the foam separates too much, pour a little faster and swirl the milk again before serving. Practice on a wide mug, since it is easier to control the design.
The key is to use well-heated milk, not overheated milk, because milk that is too hot becomes foamy and loses the silky flow needed for latte art.
Common French Press Frothing Mistakes to Avoid
Using milk that is too hot or too cold
Temperature matters a lot when learning how to use a French press to froth milk. If the milk is too hot, the proteins can start to break down, which makes it harder to build stable foam and can leave the milk tasting scorched.
If it is too cold, the froth usually forms weakly and disappears quickly. Aim for warm milk, not boiling milk—about 140°F to 150°F (60°C to 65°C) is a practical target for most drinks. A simple check is that the milk should feel hot to the touch but not uncomfortable.
For best results, warm the milk first, then froth immediately so the texture stays light and silky. If you are using dairy alternatives, be especially careful, since many plant milks foam best within a narrower temperature range. Consistent heating gives you smaller bubbles, better volume, and longer-lasting foam.
Overfilling the French press
One of the easiest mistakes is filling the French press too high before frothing. Milk expands quickly as air is introduced, so leaving enough empty space is essential. A good rule is to fill the press only one-third to one-half full with warmed milk.
If you add too much, the plunger can force milk and foam out of the spout, making a mess and reducing the amount of foam you actually keep.
Overfilling also limits the room needed for the milk to circulate, which can lead to uneven texture with large bubbles on top and thin milk underneath. For a better result, start with a smaller amount, froth in short bursts, and pour right away.
If you need more foam for multiple drinks, repeat the process in batches instead of trying to cram too much milk into one press. This gives you better control, cleaner results, and smoother microfoam.
Pumping too fast or too aggressively
When using a French press to froth milk, speed is not the goal—control is. Pumping the plunger too fast or too hard creates large, unstable bubbles instead of smooth foam. It can also splash hot milk up the sides of the press and make the texture thin rather than creamy.
A better approach is to move the plunger slowly and steadily, keeping the motion gentle and consistent. Think of it as introducing air gradually rather than whipping the milk violently. Short, controlled pumps usually give the best result, especially once the milk starts to thicken.
If you notice the foam becoming dry or foamy-looking rather than glossy, slow down and stop sooner. After frothing, tap the press lightly on the counter and swirl the milk to help integrate the foam.
This helps create silky, latte-style froth that pours smoothly and holds its shape longer in your coffee or cappuccino.
Tips to Clean and Maintain Your French Press
How to clean the mesh filter after frothing milk
Right after frothing milk, rinse the French press with hot water so the milk doesn’t dry inside the mesh filter. Fill the carafe with warm water, move the plunger up and down several times, and pour out the water to flush milk proteins from the screen and spring.
If you notice buildup, disassemble the plunger and scrub the filter, rod, and lid with mild dish soap using a soft sponge or bottle brush. Pay special attention to the edge of the mesh, where foam and fat often cling.
Avoid abrasive pads, which can bend the mesh and reduce frothing performance. For a deeper refresh, soak the parts in hot soapy water for a few minutes before scrubbing.
Then rinse thoroughly to remove any soap residue, since leftover soap can affect the taste and texture of your next batch of milk.
How to remove milk residue and odor
Milk residue can leave a stale smell if it sits in the French press, so clean it as soon as possible after use. Start by swishing warm water and a few drops of dish soap inside the carafe, then scrub the walls, base, and spout with a soft brush.
If odor remains, use a baking soda solution: mix 1 to 2 tablespoons of baking soda with warm water, let it sit for 10 to 15 minutes, and then scrub and rinse.
You can also use a vinegar rinse for stubborn smells, but rinse well afterward so the press doesn’t hold a sour taste. Dry all parts completely with a clean towel or leave them to air-dry disassembled. This helps prevent trapped moisture, which can worsen odors and encourage buildup.
Keeping the press dry between uses is one of the easiest ways to preserve fresh-tasting, well-frothed milk.
How often to deep clean the French press
If you use your French press to froth milk regularly, plan a deep clean at least once a week, and more often if you froth daily.
A quick rinse after each use is helpful, but it won’t remove all milk fats and proteins that collect in the mesh and plunger assembly. For a deep clean, disassemble every removable part, wash them in hot soapy water, and scrub small crevices where residue hides.
Check the filter screen for clogs and replace it if the mesh becomes warped or worn, since a damaged filter can make frothing less effective. Also inspect the plunger rod and lid threads for buildup.
If you notice lingering smells, reduced foam quality, or a sticky feel, it’s a sign the press needs cleaning sooner. Regular deep cleaning keeps your French press sanitary, extends its lifespan, and helps it produce smooth, airy milk foam every time.
Frequently Asked Questions
How do you froth milk with a French press?
Heat the milk until it is hot but not boiling, then pour it into the French press no more than halfway full. Pump the plunger up and down quickly for 20 to 30 seconds until the milk looks foamy and has expanded.
What kind of milk works best in a French press?
Whole milk usually creates the richest, most stable foam because of its fat content. You can also froth 2% milk, oat milk, or other barista-style plant milks, but results may vary.
How much milk should I put in the French press?
Fill the French press only about one-third to one-half full to leave room for the foam to expand. Overfilling makes frothing messy and reduces the amount of airy foam you can create.
Do I need to heat the milk before frothing it?
Yes, warming the milk first helps it froth better and makes it taste smoother. Aim for hot milk that is steaming but not boiling, since overheated milk can taste burnt and may not foam as well.
How long should I pump the French press for milk froth?
Most milk froths well after about 20 to 30 seconds of pumping. Stop when the milk has doubled in volume and looks creamy with a fine layer of foam on top.
Why is my French press milk not frothing well?
The milk may be too cold, overfilled, or the plunger may be moving too slowly. Using fresher milk, heating it properly, and pumping briskly with enough space in the French press usually improves the foam.
Can I make cold foam with a French press?
Yes, you can froth cold milk in a French press, though it will usually be less stable than hot foam. Cold foam works best with milk or plant milks designed for frothing and is great for iced drinks.
Conclusion
Using a French press to froth milk is an easy, affordable way to create café-style drinks at home. By heating the milk properly, pumping steadily, and choosing the right milk type, you can achieve a smooth, creamy foam for lattes, cappuccinos, and more. With a little practice, you’ll master the technique and enjoy better homemade coffee every day. Give it a try and enjoy the results.