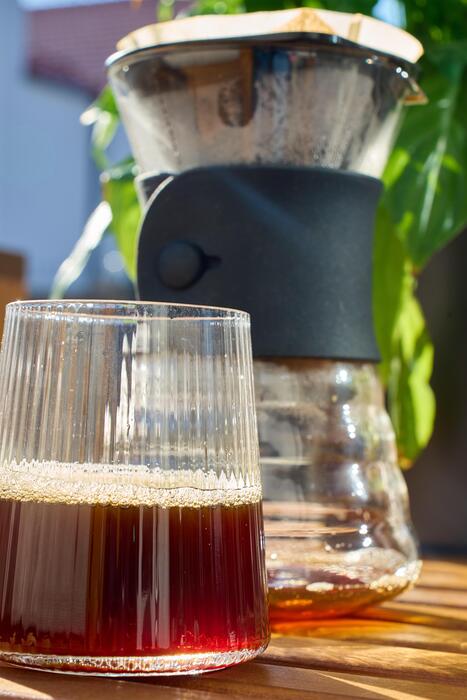
How To Make Cold Brew In Aeropress
If you are craving a smooth, low-acid caffeine fix but do not want to wait twelve hours, you have come to the right place. Making cold brew in an AeroPress is a total game changer for coffee lovers. This method delivers that signature mellow flavor in just minutes instead of a full day.
What is AeroPress Cold Brew?
Cold Brew vs. Flash Chilled Coffee
Understanding the distinction between cold brew and flash chilled coffee is essential for mastering your AeroPress technique. Cold brew involves steeping coarse grounds in room temperature or cold water for an extended period, resulting in a low-acidity, naturally sweet concentrate that lacks the bitterness often found in hot extractions.
In contrast, flash chilled coffee—often called Japanese iced coffee—is brewed hot directly over ice to lock in bright aromatics and crisp acidity.
When using your AeroPress for cold brew, you are intentionally avoiding heat to prevent the extraction of certain oils and acids, creating a smooth, chocolatey profile that is gentle on the stomach.
While flash chilling is faster, the cold brew method produces a versatile concentrate that can be stored in the refrigerator for days.
By choosing the cold brew route, you prioritize a mellow flavor profile and high caffeine concentration, making it the perfect base for refreshing iced lattes or diluted cold drinks throughout the week.
Why the AeroPress is Perfect for Cold Brewing
The AeroPress is a game-changer for cold brew enthusiasts because it solves the primary issue of traditional methods: the long wait time and messy filtration.
While standard mason jar cold brew can take 12 to 24 hours, the AeroPress allows for an accelerated immersion process that yields delicious results in just a few minutes of active stirring or a few hours of passive steeping.
Its airtight seal and plunger mechanism provide total control over pressure and filtration, ensuring a sediment-free cup that is much cleaner than French press alternatives. Because the device is compact and portable, you can prepare a fresh cold brew concentrate anywhere, from your kitchen to a campsite.
The paper filters used in the AeroPress are particularly effective at removing diterpenes and fine particulates, which highlights the clarity of flavor in your coffee beans.
This versatility makes it the ultimate tool for those who want the rich taste of cold brew without the bulky equipment or the overnight commitment typically required for large batches.
The Difference Between Immersion and Drip Methods
When making cold brew with an AeroPress, you can choose between immersion and slow-drip techniques, each offering a unique taste experience. The immersion method involves mixing grounds and water inside the chamber for a set duration, which creates a full-bodied, robust flavor as the water saturates every particle equally.
This is the most common approach for AeroPress users seeking a reliable and heavy mouthfeel. Alternatively, the slow-drip method—often achieved with specialized attachments like the PuckPuck—allows water to slowly pass through the bed of coffee drop by drop.
This technique emphasizes intense floral notes and complex acidity, mimicking the results of expensive cold brew towers. Both methods benefit from the AeroPress’s unique design, but the choice depends on whether you prefer the syrupy richness of immersion or the tea-like transparency of a drip extraction.
Regardless of the path you choose, the key is using a consistent medium-fine grind and high-quality filtered water to ensure your final concentrate is balanced, refreshing, and free from any unwanted harshness.
Essential Gear and Ingredients You Need
Choosing the Right Coffee Beans
To achieve a smooth and flavorful result when making cold brew in your AeroPress, selecting the right coffee beans is the fundamental first step.
Since the cold extraction process highlights subtle sweetness and reduces perceived bitterness, look for medium to dark roast beans with flavor profiles featuring chocolate, caramel, or nutty notes. These profiles tend to stand up well to the slower extraction time and maintain a bold body.
While light roasts can offer complex floral or fruity acidity, they often require much longer steep times to fully develop when using cold water. For the best experience, always prioritize freshly roasted whole beans rather than pre-ground options, as the aromatic oils are most potent immediately after grinding.
Single-origin beans from regions like Brazil or Sumatra are excellent choices for this method, providing a rich, syrupy mouthfeel that defines a high-quality concentrate. Ensure your beans are stored in an airtight container away from direct sunlight to preserve their delicate chemical integrity before brewing.
The Best Grind Size for Cold Extraction
The grind size is perhaps the most critical technical variable when using an AeroPress for cold brew, as it dictates the surface area available for extraction. For this specific method, you should aim for a medium-coarse to coarse grind, similar to the consistency of sea salt or standard drip coffee.
Because cold water is a less efficient solvent than hot water, a grind that is too fine will lead to over-extraction and a muddy, bitter cup that is difficult to plunge through the paper filter.
Conversely, a grind that is excessively coarse may result in a weak, under-developed brew that lacks the characteristic depth of a true concentrate. Using a high-quality burr grinder is essential to ensure particle uniformity, which prevents smaller fragments from clogging the AeroPress filter.
Achieving this precise texture allows the water to saturate the grounds evenly during the immersion phase, ensuring that the natural sugars and oils are extracted gently without the harsh tannins often found in poorly ground coffee batches.
Water Quality and Temperature Guidelines
Since coffee is approximately ninety-eight percent water, the quality of your liquid base significantly impacts the final taste of your AeroPress cold brew. You should always use filtered or bottled spring water to avoid the off-flavors caused by chlorine, minerals, or impurities found in standard tap water.
Regarding temperature, the defining characteristic of this method is the use of room temperature or chilled water rather than boiling water. Using water between 60°F and 70°F ensures a slow, gentle extraction that leaves behind the acidic compounds usually triggered by heat.
If you prefer an even crisper finish, you can use cold water directly from the refrigerator, though you may need to extend the steeping time slightly to compensate for the lower kinetic energy.
Avoid using distilled water, as it lacks the essential minerals needed to pull the flavor from the grounds effectively. By maintaining a consistent water-to-coffee ratio and using purified water, you guarantee a clean, refreshing concentrate that serves as a perfect base for iced drinks.
How to Make Cold Brew in an AeroPress (Step-by-Step)
The Inverted Method Setup
To begin your cold brew journey, start by using the inverted method to prevent premature leakage through the filter. Place the plunger inside the chamber and flip the AeroPress so it stands on the plunger with the open end facing up.
This orientation ensures that the water and grounds remain in full contact throughout the entire steeping process. Ensure you have a clean paper filter or a fine metal mesh filter ready in the cap.
Using the inverted setup allows for a more immersive extraction, which is essential when using cold water since the chemistry happens much slower than with hot water.
Make sure your AeroPress is placed on a stable, flat surface to avoid any spills during the long waiting period, as stability is key to a successful soak.
Mixing Ratios for a Strong Concentrate
Achieving the perfect flavor profile requires a specific ratio of coffee to water. Use a coarse grind size, similar to sea salt, to prevent over-extraction and bitterness. For a robust cold brew concentrate, aim for a 1:4 or 1:5 ratio.
This typically means adding about 30 grams of freshly ground coffee to the chamber and filling the rest with room temperature or cold filtered water. Stir the mixture gently with the AeroPress paddle for at least 30 seconds to ensure all grounds are fully saturated.
Using a concentrate method is highly efficient because it allows you to dilute the final result with water, milk, or ice according to your personal preference. This flexibility makes the AeroPress an ideal tool for creating a customized, smooth, and low-acid caffeine kick that lasts.
Steeping Times for Maximum Flavor
Patience is the most important ingredient when making cold brew. Unlike the standard two-minute hot brew, cold water requires significant time to pull the oils and sugars from the beans. For the best results, let your AeroPress sit at room temperature for 12 to 18 hours.
If you prefer a brighter, more delicate profile, 12 hours is usually sufficient; however, for a richer, chocolatey body, aim for the full 18-hour mark.
You can also steep the mixture in the refrigerator, but keep in mind that colder temperatures slow down extraction, so you may need to extend the time to 24 hours. Avoid steeping longer than 24 hours to prevent the development of woody or overly bitter notes.
This slow process results in a naturally sweet beverage with significantly less acidity than traditional iced coffee.
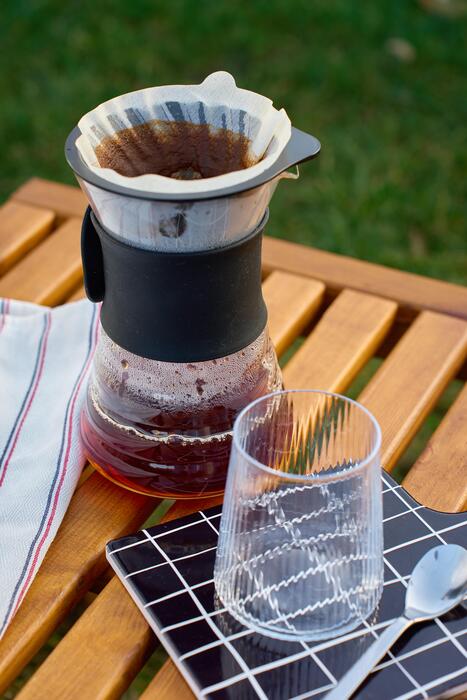
Pressing and Filtering Your Brew
Once the steeping time is complete, it is time to filter. Securely screw the filter cap with a moistened paper filter onto the chamber. Carefully flip the AeroPress over a sturdy carafe or a tall glass.
Apply slow, steady pressure to the plunger, taking about 30 seconds to fully depress it until you hear the characteristic hiss of air. This step is crucial because the AeroPress pressure helps squeeze out every bit of flavor from the saturated grounds.
If the resistance is too high, your grind may be too fine; if it is too easy, try a finer grind next time. After pressing, you will have a silky, sediment-free concentrate.
Simply clean your device immediately by popping out the puck, and enjoy your refreshing cold brew over ice for the ultimate smooth coffee experience.
The 2-Minute Quick Cold Brew Method
How to Use Agitation to Speed Up Extraction
Traditional cold brew relies on time to extract flavor, but the AeroPress allows you to substitute hours with physical vigorous agitation. By stirring the coffee grounds and cold water intensely for about sixty seconds, you create the turbulence necessary to break down the surface tension of the coffee particles.
This process forces the water into the grounds at a much faster rate than passive soaking. When you stir, you are effectively maximizing the contact between the solvent and the solutes, ensuring that the rich oils and caffeine are released into the water almost instantly.
This mechanical energy mimics the slow molecular movement of a twelve-hour steep. It is crucial to use a steady, circular motion to ensure every single coffee ground is fully saturated and contributing to the final profile.
This high-energy approach is the secret to achieving a full-bodied concentrate without the bitterness typically associated with heat, providing a smooth base that is ready for immediate dilution with ice or cold milk.
The Role of Fine Grinds in Fast Brewing
To successfully execute a two-minute cold brew, you must move away from the coarse grind size used in French presses and opt for a fine espresso-style grind.
A finer grind significantly increases the total surface area exposed to the water, which is the most critical factor when you are removing heat from the equation.
Because cold water is a less efficient solvent than hot water, the increased surface area provides more ‘entry points’ for extraction to occur rapidly. Using a consistent burr grinder ensures that you do not have oversized boulders that stay under-extracted or dust-like fines that clog the filter.
This specific grind size, combined with the pressure of the AeroPress plunger, allows you to create a concentrated ‘cold espresso’ shot that captures the sweetness and clarity of the bean.
Without this fine texture, the water would simply pass through the grounds too quickly, resulting in a weak, tea-like consistency that lacks the characteristic strength and depth of a traditional long-steeped cold brew concentrate.
Step-by-Step Instructions for Busy Mornings
Begin by placing a paper filter in the AeroPress cap and rinsing it with cool water to remove any papery taste. Add two rounded scoops of finely ground coffee into the chamber and pour cold, filtered water up to the number one mark.
Use the AeroPress paddle to stir intensely for one minute, ensuring no dry clumps remain at the bottom. After stirring, insert the plunger and press down slowly and firmly until you hear the trademark hiss of air. This total process should take roughly ninety seconds from start to finish.
Once you have your concentrated shot, bypass it by adding chilled water or ice to reach your desired strength. This method is perfect for those who want the low-acidity benefits of cold brew but lack the foresight to prepare a batch the night before.
By leveraging the AeroPress’s unique pressure system, you can enjoy a refreshing and crisp iced coffee that tastes like it took all night to prepare, making it the ultimate solution for a fast-paced morning routine.
Tips for Better Tasting Cold Brew
How to Avoid Bitter or Sour Notes
Achieving a balanced profile when making cold brew in an AeroPress requires careful attention to your grind size and water temperature. If your coffee tastes unpleasantly sharp or acidic, it is likely under-extracted, meaning you should use a finer grind or extend the steep time beyond the standard twelve hours.
Conversely, if the result is overly bitter or ashy, you have likely over-extracted the beans. To fix this, ensure you are using filtered, room-temperature water rather than hot water, as high heat can pull out harsh tannins during a long soak.
Because the AeroPress is a smaller vessel, the coffee-to-water ratio is concentrated; therefore, using freshly roasted medium-to-dark beans will provide a smoother, chocolatey profile that resists sourness. Always ensure your agitation is minimal; a quick stir at the beginning is sufficient to saturate the grounds without causing excessive bitterness.
Balancing these variables ensures a clean, sweet cup every time you brew.
Using Paper vs. Metal Filters
The choice of filter significantly impacts the mouthfeel and clarity of your AeroPress cold brew. Using standard paper filters will result in a very clean, crisp cup because the paper traps most of the coffee oils and fine sediment.
This is ideal if you prefer a bright taste profile and a light body. For an even cleaner result, some brewers recommend doubling up the paper filters to ensure no grit passes through during the final plunge.
On the other hand, a stainless steel metal filter allows more natural oils and micro-particles to enter your concentrate. This creates a much creamier, fuller-bodied texture that mimics a traditional immersion cold brew. If you enjoy a robust, heavy mouthfeel, the metal option is superior.
However, be aware that metal filters require a slightly coarser grind setting to prevent the mesh from clogging during the press, which can make the plunging process difficult or messy.
Storing Your Cold Brew Concentrate
Since the AeroPress produces a dense concentrate, proper storage is vital for maintaining flavor integrity over several days. You should always transfer your finished brew into an airtight glass container, such as a mason jar, immediately after pressing.
Glass is preferred over plastic because it does not retain odors or leach chemicals that could alter the delicate coffee notes. Keep the concentrate in the coldest part of your refrigerator to slow down the oxidation process, which eventually leads to a stale or cardboard-like taste.
When stored correctly, your AeroPress cold brew will remain fresh and vibrant for up to seven to ten days. Because this is a concentrated liquid, remember to dilute it with water, milk, or ice only at the moment of serving rather than diluting the entire batch at once.
This practice preserves the potency and aromatic qualities of the coffee, allowing you to customize each individual glass to your specific strength preference.
Best Ways to Serve Your AeroPress Cold Brew
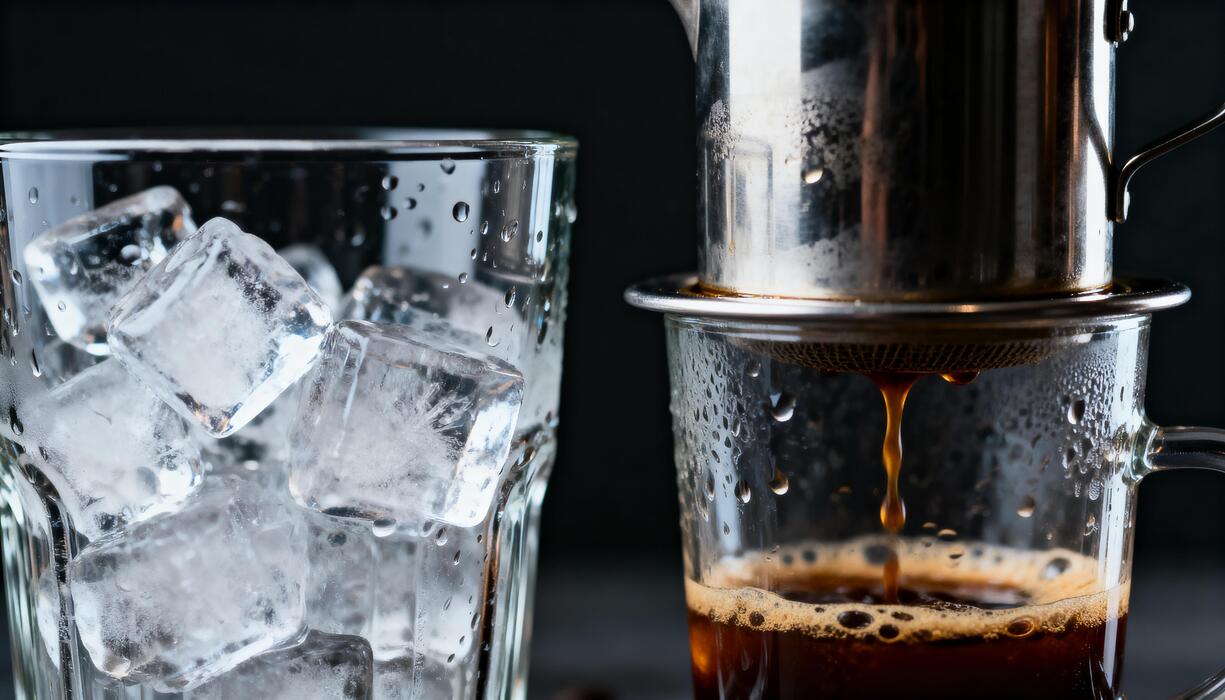
Making a Classic Cold Brew Over Ice
To master the classic Aeropress cold brew, start by using a fine to medium-fine grind size, which allows for maximum surface area extraction during the shorter immersion period. Place a paper filter in the cap and rinse it to remove any papery taste.
Add roughly 18 to 20 grams of coffee into the chamber and pour in room temperature or cool filtered water up to the number one or two mark. Stir the mixture vigorously for exactly one minute; this agitation is critical for extracting flavor without the use of heat.
After stirring, insert the plunger and press down gently but firmly. The resulting concentrate is intense and smooth. To serve, pour this concentrate over a tall glass filled with fresh ice cubes to chill the liquid instantly.
Dilute the brew with a splash of cold water or a small amount of milk if you prefer a lighter profile. This method highlights the low acidity and natural sweetness of the beans, providing a refreshing caffeine kick that is perfect for hot summer afternoons.
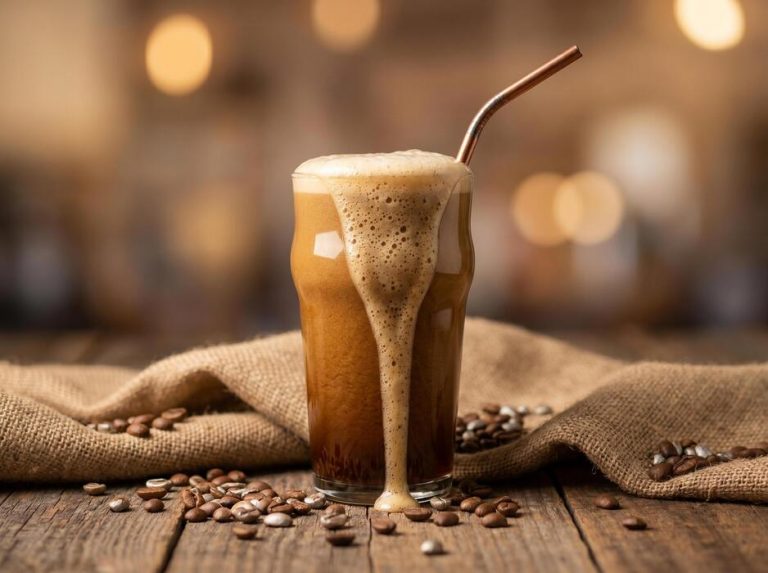
Creating Cold Brew Lattes and Macchiatos
The concentrated nature of Aeropress cold brew makes it an ideal foundation for milk-based specialty drinks like lattes and macchiatos. Since the Aeropress produces a liquid similar to espresso in strength, it cuts through the richness of dairy or plant-based alternatives perfectly.
For a cold brew latte, fill a glass with ice and add about four to six ounces of cold milk first. Slowly pour your freshly pressed cold brew concentrate over the top to create a beautiful layered effect.
If you prefer a macchiato style, reverse the order by placing the concentrate at the bottom and topping it with a dollop of cold-frothed milk. Using oat or almond milk works exceptionally well here, as their creamy textures complement the chocolatey notes often found in cold immersion brewing.
You can also add a drop of vanilla or caramel syrup to enhance the flavor profile. This approach allows you to enjoy a cafe-quality beverage at home without needing an expensive espresso machine or long overnight steeping times.
Mixing with Tonic Water or Soda
For a sophisticated and effervescent twist, try mixing your Aeropress cold brew concentrate with tonic water or sparkling soda. This combination is a staple in modern specialty coffee shops because the carbonation enhances the aromatic qualities of the coffee.
To prepare this, fill a highball glass with ice and pour in four to six ounces of premium tonic water. Slowly add your cold brew concentrate on top to watch the dark coffee swirl elegantly into the clear bubbles.
The bitterness of the quinine in the tonic water balances the deep, earthy tones of the coffee, while a squeeze of fresh lime or a sprig of rosemary adds a bright, citrusy finish.
If you find tonic too bitter, substituted it with club soda or even a splash of ginger ale for a spicy kick. This serving method is incredibly refreshing and acts as a perfect non-alcoholic alternative to a cocktail.
It is a fantastic way to showcase the versatility of your Aeropress while exploring more complex, refreshing flavor combinations during the warmer months.
Common AeroPress Cold Brew Questions
How Much Caffeine is in AeroPress Cold Brew?
The caffeine content in AeroPress cold brew is generally higher than standard drip coffee due to the concentrated coffee-to-water ratio typically used during the steeping process.
When you brew with the AeroPress, you often use a finer grind and a higher dose of coffee grounds, which increases the total extraction of caffeine molecules over time.
Because cold water extracts compounds more slowly than boiling water, a longer steep time of twelve to twenty-four hours is necessary to pull the full profile from the beans.
A typical serving of this concentrate might contain anywhere from 150 to 250 milligrams of caffeine, depending on the specific bean variety and the exact dilution ratio you choose when serving.
To manage your intake effectively, it is highly recommended to dilute the concentrate with water or milk rather than drinking it straight. This allows you to enjoy the smooth, low-acid flavor profile without experiencing the jitters or over-stimulation often associated with high-strength immersion brewing methods.
Can You Use Pre-Ground Coffee?
You absolutely can use pre-ground coffee for your AeroPress cold brew, though the results will vary based on the specific grind size of the product you purchase. Most pre-ground coffee sold in grocery stores is a medium-drip grind, which works surprisingly well for the immersion method required by the AeroPress.
While experts often recommend a coarse grind for traditional gallon-sized cold brew batches, the compact chamber of the AeroPress allows for efficient extraction with finer particles. If you are using standard pre-ground coffee, ensure you do not over-agitate the mixture to avoid making the final cup too bitter or muddy.
Simply combine your grounds and room-temperature water, then let them sit in the inverted AeroPress for several hours. This is a convenient and accessible solution for those who do not own a high-quality burr grinder at home but still want to enjoy a refreshing, chilled beverage.
Just remember to use a paper filter to ensure clarity and to remove any fine sediment that might pass through a metal mesh disk.
How to Clean Your AeroPress After Cold Brewing
Cleaning your AeroPress after a cold brew session is incredibly simple and is one of the primary reasons this device is favored by enthusiasts. Once you have finished pressing your concentrate, simply unscrew the filter cap and eject the puck of coffee grounds into your compost bin or trash.
Because cold brew uses room temperature water, there is often less oil buildup than with hot methods, but you should still rinse the rubber plunger and chamber immediately with warm, soapy water.
Pay close attention to the silicone seal, as fine coffee particles can occasionally get trapped around the edges, potentially affecting the vacuum seal during your next brew.
You should also periodically deep clean the device by soaking the parts in a mixture of water and vinegar or a specialized coffee equipment cleaner to remove any stubborn residues. Always ensure the unit is completely dry before reassembling it for storage to prevent any musty odors from developing.
Taking these quick steps will extend the lifespan of your AeroPress and ensure that every future batch of cold brew tastes fresh and delicious.
Frequently Asked Questions
What is the basic method for making cold brew in an AeroPress?
To make cold brew, add rounded scoops of medium-fine ground coffee to the AeroPress, fill with room temperature or cold water, and stir for about one minute. Allow the mixture to steep for 12 to 24 hours before pressing it through the filter into your cup.
What coffee-to-water ratio should I use for AeroPress cold brew?
A common starting point is a 1:4 or 1:5 ratio of coffee to water to create a concentrate. For a standard AeroPress, this typically means using about 30 grams of coffee and filling the chamber with water to the top mark.
Do I need to refrigerate the AeroPress while it steeps?
You can leave the AeroPress on your counter at room temperature or place it in the fridge during the 12-24 hour steep time. Room temperature brewing generally extracts flavors faster, while refrigeration results in a slightly brighter and cleaner profile.
How do I prevent the water from leaking out during the long steep?
Use the ‘inverted method’ by placing the plunger into the top of the chamber, flipping it upside down, and adding your coffee and water. This keeps the liquid sealed inside the chamber until you are ready to attach the cap and filter to press.
Can I make ‘flash’ cold brew with an AeroPress for faster results?
Yes, you can make a concentrated hot brew using less water and pressing it directly over a glass filled with ice. This instantly chills the coffee and provides a similar refreshing profile to traditional cold brew in just a few minutes.
What grind size is best for AeroPress cold brew?
A medium-fine grind, similar to table salt, works best for the AeroPress even with cold brew. While traditional cold brew uses coarse grounds, the AeroPress filter and shorter immersion time benefit from a slightly finer grind to ensure full extraction.
Conclusion
Making cold brew with an Aeropress is a game-changer for coffee lovers seeking a quick, smooth, and low-acid caffeine fix. By mastering the right coffee-to-water ratio and allowing a brief steep time, you can skip the overnight wait associated with traditional methods. Experiment with different bean varieties and grind sizes to find your perfect profile. Now that you have the tools and techniques, it is time to press your way to a refreshing homemade brew.