How To Make Starbucks Cold Brew Concentrate
Recreating that smooth, velvety Starbucks taste at home is easier than you think. If you are tired of daily coffee runs, learning how to make Starbucks cold brew concentrate will save you time and money without sacrificing flavor. From choosing the right beans to the final steep, we have the quick solutions you need to master your DIY caffeine fix today.
What is Starbucks Cold Brew Concentrate?
The difference between cold brew and iced coffee
Understanding the distinction between these two methods is essential for mastering your home barista skills. Iced coffee is essentially traditional drip coffee brewed hot and then cooled down, which often results in a thinner body and higher acidity due to the heat extraction process.
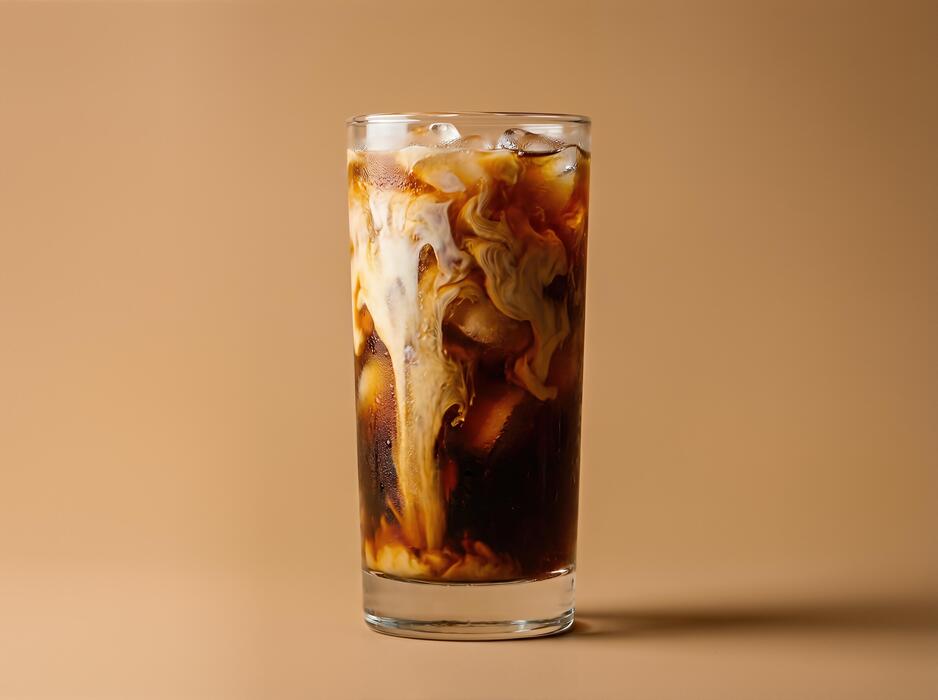
In contrast, Starbucks cold brew concentrate is made by steeping coarse grounds in cool water for up to twenty hours. This lengthy, heat-free immersion allows for a much smoother extraction that minimizes bitter oils and acidic compounds.
By using time instead of temperature, you create a dense, syrupy base that serves as a versatile foundation for various drinks. When you learn how to make Starbucks cold brew concentrate, you are essentially creating a potent extract that retains its depth even when diluted.
This process ensures a robust caffeine kick and a velvety mouthfeel that standard iced coffee simply cannot replicate, making it the superior choice for those who prefer a rich, mellow finish without the sharp bite of traditional brewing methods.
Why concentrate is better than ready-to-drink coffee
Opting for a concentrate over a pre-mixed bottle offers significant advantages in terms of customization, freshness, and value. When you prepare a concentrated batch, you gain complete control over the final strength of your beverage.
You can experiment with a one-to-one ratio of coffee to water or milk, or keep it stronger for a bold espresso-like experience. This flexibility is perfect for crafting specialty lattes or adding a splash of cream without watering down the flavor.
Furthermore, concentrate takes up significantly less space in your refrigerator compared to bulky ready-to-drink jugs, making it a smart storage solution for busy kitchens. Because it is highly potent, a single small batch can last for several days, ensuring you have a fresh caffeine source ready at a moment’s notice.
By focusing on the concentrate method, you bypass the preservatives often found in commercial bottled options, allowing the pure coffee notes to shine through while saving money by utilizing bulk coffee beans instead of paying for pre-packaged convenience.
The flavor profile of Starbucks signature blend
To successfully recreate the iconic taste at home, you must utilize a blend that mimics the specific characteristics of the Starbucks signature roast. Their cold brew is famous for a deep, chocolatey essence and subtle notes of toasted nuts that emerge during the slow steeping process.
Unlike lighter roasts that can turn sour when brewed cold, this dark, medium-acidic profile is specifically designed to withstand long immersion times. When preparing your concentrate, look for beans with low acidity and sweet undertones to achieve that smooth, lingering finish.
The result is a naturally sweet beverage that often requires less sugar or sweetener than traditional coffee. By selecting a heavy-bodied roast, you ensure that the chocolate and caramel notes remain prominent even after adding ice or dairy.
This specific flavor profile is what gives the concentrate its legendary status, providing a balanced and approachable taste that appeals to both black coffee enthusiasts and those who enjoy creamy, sweetened treats. Mastering this blend allows you to enjoy the premium cafe experience directly from your own kitchen.
Essential Ingredients and Equipment for Home Brewing
Choosing the right coffee beans for a Starbucks taste
To replicate the signature Starbucks cold brew flavor at home, you must start with the correct bean profile. Starbucks typically uses a specific blend of Latin American and African beans that are roasted to a medium-dark level.
For the closest match, look for dark roast beans with flavor notes of cocoa, molasses, or dark chocolate, as these stand up well to the long steeping process. Avoid light roasts, which can become overly acidic or tea-like when brewed cold.
Instead, opt for single-origin Colombian or Guatemalan beans if you cannot find a dedicated espresso blend. Freshness is equally critical; ensure your beans are freshly roasted within the last two weeks to preserve the volatile oils that create that rich, smooth mouthfeel.
Using high-quality, specialty-grade Arabica beans ensures your concentrate has the necessary depth and sweetness without the bitterness often associated with lower-quality Robusta varieties used in cheaper brands.
The importance of coarse grind size
Achieving the perfect Starbucks-style concentrate depends heavily on your grind consistency. You must use an extra-coarse grind, similar in texture to sea salt or peppercorns.
If the grind is too fine, the water will over-extract the coffee over the twelve to twenty-four hour steeping period, resulting in a bitter, astringent taste and a cloudy appearance.
A coarse grind allows the water to slowly penetrate the grounds, drawing out the sugars and oils while leaving the harsh tannins behind. For the best results, use a conical burr grinder rather than a blade grinder to ensure uniformity; uneven pieces lead to inconsistent extraction.
Furthermore, a coarse grind makes the filtration process much easier, preventing your fine mesh sieve or paper filter from clogging. This ensures your final concentrate is clean, crisp, and sediment-free, providing that professional, velvety texture that makes the Starbucks cold brew experience so enjoyable and easy to drink.
Filtered water vs tap water for better flavor
The quality of your water is often the most overlooked ingredient when making coffee concentrate at home. Since cold brew is roughly 98% water, any impurities in your tap water will be magnified during the long immersion process.
Chlorine, minerals, and fluoride found in standard tap water can introduce metallic or chemical aftertastes that mask the delicate notes of the coffee beans. To achieve a clean, café-quality finish, you should always use filtered or bottled spring water.
Filtered water removes sediment and odors while maintaining a balanced mineral content that aids in extraction. Avoid using distilled water, as the total lack of minerals can lead to a flat and dull flavor profile.
By using a high-quality water filtration pitcher or an under-sink system, you provide a neutral canvas that allows the rich chocolate and nutty nuances of the Starbucks-style beans to shine. This simple upgrade significantly elevates the final concentrate from average to truly professional.
The Golden Ratio for Starbucks Cold Brew Concentrate
Standard coffee-to-water ratios for beginners
To replicate the signature smooth taste of Starbucks cold brew at home, beginners should start with a standard 1:4 coffee-to-water ratio by volume. This specific measurement creates a heavy concentrate that mimics the commercial profile found in cafes.
For a typical batch, use one cup of coarsely ground coffee for every four cups of filtered water. It is vital to use a coarse grind, resembling sea salt, to ensure the water extracts the caffeine and flavor without pulling out the bitter tannins associated with finer grinds.
Simply combine the ingredients in a large pitcher, stir gently to ensure all grounds are saturated, and let the mixture steep at room temperature for roughly 20 hours.
This ratio is the safest starting point because it is forgiving and provides a consistent base that can be easily diluted later with water or milk.
By mastering this fundamental baseline, you establish a reliable foundation for your home brewing process before experimenting with more complex variables or different bean varieties.
How to measure by weight vs volume
While volume is convenient, measuring by weight is the most accurate way to achieve a professional-grade Starbucks cold brew concentrate. For the ultimate precision, use a 1:5 weight ratio, such as 100 grams of coffee to 500 grams of water.
Using a digital kitchen scale eliminates the inconsistencies caused by different roast levels; for instance, dark roast beans are physically larger but lighter than light roast beans, meaning a ‘cup’ of each contains different amounts of coffee.
When you weigh your dry grounds and your water, you ensure that every single batch tastes exactly the same, regardless of the brand or bag you buy.
If you must use volume, remember that one cup of grounds weighs approximately 80 to 90 grams, but this can vary wildly based on the coarseness of the grind.
Professional baristas always prefer mass over volume because it accounts for the density of the bean, leading to a much more balanced and predictable extraction that prevents your concentrate from being too weak or overly acidic.
Adjusting strength for your personal preference
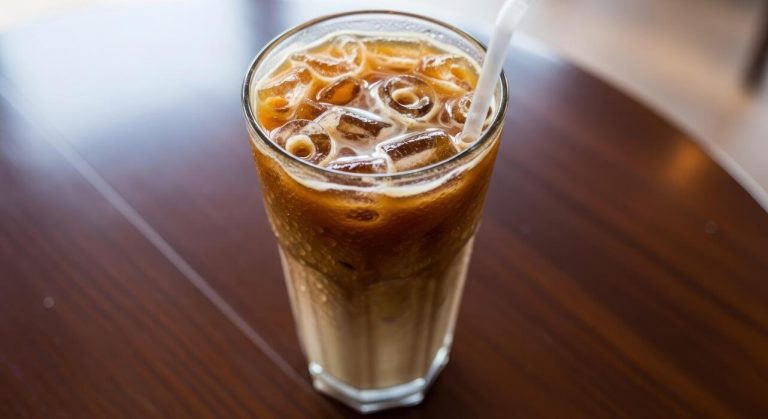
The beauty of a cold brew concentrate is its versatility, allowing you to fine-tune the intensity after the brewing process is complete. If you find the initial 1:4 ratio too intense, you can dilute the final concentrate with a 1:1 ratio of water or milk when serving.
For those who prefer a bold, ‘black coffee’ punch similar to the Starbucks Nitro style, try decreasing the water during steeping to a 1:3 ratio for an even thicker syrup.
Conversely, if the flavor is too earthy or heavy, you can shorten the steep time to 12 or 15 hours, which results in a brighter, more floral profile. Always taste your concentrate before adding sweeteners; the natural sweetness of the cold brew often requires less sugar than traditional iced coffee.
Remember that ice melt will further dilute your drink, so if you plan on sipping slowly, keep your concentrate slightly stronger to maintain the flavor integrity. Adjusting these small variables allows you to customize the caffeine kick and mouthfeel to match your specific palate perfectly.
Step-by-Step Guide to Making the Concentrate
Preparing the coffee grounds and water
To replicate the signature Starbucks flavor profile at home, you must start with the correct ratio and grind size. Select a high-quality, dark-roast bean with notes of cocoa and citrus to match their specific blend.
Use a coarse grind setting that resembles sea salt; anything finer will result in a cloudy, overly bitter concentrate that is difficult to filter. For a true concentrate, aim for a 1:4 ratio of coffee to water by weight.
For example, use one cup of ground coffee to four cups of filtered water. It is essential to use cold, filtered water rather than tap water to ensure the cleanest taste possible.
Place your coarse grounds into a large glass pitcher or a dedicated cold brew maker, then pour the water over them slowly.
Gently stir the mixture with a long spoon to ensure every ground is fully saturated, but avoid over-agitating the sediment, as this can lead to an undesirable astringency in your final beverage.
The steeping process and timing
Once your mixture is prepared, the magic of extraction happens through time rather than heat. Cover your container tightly with a lid or plastic wrap to prevent the coffee from absorbing any odors from your refrigerator.
For a bold, Starbucks-style intensity, let the mixture steep for 12 to 20 hours at room temperature. Steeping on the counter often results in a more nuanced, floral profile, while refrigerated steeping for a full 24 hours creates a mellow, chocolatey body.
Do not exceed the 24-hour mark, as the coffee will begin to extract woody, bitter tannins that ruin the smooth finish. During this period, the cold water slowly dissolves the caffeine and flavor oils without the acidity typically found in hot-brewed coffee.
This patience-driven extraction is the secret to the low-acid, velvety texture that makes cold brew concentrate so popular. Ensure the container remains in a dark spot away from direct sunlight to maintain a stable temperature throughout the entire duration of the process.
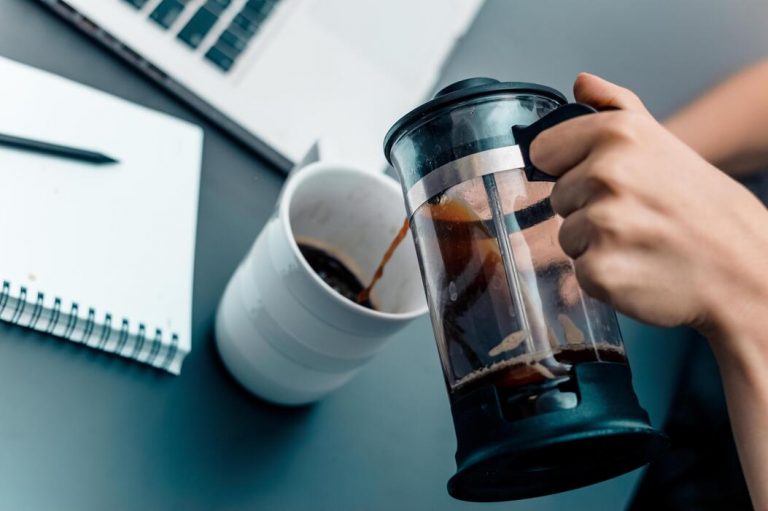
How to filter your brew for a clean finish
After the steeping time is complete, you must separate the concentrate from the spent grounds to achieve a professional, sediment-free result. Start by pouring the mixture through a fine-mesh sieve to remove the largest particles.
For the second pass, which is crucial for that polished Starbucks clarity, line the sieve with a paper coffee filter or a clean flour sack towel.
Allow the liquid to drip through naturally; never squeeze the filter, as this forces fine silt and bitter oils into your concentrate, making it taste chalky. Once the process is finished, you will be left with a potent liquid gold.
Transfer this pure concentrate into a clean glass carafe or airtight mason jar for storage. Because this is a concentrated base, it is designed to be diluted. When you are ready to serve, mix it with a 1:1 ratio of water or milk over ice.
This homemade batch will stay fresh and flavorful in your refrigerator for up to two weeks, providing a convenient caffeine boost.
How to Dilute and Serve Your Cold Brew

Mixing the concentrate with water or milk
To replicate the signature Starbucks profile at home, you must master the ratio of your potent concentrate. The standard gold rule for a balanced cup is a 1:1 dilution ratio, meaning you should combine exactly one part cold brew concentrate with one part filtered water or your choice of milk.
If you prefer the robust, kick-forward intensity of a Starbucks Nitro style, try a slightly heavier pour of concentrate, perhaps a 2:1 ratio, to maintain that deep chocolatey essence.
For those who enjoy a creamy, latte-like texture, substituting cold water with whole milk or oat milk will beautifully complement the low acidity of the brew. Always pour the concentrate into the glass first before adding your diluting liquid to ensure an even blend.
Remember that Starbucks concentrate is highly caffeinated, so starting with a balanced equal-parts mix allows you to gauge the strength before adjusting further to suit your specific palate preferences.
Creating Starbucks-style flavored drinks
Transforming your homemade concentrate into a luxury cafe beverage requires the right layering technique. To emulate the famous Vanilla Sweet Cream Cold Brew, start by stirring two tablespoons of vanilla syrup directly into your diluted concentrate while it is still room temperature or slightly chilled.
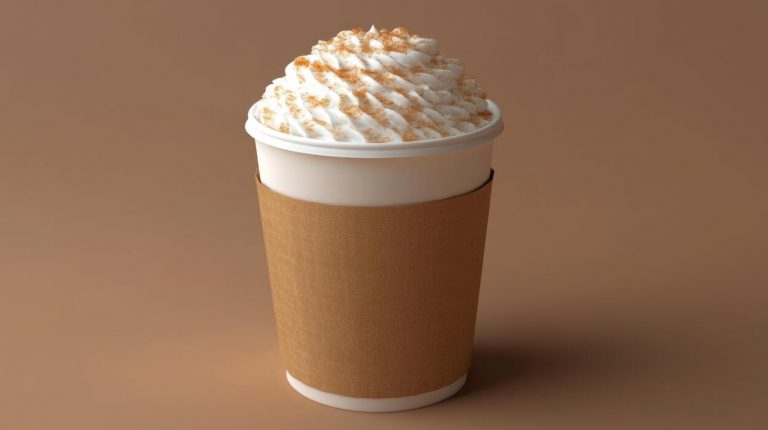
For a seasonal twist, you can whisk together a separate mixture of heavy cream, condensed milk, and pumpkin spice to create a velvety cold foam that sits gracefully on top of the dark coffee.
The key to that authentic Starbucks flavor is using high-quality simple syrups rather than granulated sugar, as liquids integrate seamlessly without leaving a gritty residue at the bottom of the glass.
If you want to mimic their caramel macchiato style, drizzle thick caramel sauce along the interior walls of your glass before adding the ice and coffee. This ensures every sip contains a hint of sweetness that balances the bold, earthy notes of your steeped cold brew concentrate.
Best ice cubes to prevent watering down your drink
One of the biggest mistakes coffee lovers make is using standard tap water ice, which melts quickly and ruins the integrity of the brew. To maintain that professional Starbucks consistency from the first sip to the last, you should create specialized cold brew ice cubes.
Simply pour a portion of your prepared, diluted cold brew into a silicone ice tray and freeze it overnight. As these coffee-based cubes melt, they actually release more flavor into the glass rather than diluting it with excess water.
If you prefer clear ice, consider using large-format spherical molds, which have a lower surface area-to-volume ratio and melt significantly slower than small chips. Another expert tip is to use filtered water for your ice to ensure no chlorine or mineral aftertastes interfere with the delicate notes of the beans.
By using these slow-melting coffee cubes, you guarantee that your handcrafted Starbucks-style beverage remains rich, bold, and perfectly chilled throughout your entire morning routine.
Tips for Storing and Maintaining Freshness
How long cold brew concentrate lasts in the fridge
Once you have successfully brewed your DIY Starbucks-style cold brew concentrate, understanding its shelf life is vital for maintaining that smooth, low-acid profile you love. Generally, a pure cold brew concentrate will remain at peak freshness for 7 to 14 days when stored in the refrigerator.
Because the coffee is highly concentrated and hasn’t been diluted with water or milk yet, it acts as its own preservative for a short period. However, the flavor profile begins to shift after the first week as oxidation occurs, which can lead to a more muted taste.
To maximize longevity, always store the concentrate in the coldest part of your fridge, usually toward the back rather than on the door where temperatures fluctuate.
If you decide to dilute the entire batch with water immediately after straining, your window of freshness shrinks significantly to about 3 to 5 days.
For the best experience, keep it in concentrated form and dilute only what you plan to drink immediately to ensure every single glass tastes as fresh as a professional barista-made beverage.
The best containers for airtight storage
Choosing the right vessel is the most effective way to protect your concentrate from absorbing unwanted odors and undergoing rapid oxidation. Glass Mason jars or swing-top glass bottles are the gold standard for home storage because glass is non-porous and will not leach chemicals or residual flavors into your coffee.
Look for containers that feature a silicone gasket or a vacuum-seal lid to create a truly airtight environment. This prevents oxygen from entering the bottle, which is the primary culprit behind stale-tasting coffee.
Additionally, try to select a container size that matches your batch volume; minimizing the headspace or empty air at the top of the jar reduces the amount of oxygen in contact with the liquid surface.
If you frequently make large batches, consider using dark amber glass bottles to protect the concentrate from light exposure, which can degrade the delicate oils.
Avoid using plastic containers if possible, as they can retain scents from previous foods and may negatively impact the clean, crisp finish that characterizes a high-quality Starbucks-inspired cold brew experience at home.
Signs that your concentrate has gone bad
Even with perfect storage conditions, cold brew concentrate eventually loses its vitality and can spoil. The first indicator to watch for is a noticeable change in aroma; if the coffee smells sour, fermented, or unusually dusty rather than chocolatey and bold, it is time to discard it.
Visually, check for any cloudiness or sediment that looks fuzzy, which could indicate mold growth, especially around the rim of the jar. While some fine silt at the bottom is normal for cold brew, any floating particles are a major red flag.
On the palate, spoiled concentrate will taste unpleasantly acidic, metallic, or thin, lacking the characteristic sweetness and depth of a fresh brew. Another subtle sign of degradation is the loss of that rich, dark color; if it starts to look translucent or brownish-gray, the flavor has likely oxidized beyond enjoyment.
To stay safe and ensure the best caffeine kick, always perform a quick sniff test before pouring your morning glass. If you have any doubts about the age or smell of your batch, it is always better to start fresh with a new soak.
Common Mistakes to Avoid When Brewing at Home
Why you should never use fine coffee grounds
One of the most frequent errors when attempting to replicate the Starbucks cold brew concentrate experience is using a fine or medium grind size.
Because cold brew involves an extended immersion period, using fine coffee grounds will lead to over-extraction, resulting in a muddy, excessively bitter flavor profile that lacks the signature smoothness you expect.
Furthermore, fine particles are incredibly difficult to filter out, often leaving a gritty sediment at the bottom of your pitcher that ruins the mouthfeel of your drink. To achieve professional results, you must use a coarse, pebble-like grind similar to sea salt.
This specific texture allows the cold water to slowly and gently extract the sugars and oils from the beans without pulling out the harsh tannins.
By sticking to a consistent coarse grind, you ensure a clean, crisp concentrate that mimics the high-quality beverage served at your favorite cafe, making the filtration process much faster and more efficient for home brewers.
The impact of steeping for too long
Patience is a virtue when making cold brew, but there is a definitive limit to how long you should let your coffee sit.
Many home baristas mistakenly believe that steeping for 30 or 40 hours will create a stronger, more caffeinated concentrate, but this actually leads to unpleasant woody and oxidized notes.
Starbucks typically aims for a sweet spot between 12 and 24 hours; exceeding this timeframe causes the grounds to release chemical compounds that taste like wet paper or old tobacco. To avoid this, set a timer and decant your concentrate as soon as the 20-hour mark is reached.
If you find the flavor too weak, don’t increase the time; instead, adjust your coffee-to-water ratio to be more concentrated. Managing your steeping schedule ensures that your concentrate remains fresh and vibrant.
Once the extraction is complete, remove the grounds immediately to stop the brewing process and preserve the delicate chocolate and nutty undertones that define a premium cold brew batch.
Temperature mistakes that cause bitterness
Temperature control is a critical factor that many beginners overlook when starting their brew. Using hot or even lukewarm water to speed up the process is a major mistake because heat changes the chemical reaction, drawing out acidic oils that create a sharp, biting sensation on the tongue.
For a true Starbucks-style concentrate, you should always use filtered, room temperature or cold water from the start. Additionally, where you store the container during the steeping process matters significantly.
While many people prefer to steep in the fridge, this can actually slow down extraction too much, leading to a weak and underdeveloped flavor. The best approach is to steep at room temperature in a cool, dark place away from direct sunlight to maintain thermal stability.
Once the brewing cycle is finished and the grounds are filtered out, you can then move the liquid to the refrigerator. This method ensures a balanced acidity and natural sweetness, preventing the harshness often associated with improper temperature management during the long immersion phase.
Frequently Asked Questions
What coffee beans should I use to replicate Starbucks cold brew concentrate?
To get the closest flavor profile to Starbucks, use a bag of Starbucks Cold Brew Pitcher Packs or their signature ‘Guatemala Antigua’ medium roast. Ensure the beans are ground to a very coarse consistency, similar to sea salt, to prevent the concentrate from becoming bitter or cloudy.
What is the ideal water-to-coffee ratio for Starbucks-style concentrate?
The standard ratio for a strong concentrate is 1:4 by weight. For example, use 1 cup of coarsely ground coffee to 4 cups of filtered water; this creates a potent base that you will later dilute with water or milk before serving.
How long should I steep the coffee grounds for the best flavor?
For a smooth, low-acid profile like Starbucks, steep your grounds at room temperature for 12 to 20 hours. Steeping for less than 12 hours results in a weak brew, while going beyond 24 hours can extract bitter tannins that ruin the flavor.
Do I need special equipment to make cold brew concentrate at home?
No special equipment is required; you can simply use a large glass jar and a fine-mesh strainer or cheesecloth. However, using a French press or a dedicated cold brew maker can make the filtration process cleaner and more efficient.
How do I dilute the concentrate once it is finished?
Because the concentrate is very strong, you should mix it using a 1:1 ratio. Combine one part coffee concentrate with one part cold filtered water or milk, then pour over fresh ice to enjoy a drink that tastes like the cafe version.
How long does homemade cold brew concentrate stay fresh?
When stored in an airtight glass container in the refrigerator, your cold brew concentrate will stay fresh and flavorful for up to two weeks. For the best taste, do not add water or milk to the storage container until you are ready to serve an individual glass.
Conclusion
Making Starbucks cold brew concentrate at home is a simple process that requires only quality beans, water, and patience. By mastering the 1:4 coffee-to-water ratio and allowing a slow twenty-hour steep, you can enjoy a smooth, café-quality beverage at a fraction of the cost. Now that you have the tools to customize your caffeine kick, it is time to start brewing. Grab your favorite roast and enjoy the refreshing taste of homemade perfection today.