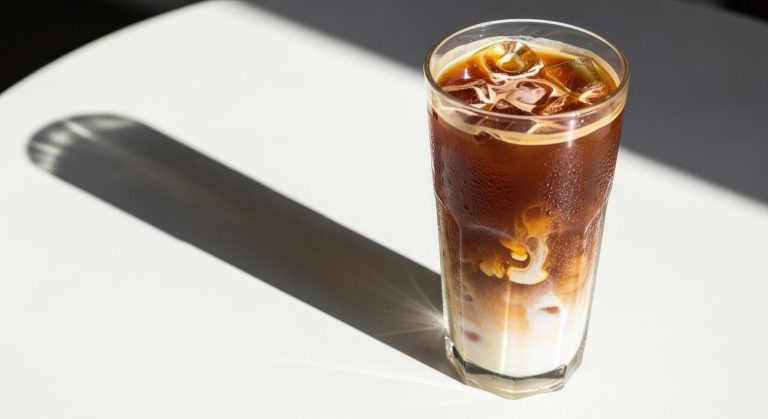
How To Make Cold Espresso At Home
Craving a refreshing caffeine kick without the coffee shop price tag? Learning how to make cold espresso at home is easier than you think, even if you do not own a fancy machine. Whether you prefer the bold intensity of a shaken espresso or a smooth poured-over-ice classic, we have got you covered. This guide provides quick, foolproof methods to chill your shots instantly while preserving that rich flavor. Let’s dive into the best techniques to master your DIY iced espresso today.
Best ways to make espresso without a machine
Using a Moka pot for stovetop espresso
The Moka pot is a classic Italian tool that produces a rich, syrup-like coffee that closely mimics traditional espresso. To start, fill the bottom chamber with pre-heated water to ensure a faster brew time and prevent burning the grounds.
Place finely ground coffee into the filter basket without tamping it down, as excessive pressure can block the steam flow. Heat the pot over a medium flame until you hear a gurgling sound, then immediately remove it from the heat to avoid a bitter aftertaste.
Since you are aiming for a cold drink, you should flash-chill the concentrate by pouring it directly into a metal pitcher sitting in an ice bath. This technique preserves the volatile aromatics while rapidly lowering the temperature.
Once cooled, pour the strong coffee over fresh ice and add cold milk or water. This method provides the heavy body and intense flavor necessary to stand up against melting ice, making it a perfect base for homemade iced lattes.
Brewing with an AeroPress
The AeroPress is arguably the most versatile manual brewer for creating a concentrated shot suitable for cold espresso drinks. For the best results, use the inverted method by placing the plunger inside the chamber and turning it upside down.
Add eighteen grams of finely ground coffee and pour in only sixty milliliters of hot water, ideally around ninety-five degrees Celsius. Stir the mixture vigorously for thirty seconds to maximize extraction, then attach the cap with a rinsed paper filter.
Carefully flip the device over a sturdy glass and plunge with steady, firm pressure. This creates a clean, sediment-free concentrate with a bright acidity that shines in cold preparations.
To serve, stir a small amount of sugar into the hot liquid if desired, then shake it in a cocktail shaker with plenty of ice.
This aeration process creates a beautiful foam similar to a shaken espresso, providing a professional-grade texture and a refreshing, crisp finish that is ideal for warm weather caffeine fixes.
Concentrated French press method
While typically used for lighter coffee, a French press can produce a powerful espresso-style concentrate if you adjust the coffee-to-water ratio. Use a high dose of dark roast coffee, specifically a one-to-four ratio, to ensure the brew is strong enough to handle dilution from ice.
Add your coarse grounds to the carafe and pour in just enough hot water to saturate them. Let the mixture steep for exactly four minutes to extract the deep oils and bold flavors without pulling out excessive bitterness.
When the timer ends, slowly press the plunger down only halfway to avoid agitating the silty fines at the bottom. Pour this dense liquid into a separate container immediately.
To make it a cold espresso, let the concentrate sit at room temperature for a few minutes before pouring it over large ice cubes.
The inherent richness of the French press method provides a velvety mouthfeel that pairs exceptionally well with cold foam or cream, offering a sophisticated and robust alternative to expensive coffee shop beverages.
How to cool down hot espresso fast

The cocktail shaker method
One of the most effective professional techniques for cooling espresso instantly is using a cocktail shaker. To start, brew your double shot directly into a small container and then pour it into a shaker filled with plenty of ice.
The key to success is to shake vigorously for at least fifteen seconds to ensure maximum aeration and thermal transfer. This rapid movement breaks down the heat while creating a signature silky micro-foam on top of the liquid.
Once the outside of the shaker feels frost-cold to the touch, use a Hawthorne strainer to pour the liquid into your serving glass. By straining the liquid away from the melting ice, you prevent unnecessary dilution while maintaining the bold, concentrated flavor profile of the beans.
This method is ideal for those who enjoy a textured mouthfeel similar to a nitro brew or an espresso martini. It is the fastest way to achieve a professional-grade chilled beverage without waiting for the refrigerator to do the heavy lifting.
Using chilled glassware and metal spoons
If you want to lower the temperature of your espresso without adding any water or ice directly to the brew, utilizing thermal mass is a brilliant solution. Before you begin brewing, place your heavy-bottomed glassware in the freezer for at least twenty minutes.
A chilled glass acts as a heat sink, absorbing the thermal energy from the liquid the moment it makes contact. To accelerate this cooling process even further, place a stainless steel spoon inside the glass before pouring the hot espresso.
Metal is an excellent conductor of heat, and the spoon will draw the warmth out of the liquid and dissipate it into the air and the surrounding cold glass. You can even use multiple spoons, swapping a warm one for a fresh, frozen one every thirty seconds.
This approach is perfect for purists who want to enjoy the complex notes of a single-origin roast at a lower temperature without the risk of melting ice altering the carefully balanced acidity and body of the shot.
Flash chilling with large ice cubes
Flash chilling is a popular technique that balances speed with flavor preservation by minimizing the surface area of the ice involved. Instead of using small, crushed ice that melts instantly and waters down your coffee, you should utilize one or two large clear ice spheres or oversized cubes.
Brew your espresso and immediately pour it over the large ice mass. Because large cubes have a lower surface-area-to-volume ratio, they provide significant cooling power while melting at a much slower rate than standard tray ice.
This allows the espresso to reach a refreshing temperature in seconds without becoming thin or watery. For the best results, stir the espresso gently around the ice for about ten seconds to ensure even cooling throughout the drink.
If you are preparing a milk-based cold coffee, this method ensures the espresso remains strong enough to cut through the creaminess of the dairy. It is a reliable, low-effort way to transform a hot shot into a crisp, cold treat while keeping the caffeine concentration exactly where it should be.
Step-by-step guide to the Iced Americano
Ideal water to espresso ratios
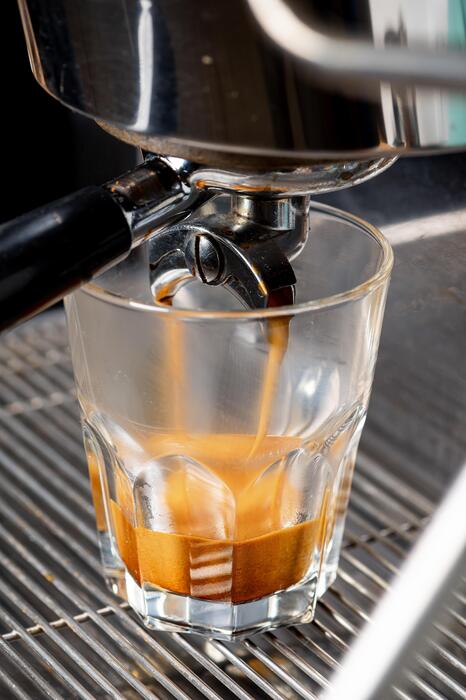
To achieve a balanced flavor when learning how to make cold espresso at home, mastering the ideal water to espresso ratio is critical. For a standard Iced Americano, most professional baristas recommend a ratio of 1:2 or 1:3, depending on your preference for strength.
If you are using a standard double shot of espresso, which typically measures about two ounces, you should aim to add between four to six ounces of filtered water.
This specific balance ensures that the coffee remains bold enough to stand up against the melting ice without becoming overly diluted or watery.
If you prefer a lighter, more refreshing drink, you can extend the water volume slightly, but be careful not to exceed eight ounces, as the nuanced flavor notes of the espresso may become lost.
Using a kitchen scale to measure your output in grams provides the most consistent results for home brewing, allowing you to replicate that perfect coffee shop quality every single morning with total precision and ease.
Why you should add water before ice
A common mistake when preparing cold espresso drinks is pouring hot coffee directly over a glass full of ice. To maintain the best texture and temperature, you should always add room temperature water to the espresso before introducing the ice cubes.
This technique is known as tempering the shot; it prevents the thermal shock that occurs when boiling-hot liquid hits frozen ice, which often leads to rapid melting and immediate dilution.
By mixing the espresso with water first, you lower the overall temperature of the liquid, ensuring that when the ice is finally added, it stays solid for much longer.
This method preserves the crema and body of the espresso, resulting in a crisp, clean mouthfeel rather than a lukewarm, watery mess.
Furthermore, adding ice last allows you to control the final volume of the drink more effectively, ensuring that your glass does not overflow and that the concentration of caffeine and flavor remains perfectly balanced from the first refreshing sip to the very last drop.
Best roast profiles for iced drinks
Selecting the right beans is essential for a successful Iced Americano, as cold temperatures tend to highlight different chemical properties in the coffee.
Generally, medium to dark roast profiles are considered the best choice for iced espresso because they possess the low acidity and heavy body required to punch through the cold water and ice.
These roasts typically feature tasting notes of caramel, dark chocolate, and toasted nuts, which remain pleasant and sweet even as the drink chills. While light roasts are popular for hot pour-overs, their high acidity can sometimes taste sour or unpleasantly sharp when served cold.
If you do prefer a lighter profile, look for beans with citrus or floral undertones that can provide a bright, tea-like quality to your beverage. Regardless of the roast level, ensure your beans are freshly ground just before brewing to capture the volatile oils that provide the drink’s signature aroma.
Choosing a specialty-grade Arabica will guarantee a smooth finish, making your homemade cold espresso experience truly exceptional and professional in every way.
How to make a Shakerato at home
Essential tools for a frothy texture
To replicate the signature frothy texture of a Shakerato at home, you must prioritize mechanical agitation using a stainless steel cocktail shaker. If you do not own a professional shaker, a sturdy mason jar with a tight-sealing lid serves as an excellent alternative for creating that essential microfoam.
Start by pulling a double shot of high-quality espresso and pouring it immediately over a generous amount of large, solid ice cubes.
The size of the ice is critical; small chips melt too quickly and dilute the coffee, whereas large cubes provide the necessary surface area to chill the liquid rapidly while aerating the proteins in the coffee. Secure the lid tightly and shake vigorously for at least fifteen to twenty seconds.
You are looking for a significant temperature drop on the outside of the vessel and a distinct change in the sound of the ice, which indicates that the espresso has transformed into a thick, luxurious cold foam ready for serving.
Adding simple syrup and aromatics
While traditionalists often enjoy the drink unsweetened, adding a touch of liquid simple syrup is the secret to achieving a stable, velvety head of foam. Unlike granulated sugar, which struggles to dissolve in cold liquids, simple syrup integrates instantly, enhancing the natural chocolate and nutty notes of your espresso beans.
For a modern twist on this classic Italian preparation, consider infusing your syrup with aromatics like vanilla bean, orange zest, or a sprig of fresh rosemary. These subtle additions elevate the sensory experience without masking the robust intensity of the coffee.
Always add your sweetener to the shaker before the agitation process to ensure it emulsifies perfectly with the hot espresso and ice. This step is vital for balancing the inherent bitterness of the dark roast, resulting in a sophisticated and well-rounded cold beverage that feels like a professional craft cocktail.
Experimenting with different syrups allows you to customize the flavor profile to suit your specific palate while maintaining the drink’s refreshing integrity.
Straining for a perfect foam layer
The final stage in mastering the Shakerato involves a precise pour to preserve the delicate aeration you created during the shaking phase.
Use a Hawthorne strainer or a fine-mesh sieve to separate the chilled liquid from the spent ice cubes, which have now served their purpose of cooling and diluting the espresso to the perfect concentration.
Position your glass—ideally a chilled coupe or martini glass—on a flat surface and pour the mixture in a steady, continuous stream.
As you reach the end of the pour, you will notice a dense, caramel-colored crema cascading over the dark coffee, eventually settling into a distinct, thick layer at the top. This foam is the hallmark of a well-made Shakerato and should hold its shape for several minutes.
For a professional finishing touch, garnish the foam with three whole coffee beans or a light dusting of cocoa powder. This careful straining technique ensures that no unwanted ice shards interrupt the silky, smooth mouthfeel of your homemade cold espresso masterpiece, providing a truly cafe-quality experience.
Tips for making cold espresso milk drinks
Building a classic Iced Latte
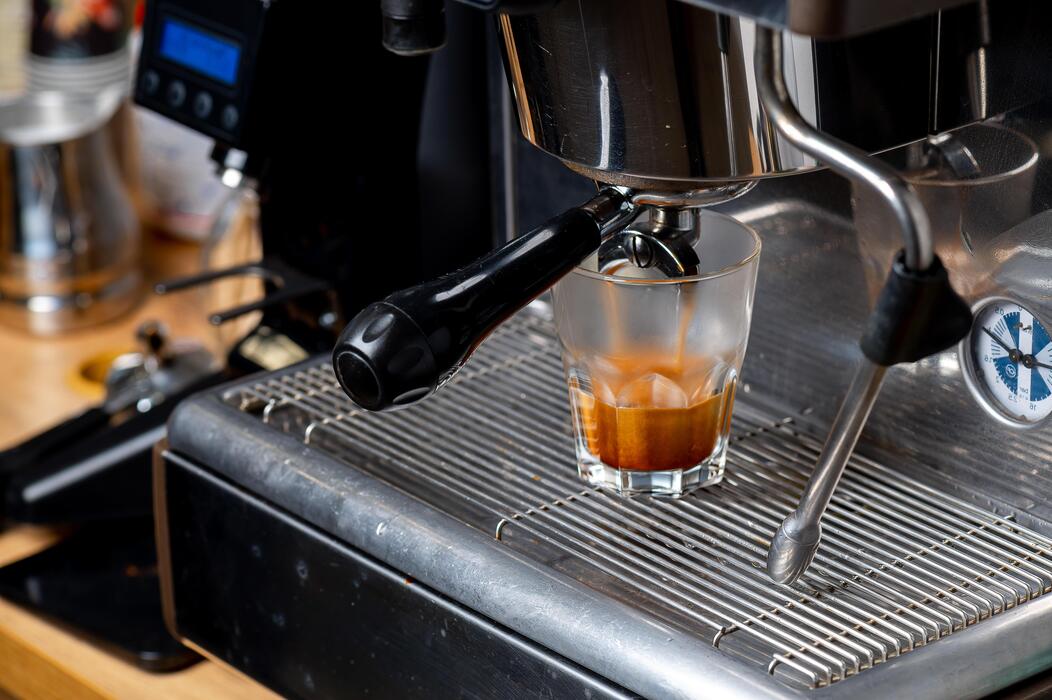
To master the classic iced latte, start by filling a tall glass with large, solid ice cubes rather than crushed ice to prevent rapid dilution.
Pull a double shot of espresso directly into a small heat-proof pitcher and, if you prefer a sweeter beverage, stir in your liquid sweeteners or syrups while the coffee is still hot to ensure complete dissolution.
Pour about six to eight ounces of cold milk over the ice first, then slowly introduce the espresso. This sequence helps temper the heat of the coffee, preserving the rich, creamy texture of the milk without causing a watery consistency.
For a professional touch, use whole milk to achieve a velvety mouthfeel that balances the natural acidity of the beans. Always ensure your espresso is freshly brewed; letting it sit too long before mixing can lead to a bitter profile.
By following these steps, you create a balanced, refreshing drink that rivals any premium coffee shop experience from your own kitchen.
How to layer espresso over milk
Achieving that visually stunning gradient effect requires a basic understanding of liquid density and a steady hand. Begin by filling your glass with milk and plenty of ice, leaving about an inch of space at the top.
The key to successful layering is to pour the espresso slowly over the back of a spoon or directly onto a large ice cube to break the fall. This technique minimizes the force of the liquid, allowing the hot espresso to float gracefully on top of the colder, denser milk.
As the drink sits, the coffee will slowly bleed downward, creating a beautiful marble effect. To maintain these distinct layers until you are ready to drink, avoid stirring immediately. Using a chilled glass can also help maintain the temperature differential necessary for the layers to stay separated.
This method doesn’t just look impressive; it allows you to control the flavor experience by choosing when to incorporate the bold espresso into the creamy base, ensuring every sip is perfectly customized.
Dairy-free milk swaps that don’t curdle
When making cold espresso drinks with plant-based alternatives, the biggest challenge is preventing separation or curdling. To avoid this, always opt for barista-edition non-dairy milks, which are specifically formulated with stabilizers to handle the acidity and heat of espresso.
Oat milk is widely considered the best choice for cold drinks because of its naturally creamy consistency and neutral flavor profile that complements medium-roast beans.
If you prefer almond or soy milk, try to avoid pouring hot espresso directly onto very cold alternative milk; instead, let the espresso cool for thirty seconds or whisk the milk slightly before combining. This mechanical agitation helps emulsify the proteins and fats, making the mixture more stable.
Additionally, adding a tiny pinch of salt or using a dash of maple syrup can act as a bridge between the coffee and the plant milk, further reducing the risk of a grainy texture. These simple adjustments ensure your vegan latte remains smooth, consistent, and delicious throughout the entire glass.
Common mistakes when making cold espresso
How to avoid watery, diluted coffee
One of the most frequent errors when learning how to make cold espresso at home is pouring hot liquid directly over standard ice cubes, which leads to immediate melting and a thin, flavorless profile.
To prevent this, you should brew your espresso directly onto a large, solid ice sphere or a single oversized cube, as these have less surface area and melt much slower than crushed ice.
Another professional technique is to use coffee ice cubes made from leftover brew, ensuring that as they melt, they actually strengthen the beverage rather than weakening it.
Additionally, consider the ‘flash chill’ method by using a metal cocktail shaker to rapidly drop the temperature before the espresso touches your serving ice.
By controlling the dilution ratio and using thermal-efficient glassware, you maintain the bold body and intense syrupy texture that defines a high-quality espresso, ensuring your drink remains refreshing without ever tasting like tinted water.
Dealing with bitter over-extraction
When espresso is served cold, its inherent bitterness becomes much more pronounced, making it vital to avoid over-extraction during the brewing phase.
Many home baristas make the mistake of using water that is too hot or a grind that is too fine, resulting in a harsh, ashy aftertaste that ruins the chilled experience.
To fix this, slightly coarsen your grind size compared to what you would use for a hot latte, which allows for a cleaner extraction.
You should also aim for a shorter brew time, often referred to as a ‘ristretto’ shot, to capture the sweetness and acidity while leaving the bitter compounds behind in the puck.
If you find the result is still too sharp, adding a tiny pinch of saline solution or salt can chemically suppress the bitterness and enhance the natural caramel notes. Mastering the balance of contact time and temperature ensures your cold espresso remains smooth, vibrant, and naturally sweet on the palate.
Why fresh beans matter for cold drinks
Using stale or pre-ground coffee is a critical mistake because cold temperatures significantly mute the aromatic volatiles that give espresso its complex character.
To achieve a cafe-quality result at home, you must grind your beans immediately before brewing to preserve the delicate oils and CO2 levels that create a rich crema.
When coffee is oxidized, it develops a flat, cardboard-like flavor that is amplified when served over ice, whereas freshly roasted medium-to-dark blends provide the necessary chocolate and nutty undertones that stand up well to chilling.
Look for beans with a roast date within the last two weeks to ensure maximum flavor density. Furthermore, selecting high-altitude Arabica beans provides a crisp acidity that tastes refreshing when cold, unlike older beans which can taste unpleasantly metallic.
Investing in quality whole beans and a reliable burr grinder is the single most effective way to elevate your home-brewed cold espresso from mediocre to truly professional and satisfying.
Creative ways to flavor your cold espresso
Making DIY coffee shop syrups
Elevate your homemade cold espresso by crafting custom simple syrups that rival your favorite high-end cafe. To begin, combine equal parts granulated sugar and water in a small saucepan over medium heat until the crystals fully dissolve.
For a classic profile, add a splash of pure vanilla extract or a split vanilla bean while the liquid is still warm. If you prefer more adventurous flavors, try steeping dried lavender buds or fresh mint leaves in the mixture for about ten minutes before straining.
Once cooled, these syrups integrate seamlessly into chilled liquids, preventing the gritty texture often caused by raw sugar. Storing your homemade syrups in glass bottles in the refrigerator ensures you have a quick way to sweeten your drink throughout the week.
Experimenting with brown sugar or honey as a base can also provide a richer molasses undertone that complements the natural bitterness of the roasted beans. This cost-effective method allows you to control the sweetness level perfectly every time you brew.
Using citrus peels and spices
For a sophisticated and refreshing twist on your cold espresso, look toward your pantry and fruit bowl for inspiration. Expressing the oils from a fresh orange or lemon peel directly over your glass adds a bright, aromatic dimension that cuts through the intensity of the coffee.
Simply twist a small strip of zest to release the citrus essences before dropping it into your drink. If you prefer warmth, consider adding a pinch of ground cardamom or cinnamon directly into the espresso shot while it is still hot to ensure the spices bloom and distribute evenly.
For a subtle heat, a tiny dash of cayenne pepper can create a unique Mexican-inspired mocha when paired with a hint of chocolate. These natural additives provide a complex flavor profile without the need for additional calories or artificial sweeteners.
Utilizing whole spices like star anise or cloves during the cooling process can also infuse the liquid with a deep, woodsy fragrance that makes your home brewing experience feel like a professional tasting.
Cold foam toppings you can whisk at home
Achieving that velvety, cloud-like layer on top of your cold espresso is surprisingly simple to do without expensive machinery. Start by pouring a small amount of skim milk or a barista-blend oat milk into a glass, as these varieties typically froth the best due to their protein structure.
Add a teaspoon of maple syrup or a drop of almond extract for flavor, then use a handheld battery-operated milk frother to whisk the liquid for about thirty seconds until it doubles in volume and becomes thick.
If you do not own a frother, you can achieve similar results by shaking the milk vigorously in a small mason jar for one minute. Gently pour this dense, creamy foam over the back of a spoon onto your iced espresso to create beautiful layers.
This technique not only adds a luxurious mouthfeel to your beverage but also acts as a canvas for garnishes like cocoa powder or sea salt. Mastering this topping allows you to enjoy a cafe-quality aesthetic and texture from the comfort of your own kitchen.
Frequently Asked Questions
Can I make iced espresso without an espresso machine?
Yes, you can use a Moka pot or an AeroPress to create a concentrated coffee that mimics espresso. While not technically true espresso, these methods provide the strong, bold flavor profile needed to stand up to ice and milk.
How do I prevent cold espresso from tasting watery?
To prevent dilution, brew your espresso directly over a large amount of ice to chill it instantly, or use coffee ice cubes. Avoid letting the hot espresso sit at room temperature for too long, as this can lead to oxidation and a bitter taste.
What is the best way to chill espresso quickly?
The most effective method is the ‘shaken’ technique, where you pour fresh espresso into a cocktail shaker with ice and shake vigorously for 15 seconds. This chills the liquid instantly and creates a desirable frothy texture.
Should I use a specific roast for cold espresso drinks?
Medium to dark roasts are generally preferred for cold espresso because their chocolatey and nutty notes remain prominent when chilled. Lighter roasts can sometimes taste overly acidic or sour when served over ice.
How do I make a Starbucks-style Iced Shaken Espresso at home?
Brew two shots of espresso and pour them into a jar or shaker with ice, sweetener, and a dash of cinnamon. Shake until frothy, pour into a glass, and top with a splash of your favorite milk or cream.
Can I store brewed espresso in the fridge for later use?
While you can store it for up to 24 hours, espresso begins to lose its volatile aromatic compounds and develop a bitter, flat flavor shortly after brewing. For the best taste, it is highly recommended to brew and chill your espresso immediately before serving.
Conclusion
Mastering the art of making cold espresso at home allows you to enjoy cafe-quality beverages without the premium price tag. Whether you choose to chill a fresh shot quickly over ice or utilize a specialized cold brew method, the key lies in using high-quality beans and proper ratios. Now that you have these techniques in your arsenal, it is time to start experimenting. Embrace the process, refine your signature recipe, and elevate your daily coffee ritual.