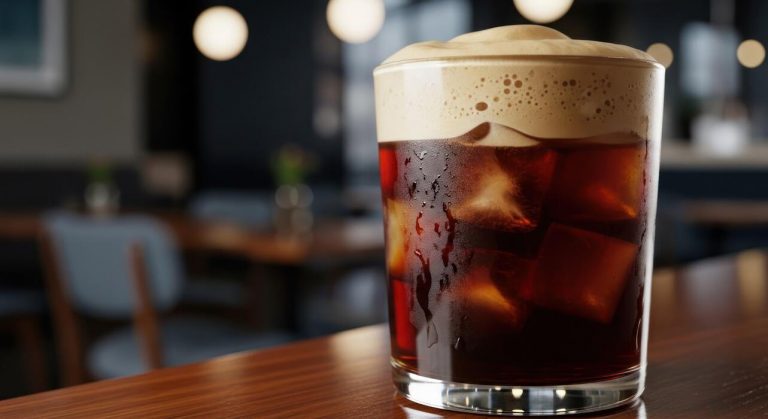
How To Make Cold Brew Taste Good
If your homemade cold brew is coming out bitter or watery, you are not alone. Making this smooth concentrate at home is an art, but a few simple tweaks can transform your morning cup from dull to delicious. Whether you need to adjust your grind size or experiment with unique add-ins, we have the solutions you need. This guide quickly covers exactly how to make cold brew taste good so you can enjoy cafe-quality coffee right in your own kitchen.
Choose the best coffee beans for cold brew
Why dark roasts work best for low acidity
Selecting a dark roast is a strategic move if you want your cold brew to taste exceptionally smooth and rich. During the extended steeping process, cold water extracts flavor differently than hot water, naturally highlighting the chocolatey and nutty notes found in darker beans while minimizing harsh bitterness.
Because dark roasts undergo a longer roasting process, the chemical structure of the bean changes, resulting in significantly lower acidity levels compared to lighter alternatives.
This makes it the perfect solution for anyone with a sensitive stomach or those who prefer a heavy-bodied cup without the bright, citrusy zing that can sometimes become overwhelming in a concentrate.
By prioritizing dark roasts or espresso blends, you ensure a bold foundation that stands up well to the addition of milk or cream.
Ultimately, leaning into these deeper profiles ensures a mellow, caramel-like finish that defines high-quality cold brew and prevents the final beverage from tasting sour or underdeveloped after twenty-four hours of extraction.
The importance of using fresh whole beans
The secret to a vibrant and aromatic cold brew lies in the timing of your grind and the quality of your source material.
You should always opt for freshly roasted whole beans rather than pre-ground bags, as coffee oils begin to oxidize and lose their nuanced flavors almost immediately after being crushed.
When making cold brew, you need a consistent extra-coarse grind—resembling sea salt—to allow for slow, even saturation and to prevent the sediment from making your drink cloudy or overly bitter.
Purchasing whole beans allows you to control this texture precisely, which is the most critical factor in achieving a clean, crisp taste.
Look for a roast date on the bag within the last two to four weeks to ensure the essential oils are still intact, providing that signature depth and sweetness.
Investing in a quality burr grinder at home ensures that you are capturing the peak flavor potential of the bean, transforming a simple refrigerated drink into a gourmet experience that rivals any professional coffee shop.
Flavor profiles to look for in cold brew coffee
To make your cold brew taste truly professional, you must pay close attention to the specific tasting notes listed on the coffee packaging. Since the cold extraction method excels at pulling out sweetness, look for beans that feature notes of dark chocolate, hazelnut, molasses, or brown sugar.
These profiles harmonize perfectly with the slow-steeping technique, creating a syrupy mouthfeel that feels indulgent even when served black.
Avoid beans described as having high floral or intense fruity acidity, such as certain Ethiopian Yirgacheffe varieties, as these can sometimes result in a fermented or vinegary taste when brewed cold for long periods.
Instead, seek out Central or South American origins like Brazil or Colombia, which are famous for their balanced, earthy, and nutty characteristics. By matching the bean’s natural profile to the brewing method, you maximize the natural sweetness and complexity of the concentrate.
Selecting a profile with low-toned sweetness ensures that your finished beverage is refreshing, balanced, and requires very little added sugar to taste absolutely delicious.
Get the grind size right for smooth flavor

Why you must use a coarse grind
To ensure your cold brew tastes smooth and refreshing, you must start with a coarse, heavy grind that resembles sea salt or peppercorns. Unlike traditional hot brewing methods that rely on quick extraction, cold brew is a slow, passive process that requires several hours of immersion.
A larger particle size is essential because it allows the water to gently pull out the sweet and chocolatey notes without over-extracting the harsh, acidic components. When you use a coarse setting, you create more space between the coffee particles, allowing for a steady flow and a balanced saturation.
This specific texture ensures that the natural oils and subtle sugars are released at a controlled pace, resulting in a rich and mellow concentrate.
By committing to a coarse grind, you avoid the common pitfall of a muddy flavor profile, laying the perfect foundation for a professional-quality beverage that highlights the unique characteristics of your chosen beans.
How fine grinds cause bitterness and silt
One of the most frequent mistakes in cold brewing is using a fine or medium-fine grind, which almost always leads to an unpleasant bitterness and dry aftertaste.
Because cold brew involves a long steep time, fine particles provide too much surface area, causing the water to extract tannins and organic acids that are typically avoided.
These smaller bits often bypass even the best filters, leaving a gritty silt at the bottom of your glass that ruins the mouthfeel of the drink.
Furthermore, fine grounds tend to clump together during the immersion phase, creating uneven extraction zones where some coffee is over-processed while other parts remain dry. This inconsistency results in a harsh, astringent flavor that masks the delicate nuances of the roast.
To keep your brew clean and vibrant, you must steer clear of the dusty consistency used for espresso or drip coffee, as it simply cannot withstand the long-term contact with water required for this method.
Setting your grinder for the perfect consistency
Achieving the ideal texture requires a deliberate approach to your equipment settings to ensure a uniform and chunky consistency. If you are using a burr grinder, look for the highest numerical settings, often labeled for French Press or Cold Brew, to produce large, distinct fragments.
For those using a basic blade grinder, it is best to use short, rhythmic pulses rather than a continuous hold to prevent the beans from turning into a fine powder.
Periodically shake the grinder between pulses to redistribute the beans, ensuring that every piece is broken down to the size of coarse kosher salt. Consistency is vital because a mix of fine dust and large chunks will lead to a confused flavor profile that is both sour and bitter.
Once you find the sweet spot on your machine, take note of the setting so you can replicate the results. Investing a few extra minutes in calibration will guarantee a silky-smooth finish and a clean cup every single time you brew.
Perfect your coffee to water ratio

The standard ratio for cold brew concentrate
To ensure your cold brew tastes exceptionally smooth and balanced rather than weak or overly bitter, you must begin with a reliable baseline ratio. For a versatile concentrate, the gold standard is a 1:4 coffee-to-water ratio.
This specific concentration allows for a robust extraction of flavors while minimizing the harsh acidity often found in hot-brewed methods. By utilizing this concentrated base, you create a liquid that is rich enough to withstand dilution later with ice, milk, or water without losing its complex chocolatey and nutty notes.
Using a coarse grind size is essential here, as it prevents the water from over-extracting fine particles during the long steep time. If you find your brew tastes too watery, your ratio is likely too thin, whereas a heavy, syrupy texture indicates a successful concentrate.
This foundational step is the most critical factor in achieving that professional, cafe-quality taste at home, providing a consistent flavor profile that serves as the perfect canvas for your favorite morning additives.
How to measure by weight vs volume
Precision is the secret ingredient to making cold brew taste consistently good every single time you brew a fresh batch. While many beginners reach for measuring cups, the most accurate method is to measure by weight using a digital scale.
Different coffee beans have varying densities based on their roast level; for instance, dark roasts are physically larger but lighter than light roasts. Therefore, a cup of one bean might weigh significantly less than a cup of another, leading to inconsistent strength.
Aim for one gram of coffee to four grams of water for a precise concentrate. If you do not own a scale and must use volume, a general rule is to use one cup of coarse grounds for every four cups of water.
However, be aware that volumetric measurements are prone to error due to air gaps between the large, coarse particles. Investing in a simple kitchen scale ensures that you hit the exact extraction target, eliminating the guesswork and preventing the frustration of a batch that tastes unexpectedly sour or muddy.
Adjusting strength for your personal taste
Once you have mastered the initial concentrate, the real magic happens during the final dilution stage where you tailor the drink to your palate. Most people find that a 1:1 dilution ratio of concentrate to cold water or milk creates the most palatable drinking experience.
If you prefer a bold, caffeine-heavy kick that mimics a strong iced Americano, try reducing the added liquid to a 2:1 ratio of concentrate to water.
Conversely, if the flavor feels too intense or overwhelming, simply increase the amount of water or creamy milk until the profile softens to your liking.
Remember that ice melt will further dilute your beverage over time, so if you plan on sipping slowly, start with a slightly stronger mix than you think you need. Experimenting with these final proportions allows you to control the mouthfeel and intensity of the coffee.
By documenting your favorite proportions, you can replicate the exact level of sweetness and body that makes your homemade cold brew taste better than the expensive versions found at local coffee shops.
Use high quality water and filtration
Why tap water ruins the taste of cold brew
Since water makes up roughly ninety-eight percent of your final beverage, the quality of your tap source is the most common culprit behind a disappointing batch.
Municipal tap water frequently contains high levels of chlorine, fluoride, and heavy metals that are added for safety but wreak havoc on delicate coffee flavor profiles.
In a long immersion process like cold brewing, these chemicals have ample time to interact with the coffee grounds, often resulting in a harsh, metallic aftertaste or a distinct chemical odor that masks the bean’s natural sweetness.
Furthermore, tap water with excessive mineral hardness can prevent the water from effectively pulling the desired oils and compounds from the grounds, leading to a flat or chalky mouthfeel. By neglecting your water quality, you are essentially burying the high-quality specialty beans you purchased under a layer of industrial impurities.
Prioritizing pure water ensures that the intrinsic chocolatey and fruity notes of your cold brew are allowed to shine without interference.
The benefits of using filtered or spring water
Switching to filtered or bottled spring water is the most immediate way to elevate your home brewing game and achieve a café-quality result. Utilizing a multi-stage carbon filter or a dedicated water pitcher effectively removes volatile organic compounds and sediments while maintaining a balanced mineral content.
This balance is crucial because magnesium and calcium ions actually assist in extracting flavorful acids and sugars from the coffee cells during the long steeping window.
Spring water is often considered the gold standard for cold brew because it possesses a naturally neutral pH level, which prevents the final concentrate from becoming overly acidic or unpleasantly bitter.
When you use clean, odor-free water, you create a blank canvas that allows the complex nuances of the roast to develop fully over sixteen to twenty-four hours.
This small investment in ingredient quality results in a noticeably smoother finish, a syrupy body, and a clean palate that highlights the natural sweetness of the coffee cherry.
How water temperature affects the initial bloom
While cold brew is defined by its low-temperature extraction, the temperature of the water you use to start the process significantly impacts the initial saturation of the grounds.
Starting with room temperature filtered water rather than ice-cold water helps to initiate a gentle ‘bloom,’ allowing trapped carbon dioxide to escape more efficiently from the coffee particles.
If the water is too cold at the very beginning, it can cause the coffee oils to seize, leading to an uneven extraction and a thin, watery texture.
By ensuring your filtered water is between 65 and 70 degrees Fahrenheit during the initial mixing stage, you facilitate better contact between the water and the coffee solubles. This stage is vital for unlocking the aromatic compounds that characterize a premium cold brew.
Once the grounds are fully saturated and the initial degassing has occurred, you can then move the vessel to a refrigerator. This controlled approach to temperature ensures a consistent and robust flavor extraction that avoids the sourness often associated with under-extracted, cold-start brewing methods.
Master the steeping time and temperature

Countertop vs refrigerator brewing times
Temperature is the primary driver of extraction speed, so deciding where to let your jar sit will dictate your total clock time. If you choose room temperature brewing, the process is significantly faster; the ambient heat helps dissolve coffee particulates and oils in roughly 12 to 16 hours.
This method often produces a bolder, more traditional coffee profile. Conversely, refrigerator brewing is a much slower, gentler process that typically requires 18 to 24 hours to reach full strength.
Because the cold slows down the molecular movement, it prevents the extraction of certain bitter compounds, resulting in a cleaner, crisper, and more tea-like finish. To make your cold brew taste good, you must match your duration to your environment.
If you leave a countertop batch for 24 hours, it will likely taste heavy and muddy, whereas a 12-hour fridge batch will taste weak, watery, and underdeveloped. Consistency in your brewing environment ensures repeatable, delicious results every single time.
How to avoid over-extraction and sourness
Achieving a balanced flavor profile requires a delicate dance between time and grind size to avoid the twin pitfalls of over-extraction and sourness.
Sourness or saltiness is usually a sign of under-extraction, meaning the water didn’t have enough time to pull the sugars from the beans, or your grind was too coarse for the chosen duration. To fix this, simply extend your steeping time by two-hour increments.
On the other end of the spectrum, over-extraction manifests as a harsh, dry, or astringent bitterness that lingers on the back of the tongue. This happens when the coffee grounds remain in contact with the water for too long, pulling out woody cellulose and tannins.
To prevent this, always use a consistent coarse grind—resembling sea salt—and set a strict timer. If you find your brew is consistently bitter even at shorter times, try using filtered water to ensure that mineral content isn’t interfering with the delicate chemical balance of your extraction process.
The sweet spot for 12 to 24 hour steeping
Finding your personal flavor ‘sweet spot’ is the final step in mastering the cold brew process. Most experts agree that the optimal window falls between 12 and 24 hours, but the specific minute you pull the filter matters.
For those who enjoy a bright and floral cup, aim for the 12 to 15-hour mark on the countertop; this preserves the acidic highlights of light-roast beans.
If you prefer a rich, chocolatey, and syrupy concentrate that holds up well when diluted with milk or cream, target the 20 to 24-hour range inside the refrigerator. It is helpful to taste-test your brew periodically once you hit the 12-hour mark.
Simply use a spoon to sample a small amount; if it tastes thin, let it ride. Once the profile hits a mellow, wine-like richness without a sharp bitter edge, stop the process immediately by filtering out the grounds.
Mastering this timing ensures you capture the peak sweetness of the bean while avoiding the oxidation that ruins flavor.
How to filter cold brew for a clean finish
Using paper filters to remove oils and sediment
To ensure your cold brew tastes exceptionally smooth and crisp, the most effective step is incorporating a high-quality paper filter. While metal mesh strainers are convenient for initial separation, they often allow fine silts and heavy coffee oils to pass through into the final carafe.
These elements contribute to a muddy mouthfeel and a lingering bitterness that masks the natural sweetness of the beans. By using paper filters to remove oils and sediment, you trap the microscopic particles that cause cloudiness and unwanted astringency.
For the best results, always rinse your paper filter with hot water before use to eliminate any potential papery taste. This simple preparation step ensures that only the cleanest, most vibrant flavor compounds reach your cup.
The resulting liquid will have a translucent clarity and a lighter body, highlighting the unique floral or fruity notes of your coffee. Achieving a clean finish is the secret to making cold brew that rivals high-end specialty cafes, providing a refreshing experience without any gritty residue.
The double-filtration method for clarity
If you are struggling with a cloudy brew, implementing a two-step approach can drastically improve the profile of your concentrate. The double-filtration method for clarity involves first passing the steeped grounds through a coarse metal sieve or a nut milk bag to remove the bulk of the saturated coffee grounds.
Once the heavy lifting is done, perform a second pass through a fine-mesh pour-over dripper lined with a paper filter. This secondary stage is significantly faster because the paper won’t get instantly clogged by large particles.
By separating the process, you effectively eliminate fine particulates that often lead to over-extraction even after the brewing process is technically finished. This technique ensures a polished, professional-grade finish that looks as good as it tastes.
A sediment-free brew stays fresh longer in the refrigerator, as there are no suspended solids left to degrade or turn sour over time. Taking the extra five minutes to double-filter will transform a standard homemade batch into a sophisticated, bright, and incredibly balanced beverage that highlights the coffee’s quality.
Cleaning your equipment to prevent off-flavors
Even the best filtering techniques cannot save a batch made in poorly maintained containers. Residual coffee oils from previous brews can quickly oxidize and turn rancid, imparting a stale, metallic, or sour taste to your fresh steep.
Therefore, cleaning your equipment to prevent off-flavors is a non-negotiable step for anyone seeking the perfect cup. You should use an unscented, food-safe cleaner specifically designed for coffee equipment to break down stubborn organic deposits that regular dish soap might miss.
Pay close attention to rubber gaskets, spigots, and mesh screens where old grounds tend to hide and mold can potentially develop. After cleaning, ensure every component is thoroughly dried before storage to prevent bacterial growth.
Maintaining a sterile brewing environment ensures that the only flavors present are those intended by the roaster. When your gear is pristine, the delicate nuances of the cold brew are allowed to shine, resulting in a consistently delicious and sweet finish every time you brew.
Proper hygiene is the foundation of a clean-tasting, high-quality concentrate that remains enjoyable for up to two weeks.
Ways to flavor and serve your cold brew
Best natural sweeteners and syrups
To elevate the flavor profile of your cold brew without relying on refined sugars, consider using liquid natural sweeteners like maple syrup, agave nectar, or high-quality honey.
Unlike granulated sugar, which often fails to dissolve in cold liquids and leaves a gritty texture at the bottom of your glass, these liquid options integrate seamlessly for a consistent taste.
If you prefer a more gourmet experience, crafting a homemade simple syrup infused with vanilla beans, cinnamon sticks, or almond extract allows you to control the sweetness intensity while avoiding artificial preservatives.
For those monitoring their sugar intake, monk fruit drops or liquid stevia provide a concentrated burst of sweetness that complements the chocolatey notes inherent in most cold brew blends.
Always start with a small amount, such as half a teaspoon, and gradually increase it to ensure the natural coffee character remains the star of the show.
By choosing the right sweetener, you can transform a basic cup into a balanced, cafe-quality beverage that highlights the smooth, low-acid profile of the beans.
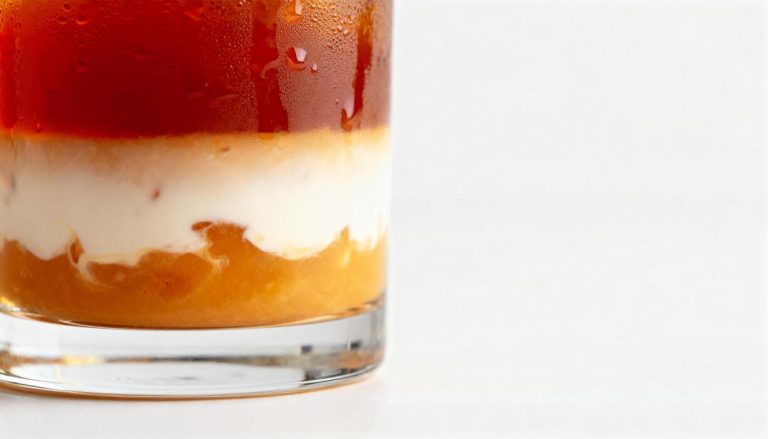
Adding milk, cream, or dairy-free alternatives
One of the most effective ways to achieve a velvety texture in your cold brew is by experimenting with different fats and proteins found in dairy and plant-based milks.
Traditional heavy cream or half-and-half provides a luxurious mouthfeel that rounds out any lingering sharp edges, turning the coffee into a decadent treat.
If you prefer a lighter profile, oat milk is widely considered the gold standard for cold brew due to its natural creaminess and subtle malty flavor that mirrors the profile of coffee beans.
Nut-based options like almond or cashew milk add a pleasant toasted aroma, though they may require a quick stir to prevent separation. For a modern twist, try creating a cold foam by frothing skim milk or vanilla soy milk and layering it on top of the ice.
This technique allows you to enjoy a creamy sensation with every sip without diluting the caffeine kick. Whether you choose full-fat dairy or a sustainable oat alternative, adding a splash of creaminess is a foolproof method to enhance the drink’s body and overall drinkability.
How to use salt to cut through bitterness
While cold brewing naturally results in a lower acidity levels compared to hot extraction, some batches can still exhibit a persistent bitter finish. A professional barista secret to fixing this is the addition of a tiny pinch of sea salt or kosher salt directly into the finished glass.
Salt works on a chemical level by neutralizing the bitterness receptors on your tongue, which in turn allows the inherent sweetness and fruity undertones of the coffee to become more prominent.
You do not need enough to make the drink taste salty; a minuscule amount—just a few grains—is sufficient to chemically balance the flavor profile.
If you find your cold brew concentrate is particularly intense, you can even add a pinch of salt to the grounds before the steeping process begins to ensure a smoother extraction from the start.
This simple kitchen hack is remarkably effective for salvaging over-steeped batches and provides a clean, crisp finish that highlights the complex nuances of the roast. Mastering the use of salt ensures your cold brew is consistently smooth and never unpleasantly harsh.
Frequently Asked Questions
What is the best coffee-to-water ratio for cold brew?
For a smooth and balanced flavor, use a ratio of 1:8 for ready-to-drink coffee or 1:4 if you prefer a strong concentrate. Using too much water can lead to a weak, thin taste, while too little water makes it overly harsh.
Why does my cold brew taste bitter or sour?
Bitterness is usually caused by over-extraction or using a grind that is too fine, while sourness often results from under-extraction or using old beans. Ensure you use a very coarse grind and steep for 12 to 24 hours to achieve a mellow profile.
Does the type of coffee bean matter for cold brew?
Yes, light roasts can sometimes taste acidic when cold brewed, so most enthusiasts recommend medium to dark roasts. These beans typically offer chocolatey, nutty, and low-acid notes that translate well into a smooth cold beverage.
Should I use filtered water for cold brew?
Using filtered water is essential because cold brew is 98% water and any impurities or chlorine in tap water will be magnified. Filtered water allows the natural sweetness and subtle nuances of the coffee beans to shine through.
How can I enhance the flavor of cold brew without sugar?
You can add a pinch of salt to neutralize bitterness or steep a cinnamon stick or vanilla bean directly with the grounds. Adding a splash of oat milk or almond milk can also provide a creamy texture that improves the overall mouthfeel.
How long should I steep cold brew for the best taste?
The sweet spot for steeping is generally between 16 and 18 hours at room temperature, or up to 24 hours in the refrigerator. Steeping longer than 24 hours often results in a ‘woody’ or overly bitter taste that ruins the smoothness.
Why is the grind size so important for cold brew?
A coarse, breadcrumb-like grind is vital because the long contact time with water extracts flavors slowly. If the grind is too fine, the water extracts too many tannins, leading to a muddy and unpleasantly bitter cup.
Conclusion
Mastering the art of cold brew comes down to balancing high-quality beans, the right grind size, and a patient steeping process. By experimenting with dilution ratios and adding creative flavors like cinnamon or sea salt, you can transform a simple concentrate into a cafe-quality treat. Do not be afraid to adjust variables until you find your perfect cup. With these simple tips, you are ready to enjoy a smooth, refreshing brew every single morning.