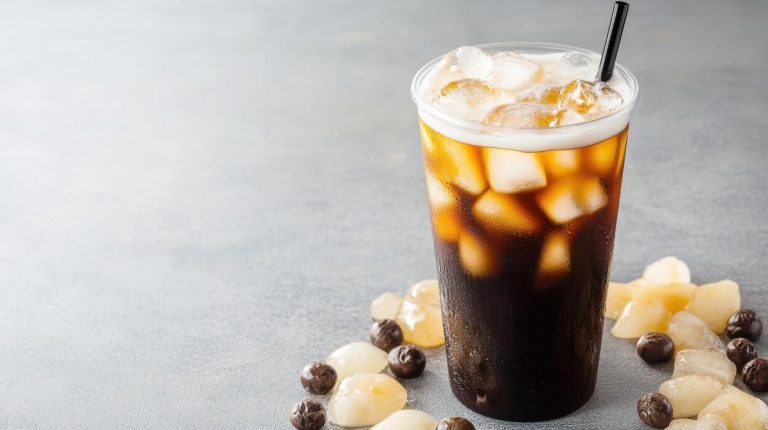
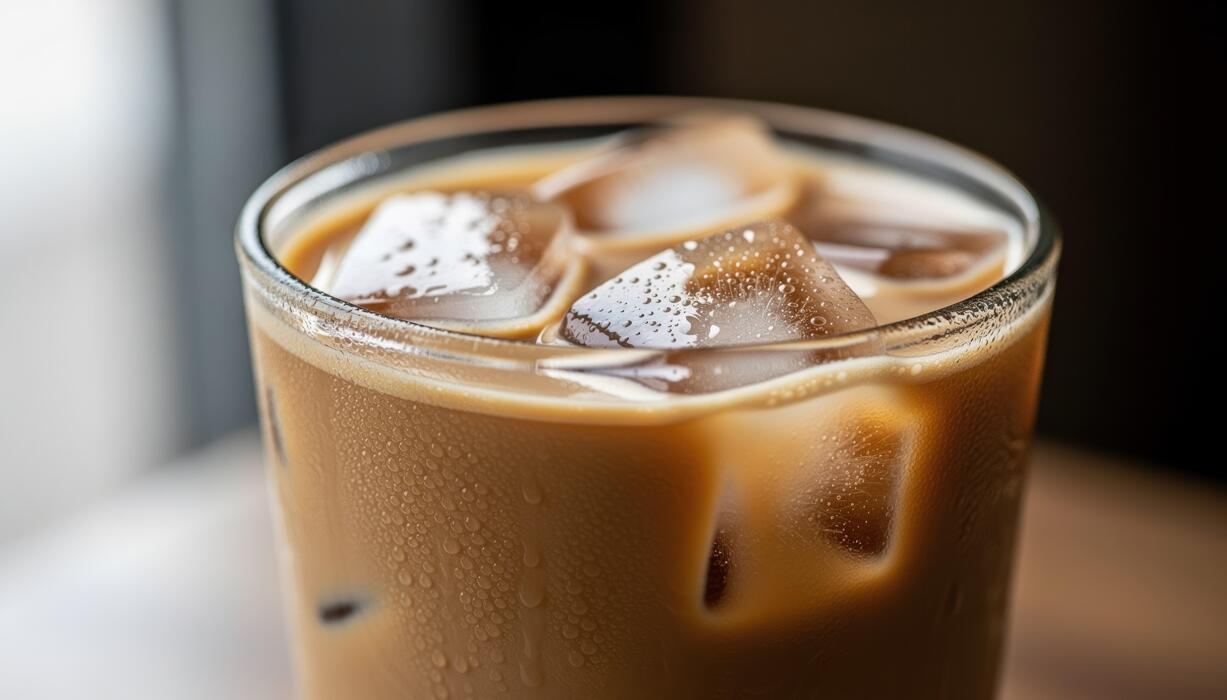
How To Make Regular Iced Coffee
Craving a refreshing caffeine kick without the coffee shop price tag? You have come to the right place. Learning how to make regular iced coffee at home is surprisingly simple and much faster than you might think. Whether you prefer a bold brew or something sweet and creamy, this guide delivers the perfect technique to ensure your drink stays chilled and flavorful. We will dive straight into the best methods to help you master this classic beverage in minutes.
What is Regular Iced Coffee?
The Difference Between Iced Coffee and Cold Brew
To understand how to make regular iced coffee, you must first distinguish it from cold brew. Regular iced coffee is made by brewing coffee hot and then cooling it down, whereas cold brew involves steeping grounds in room temperature water for up to twenty-four hours.
Because hot water extracts solubles and oils more efficiently, regular iced coffee boasts a brighter acidity and a more complex aromatic profile than its cold-steeped counterpart.
When you learn how to make regular iced coffee, you are essentially mastering the art of flash-chilling or refrigeration to preserve those delicate flavor notes. Many enthusiasts prefer this method because it is significantly faster to prepare and offers a crisp, refreshing finish that mimics your favorite morning drip coffee.
By using a standard drip machine or pour-over, you can create a base that is vibrant and full-bodied, provided you account for the inevitable melting of ice during the cooling process. This distinction is vital for achieving the perfect balance of flavor and temperature.
Why Freshly Brewed Coffee Matters
The foundation of a superior iced beverage lies in the quality of the initial brew. When figuring out how to make regular iced coffee, always prioritize freshly roasted beans and high-quality filtered water.
As coffee cools, its chemical composition changes, and any existing bitterness or stale flavors will become much more pronounced. To combat the dilution that occurs when hot liquid hits ice, it is a standard professional technique to brew your coffee at double strength.
This ensures that as the ice melts, the beverage settles into a perfectly balanced concentration rather than becoming watery or weak. Using a manual pour-over method allows for maximum control over the extraction process, ensuring that the floral and fruity notes are highlighted before the chilling begins.
If you use old or pre-ground coffee, the resulting iced drink will likely taste flat or metallic. By focusing on a high-quality, hot extraction, you capture the peak flavor potential of the bean, which remains the most critical step in crafting a coffeehouse-quality drink at home.
The Science of Chilling Hot Coffee
Mastering how to make regular iced coffee requires a basic understanding of thermal dynamics to prevent a watered-down result. The most effective method is flash-chilling, which involves brewing the hot coffee directly over a measured amount of ice.
This rapid temperature drop locks in the volatile aromatics that would otherwise dissipate if the coffee were left to cool slowly at room temperature. To execute this perfectly, replace half of your brewing water with solid ice cubes in the carafe.
As the hot coffee drips down, it melts the ice instantly, creating a chilled concentrate that is ready to serve immediately. Alternatively, if you prefer to brew a full pot and refrigerate it, ensure the container is airtight to prevent oxidation and the absorption of refrigerator odors.
Rapid cooling is generally superior because it minimizes the time the coffee spends in the ‘lukewarm’ zone where acidity can turn into unpleasant bitterness. By controlling the rate at which the heat dissipates, you maintain a clean, sharp flavor profile that defines a truly professional iced coffee experience.
Essential Ingredients and Tools You Need
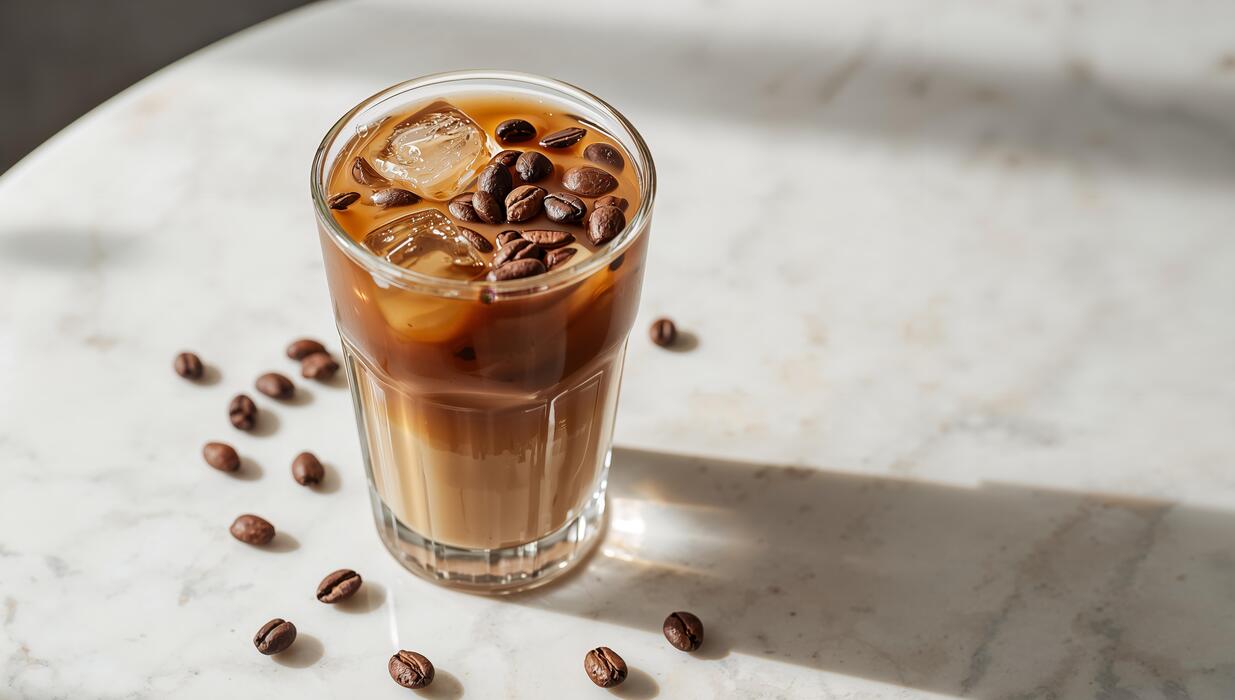
Choosing the Best Coffee Beans
To craft a superior regular iced coffee, start by selecting high-quality medium to dark roast coffee beans. These roasts possess the necessary intensity to ensure the flavor remains robust even after dilution from melting ice.
While light roasts offer complex acidity, they often taste thin when chilled, so look for flavor profiles featuring chocolate, nutty, or caramel notes for a more satisfying experience.
If you have a grinder at home, always opt for whole bean coffee and grind it just before brewing to preserve the volatile oils and aromatic compounds. For a standard drip or pour-over method, a medium-coarse grind is ideal to prevent over-extraction and bitterness.
If you prefer convenience, high-quality pre-ground coffee works well, provided it is kept in an airtight container away from light and moisture. Consistency is key, so measuring your beans with a digital kitchen scale ensures a perfect coffee-to-water ratio every single time you brew.
Water Quality and Ice Cube Tips
Since coffee is mostly water, using filtered or bottled water is essential for achieving a clean and crisp taste without the interference of chlorine or minerals found in tap water.
The temperature of your brewing water should ideally sit between 195 and 205 degrees Fahrenheit to extract the best flavors without scorching the grounds. A common mistake in making iced coffee is using standard ice cubes that melt quickly and water down the beverage.
To prevent this, consider making coffee ice cubes by freezing leftover brewed coffee in silicone trays; as these melt, they actually strengthen the flavor of your drink rather than weakening it.
If you prefer regular ice, use large, solid cubes which have less surface area and melt much slower than crushed ice.
Always fill your glass to the brim with ice before pouring the hot or room-temperature coffee over it to ensure an instant chill and refreshing temperature that lasts until the very last sip.
Basic Kitchen Equipment for Success
You do not need expensive machinery to make professional-grade iced coffee at home; a few basic kitchen essentials will suffice. A standard drip coffee maker, French press, or pour-over dripper are all excellent choices for the initial brewing phase.
To ensure the perfect strength, a digital scale helps you maintain a precise ratio, typically around two tablespoons of grounds for every six ounces of water. A long-handled stirring spoon is necessary for thoroughly incorporating sweeteners or milk into the cold liquid.
For those who enjoy a creamy texture, a small handheld milk frother can elevate your drink by creating a light foam topper. Additionally, a heat-resistant glass or tumbler is vital to prevent cracking when hot coffee hits the cold ice.
Using a reusable straw can also enhance the drinking experience by allowing you to sip from the bottom where the coffee is coldest. Having these tools ready ensures a smooth and efficient brewing process every morning.
How to Make Iced Coffee Using the Drip Method
Brewing a Concentrated Pot
To master the drip method for iced coffee, you must start by brewing a robust, concentrated base. Standard drip machines are designed for hot consumption, so you must adjust your approach to ensure the flavor survives the addition of ice.
Begin by cleaning your machine and using freshly ground medium-roast beans for the best profile. When you initiate the cycle, the goal is to produce a smaller volume of liquid that carries the full intensity of a standard pot.
This high-concentration brew prevents the final drink from tasting thin or watery once it hits the ice cubes. Make sure to use filtered water to keep the flavor profile crisp and clean.
By focusing on a stronger extraction during the initial heating phase, you create a versatile coffee essence that maintains its integrity.
This foundational step is crucial because it accounts for the inevitable melting that occurs during the cooling process, ensuring your homemade iced coffee remains bold and satisfying from the first sip to the very last drop.
The Proper Coffee-to-Water Ratio
Achieving the perfect balance requires a specific adjustment to your usual coffee-to-water ratio. For a standard hot cup, you might use a 1:16 ratio, but for the drip iced method, you should double the amount of coffee grounds while keeping the water amount the same.
This effectively creates a double-strength concentrate. If your machine usually takes six scoops for a full carafe, use twelve scoops instead. This technique is often referred to as the flash-brew method or Japanese-style iced coffee when brewed directly over ice.
By increasing the dosage of grounds, you ensure that the aromatic compounds and caffeine levels are high enough to withstand dilution. It is helpful to use a kitchen scale for precision, aiming for approximately 60 grams of coffee per 500 milliliters of water.
This mathematical approach removes the guesswork and guarantees a consistent, café-quality result every time you brew. Monitoring your ratios carefully allows you to customize the strength to your personal preference without sacrificing the essential body of the beverage.
Cooling Your Coffee Without Dilution
The final challenge in the drip process is cooling the liquid rapidly without turning it into a translucent, weak mess. The most effective strategy is to fill your carafe halfway with ice before the brewing cycle begins.
As the hot, concentrated coffee drips onto the ice, it flashes-chills, locking in the bright acidity and delicate floral notes that are often lost during slow cooling.
If your machine doesn’t allow for an ice-filled carafe, you can brew the concentrate into a glass pitcher and immediately place it in an ice bath. Avoid letting the coffee sit at room temperature for too long, as this can lead to oxidation and a bitter aftertaste.
For an even more professional touch, consider using coffee ice cubes made from previous batches to chill your drink. This ensures that as the cubes melt, they add more coffee flavor rather than plain water.
Once the liquid is cold, pour it over fresh ice in a tall glass, add your preferred sweeteners or milk, and enjoy a perfectly chilled, full-bodied treat.
Fast Ways to Chill Hot Coffee Instantly
The Flash Chill or Japanese Method
The flash chill method, often referred to as the Japanese style, is widely considered the gold standard for creating delicious iced coffee in minutes. To execute this technique, you should brew your coffee at double strength directly onto a measured amount of fresh ice.
By using a pour-over dripper or a standard drip machine, the hot liquid hits the ice immediately, which instantly locks in the delicate aromatic compounds and bright acidity that are often lost during slow cooling processes.
The key to success is calculating your water-to-ice ratio accurately; typically, you should replace half of your brewing water with ice by weight. This ensures that as the ice melts, it dilutes the concentrated brew to the perfect drinking strength without making it taste thin or watery.
This method is incredibly efficient because it eliminates the need for long refrigeration wait times, allowing you to enjoy a crisp and vibrant beverage the moment the brewing cycle finishes.
Using a Cocktail Shaker for Rapid Cooling
If you have already brewed a pot of hot coffee and need it cold immediately, a cocktail shaker is your most effective tool for rapid thermal transfer.
Pour your hot coffee into a shaker filled to the brim with large ice cubes, then secure the lid and shake vigorously for at least thirty seconds.
The physical action of shaking forces the hot liquid into constant contact with the cold surface of the ice, dropping the temperature of the coffee to near-freezing almost instantly.
This technique also introduces aeration, which creates a luxurious, frothy micro-foam on top of the drink, enhancing the overall mouthfeel and texture. Once the outside of the shaker feels painfully cold to the touch, strain the coffee into a fresh glass filled with new ice.
This prevents the original, partially melted ice from further diluting your drink. Using a shaker is a professional hack that transforms basic hot coffee into a chilled, cafe-quality beverage with minimal effort and zero waiting.
The Benefits of Using Coffee Ice Cubes
One of the biggest challenges when making iced coffee at home is the inevitable dilution that occurs as regular ice melts. To solve this problem permanently, you should freeze leftover coffee into ice cube trays to create specialized coffee cubes.
When you pour hot or room-temperature coffee over these frozen blocks, they serve a dual purpose: they chill the liquid rapidly while ensuring the flavor profile remains bold and concentrated from the first sip to the last.
As these cubes melt, they actually release more coffee into your glass rather than water, which allows you to maintain the perfect caffeine kick. For an even more indulgent experience, you can experiment by adding a hint of vanilla or simple syrup to the coffee before freezing the cubes.
This proactive approach to coffee preparation ensures that even if you are in a rush, your drink will never taste weak. Keeping a stash of these cubes in your freezer is the ultimate secret to consistent, high-quality homemade iced coffee.
Best Ways to Sweeten and Flavor Your Drink
How to Make Simple Syrup at Home
One of the most common frustrations when learning how to make regular iced coffee is discovering that granulated sugar does not dissolve in cold liquids, leaving a gritty texture at the bottom of your glass.
The most effective solution is to create a homemade simple syrup by combining equal parts water and white sugar in a small saucepan. Heat the mixture over medium heat, stirring occasionally until the liquid becomes completely clear and the granules have fully dissolved.
You do not need to bring it to a rolling boil; just enough heat to facilitate the bond is sufficient. Once finished, let the syrup cool to room temperature before transferring it to a glass bottle for storage in the refrigerator.
Using a liquid sweetener ensures your drink is perfectly sweetened from the first sip to the last, as the syrup integrates seamlessly with the cold coffee and ice. This professional technique allows you to customize the sweetness level precisely to your personal preference without any grainy residue.
Natural Sweeteners That Dissolve Easily
If you are looking for alternatives to refined white sugar, there are several natural liquid sweeteners that blend beautifully into chilled beverages. Maple syrup is a standout choice because it is already in liquid form and adds a subtle, earthy richness that complements the roasted notes of the coffee beans.
Similarly, honey or agave nectar are excellent options, though honey can become slightly thick when it hits very cold liquid.
To prevent clumping, try stirring your honey or agave into the coffee while it is still slightly warm, or mix it with a tiny splash of hot water to create a honey-water concentrate before adding your ice.
These options provide a healthier profile and complex flavor dimensions that standard sweeteners lack. For those monitoring their sugar intake, liquid stevia or monk fruit drops are highly concentrated alternatives that dissolve instantly.
Experimenting with these natural sources allows you to find a balance that enhances the natural bitterness of the brew while maintaining a smooth, refreshing mouthfeel for your daily caffeine fix.
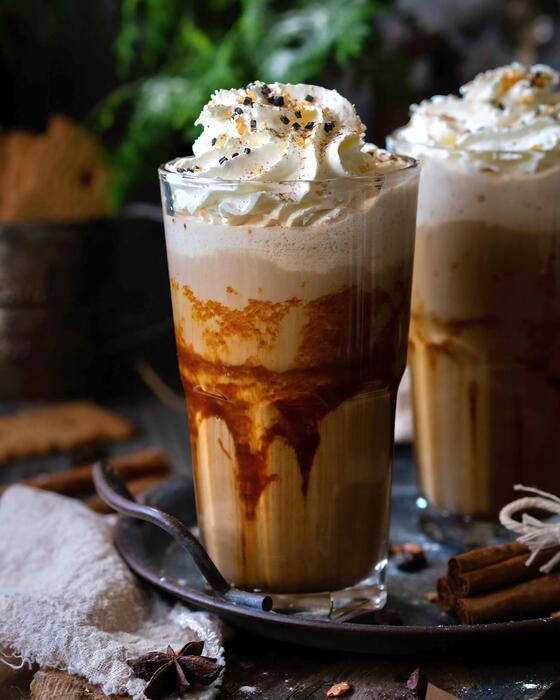
Adding Vanilla, Cinnamon, or Caramel
Elevating your regular iced coffee into a cafe-quality treat is easily achieved by incorporating aromatic extracts and spices. To infuse a classic flavor, stir in a half-teaspoon of pure vanilla extract or a drizzle of high-quality caramel sauce.
If you prefer a warmer spice profile, try shaking your coffee with a pinch of ground cinnamon; however, for the best texture, it is often better to brew the coffee with a cinnamon stick included in the pot or to whisk the spice into the milk before pouring it over the ice.
This prevents the spice from floating on the surface. For a more indulgent experience, you can create a caramel swirl by coating the inside of your glass before adding the coffee and ice.
These small additions transform a simple beverage into a gourmet experience without the need for expensive store-bought creamers.
By mastering these flavoring techniques, you gain complete control over the ingredients, ensuring your drink is free from artificial preservatives while still delivering the bold, sweet, or spicy kick you desire every morning.
Tips for Choosing the Right Milk or Creamer
Dairy Options for a Richer Texture
When making regular iced coffee at home, the type of dairy you select significantly impacts the final mouthfeel and flavor balance. For the most indulgent experience, whole milk is the gold standard because its high fat content creates a velvety texture that stands up well to melting ice cubes.
If you prefer something even more decadent, consider using half-and-half or a splash of heavy cream, which provides a silky consistency that mimics professional coffee shop beverages. These richer options are excellent for balancing the natural acidity or bitterness of a strong cold brew or a concentrated drip coffee.
For those watching calories, 2% milk offers a middle ground, providing a clean finish without making the drink feel too watery.
Always ensure your dairy is chilled thoroughly before adding it to the glass; pouring cold milk over the ice helps maintain the drink’s temperature and prevents the ice from diluting your coffee too quickly as you enjoy your refreshing beverage.
Best Plant-Based Milks for Iced Drinks
Choosing a non-dairy alternative requires looking for options that won’t curdle when they hit the cold, acidic environment of your coffee. Oat milk is widely considered the best choice for iced coffee because its naturally creamy density and subtle sweetness closely resemble traditional dairy.
It blends seamlessly without separating, ensuring every sip is consistent. Unsweetened almond milk is another popular favorite, offering a light, nutty undertone that complements medium-roast beans, though it has a thinner profile than oat milk.
For those who enjoy a tropical twist, coconut milk adds a distinct richness and a hint of sweetness that pairs beautifully with dark roasts.
To achieve the best results, look for ‘Barista Edition’ labels on plant-based cartons, as these are formulated with stabilizers that prevent separation and allow for a smoother pour.
Always give your milk carton a vigorous shake before pouring to ensure the fats and proteins are well-distributed, providing a uniform color and flavor throughout your entire glass of iced coffee.
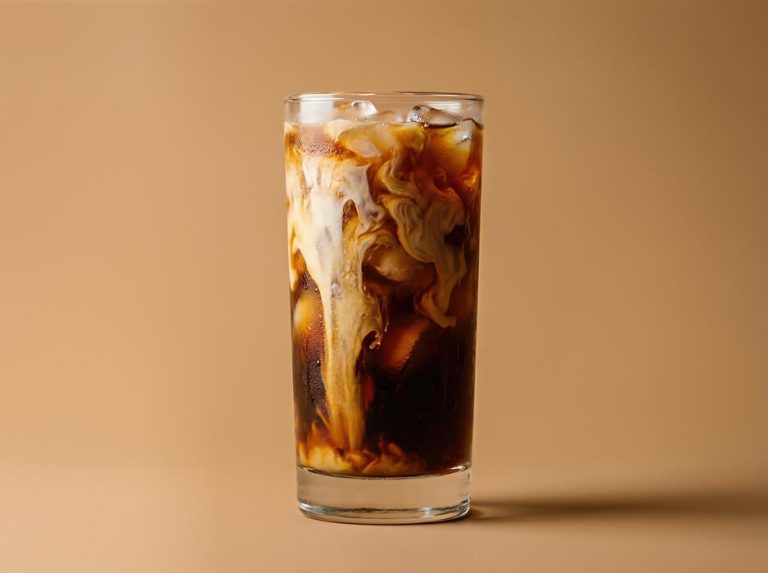
How to Layer Milk for a Professional Look
To elevate your regular iced coffee into a visually stunning masterpiece, mastering the layering technique is essential. Start by filling your glass to the brim with large, solid ice cubes rather than crushed ice, as this provides the necessary structure for the liquids to interact.
Pour your brewed coffee or concentrate over the ice first, leaving about two inches of space at the top of the glass. The secret to a perfect gradient is to pour the milk slowly over the back of a spoon or directly onto a large ice cube.
This technique breaks the fall of the liquid, allowing the heavier milk to cascade gently through the coffee in beautiful, marble-like swirls. This method is not just about aesthetics; it allows you to control the dilution and sweetness as you stir the drink yourself.
For an even more advanced look, you can froth your cold milk slightly before pouring to create a soft, pillowy layer of foam that sits elegantly on the surface, mimicking a high-end cafe presentation.
Common Mistakes to Avoid When Making Iced Coffee
How to Prevent Watery or Weak Coffee
The most frequent error when learning how to make regular iced coffee is using a standard coffee-to-water ratio that fails to account for melting ice.
To avoid a diluted, watery beverage, you should always brew your coffee at double strength by using twice the amount of grounds for the same volume of water.
This ensures that as the ice cubes melt upon contact with the hot liquid, the resulting drink maintains a robust, bold profile rather than becoming thin and flavorless.
Another effective solution is to create coffee ice cubes by freezing leftover brew in a tray; using these instead of regular water ice prevents any dilution whatsoever as they melt.
Additionally, you should let the coffee reach room temperature before pouring it over ice to slow down the initial melting process. By focusing on these concentration techniques, you can enjoy a professional-quality iced coffee that remains rich and satisfying from the first sip to the very last drop.
Avoiding Bitter Flavors from Over-Extraction
Achieving a smooth taste requires careful attention to temperature and timing to prevent harsh, bitter notes. A common mistake is using boiling water directly on the grounds, which causes over-extraction; instead, aim for a water temperature between 195°F and 205°F to extract the best oils without scorching the beans.
If you are using a pour-over or drip method, ensure your grind size matches your brewing equipment, as coffee that is ground too fine for the specific method will often result in an unpleasant, astringent aftertaste.
Furthermore, you should rinse your paper filters with hot water before brewing to remove any papery residue that can interfere with the clean profile of your iced drink.
If you find your hot-brewed coffee is consistently too bitter, try adding a tiny pinch of salt to the finished cup to neutralize the acidity, or transition to a cold brew method which naturally reduces the extraction of bitter compounds for a much mellower finish.
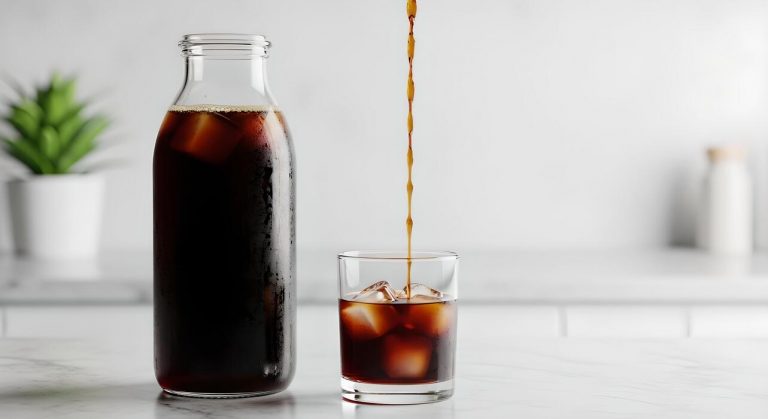
Storage Tips for Leftover Brew
Many people mistakenly leave their brewed coffee sitting out on the counter or in the pot, which leads to oxidation and a stale, metallic taste.
To preserve the fresh quality of your beverage, you should transfer the coffee to an airtight glass container as soon as it reaches room temperature and place it immediately in the refrigerator. Avoid using plastic containers, as they can retain old odors that taint the flavor of your fresh brew.
When stored correctly in a sealed jar, your coffee will stay fresh for up to 48 hours, allowing you to prep your morning caffeine fix the night before.
It is also vital to keep the coffee away from pungent foods like onions or garlic in the fridge, as coffee is highly porous and will absorb surrounding scents.
For the best experience, never reheat your coffee before chilling it for ice, as repeated temperature changes break down the delicate flavor molecules, resulting in a dull and unappealing drink.
Frequently Asked Questions
What is the basic method for making regular iced coffee?
To make regular iced coffee, brew your favorite coffee at double strength using half the usual amount of water. Once brewed, pour the hot coffee directly over a large glass filled with ice cubes to chill it instantly.
How do I prevent my iced coffee from becoming watery?
The best way to avoid dilution is to use coffee ice cubes made from leftover brewed coffee. Alternatively, brewing a concentrated ‘flash chill’ batch ensures that the melting ice brings the coffee to a standard strength rather than watering it down.
When should I add sugar or sweeteners to iced coffee?
It is best to add granulated sugar while the coffee is still hot so it dissolves completely. If the coffee is already cold, use a liquid sweetener like simple syrup or agave nectar to avoid a grainy texture at the bottom of the glass.
Can I use a regular drip coffee maker for iced coffee?
Yes, you can use a standard drip machine by simply doubling the amount of grounds per cup of water. After the cycle finishes, let the carafe sit for a few minutes before pouring the coffee over ice.
What is the difference between iced coffee and cold brew?
Regular iced coffee is brewed hot and then cooled down quickly with ice, resulting in a crisp and bright flavor. Cold brew is made by steeping grounds in room temperature water for 12-24 hours, creating a smoother, less acidic concentrate.
How much milk or cream should I add to my iced coffee?
Most people enjoy a ratio of about 3 parts coffee to 1 part milk or cream. Add your dairy after the coffee has been poured over ice to see the color change and adjust the richness to your preference.
Conclusion
Mastering the art of regular iced coffee at home is a simple yet rewarding way to upgrade your daily routine. By focusing on a strong brew and allowing proper cooling time, you can achieve a refreshing, cafe-quality beverage without the expensive price tag. Feel free to experiment with different sweeteners and milk options to find your perfect balance. Now that you have the tools, it is time to start brewing and enjoy your delicious homemade creation.