How To Remove Coffee Stain In Cup
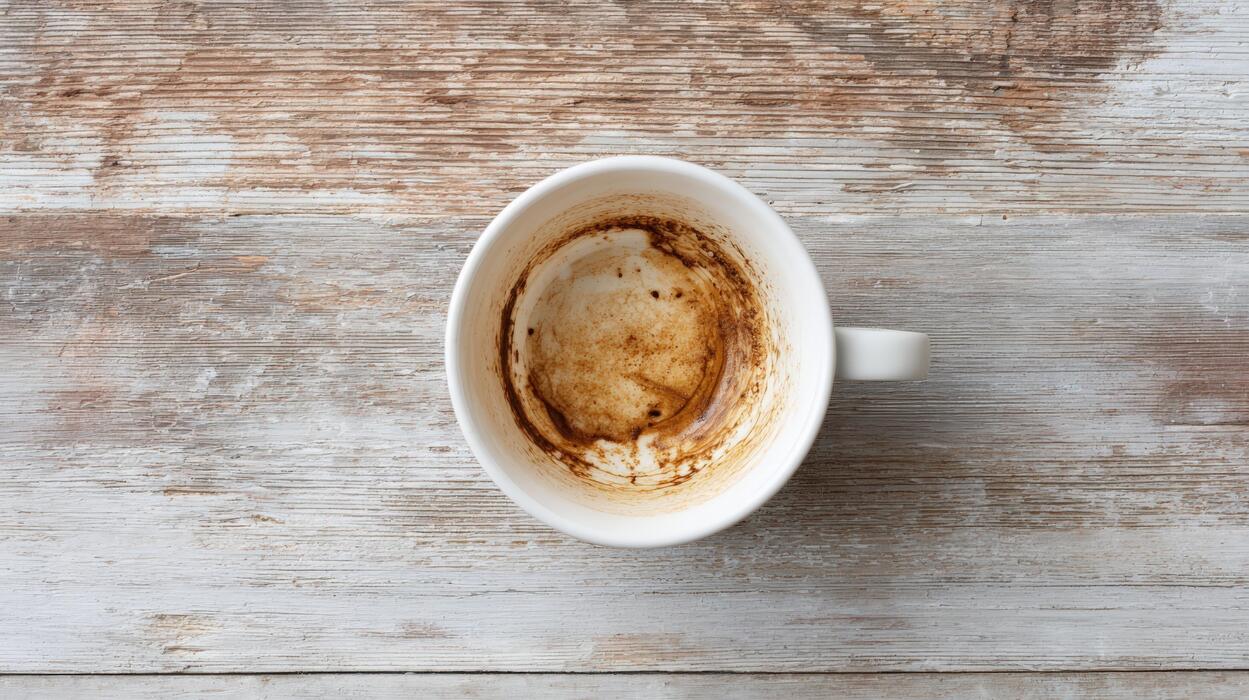
If you’ve been wondering how to remove coffee stain in cup, you’re not alone—those stubborn brown rings can make even a clean mug look grimy. The core issue is that coffee’s tannins cling to porous ceramic or glass. You’ve come to the right place for a fast, effective fix. We’ll cut through the hype and give you a simple method using common kitchen ingredients, so your cup looks spotless in minutes.
Why Coffee Stains Form on Cups
Tannins in coffee cause discoloration
Coffee stains are primarily caused by tannins, natural compounds found in coffee beans that bind to porous surfaces like ceramic and plastic. When you brew coffee, these tannins dissolve in water and adhere to microscopic cracks in your cup. Over time, they oxidize and darken, creating the familiar brown ring.
To prevent stubborn buildup, rinse your cup immediately after use with hot water, as dried tannins become harder to remove. For existing stains, a paste of baking soda and water works wonders—gently scrub with a soft sponge for 30 seconds.
Alternatively, white vinegar mixed with water (1:1 ratio) can break down tannin bonds; soak for 15 minutes and rinse thoroughly. Avoid abrasive cleaners that scratch surfaces, as scratches provide more footholds for tannins. For daily maintenance, use a dishwasher with a rinse aid to minimize residue.
Understanding tannins helps you target stains effectively without damaging your favorite mug.
How heat and time set stains deeper
Heat from hot coffee accelerates the oxidation of tannins, causing them to bond more strongly with cup surfaces. The longer a stain sits, the more these compounds polymerize—forming a durable, stubborn layer. Immediate action is key: rinse with cold water right after drinking to halt the setting process.
For set-in stains, lemon juice or salt can lift discoloration; sprinkle salt on a lemon half and rub the stain for 60 seconds. Another method: fill the cup with denture cleaning tablets dissolved in warm water—let it soak for 20 minutes to break down polymerized tannins.
Avoid using boiling water to soak stains, as it can further set them. Instead, opt for hydrogen peroxide (3% solution) for a gentle bleaching effect—apply with a cloth and let sit for 10 minutes. Regular, prompt cleaning prevents heat from making stains permanent, saving you scrubbing effort later.
Common mistakes that make stains worse
Many people inadvertently worsen coffee stains by using harsh abrasives like steel wool or scouring pads, which scratch the cup’s surface and create new crevices for tannins to hide. Another mistake is soaking in bleach—while it whitens, it can damage glazes and leave harmful residues.
Avoid delaying cleaning until the next day, as dried stains are exponentially harder to remove. Also, overusing dish soap doesn’t help; it can leave a film that traps tannins. Instead, adopt these fixes: use a magic eraser for gentle abrasion, or apply baking soda paste with a soft cloth.
For plastic cups, avoid hot water rinses that soften plastic and embed stains. A better approach is cold water pre-rinse followed by a vinegar soak. Lastly, never stack cups wet—moisture between cups encourages stain transfer. By avoiding these pitfalls, you’ll keep cups stain-free with minimal effort.
Best Ways to Remove Coffee Stains with Baking Soda
Step-by-step baking soda paste method
To effectively remove coffee stains from your cup using baking soda, start by rinsing the cup with warm water to loosen any residue.
Sprinkle a generous amount of baking soda directly onto a damp sponge or soft cloth, or create a paste by mixing three parts baking soda with one part water. Gently scrub the stained areas in a circular motion, focusing on the bottom and sides where discoloration is heaviest.
For extra stubborn marks, let the paste sit for a minute before scrubbing. The mild abrasiveness of baking soda lifts stains without scratching glass or ceramic surfaces. Rinse thoroughly with warm water and dry with a clean towel.
This method is quick, non-toxic, and uses common household ingredients, making it ideal for daily cup maintenance. Avoid using harsh chemicals or steel wool, which can damage delicate finishes. For best results, treat stains promptly before they set deeply into the porous material.
How long to let baking soda sit on stains
For optimal stain removal, allow the baking soda paste to sit on coffee stains for 10 to 15 minutes before scrubbing. This dwell time gives the baking soda enough opportunity to break down the tannins and oils responsible for stubborn discoloration.
If the stains are particularly old or baked on, extend the sitting time to 20 to 30 minutes, but avoid letting it dry completely, as this can make scrubbing less effective. For very light or fresh stains, a shorter period of 5 minutes may suffice.
During the waiting period, keep the paste moist by lightly misting it with water if needed. After the designated time, scrub gently with a soft sponge or brush, then rinse thoroughly. This approach ensures the baking soda works as a gentle yet powerful abrasive, lifting stains without excessive rubbing.
Adjust the sitting time based on stain severity to avoid unnecessary effort while maximizing results.
Using baking soda with vinegar for tough stains
For persistent coffee stains that resist baking soda alone, combine it with white vinegar to create a powerful cleaning reaction. First, sprinkle a layer of baking soda over the stained areas inside the cup.
Then, slowly pour a small amount of white vinegar over the baking soda, allowing it to fizz and bubble. This chemical reaction helps lift deeply embedded stains by loosening residue and breaking down organic compounds. Let the mixture sit for 5 to 10 minutes while it actively works.
After the fizzing subsides, scrub the cup with a soft brush or sponge in circular motions, focusing on tough spots. Rinse thoroughly with warm water and dry completely. For extra stubborn marks, repeat the process or add a final scrub with a baking soda paste.
This method is highly effective for removing coffee rings and discoloration without harsh chemicals, making it safe for most cup materials. Always test on a small area first if using on delicate finishes.
How to Use White Vinegar for Coffee Stains
Simple vinegar soak technique
For most coffee stains, a straightforward white vinegar soak is your first and best option. Start by filling the stained cup with equal parts white vinegar and hot water, ensuring the solution covers the discolored areas completely.
Let it sit for at least 30 minutes to an hour; for stubborn, set-in stains, an overnight soak is more effective. The acetic acid in the vinegar works to break down the tannins and oils from the coffee that cause the brown residue.
After soaking, simply pour out the solution and scrub the cup with a soft sponge or bottle brush. You’ll notice the stain lifts away with minimal effort. This method is gentle on all cup materials, including ceramic, glass, and stainless steel, and avoids harsh chemicals.
It’s a safe, eco-friendly approach that uses common household ingredients. For best results, use undiluted white vinegar directly on particularly tough spots, letting it sit for 15 minutes before scrubbing. This simple technique is reliable for regular maintenance and deep cleaning alike.
Mixing vinegar with dish soap for extra power
When a simple vinegar soak isn’t enough, amplify its stain-fighting power by combining it with dish soap.
Create a potent cleaning paste by mixing two tablespoons of white vinegar with one tablespoon of liquid dish soap (like Dawn or any grease-cutting brand) and a small amount of baking soda if needed to form a thick consistency.
Apply this mixture directly to the coffee stain inside the cup, using a soft cloth or sponge to gently scrub the area. Let it sit for 10 to 15 minutes to allow the soap to break down oily coffee residues while the vinegar tackles mineral deposits and discoloration.
The dish soap emulsifies the coffee oils, making them easier to rinse away, while the vinegar’s acidity lifts stubborn stains. For extra scrubbing power, sprinkle a little baking soda on the paste before scrubbing—this creates a mild abrasive action without scratching.
This combination is especially effective for cups with lingering ring stains or those that have been used repeatedly without proper cleaning. Rinse thoroughly afterward to avoid any soapy residue.
Rinsing tips to remove vinegar smell
After using vinegar to remove coffee stains, a lingering vinegar smell is common but easily eliminated with proper rinsing. Start by thoroughly rinsing the cup under hot running water for at least 30 seconds, ensuring all vinegar solution is washed away.
For a fresh scent, add one teaspoon of baking soda to the cup and scrub with a damp sponge—baking soda neutralizes the acidic vinegar odor naturally.
Alternatively, rinse the cup with a mixture of cold water and a few drops of lemon juice; the citrus scent will mask any remaining vinegar while also cutting through residues.
Another effective trick is to fill the cup with hot water and a dash of salt, letting it sit for 10 minutes before rinsing; salt absorbs odors and leaves the cup fresh.
Always dry the cup completely with a clean towel or let it air dry upside down, as moisture can trap smells. For stubborn odors, repeat the baking soda scrub or run the cup through a dishwasher cycle on high heat.
These simple steps ensure your cup smells neutral and is ready for your next coffee.
Lemon Juice and Salt Method for Stubborn Stains
Why lemon juice cuts through tannin residue
Coffee stains are primarily caused by tannins, organic compounds that bind to the porous surface of your cup. Lemon juice contains citric acid, a natural chelating agent that breaks down these tannin bonds on a molecular level.
When you apply lemon juice directly to a stain, the acid dissolves the discoloration without requiring harsh scrubbing. For best results, use freshly squeezed lemon juice (bottled versions often have lower acidity).
The acid works by neutralizing the alkaline residue left by coffee, lifting the stain from the ceramic or glass surface. Simply pour a small amount into the cup and let it sit for 10-15 minutes to allow the citric acid to penetrate the stain.
This method is particularly effective for older, set-in stains that have had time to oxidize. The mild acidity is safe for most cup materials and leaves no chemical aftertaste when rinsed thoroughly. For maximum effect, combine with the salt step below to create a powerful stain-removing paste.
How to apply salt as a gentle abrasive
After applying lemon juice, sprinkle a generous layer of table salt onto the stained area. Salt acts as a non-scratching abrasive that helps physically dislodge the loosened tannins without damaging the cup’s surface. Use coarse kosher salt for tougher stains or fine table salt for delicate glassware.
Gently scrub the salt into the stain using a soft sponge or your fingers in circular motions for 1-2 minutes. The salt crystals create micro-scratches that lift residue without leaving visible marks. Avoid using metal scrubbers or overly abrasive pads, as these can scratch ceramic glazes or cloud glass.
The salt also absorbs excess moisture, helping the lemon juice stay concentrated on the stain. For stubborn rings at the bottom of the cup, add a bit more salt and let the paste sit for 5 minutes before scrubbing again.
This combination is safe for daily use and won’t degrade cup finishes over time. Rinse thoroughly with warm water to remove all salt and lemon residue.
Best practices for ceramic and glass cups
For ceramic cups, avoid sudden temperature changes when using this method—never pour cold lemon juice into a hot cup as it may cause cracking. Instead, let the cup cool to room temperature first. For glass cups, use lukewarm water to rinse, as extreme heat can weaken the glass.
Always test the lemon-salt paste on a small, inconspicuous area of decorative mugs to ensure it doesn’t affect painted designs. Rinse immediately after scrubbing to prevent any acidic residue from dulling glossy finishes. For daily maintenance, use this method once a week to prevent buildup.
Avoid leaving lemon juice on cups for longer than 30 minutes, as prolonged acid exposure may etch glass or fade ceramic patterns. For delicate glassware, substitute salt with baking soda for an even gentler abrasive. After cleaning, dry cups thoroughly with a soft cloth to prevent water spots.
This eco-friendly method eliminates the need for harsh chemicals and keeps your cups looking crystal clear and stain-free.
Tips for Removing Coffee Stains from Travel Mugs

Cleaning stainless steel travel mugs safely
To remove coffee stains from a stainless steel travel mug without damaging the surface, start by filling the mug with hot water and adding a tablespoon of baking soda. Let it soak for 15-20 minutes, then scrub gently with a non-abrasive sponge or a soft-bristled bottle brush.
For stubborn stains, make a paste of baking soda and water, apply it to the stained areas, and let it sit for 10 minutes before scrubbing.
Another effective method is to use white vinegar: fill the mug with equal parts vinegar and hot water, let it soak for 30 minutes, then rinse thoroughly. Avoid using bleach or harsh chemicals, as they can corrode stainless steel.
For daily maintenance, rinse the mug immediately after use and dry it completely to prevent mineral deposits. This approach keeps your mug clean and stain-free while preserving its finish.
How to treat plastic travel mug stains
Plastic travel mugs are porous, so coffee stains can set in quickly. Start by washing the mug with warm, soapy water and a soft sponge to remove fresh stains.
For older stains, create a solution of 1 part bleach to 10 parts water and soak the mug for 15-20 minutes—this whitens plastic effectively. Rinse thoroughly with hot water afterward to remove any bleach residue.
Alternatively, use lemon juice or hydrogen peroxide: apply either directly to the stain, let it sit for 30 minutes, then scrub with a paste of baking soda and water. Avoid using abrasive scrubbers, as they can scratch plastic and create more hiding spots for stains.
For tough stains, try a denture tablet: drop one into the mug filled with hot water, let it fizz for 15 minutes, then rinse. Regular cleaning after each use prevents stains from becoming permanent.
Avoiding scratches that trap future stains
Scratches on your travel mug create tiny crevices where coffee particles and oils accumulate, making stains harder to remove over time. To prevent scratches, always wash with non-abrasive sponges or soft cloths—never use steel wool or harsh scrub pads.
For cleaning, stick to baking soda, vinegar, or mild dish soap instead of abrasive powders. When drying, use a soft towel or let the mug air dry upside down to avoid friction. Avoid using metal utensils inside the mug, as they can scrape the interior surface.
For plastic mugs, consider using a bottle brush with soft bristles to reach all areas without damage. If your mug already has scratches, minimize future staining by rinsing it immediately after each use and applying a thin layer of coconut oil to the interior occasionally to create a protective barrier.
These habits extend your mug’s life and keep it looking clean.
How to Prevent Coffee Stains from Coming Back
Rinse cups immediately after use
The most effective way to prevent coffee stains from setting is to rinse your cup immediately after finishing your drink. Coffee contains tannins, which bind to ceramic and glass surfaces as they dry.
A quick rinse with warm water within minutes of use removes the majority of these staining compounds before they have a chance to adhere. For best results, use hot water and a soft sponge or your thumb to gently scrub the interior.
Avoid letting the cup sit in the sink with cold water, as this can allow stains to harden. If you cannot rinse right away, at least fill the cup with water to dilute the residue.
This simple habit takes only 10 seconds but drastically reduces the need for harsh scrubbing later. Consistency is key—making this a routine after every coffee break will keep your cups looking fresh with minimal effort.
Weekly deep cleaning routine
Even with immediate rinsing, a weekly deep clean will prevent stubborn stains from building up over time. Start by filling your cup with equal parts white vinegar and hot water, letting it soak for 15-20 minutes. The acidity in vinegar breaks down tannin deposits effectively.
For extra stain-fighting power, add a tablespoon of baking soda to create a gentle abrasive paste. Scrub the cup with a non-abrasive sponge, paying special attention to the bottom and rim where residue often collects. Rinse thoroughly with hot water.
Alternatively, you can use a denture tablet—drop one in a cup of warm water and let it fizz for 30 minutes before rinsing. This method is particularly effective for removing brown rings. Avoid using bleach or harsh chemicals, as they can damage cup finishes and leave harmful residues.
A consistent weekly routine ensures stains never become permanent.
Choosing stain-resistant cup materials
Prevention starts with selecting the right cup material. Porcelain and high-fired ceramic with a smooth, glossy glaze are naturally less porous, making it harder for coffee tannins to penetrate. Avoid unglazed or matte finishes, as their rough surfaces trap stains.
Glass cups are another excellent choice—they are non-porous and easy to clean, though they may show stains more visibly. For travel mugs, look for stainless steel with a high-quality interior coating; many brands offer a non-stick or ceramic-lined interior that resists staining.
Double-wall insulated cups also help because they keep coffee hot longer, reducing the need for reheating that can set stains. If you prefer plastic, choose Tritan or polypropylene, which are stain-resistant compared to standard polycarbonate. Investing in stain-resistant materials saves time on cleaning and keeps your cups looking new.
Always check product labels for stain-resistant claims before purchasing.
When to Replace a Stained Coffee Cup
Signs of permanent damage from stains
Even after thorough cleaning, some coffee stains may indicate permanent damage to your cup. Look for stains that remain after scrubbing with baking soda or vinegar; these often mean the glaze has worn away, allowing coffee oils to seep into the porous ceramic.
If the stain is dark, uneven, or has a rough texture, the cup’s surface is likely compromised. Check for a lingering odor of stale coffee even after washing, as this suggests deep absorption.
Hold the cup up to light—if you see shadowy patches or discoloration that doesn’t fade, it’s a sign the material has absorbed stains permanently. Also inspect for any changes in the cup’s feel, like a chalky or sticky residue that reappears after drying.
These signs mean the cup is no longer safe for repeated use, as the stain can harbor residues that affect taste and hygiene. Replace the cup immediately if you notice any of these issues to avoid potential health risks and ensure your coffee always tastes fresh.
How scratches and cracks harbor bacteria
Scratches and cracks in a coffee cup are more than cosmetic flaws—they create microscopic havens for bacteria. Even tiny scratches can trap coffee residue and moisture, providing a breeding ground for mold, yeast, and harmful pathogens like E. coli or salmonella.
Cracks, especially those that extend to the interior surface, allow liquids to seep into the cup’s structure, where they can’t be fully removed by washing. The warmth and moisture from repeated use accelerate bacterial growth in these hidden spaces.
To test for cracks, run your finger around the rim and interior; any rough spots or fissures are red flags. If you see any visible scratches or cracks, discard the cup immediately—no amount of cleaning can guarantee sterilization once the surface is broken.
Remember that even hairline cracks can compromise the cup’s integrity, leading to potential breakage during use. Your health is worth more than a favorite mug, so prioritize safety over sentimentality.
Cost-effective alternatives to buying new cups
If your stained or damaged cup needs replacing, there are affordable and eco-friendly options that won’t break the bank. Consider buying second-hand mugs from thrift stores or garage sales—you can often find unique, high-quality ceramic or glass cups for under $1.
Look for cups with smooth, unglazed interiors to minimize future staining. Alternatively, purchase a set of plain white ceramic mugs from discount retailers; they’re inexpensive, durable, and easy to clean. For a long-term solution, invest in double-walled glass cups—they resist staining and are dishwasher safe.
If you want to repurpose, use an old cup for non-food items like pen holders or plant pots. Avoid cheap plastic cups, as they scratch easily and harbor bacteria. You can also swap with a friend or host a mug exchange party to refresh your collection for free.
The key is to choose cups that are smooth, non-porous, and easy to sanitize—this saves money and reduces waste while ensuring your coffee stays safe and delicious.
Frequently Asked Questions
What is the most effective method to remove coffee stains from a cup?
Baking soda is highly effective. Sprinkle a small amount onto a damp sponge or directly into the cup, scrub gently, and rinse. For stubborn stains, make a paste with water and let it sit for a few minutes before scrubbing.
Can I use vinegar to remove coffee stains from a mug?
Yes, white vinegar works well. Fill the cup with equal parts vinegar and water, let it soak for 30 minutes, then scrub with a sponge. Rinse thoroughly to remove the vinegar smell.
How do I remove old, set-in coffee stains from ceramic cups?
Create a paste of baking soda and hydrogen peroxide or lemon juice. Apply it to the stains, let it sit for 15–20 minutes, then scrub with a non-abrasive sponge. Rinse well.
Will bleach damage my coffee cup if I use it to remove stains?
Diluted bleach can be used for white ceramic or glass cups, but avoid it on colored or patterned mugs as it may cause fading. Soak the cup in a solution of 1 part bleach to 10 parts water for 10 minutes, then rinse thoroughly.
Can I use denture cleaning tablets to clean coffee-stained cups?
Yes, denture tablets are excellent for removing coffee stains. Drop one tablet into the cup with warm water, let it fizz and soak for 30 minutes, then rinse. This works well for hard-to-reach stains.
How do I prevent coffee stains from forming in my cup?
Rinse your cup immediately after use to prevent residue from drying. Regularly clean with baking soda or a mild abrasive to stop stains from building up. Avoid leaving coffee in the cup for long periods.
What should I avoid when cleaning coffee stains from cups?
Avoid using harsh abrasives like steel wool on delicate or glazed cups, as they can scratch the surface. Also, avoid mixing bleach with other cleaners, which can create toxic fumes.
Can I remove coffee stains from a stainless steel travel mug?
Yes, use a mixture of baking soda and water or a small amount of vinegar. Scrub with a soft brush or sponge, rinse thoroughly. Avoid abrasive pads that can scratch the metal.
Conclusion
Removing coffee stains from cups is simple with common household items like baking soda, vinegar, or lemon juice. The key is to scrub gently but thoroughly, focusing on the ring where stains linger. For stubborn marks, let the solution soak for a few minutes. By using these natural methods, you can keep your cups looking pristine without harsh chemicals. So next time you finish your brew, don’t let stains win—give your favorite mug the quick care it deserves.