How To Make Iced Coffee Pour Over
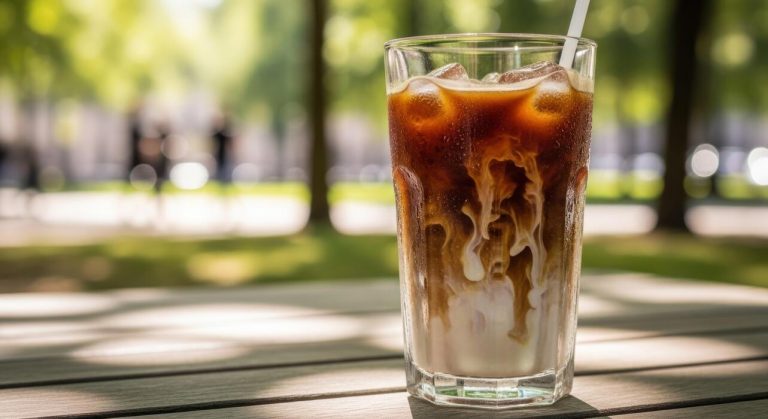
How to make iced coffee pour over is a common question for anyone who loves rich, clean coffee but hates watery, diluted iced drinks. The core problem is balancing hot brewing with immediate chilling without losing flavor. You’re in the right place: the secret is brewing a stronger concentrate directly onto ice, locking in brightness and aroma. This guide delivers the precise ratio and technique for a perfectly smooth, never-bitter glass.
What You Need for Pour Over Iced Coffee
Essential pour over equipment
To master the pour over iced coffee method, you’ll need a few key tools. Start with a pour over dripper (like a Hario V60 or Chemex) and unbleached paper filters to remove oils and sediment for a clean cup.
A gooseneck kettle gives you precise control over water flow, ensuring even extraction. You’ll also need a carafe or large mug to catch the coffee over ice, plus a kitchen scale to measure coffee and water accurately—aim for a 1:15 coffee-to-water ratio.
Don’t forget a burr grinder for consistent, medium-fine grounds (similar to table salt). Finally, have ice cubes ready; use filtered water for best taste. Optional but helpful: a timer to track brew time (target 2.5-3 minutes) and a stirring spoon to ensure all grounds are saturated.
With these essentials, you’re set to brew a refreshing, bold iced coffee without bitterness.
Best coffee beans for iced coffee
For pour over iced coffee, choose beans that shine when chilled. Medium to dark roasts work best, as they offer rich, chocolatey, or nutty flavors that hold up against ice dilution. Single-origin beans from Central or South America (like Colombia or Brazil) provide smooth, balanced profiles with low acidity.
Avoid light roasts with bright, fruity notes—they can taste sour or thin when iced. For a bolder kick, try a dark roast from Sumatra or Ethiopia, which adds earthy, spicy depth. Always buy whole beans and grind them just before brewing to preserve oils and aromatics.
Look for beans roasted within 2-4 weeks for peak freshness. If you prefer a cleaner taste, opt for washed-process beans; for more body, natural-process beans work well.
Experiment with small batches to find your ideal flavor—remember, iced coffee amplifies sweetness and masks bitterness, so a slightly coarser grind can prevent over-extraction.
Ice and water ratio basics
The key to perfect pour over iced coffee is balancing ice and hot water to avoid dilution. Use a 1:1 ratio of ice to hot water by weight—for example, 150g ice and 150g hot water for a 300g total brew.
Place the ice directly in your carafe before brewing; the hot coffee melts it slightly, cooling the brew instantly while preserving flavor. For a stronger concentrate, try a 2:1 water-to-ice ratio (200g hot water, 100g ice) and top up with milk or more ice later.
Always use large ice cubes—they melt slower than small ones, preventing watery coffee. Adjust based on your taste: more ice yields a lighter, quicker-chilled drink; less ice gives a bolder concentrate. Remember, the coffee grounds absorb some water, so your final yield will be less than the total water used.
Brew as usual, but aim for a slightly finer grind to compensate for the shorter extraction time caused by cooling.
How to Set Up Your Pour Over for Iced Coffee

Choosing the right carafe or mug
Start by selecting a heatproof glass carafe or a sturdy ceramic mug that can handle both hot coffee and ice. A borosilicate glass carafe is ideal because it resists thermal shock from the sudden temperature change. If using a mug, ensure it’s microwave-safe to avoid cracks.
For a standard 16-ounce iced coffee, choose a vessel that holds at least 20 ounces to leave room for ice and prevent spills. A wide opening makes it easier to add ice and stir without splashing. Avoid thin glass or plastic containers that may warp or break.
Your vessel should also fit securely under your pour-over dripper—a flat-bottomed carafe works best for stability. This setup ensures a smooth brewing process and a refreshing final drink without mess or breakage.
Pre-wetting the filter step
Before adding coffee, pre-wet your paper filter with hot water to remove papery taste and warm the dripper. Place the filter in your pour-over cone, then pour about 200°F water evenly over it until the entire filter is saturated.
Let the water drain through into your carafe or mug, then discard the rinse water. This step also preheats your vessel, helping maintain extraction temperature.
For iced coffee, a thorough rinse is crucial because cold ice will quickly cool the brew, so you want every degree of heat from the start. Use fresh, filtered water for the rinse to avoid off-flavors. Skipping this can result in a papery, dull taste in your final iced coffee.
A well-wetted filter also ensures even water flow through the coffee grounds, leading to a balanced extraction.
Adding ice to the serving vessel
After pre-wetting and discarding rinse water, fill your carafe or mug with ice cubes—about half to two-thirds full. For a stronger, less diluted iced coffee, use larger ice cubes or even coffee ice cubes made from leftover brew.
The ice will melt as hot coffee drips onto it, so account for dilution by using a finer grind and slightly more coffee than for hot brew (e.g., 1:15 coffee-to-water ratio). Place your pour-over dripper directly over the ice-filled vessel.
As you brew, the hot coffee lands on the ice, rapidly chilling it without over-extraction. For a cleaner taste, avoid stirring until after brewing. This method locks in flavors and creates a smooth, refreshing iced coffee without bitterness.
Adjust ice quantity based on your preferred strength—more ice for a lighter drink, less for a bolder one.
Step-by-Step Guide to Making Pour Over Iced Coffee
Grinding coffee for the perfect extraction
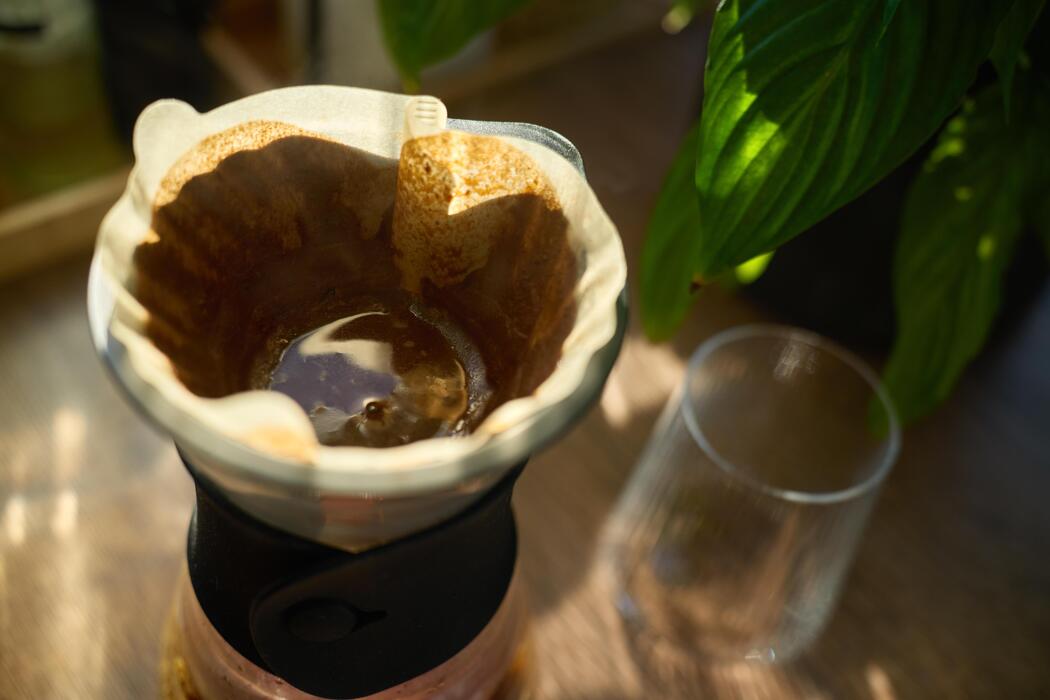
Start with fresh, whole-bean coffee and grind it just before brewing for maximum flavor. For pour-over iced coffee, use a medium-coarse grind, similar to sea salt. This size allows water to extract flavors evenly without over-extracting, which can cause bitterness.
Too fine a grind leads to a muddy, over-extracted brew, while too coarse results in weak, sour coffee. Weigh your coffee: use 30 grams of coffee for every 500 grams of water (a 1:16 ratio). This ratio ensures a balanced strength, even when diluted by ice.
Use a burr grinder for consistent particle size, which promotes even extraction. Before grinding, measure your ice: fill your carafe with 200 grams of ice (about 2 cups), then subtract that from total water (e.g., 500g water total, so 300g hot water).
This pre-ice method locks in flavor and chills the coffee instantly. Grind just before brewing to preserve volatile oils and aromas. A consistent grind is your first step to a clean, flavorful iced coffee.
Bloom phase: why it matters
The bloom is a critical 30-45 second step that releases trapped carbon dioxide from freshly ground coffee, allowing for even extraction.
After placing your filter and grounds, pour twice the weight of the coffee in hot water (e.g., 60g water for 30g coffee) over the grounds in a circular motion, ensuring all grounds are saturated. Immediately start a timer. During bloom, you’ll see bubbles and a slight expansion—this is CO2 escaping.
If you skip this, gas pockets block water from reaching coffee particles, leading to under-extraction and a flat, sour taste. For iced coffee, this step is vital because you’re using less hot water, so every drop must extract fully.
Use water just off the boil (around 200°F or 93°C) to maximize bloom efficiency. After 30-45 seconds, the grounds will settle slightly, indicating they’re ready for the main pour. A proper bloom ensures your iced coffee is bright, balanced, and free of off-flavors.
Pouring technique for balanced flavor
After the bloom, pour the remaining hot water in slow, concentric circles, starting from the center and moving outward, then back to center. Avoid pouring directly onto the filter edge to prevent channeling—uneven water flow that causes bitter or sour spots. Use a gooseneck kettle for precise control.
Divide the remaining water (e.g., 240g for a 300g total) into two or three equal pours, each 30-45 seconds apart. This staged pouring maintains a consistent slurry temperature and extraction rate. For iced coffee, keep the total brew time around 3-4 minutes; longer can over-extract.
As you pour, watch the water level: it should stay just below the filter rim. The goal is a steady drip, not a fast stream. After the final pour, let the water drain completely before removing the filter.
The result is a smooth, concentrated brew that, when poured over ice, delivers a crisp, full-bodied iced coffee without bitterness or acidity.
Tips for Adjusting Strength and Flavor
How to make a stronger iced coffee
To increase strength without bitterness, use a higher coffee-to-water ratio. Instead of the standard 1:15, try 1:12 or even 1:10 (e.g., 20 grams of coffee to 200 grams of water). This ensures bold flavor even as ice dilutes the brew.
Another tip: brew directly over ice in your carafe—use half the total water as ice, then pour hot water over the grounds. The rapid chilling locks in bright notes while the reduced water volume concentrates the coffee.
For an extra kick, consider a double-strength brew by grinding slightly finer (like table salt) and extending steep time by 30 seconds. Always use fresh, cold water and pre-wet your filter to avoid paper taste.
Finally, stir the finished concentrate well before pouring over fresh ice to ensure even distribution of dissolved solids.
Adjusting grind size for taste
Grind size directly impacts extraction and flavor. For balanced, sweet iced coffee, aim for a medium-fine grind (similar to beach sand). If your brew tastes sour or weak, the grind is too coarse—go finer to increase surface area and extract more solubles.
Conversely, if it tastes bitter or harsh, the grind is too fine, leading to over-extraction; coarsen it slightly. For pour-over iced coffee, start with a 20-gram dose and adjust by 1-2 notches on your grinder. A useful test: brew a small batch, taste, then adjust.
Remember, finer grinds require shorter brew times (2:30–3:00 minutes), while coarser grinds need longer (3:30–4:00 minutes). Keep a brew log to track ratio, grind, and taste—this helps you replicate your perfect cup. Always use a burr grinder for consistency, and avoid blade grinders that produce uneven particles.
Adding milk or sweeteners after brewing
For the best texture and flavor, always add milk or sweeteners after brewing and chilling. Pour the hot concentrate over a full glass of ice first—this prevents dairy from curdling and ensures even cooling.
Use cold milk, cream, or plant-based alternatives like oat or almond milk; add slowly while stirring to avoid separation. For sweetness, simple syrup (equal parts sugar and water dissolved) blends instantly, unlike granulated sugar which may sink. Start with 1–2 teaspoons of syrup per 8 ounces, then adjust.
For a creamy iced latte, combine 2 parts coffee concentrate with 1 part milk. Flavor variations include vanilla syrup, cinnamon, or a pinch of salt to reduce bitterness. To avoid dilution, use ice cubes made from leftover coffee or milk—they melt slower and maintain strength.
Always taste before adding extras, as the base brew’s intensity determines how much complement it needs.
Common Mistakes to Avoid When Making Iced Pour Over
Using too much or too little ice
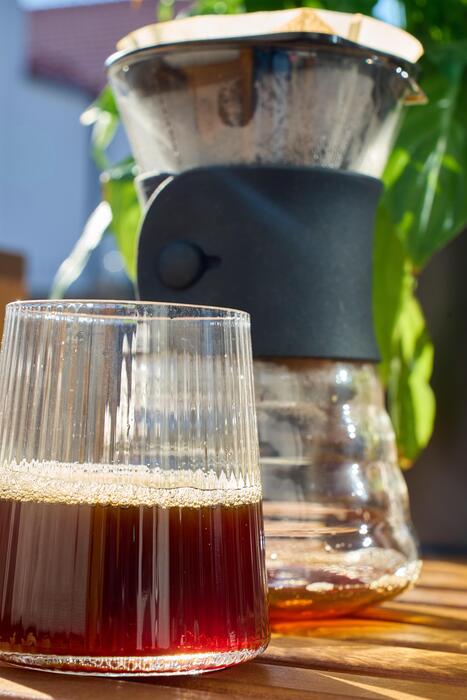
Striking the right ice-to-coffee ratio is crucial for a balanced iced pour over. Too much ice will dilute your coffee, leaving it watery and weak as the ice melts. Conversely, too little ice means your hot coffee won’t cool quickly enough, leading to over-extraction and bitterness.
Aim for a 1:1 ratio of ice to hot water (e.g., 100g ice and 100g hot water). Place all the ice directly in your serving carafe before brewing. As the hot coffee drips onto the ice, it chills rapidly, locking in bright, clean flavors.
Adjust based on your taste: more ice for a stronger brew (since less hot water extracts less) or less for a milder cup. Always use large, high-quality ice cubes that melt slower, and consider weighing your ice for precision.
This simple adjustment ensures your iced pour over stays crisp and flavorful from first sip to last.
Over-extracting the coffee grounds
Over-extraction is the enemy of a smooth iced pour over, often caused by grinding too fine or brewing too slowly. When you use a fine grind, the water struggles to pass through, increasing contact time and pulling out bitter compounds.
For iced coffee, aim for a medium-coarse grind—similar to sea salt—which allows a steady, 3-4 minute brew. Another culprit is stalling the pour: if you pause too long, the coffee bed cools and over-extracts. Instead, pour in steady, concentric circles, keeping the water level consistent.
Also, note that iced coffee requires a stronger brew ratio (like 1:15 coffee to total water) because ice dilutes it. If your coffee tastes harsh or ashy, you’re over-extracting. Fix it by coarsening your grind slightly, shortening your brew time, or using water just off the boil (around 200°F).
This preserves the delicate flavors that shine when chilled.
Skipping the bloom step
Skipping the bloom is a common shortcut that ruins your iced pour over’s clarity and depth. The bloom is the initial pour of hot water (about twice the coffee weight) that releases trapped carbon dioxide from freshly ground beans.
Without it, CO2 creates a barrier, preventing even extraction and leading to sour, underdeveloped flavors. For iced coffee, this step is non-negotiable because the shorter brew time amplifies any flaws. After grinding, pour just enough water to saturate the grounds, then wait 30-45 seconds until bubbling subsides.
This opens the coffee for optimal extraction. Use a gooseneck kettle for precise control, starting from the center and spiraling outward. Even with ice in the carafe, the bloom ensures your final cup is balanced and aromatic.
Never rush this step—it takes seconds but transforms your brew from flat to vibrant, especially when the coffee is served cold.
Best Ways to Serve and Store Iced Pour Over Coffee
Serving over fresh ice for best taste
For the most flavorful iced pour over, always serve it over fresh, high-quality ice made from filtered water. Avoid using ice that has been sitting in the freezer for days, as it can absorb odors and dilute your coffee with off-flavors.
When brewing directly onto ice, use a 1:1 coffee-to-ice ratio—for example, brew 200 grams of coffee directly onto 200 grams of ice in a heatproof carafe. This rapid chilling locks in bright acidity and aromatic oils, preventing bitterness.
For an extra-cold experience without dilution, consider coffee ice cubes: freeze leftover brewed coffee in an ice tray. Then, when serving, replace regular ice cubes with coffee cubes. As they melt, they enrich the drink rather than watering it down.
Always serve immediately after brewing for the crispest, cleanest flavor profile. If you prefer a stronger taste, use larger ice cubes that melt slower, maintaining the coffee’s intended strength and temperature longer.
How to store leftover coffee
If you have leftover iced pour over coffee, store it in an airtight container in the refrigerator for up to 24 hours. Transfer the coffee to a glass jar or bottle, leaving minimal headspace to reduce oxidation.
Avoid storing it in the original brewing carafe unless it has a tight seal, as exposure to air accelerates flavor loss. For best results, cool the coffee quickly by placing the container in an ice bath before refrigerating—this preserves volatile aromatic compounds.
Do not add milk or sweeteners before storage, as they can spoil or alter taste. When ready to drink, pour over fresh ice and stir.
Note that refrigerated coffee may develop a slightly muted flavor; you can revive it by adding a pinch of salt or a splash of fresh cold brew. Discard any coffee that smells sour or stale after 24 hours.
Never freeze leftover brewed coffee unless making coffee ice cubes, as thawing damages texture and taste.
Garnishing ideas for presentation
Elevate your iced pour over with simple, elegant garnishes that complement its flavor. Start by adding a single long strip of orange or lemon zest over the glass rim—its oils enhance the coffee’s citrus notes.
For a visual pop, float a few toasted cinnamon sticks or star anise on top; they slowly infuse warmth without overwhelming the brew. A dollop of lightly whipped cream dusted with cocoa powder or cinnamon adds richness and a café-style finish.
For a refreshing twist, muddle fresh mint leaves with a teaspoon of simple syrup at the bottom of the glass before pouring the coffee over ice—this creates a layered, herbaceous drink.
Alternatively, skewer coffee ice cubes (made from leftover brew) on a cocktail pick with a single espresso bean for a sophisticated touch. Always garnish just before serving to maintain freshness.
Keep garnishes minimal to let the pour over’s clarity shine, but these small details turn a simple drink into a memorable experience.
Frequently Asked Questions About Iced Pour Over Coffee
Can you use any coffee bean for iced pour over?
Yes, you can use any coffee bean for iced pour over, but for the best results, choose beans that complement the brewing method. Medium to light roasts are ideal because they preserve bright acidity and fruity notes that shine when chilled.
Dark roasts can taste bitter or flat once iced, so if you prefer them, use a slightly finer grind to extract more sweetness. Single-origin beans with flavor notes like citrus, berry, or floral are excellent for a refreshing cup.
Avoid overly oily beans, as they can clog your filter and lead to uneven extraction. For a balanced brew, grind your beans to a medium-coarse consistency—similar to sea salt—and use a ratio of 1:15 coffee to water (e.g., 20g coffee to 300g water).
This ensures the ice dilutes the coffee without washing out the flavor. Experiment with beans from Ethiopia, Kenya, or Colombia for a vibrant iced coffee experience.
Remember, the key is to brew a stronger concentrate since the ice will melt, so adjust your grind and ratio to match your taste preferences.
How long does iced pour over coffee last?
Iced pour over coffee is best enjoyed immediately after brewing for peak flavor and freshness. If you need to store it, refrigerate it in an airtight container for up to 24 hours, but note that the taste will degrade over time.
The ice in your cup will melt, diluting the coffee, so consume it within 2-3 hours of preparation for optimal taste. To extend its life, brew a concentrate (using half the water, then add ice) and store it separately.
Avoid leaving it at room temperature for more than 2 hours, as bacteria can grow. For best results, brew only what you’ll drink in one sitting—freshness is key to enjoying the vibrant flavors of pour over coffee.
If you must store it, re-ice it when serving to restore chill without over-diluting. Remember, coffee oxidizes quickly once brewed, so refrigerate promptly and use within a day. For a quick fix, freeze leftover coffee into ice cubes to use later without watering down your drink.
Is pour over iced coffee stronger than cold brew?
No, pour over iced coffee is not inherently stronger than cold brew, but it offers a different flavor profile and caffeine content. Cold brew is typically made by steeping coarse grounds in cold water for 12-24 hours, resulting in a smooth, low-acid concentrate that can be diluted.
It often has a higher caffeine concentration per ounce due to the long extraction time. In contrast, pour over iced coffee uses hot water for a quick extraction, then chills it over ice, preserving bright acidity and aromatic oils.
The strength depends on your coffee-to-water ratio: a standard pour over uses 1:15 to 1:17, while cold brew concentrate uses 1:4 to 1:8. So, cold brew can be stronger if undiluted, but pour over can be adjusted to match.
For a bolder iced pour over, use a finer grind and a ratio of 1:12, or brew directly over ice to lock in flavors. Ultimately, choose pour over for complexity and cold brew for smoothness.
Frequently Asked Questions
What is iced pour over coffee?
Iced pour over coffee is a brewing method where hot water is poured over coffee grounds directly onto ice, which rapidly chills the coffee. This technique preserves the coffee’s delicate flavors and aromas that can be lost with traditional iced coffee methods.
How do I make iced coffee with a pour over?
Place a filter in your pour over dripper, add medium-coarse ground coffee, and set it over a carafe filled with ice. Slowly pour hot water (just off the boil) over the grounds in a circular motion, allowing the coffee to drip directly onto the ice. Use a ratio of about half the water as ice and half as hot water.
What coffee grind size is best for iced pour over?
A medium-coarse grind, similar to sea salt, works best for iced pour over. This size allows for proper extraction during the shorter brew time while preventing over-extraction that can cause bitterness.
What coffee to water ratio should I use for iced pour over?
Use a 1:15 to 1:17 coffee-to-total-water ratio (e.g., 20g coffee to 300g total water). For iced coffee, split the total water so that about 40-50% is ice and the rest is hot water, ensuring proper strength and dilution.
Do I need to adjust my pour over technique for iced coffee?
Yes, use a slightly finer grind than for hot pour over to compensate for the ice dilution, and pour more slowly to ensure even extraction. Also, pre-wet the filter with hot water to avoid any paper taste affecting the chilled coffee.
How can I prevent my iced pour over from being watery?
To avoid watery coffee, use a stronger coffee-to-water ratio (like 1:12) and ensure your ice is fresh and not melting too quickly. Brew directly onto the ice in the carafe rather than adding ice after, which can dilute unevenly.
Can I use any pour over dripper for iced coffee?
Yes, most pour over drippers like the Hario V60, Chemex, or Kalita Wave work well for iced coffee. Just ensure your carafe or cup can hold enough ice and that you adjust the grind size to match the dripper’s flow rate.
Conclusion
Mastering the pour-over iced coffee method rewards you with a crisp, vibrant brew free of bitterness. The key takeaways are to use a coarse grind, double the coffee grounds for strength, and pour directly over ice to lock in flavor. This technique offers total control for a superior, custom cup. Ditch the stale pre-made stuff and embrace this simple ritual. Your perfect, refreshing iced coffee is just a brew away—try it tomorrow morning.