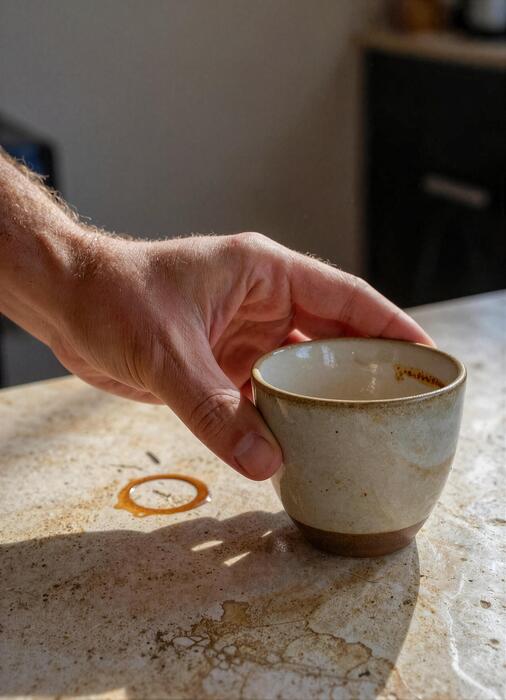
How Make Cold Coffee At Home
Craving a refreshing caffeine fix without the coffee shop price tag? Learning how to make cold coffee at home is easier than you think, and you probably already have everything you need in your kitchen. Whether you prefer a smooth cold brew or a quick iced latte, we have you covered. Let’s dive into these easy techniques so you can enjoy professional-quality coffee today.
Best ways to make cold coffee at home
The difference between iced coffee and cold brew
Understanding the fundamental distinction between these two methods is the first step toward mastering cold coffee at home. Iced coffee is brewed using hot water, which extracts oils and acids quickly, before being cooled down or poured directly over ice.
This method preserves the bright, acidic profile of the bean but can become diluted if not brewed at double strength. In contrast, cold brew involves steeping coarse grounds in room temperature or cold water for 12 to 24 hours.
This slow process results in a concentrated syrup that is naturally lower in acidity and significantly smoother on the palate.
While iced coffee offers an immediate caffeine fix with a sharp, crisp finish, cold brew provides a rich, chocolatey base that stays fresh in the refrigerator for up to a week.
Choosing between them depends on whether you prefer a refreshing, light beverage or a bold, velvety concentrate that can be customized with various milks and sweeteners.
Essential equipment for your home coffee bar
You do not need expensive machinery to create professional-quality cold drinks; however, a few key tools will elevate your results. A burr grinder is perhaps the most critical investment, as it ensures a consistent coarse grind size, which is vital for preventing bitterness in cold brew.
For the brewing vessel, a French press is an excellent multi-purpose tool that allows for easy steeping and straining of grounds. If you prefer the clarity of iced coffee, a pour-over dripper or a standard drip machine works perfectly, provided you have a high-quality carafe.
Additionally, consider purchasing a digital scale to maintain precise coffee-to-water ratios, ensuring every batch tastes identical. To enhance the experience, keep silicone ice cube trays on hand to create large cubes that melt slowly, or freeze leftover coffee into cubes to prevent your drink from becoming watered down.
These simple additions transform a basic kitchen into a functional and highly efficient home coffee laboratory.
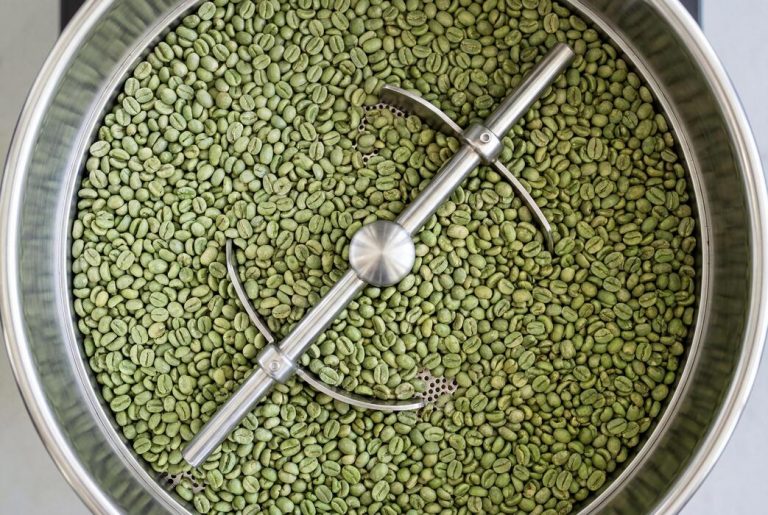
Choosing the right coffee beans for cold drinks
The beans you select will dictate the final flavor profile, as cold temperatures highlight different notes than hot water. For a classic, smooth cold brew, look for dark roast beans with flavor notes of chocolate, nuts, or caramel.
These heavy-bodied beans stand up well to the long steeping process and pair beautifully with dairy or plant-based milks. If you are making flash-chilled iced coffee, medium or light roast African beans are often preferred because their floral and citrusy nuances are amplified when served cold.
Always prioritize freshly roasted whole beans over pre-ground varieties to ensure the volatile aromatics remain intact until the moment of brewing. Experimenting with single-origin beans can reveal hidden complexities, such as berry or stone fruit undertones, that are often lost in hot preparations.
Ultimately, the best bean is one that maintains its integrity when chilled, providing a balanced and flavorful foundation for your favorite DIY coffee recipes throughout the warmer months.
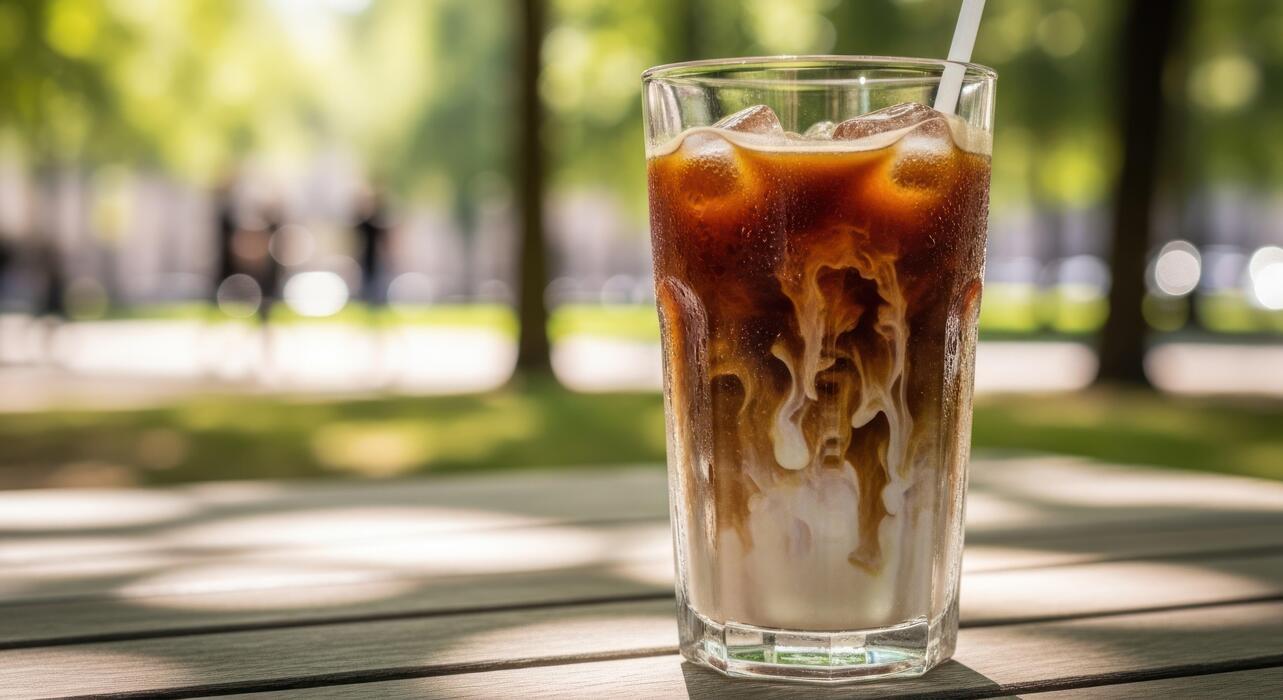
How to make classic iced coffee in minutes

The hot-over-ice brewing method
The fastest way to enjoy a refreshing glass of cold coffee without waiting hours for a cold brew is the hot-over-ice technique. To begin, brew a concentrated pot of your favorite blend using double the amount of coffee grounds you would normally use for a standard hot cup.
This increased strength is vital because the melting ice will naturally dilute the liquid as it cools. Once your coffee is ready, fill a large glass or carafe to the brim with fresh ice cubes and pour the hot coffee directly over them.
The immediate temperature drop locks in the bright acidity and aromatic oils that are often lost in slower cooling methods. For the best flavor profile, ensure you are using filtered water and a medium-to-dark roast that can stand up to the rapid chilling process.
This method allows you to go from a craving to a finished beverage in under five minutes, making it the ultimate solution for busy mornings or sudden caffeine needs.
How to prevent watered-down coffee
One of the biggest challenges when making iced coffee at home is maintaining a rich, bold flavor as the ice melts. A professional secret to solving this issue is to prepare coffee ice cubes in advance.
Simply pour your leftover morning coffee into an ice cube tray and freeze them until solid. By using these frozen coffee blocks instead of regular water ice, your drink actually gets stronger and more flavorful as it sits rather than becoming thin and translucent.
Additionally, always sweeten your coffee while it is still hot or use a simple syrup. Granulated sugar does not dissolve well in cold liquids, leading to a gritty texture at the bottom of your glass.
If you prefer a creamy finish, consider using heavy cream or condensed milk, which provides a thicker mouthfeel that resists dilution better than standard skim milk. These simple adjustments ensure that your homemade version tastes just as premium and robust as any specialty café offering throughout the entire drinking experience.
Using a cocktail shaker for a frothy texture
To elevate your homemade iced coffee with a luxurious, velvety texture, reach for a standard cocktail shaker. This tool is not just for mixed drinks; it is the perfect vessel for aerating coffee to create a thick, foamy head similar to a nitro brew.
Start by adding your freshly brewed coffee, your choice of sweetener, and a handful of ice into the shaker. Secure the lid tightly and shake vigorously for at least thirty seconds until the exterior of the metal feels frosty to the touch.
The rapid agitation breaks down the proteins in the coffee and incorporates tiny air bubbles, resulting in a beautiful froth and a chilled temperature. Strain the mixture into a fresh glass filled with new ice to maintain the crispness.
This mechanical aeration enhances the perceived creaminess of the drink even if you choose to skip the dairy. It is a simple, effective way to achieve a professional aesthetic and mouthfeel using basic kitchen equipment you likely already own in your home pantry.
Easy cold brew coffee recipe for beginners
The perfect coffee-to-water ratio
To master cold brew at home, the foundation lies in the balance between your grounds and liquid.
For a versatile concentrate that works perfectly over ice or with milk, beginners should follow a 1:4 ratio, which translates to one cup of coarsely ground coffee for every four cups of cold, filtered water.
Using a coarse grind size is non-negotiable; it should resemble sea salt or breadcrumbs to ensure a clean extraction without the bitterness often found in hot coffee. If you prefer a lighter, ready-to-drink version right out of the jar, you can adjust this to a 1:8 ratio.
Always use filtered water whenever possible, as the quality of your water directly impacts the final flavor profile of your brew.
This simple measurement ensures that your coffee remains bold and smooth, providing a rich base that stands up to dilution from melting ice cubes or heavy creamers later in the process. Consistency in these measurements is the secret to professional results.
Step-by-step steeping instructions
Once you have your ingredients measured, place the coarse grounds into a large glass jar or a French press. Slowly pour your filtered water over the grounds, ensuring every particle is fully saturated.
Instead of aggressive stirring, use a long spoon to gently submerge the grounds, which prevents over-extraction and keeps the flavor profile mellow. Seal the container tightly and let it sit at room temperature or in the fridge for a duration of 12 to 18 hours.
Steeping on the counter often results in a brighter, more floral profile, while the refrigerator produces a deeper, chocolatey taste. Avoid exceeding 24 hours, as this can introduce unwanted woody or bitter notes into your beverage.
This passive brewing method relies on time rather than heat to extract the oils and caffeine, resulting in a drink that is significantly lower in acidity than traditional iced coffee. Patience is the most important ingredient during this stage of the process for a smooth finish.
How to strain and store your concentrate
After the steeping period is complete, the final step is removing the spent grounds to achieve a sediment-free drink. If you used a French press, simply plunge slowly; otherwise, pour the mixture through a fine-mesh sieve lined with a paper coffee filter or a cheesecloth.
This double-filtration method ensures a silky-smooth texture and prevents the coffee from becoming muddy over time. Once strained, transfer your fresh cold brew concentrate into a clean glass carafe or airtight mason jar.
This concentrate is incredibly stable and can be stored in the refrigerator for up to two weeks, making it the ultimate convenience for busy mornings. When you are ready to serve, simply mix one part concentrate with one part water or milk depending on your strength preference.
Because the caffeine content is high, you can even freeze the coffee into ice cubes to prevent your drink from being watered down as you enjoy it. This efficient storage method ensures you always have premium coffee available at home.
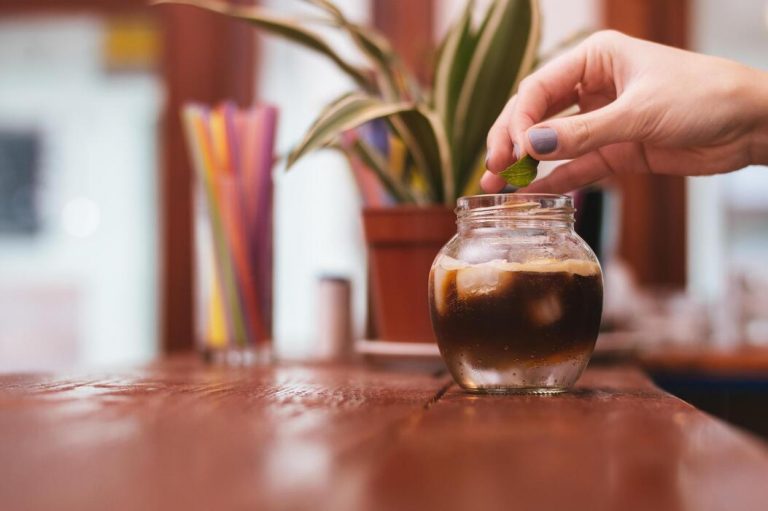
How to make a creamy Greek-style frappe
Using instant coffee for maximum foam
To achieve that iconic, thick layer of foam characteristic of a Greek-style frappe, you must start with the right base. Unlike ground beans, spray-dried instant coffee contains specific proteins and minimal oils, which are essential for creating a stable, meringue-like structure when agitated.
Begin by adding two teaspoons of your preferred instant coffee into a tall glass or a specialized mixing vessel. Add just enough cold water to cover the granules—usually about two tablespoons. This high concentration is the secret to a dense froth that won’t dissipate quickly.
Using a handheld milk frother or a dedicated frappe mixer, whip the mixture until it transforms from a dark liquid into a stiff, light-caramel foam that clings to the sides of the glass. This foundational step ensures your cold coffee has a luxurious mouthfeel that rivals any professional cafe offering.
By mastering this ratio, you create a professional-grade base that supports the weight of ice and milk without losing its velvety, aerated texture during the drinking process.
The secret to the perfect sugar balance
Achieving the ideal sweetness in a Greek frappe is more than just a matter of taste; it is a structural necessity for the foam. In Greece, these drinks are traditionally categorized as sketos (plain), metrios (medium), or glykos (sweet).
For a perfectly balanced metrios frappe, add exactly two teaspoons of granulated sugar for every two teaspoons of coffee before you begin the foaming process. The sugar crystals act as an abrasive agent during mixing, helping to trap more air bubbles and stabilizing the foam’s integrity.
If you prefer a smoother, less bitter profile, adding the sugar at the start ensures it dissolves completely into the coffee concentrate, preventing a grainy texture at the bottom of your glass.
Remember that the addition of cold milk later will naturally mellow the intensity of the coffee, so it is often better to lean slightly sweeter during the initial mixing phase.
This careful calibration of ingredients creates a harmonious flavor profile where the bold coffee notes are complemented, rather than masked, by the sweetness.
Blending vs. shaking techniques
While both methods can produce a refreshing cold coffee, the choice between blending and shaking significantly impacts the final consistency of your frappe. Using an electric handheld mixer or a stationary frappe machine is the gold standard, as the rapid rotation creates a micro-foam that is incredibly smooth and long-lasting.
If you do not have a mixer, a tightly sealed cocktail shaker or a simple glass jar can serve as an effective alternative. When shaking by hand, you must use vigorous, vertical motions for at least thirty seconds to achieve a similar level of aeration.
Once your foam is ready, gently slide in several large ice cubes to chill the drink without immediately diluting it. Slowly pour cold water or milk down the side of the glass to preserve the thick foam layer on top.
The blending technique generally yields a more uniform, creamy result, whereas shaking provides a classic, rustic texture. Whichever method you choose, the goal is to maintain the separation between the dense, flavorful foam and the chilled liquid base for the ultimate experience.
Tips for flavoring your homemade cold coffee

How to make simple syrup at home
To achieve a professional sweetness in your cold coffee without any gritty sugar residue at the bottom of your glass, you should master the art of making a basic simple syrup. Start by combining equal parts granulated sugar and filtered water in a small saucepan over medium heat.
Stir the mixture constantly until the sugar completely dissolves and the liquid becomes perfectly clear, which usually takes about three to five minutes.
It is vital that you do not let the mixture reach a rolling boil, as this can alter the viscosity and create a thick caramel state that is difficult to pour.
Once the syrup is ready, remove it from the heat and let it cool to room temperature before transferring it into a glass jar. For a unique twist, you can infuse the syrup with herbs like mint or lavender while it is still warm.
This homemade sweetener integrates instantly into chilled liquids, ensuring every sip of your beverage is consistently delicious and perfectly balanced.
Best milk and dairy-free alternatives
The choice of whitener significantly impacts the mouthfeel and overall flavor profile of your homemade chilled brew. If you prefer traditional dairy, whole milk provides a creamy richness that stands up well to strong coffee concentrates.
However, for those seeking plant-based options, oat milk is widely considered the gold standard because its natural fats create a velvety texture similar to dairy. Almond milk offers a lighter, nutty finish but can sometimes separate in cold acidic environments, so look for barista-grade versions specifically designed for stability.
If you want a tropical flair, coconut milk adds a distinct sweetness that pairs beautifully with dark roasts. For the best results, always chill your milk thoroughly before adding it to your glass to maintain the ideal serving temperature.
Experimenting with different fat contents will help you find the perfect balance between the bold caffeine kick and a smooth, luxurious finish that mimics your favorite high-end cafe experience right in your own kitchen.
Adding spices and natural extracts
Elevating your beverage beyond standard sweetness is easy when you utilize the aromatic power of spices and extracts already found in your pantry.
For a warm, comforting undertone, try whisking a pinch of ground cinnamon or cardamom directly into your coffee grounds before brewing to allow the oils to infuse naturally.
If you prefer a cleaner finish, pure vanilla or almond extract can provide a sophisticated depth of flavor without the need for additional calories or heavy sugars. Just a few drops are usually enough to transform the entire drink.
Another expert tip is to add a tiny pinch of sea salt, which chemically suppresses bitterness and enhances the perception of the coffee’s natural chocolatey or fruity notes.
For those who enjoy a bit of zest, a small piece of orange peel expressed over the glass adds refreshing citrus oils that cut through the richness. These simple additions allow you to customize your drink to your exact palate preferences while keeping the ingredients natural and healthy.
Creative ways to upgrade your cold coffee
Making coffee ice cubes to save flavor
One of the most common frustrations when learning how to make cold coffee at home is dealing with a beverage that becomes watery as the ice melts.
To solve this, you should start making coffee ice cubes to preserve the integrity of your brew from the first sip to the last. Simply brew a fresh pot of your favorite roast, let it cool to room temperature, and pour the liquid into standard silicone ice trays.
For an extra layer of complexity, you can whisk in a touch of vanilla or a pinch of cinnamon before freezing. Once solid, these cubes act as a flavor reservoir; as they melt, they release more coffee instead of plain water.
This technique ensures your drink remains bold and caffeinated regardless of how slowly you drink it. It is a professional-grade hack that transforms a standard iced coffee into a premium experience.
By keeping a stash of these in your freezer, you are always ready for a refreshing, full-bodied treat without any dilution.
How to achieve a salted caramel finish
To elevate your homemade brew with a sophisticated edge, focus on mastering a salted caramel finish that rivals any high-end cafe. Start by drizzling high-quality caramel sauce along the inner walls of your glass before adding your ice and coffee.
The secret to a balanced flavor profile is the addition of flaky sea salt, which cuts through the intense sweetness and enhances the natural chocolate notes of the coffee beans.
You can create a quick DIY syrup by melting brown sugar with a splash of heavy cream and a generous pinch of salt, stirring until the mixture is smooth and glossy.
For a more integrated taste, stir the caramel directly into hot coffee before pouring it over ice to ensure it dissolves completely. This method prevents the syrup from clumping at the bottom of the glass.
The combination of savory and sweet creates a complex, indulgent layer that makes your morning routine feel like a special occasion. Experimenting with different salt varieties can further refine the specific flavor notes of your drink.
Topping your drink with homemade cold foam
The ultimate way to upgrade your beverage is by topping your drink with homemade cold foam, providing that sought-after velvety texture. You do not need expensive equipment to achieve this; a simple handheld milk frother or even a tightly sealed mason jar will work perfectly.
Combine skim milk or a barista-blend oat milk with a teaspoon of maple syrup or vanilla extract in a small container. Froth the mixture for about thirty seconds until it doubles in volume and becomes thick and creamy.
Slowly pour this aerated topping over your iced coffee, watching as it sits elegantly on the surface before slowly cascading down into the dark liquid. This creates a luxurious mouthfeel and visual appeal that defines a professional-style cold brew.
If you want to get creative, try adding a dash of cocoa powder or pumpkin spice to the milk before frothing.
This simple addition provides a rich, airy contrast to the sharp acidity of the coffee, making every glass look and taste like it was crafted by an expert barista in your own kitchen.
Common mistakes when making cold coffee
Why your coffee tastes bitter or sour
One of the most frequent errors when learning how to make cold coffee at home is using the wrong water temperature or steep time, leading to unpleasant flavors. If your brew tastes overly sharp or sour, it is likely under-extracted, meaning the water didn’t pull enough flavor from the beans.
Conversely, a harsh, dry bitterness often stems from over-extraction caused by steeping the grounds for too long, typically exceeding twenty-four hours. To achieve a smooth, chocolatey profile, you should monitor your steeping time closely, aiming for a sweet spot between twelve and eighteen hours at room temperature.
Additionally, ensure you are using filtered water to avoid chemical off-tastes from tap water minerals that can distort the delicate profile of your beans. Balancing these variables ensures your homemade concentrate remains refreshing and clean.
Avoid the temptation to use boiling water for cold brew; instead, stick to cool or ambient temperatures to prevent scorching the grounds and releasing unwanted acidic compounds that ruin the experience.
How grind size affects the final result
The texture of your coffee grounds is the most critical factor in determining the clarity and body of your cold beverage. A common mistake is using a fine grind intended for espresso or drip machines, which results in a muddy, silt-heavy cup that is difficult to filter.
For the best results at home, you must use a coarse, sea-salt-like grind to allow the water to flow freely around the particles during the long immersion process. This specific texture facilitates a slow, even extraction that highlights the bean’s natural sweetness without pulling out the heavy tannins.
If you find your coffee feels heavy or gritty on the tongue, invest in a quality burr grinder to ensure consistency across all particles. Proper filtration is also easier when the grounds are large, as they won’t clog your mesh or paper filters.
By avoiding pre-ground coffee which is often too fine, you gain control over the strength and cleanliness of your final concentrate, resulting in a professional-grade drink.
Proper storage times for fresh taste
Even the most perfectly brewed cold coffee will lose its vibrancy if it isn’t stored correctly in the refrigerator. Many home brewers make the mistake of leaving their concentrate in an open pitcher, which exposes the liquid to oxygen and fridge odors, leading to a stale or ‘flat’ flavor profile.
To maintain peak freshness, you should store your coffee in an airtight glass container like a mason jar or a specialized carafe. While cold brew is known for its longevity, you should aim to consume the concentrate within seven to ten days for the best sensory experience.
After this period, the oils in the coffee can begin to oxidize, creating a soapy or rancid aftertaste. If you have diluted your concentrate with water or milk already, that window shrinks significantly; diluted coffee should be finished within two days to prevent spoilage.
Labeling your containers with the brew date helps you track freshness and ensures every glass of cold coffee you pour at home tastes as crisp as the first.
Frequently Asked Questions
What is the easiest way to make cold coffee at home?
The simplest method is to brew a strong cup of regular hot coffee, let it cool to room temperature, and then pour it over a glass filled with ice cubes. Add your preferred milk and sweetener to taste for a quick refreshment.
How do I make cold brew coffee?
To make cold brew, combine coarsely ground coffee beans with cold water in a jar using a 1:4 ratio. Let it steep in the refrigerator for 12 to 24 hours, then strain the mixture through a coffee filter or fine-mesh sieve.
How can I prevent my cold coffee from becoming watery?
To avoid dilution, you can make coffee ice cubes by freezing leftover coffee in an ice tray. As these cubes melt in your drink, they add more coffee flavor instead of watering it down.
Can I use instant coffee to make cold coffee?
Yes, you can dissolve 1-2 tablespoons of instant coffee granules in a small amount of warm water first to ensure it blends smoothly. Once dissolved, fill the rest of the glass with cold milk or water and ice.
What is the best way to sweeten cold coffee?
Granulated sugar does not dissolve well in cold liquids, so it is best to use a simple syrup or liquid sweetener like maple syrup or honey. Alternatively, mix the sugar into the coffee while it is still hot before cooling it down.
How do I make a frothy iced latte at home?
Shake your cold milk vigorously in a mason jar for 30 seconds or use a handheld milk frother until it becomes bubbly. Pour the frothed milk over a concentrated shot of coffee or espresso and ice for a cafe-style texture.
Conclusion
Making delicious cold coffee at home is both simple and rewarding. By mastering basic techniques like cold brewing or chilling fresh espresso, you can enjoy cafe-quality beverages while saving money. Remember to experiment with different bean varieties, milk alternatives, and sweeteners to find your perfect signature blend. Grab your favorite mug, add some ice, and enjoy your refreshing homemade creation today.