How To Make Iced Coffee With Espresso
Craving a refreshing caffeine kick but not sure how to bridge the gap between hot shots and cold glass? Making iced coffee with espresso is easier than you think, and it tastes much better than watered-down leftovers. Whether you want a classic iced latte or a bold americano over ice, we have the perfect method for you. This guide will show you exactly how to brew, chill, and mix your espresso for a smooth, cafe-quality drink in minutes.
Essential tools and ingredients for iced espresso
Choosing the right espresso machine
To craft a professional-grade iced coffee, you must prioritize a machine capable of maintaining high pressure and temperature stability.
For home baristas, a semi-automatic espresso machine offers the most control over the extraction process, allowing you to fine-tune the grind size and tamping pressure to prevent a watery result when ice is added.
If convenience is your primary concern, a high-quality super-automatic machine or a Nespresso system can deliver consistent results with the touch of a button. Regardless of the model, ensure your equipment features a powerful heating element to pull a concentrated double shot that retains its flavor profile when diluted.
A machine with a dedicated hot water spout is also useful for pre-heating your portafilter. Investing in a machine with a built-in PID controller will guarantee the thermal precision necessary to avoid the bitterness that often ruins the refreshing nature of a cold espresso drink.
By selecting the right hardware, you establish a solid foundation for every iced beverage.
Best coffee beans for cold drinks
Selecting the appropriate bean is critical because cold temperatures can mute certain flavor notes. For iced espresso, a medium to dark roast is generally preferred as it provides a robust, chocolatey, or nutty backbone that stands up well against melting ice and milk.
Look for beans labeled as espresso blends, which are specifically roasted to handle high-pressure extraction without becoming overly acidic. If you prefer a more modern taste, a single-origin Ethiopian or Kenyan bean can offer bright, fruity acidity that transforms into a refreshing, tea-like quality when chilled.
Always prioritize freshly roasted whole beans and grind them immediately before brewing to preserve the delicate volatile oils that provide aroma and body. Avoid oily, over-roasted beans that may taste charred or ashy once cold.
By choosing a bean with a bold flavor profile, you ensure that the essence of the coffee remains the star of the show, even as the ice begins to dilute the concentrated shot over time.
Quality water and ice requirements
The purity of your water and the quality of your ice are often overlooked but are essential for a clean-tasting iced espresso. Since coffee is over ninety percent water, using filtered or bottled spring water is necessary to remove chlorine and minerals that can cause off-flavors or damage your machine.
When it comes to cooling your drink, the size and density of the ice cubes matter significantly. Large, solid cubes melt slower than crushed ice, preventing your espresso from becoming prematurely watered down and flavorless.
For the best experience, consider using ice made from filtered water to ensure no freezer odors migrate into your beverage. If you want to take your drink to the next level, you can even freeze espresso coffee into ice cubes, which keeps the drink strong until the very last sip.
Ensuring that your water is free of impurities and your ice is fresh will dramatically improve the clarity and crispness of your final iced coffee, making it a truly café-quality experience.
How to pull the perfect espresso shot
Grind size and dosing tips
To achieve the ideal foundation for iced coffee, you must start with a fine, powdery grind that resembles the texture of table salt. If your espresso tastes sour or watery when poured over ice, your grind is likely too coarse, allowing water to pass through too quickly.
Conversely, a grind that is too fine will result in a bitter, over-extracted shot that overpowers the refreshing nature of an iced beverage. For a standard double shot, aim for a dose of 18 to 20 grams of freshly roasted beans.
Using a digital scale is essential here to ensure precision, as even a half-gram deviation can significantly alter the flavor profile. By maintaining a consistent coffee-to-water ratio, typically 1:2, you create a concentrated liquid that retains its structural integrity and bold notes even as the ice begins to melt.
This careful preparation ensures your iced latte or Americano remains vibrant and flavorful throughout the entire drinking experience.
Tamping for consistent extraction
Proper tamping is the secret to preventing channeling, which occurs when water finds the path of least resistance through the coffee puck. To prepare your shot for an iced drink, distribute the grounds evenly in the portafilter before applying firm, level pressure of approximately 15 to 30 pounds.
The goal is to create a perfectly flat surface so the hot water saturates the grounds uniformly. If the puck is slanted, the water will flow unevenly, leading to a thin and unbalanced espresso that disappears when mixed with milk or cold water.
Use a calibrated tamper if you are a beginner to ensure you are applying the correct amount of force every time. Remember that the resistance created by a tightly packed puck is what generates the beautiful crema and rich oils necessary for a high-quality beverage.
A solid, level tamp ensures that every drop of espresso contributes to a smooth, chocolatey, and robust base that stands up perfectly against cold temperatures.
Timing your brew for maximum flavor
The duration of your extraction is critical when the espresso is destined to be chilled. Aim for a total extraction time of 25 to 30 seconds from the moment you engage the pump.
If the shot pulls too fast, it will lack the body needed to flavor the ice; if it takes too long, the resulting bitterness will become unpleasant as the drink cools.
Watch for the color transition from dark brown to a golden blond, known as blonding, which signals that you have extracted the best flavors.
Once the shot is pulled, some baristas prefer to pull the shot directly over a small amount of ice or use a chilled glass to lock in the volatile aromatic compounds immediately. This technique, often called a flash-chill, prevents the espresso from oxidizing and becoming acidic.
Monitoring your shot timing ensures a sweet, balanced profile that provides the perfect caffeine kick without the harshness often associated with poorly brewed cold espresso drinks.
Step-by-step guide to making basic iced espresso
Preparing your glass and ice
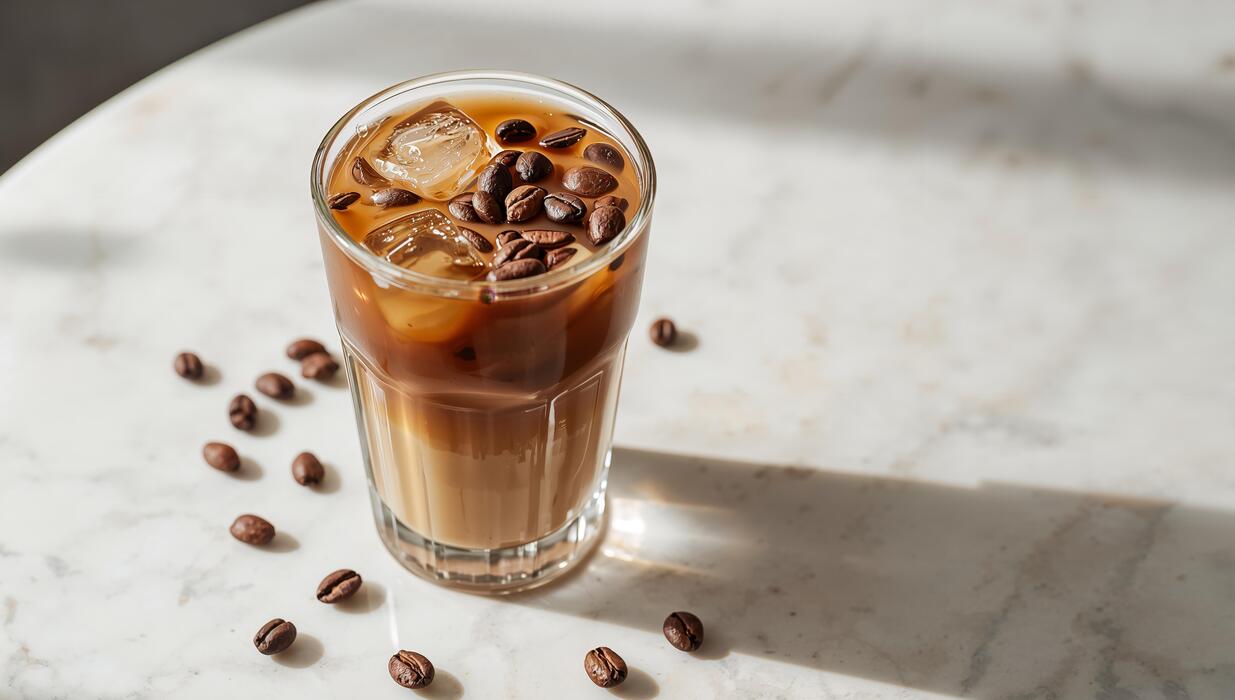
To begin your iced espresso journey, start by selecting a medium-sized glass, preferably one made of tempered glass or thick ceramic to handle temperature shifts.
Fill the glass to the brim with large, solid ice cubes rather than crushed ice; larger cubes have less surface area and melt more slowly, ensuring your drink remains concentrated.
For an enhanced experience, many enthusiasts recommend using coffee ice cubes made from leftover brews to prevent any watery residue as you sip.
Before brewing your espresso, place your prepared glass in the freezer for five minutes to give it a chilled foundation, which helps stabilize the temperature of the liquid immediately upon contact. Ensure your espresso machine is preheated and your portafilter is clean.
Having your vessel and ice ready before the extraction begins is crucial because espresso quality degrades quickly once the shot is pulled. This preparation phase sets the stage for a professional-quality beverage that retains its bold profile from the very first sip to the last.
The cooling process to avoid dilution
One of the biggest challenges when making iced espresso is preventing the hot liquid from melting the ice too quickly, which results in a weak, watery flavor.
To master the cooling process, pull your double shot of espresso into a separate small metal pitcher or a room-temperature ceramic cup rather than directly onto the ice. Allow the espresso to sit for roughly thirty seconds to let the initial intense heat dissipate slightly without losing the crema.
If you want a smoother texture, consider using a cocktail shaker; place the espresso and ice inside and shake vigorously for ten seconds. This technique aerates the coffee and chills it instantly, creating a frothy, cold liquid that can be strained over fresh ice.
By managing the thermal transition carefully, you preserve the intricate notes of the bean and ensure the caffeine kick isn’t diluted. This step is the secret to achieving that rich, syrupy mouthfeel that distinguishes a specialty cafe drink from a standard homemade iced coffee.
Mixing and serving instructions
Once your espresso is sufficiently chilled, pour it slowly over your fresh glass of ice. If you prefer a classic black iced espresso, simply give it a gentle stir with a long spoon to distribute the temperature evenly.
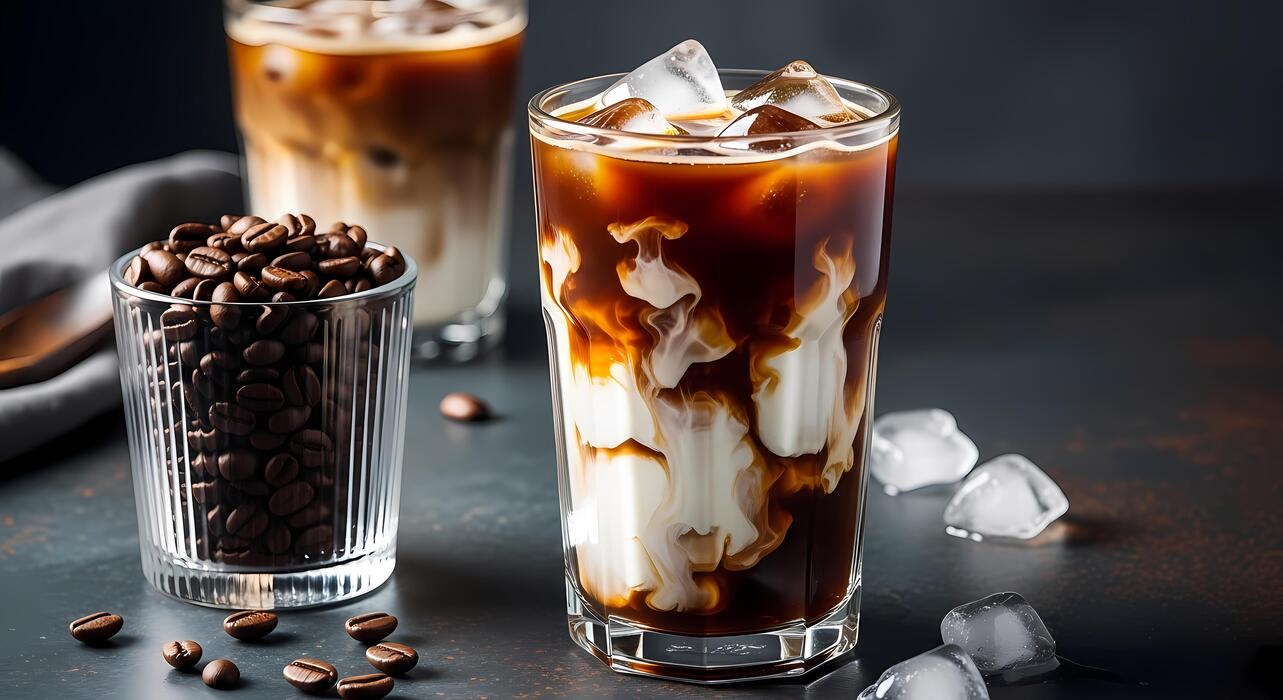
For those who enjoy a creamier beverage, this is the time to add your choice of cold milk or a splash of heavy cream; watch as the beautiful marble effect swirls through the dark coffee.
If you use sweeteners like simple syrup or flavored oils, stir them into the hot espresso before the cooling phase to ensure they dissolve completely and distribute evenly. Finally, consider a garnish like a dusting of cocoa powder or a twist of lemon peel to elevate the aroma.
Serve your creation immediately with a reusable straw to enjoy the layered textures and flavors. By following these specific mixing steps, you create a balanced, refreshing drink that highlights the espresso’s natural sweetness while providing a crisp, cooling sensation perfect for any time of the day.
Popular iced espresso variations to try at home
How to make an Iced Americano
To craft a refreshing Iced Americano, start by pulling two fresh shots of espresso into a small heat-proof vessel.
The secret to a crisp taste is diluting the espresso with cold water before adding it to the ice, which prevents the ice from melting too rapidly and watering down the profile.
Fill a tall glass with large, solid ice cubes and add approximately six to eight ounces of chilled filtered water. Slowly pour your espresso over the top to create a beautiful swirling effect. This method preserves the delicate crema and aromatic oils that define a high-quality espresso shot.
For those who prefer a touch of sweetness, incorporate a liquid sweetener like simple syrup while the espresso is still warm to ensure it dissolves completely.
You can also experiment with a pinch of sea salt to enhance the natural chocolatey notes of the beans, resulting in a sophisticated, low-calorie beverage that highlights the complex characteristics of your favorite coffee roast.
Classic Iced Latte techniques
Mastering the Iced Latte at home requires a careful balance between rich espresso and creamy milk. Begin by pulling a double shot of espresso and allowing it to cool slightly so it doesn’t immediately scald the dairy.
Fill a glass with plenty of ice and pour in about eight to ten ounces of your preferred milk or plant-based alternative, such as oat or almond milk. Pour the espresso directly over the milk, watching as the dark coffee slowly marbles through the white liquid.
To elevate the texture, consider using a handheld milk frother to create a light layer of cold foam on top, which adds a luxurious mouthfeel similar to café-style drinks. If you enjoy flavored lattes, add a tablespoon of vanilla or caramel syrup to the glass before the milk.
This technique ensures a consistent flavor profile throughout the drink, providing a smooth and satisfying experience that perfectly balances the bitterness of the espresso with the natural sweetness of the milk.
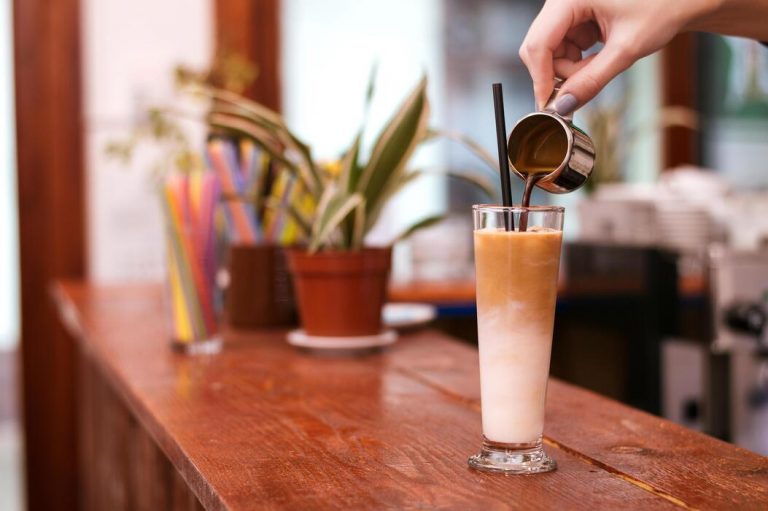
Making an Iced Shaken Espresso
The Iced Shaken Espresso is a trendy variation that focuses on aeration and temperature to create a unique texture. To start, brew two shots of espresso and immediately pour them into a cocktail shaker or a mason jar filled with ice.
Add your choice of sweetener, such as brown sugar or flavored syrup, directly into the shaker. Secure the lid and shake vigorously for about fifteen to twenty seconds until the liquid is thoroughly chilled and a thick, frothy foam develops on the surface.
Strain the mixture into a fresh glass filled with ice, making sure to include that signature micro-foam. Top the drink with a splash of half-and-half or oat milk for a creamy finish that complements the aerated coffee.
Shaking the espresso not only cools it instantly but also mellows the acidity, resulting in a bold yet incredibly smooth beverage. This method is ideal for those who want a strong caffeine kick with a refined, velvety texture that feels like a professional treat.
Best ways to sweeten and flavor your drink

Simple syrup vs. granulated sugar
When sweetening iced coffee made with espresso, the physical state of your sweetener determines the final texture and consistency of your drink.
Because espresso is hot when pulled but rapidly cools when hitting ice, granulated sugar often fails to dissolve completely, resulting in a gritty residue at the bottom of your glass. To avoid this, use simple syrup which integrates instantly regardless of temperature.
You can easily make a basic version by simmering equal parts water and sugar until clear. If you prefer the flavor profile of granulated options like cane or brown sugar, ensure you stir them into the hot espresso shot before pouring it over the ice.
This heat-induced dissolution ensures a smooth mouthfeel. Using a liquid sweetener allows for consistent sweetness throughout every sip, preventing the common issue of an oversweet finish. Experimenting with different sugar-to-water ratios in your syrups can also help you control the viscosity and density of your homemade iced lattes.
Using natural extracts and spices
Enhancing your iced espresso drinks does not always require high-calorie sugars; natural extracts and pantry spices offer a sophisticated depth of flavor.
A few drops of pure vanilla or almond extract added directly to your milk or espresso can transform a standard drink into a gourmet experience without adding any actual sugar.
For those who enjoy warmth and complexity, try shaking ground cinnamon or cardamom with your espresso and ice in a cocktail shaker. The aeration process helps the spices emulsify with the natural oils of the coffee, creating a fragrant foam.
Another excellent technique is to infuse your milk or cream with orange zest or a pinch of sea salt to brighten the citrus notes of the coffee beans. These natural additions are perfect for those who want to highlight the inherent roast profile of the espresso rather than masking it.
By utilizing these aromatic elements, you create a multi-dimensional beverage that feels indulgent yet remains relatively light and refreshing for daily consumption.
Top flavored syrups for espresso
The bold, concentrated nature of espresso makes it the perfect canvas for professional-grade flavored syrups that mimic a cafe environment at home. Classic choices like caramel, hazelnut, and vanilla remain the most popular because they balance the natural bitterness of the dark roast with creamy, toasted notes.
If you want to elevate your iced coffee, consider richer sauces like white chocolate or mocha, which add body and a velvety texture to the drink.
When using these, it is best to drizzle the syrup along the sides of the glass before adding ice to ensure an aesthetic presentation and even distribution. Seasonal variations such as lavender or salted caramel can also provide a unique twist to your routine.
Always remember that espresso is intense, so start with one tablespoon of syrup and adjust according to your preference. High-quality syrups made with real cane sugar provide a cleaner finish than those using corn syrup, ensuring your iced espresso maintains its premium taste without a chemical aftertaste.
Tips for preventing watery iced coffee
Making and using coffee ice cubes
One of the most effective ways to ensure your iced espresso never tastes diluted is to replace standard water ice with frozen coffee cubes.
To start, brew an extra batch of your favorite espresso or strong drip coffee and allow it to reach room temperature before pouring it into silicone ice trays.
By using coffee-based cubes, you ensure that as the ice melts into your drink, it actually reinforces the caffeine content and flavor profile rather than washing it away.
For an even more indulgent experience, you can experiment by adding a touch of vanilla or simple syrup to the coffee before freezing, creating a flavor-enhancing melt that evolves as you sip.
This proactive step eliminates the rush to finish your drink before it becomes watery, allowing you to enjoy the rich, bold notes of your espresso until the very last drop. It is a simple preparation step that completely transforms the longevity and quality of your homemade iced beverages.
The flash-chilling method
The flash-chilling technique, often associated with Japanese-style brewing, is a superior way to preserve the delicate aromatics of espresso without the risk of over-dilution. Instead of letting your hot espresso sit out and oxidize, you should brew your shots directly over a measured amount of ice.
This immediate temperature drop locks in the bright acidity and complex oils that are often lost during slow cooling.
To master this, you must account for the meltwater as part of your total liquid volume, essentially using the ice to both chill and stretch the concentrated espresso into a balanced beverage.
Use a cocktail shaker to further aerate the mixture, which creates a luxurious frothy texture while cooling the liquid to sub-zero temperatures in seconds. This method is far more efficient than traditional cooling and ensures that your iced coffee remains crisp and vibrant.
By controlling the thermal shock, you achieve a professional-grade result that rivals any high-end cafe offering.
Optimal ice-to-coffee ratios
Achieving the perfect balance in an iced espresso drink requires a strategic approach to the ratio of ice to liquid. A common mistake is using too little ice, which causes the cubes to melt rapidly and saturate the espresso with excess water.
Instead, you should fill your glass to the brim with large, dense ice cubes before pouring your shots. Larger cubes have less surface area than crushed ice, meaning they melt much slower while providing maximum cooling power.
For a standard double shot of espresso, aim for approximately six to eight ounces of ice to ensure the beverage stays cold without becoming thin. If you are adding milk or sweeteners, pour them over the ice first to create a thermal buffer before the hot espresso hits the glass.
This layering technique helps maintain the structural integrity of the ice, keeping your drink bold and concentrated. Monitoring these proportions carefully will guarantee a consistently flavorful experience every time you brew at home.
Common mistakes when making iced espresso
Adding hot espresso directly to thin ice
One of the most frequent errors when learning how to make iced coffee with espresso is pouring a hot double shot directly over a handful of small, thin ice cubes.
This immediate thermal shock causes the ice to melt instantly, resulting in a watery, flavorless beverage that lacks the rich body expected from an espresso-based drink.
To fix this, you should always use large, solid ice cubes that have a lower surface-area-to-volume ratio, as they melt much slower and preserve the integrity of the brew.
Additionally, try chilling your glassware in the freezer beforehand or using a cocktail shaker to flash-chill the espresso with ice before straining it into a fresh glass. This method ensures your drink stays cold without becoming overly diluted.
By controlling the dilution rate, you maintain the intense aromatic profile of the beans while achieving the refreshing temperature required for a perfect summer beverage that remains bold from the first sip to the very last drop.
Using the wrong milk-to-coffee balance
Achieving the perfect iced espresso requires a delicate equilibrium between the concentrated coffee and your choice of dairy or plant-based alternative. Many home baristas make the mistake of filling a large glass with milk and adding only a single shot, which completely masks the nuanced notes of the roast.
To create a professional-grade drink, you should maintain a specific ratio of roughly one part espresso to two or three parts milk.
If you prefer a larger drink, it is essential to increase the shot count rather than simply adding more liquid, which prevents the coffee from tasting like flavored milk.
Furthermore, remember that ice takes up significant volume in the glass; account for this by measuring your ingredients precisely before combining them.
Using full-bodied milks like whole milk or barista-edition oat milk can also help enhance the creamy texture, ensuring the espresso remains the star of the show while providing a smooth, balanced mouthfeel that isn’t overwhelmed by excessive dilution or heavy creamers.
Over-extracting the beans
When making iced coffee, many people mistakenly believe they need to over-extract their espresso to make it taste stronger against the melting ice. This leads to a common pitfall: pulling a shot for too long, which introduces harsh, burnt, and astringent flavors into the cup.
Because cold temperatures can actually highlight bitterness, it is vital to dial in your grind size to achieve a standard twenty-five to thirty-second extraction. Instead of over-extracting, you should use a darker roast or a higher dose of coffee grounds to achieve a bolder profile without the unpleasant acidity.
If your drink tastes too sharp once chilled, adjust your brew temperature slightly lower to mellow out the finish. Mastering the extraction process ensures that even as the ice begins to melt, the natural sweetness and complex oils of the espresso remain prominent.
By focusing on quality extraction rather than sheer volume, you produce a clean, sophisticated iced coffee that rivals the best specialty cafes while avoiding the common trap of bitterness.
Frequently Asked Questions
What is the basic method for making iced coffee with espresso?
To make a standard iced espresso, brew one or two shots of espresso directly into a glass or a small pitcher. Fill a separate glass with fresh ice and pour the hot espresso over it, then top with cold water or milk depending on your preference.
How do I prevent the ice from melting too quickly and watering down the drink?
You can minimize dilution by using ‘flash chilling’ techniques, such as shaking the espresso with ice in a cocktail shaker before straining it into a fresh glass of ice. Alternatively, use coffee ice cubes made from frozen leftover coffee so that as they melt, they add more flavor instead of water.
Should I add sugar or sweeteners before or after adding ice?
It is best to add granulated sugar or thick syrups to the espresso while it is still hot so they dissolve completely. If the drink is already cold, use a liquid sweetener like simple syrup or agave nectar to ensure an even distribution of sweetness.
What is the difference between an Iced Americano and an Iced Latte made with espresso?
An Iced Americano consists of espresso shots topped with cold water and ice, resulting in a bold, coffee-forward taste. An Iced Latte uses espresso combined with a larger volume of cold milk and ice, creating a creamier and more mellow flavor profile.
Can I make iced coffee with espresso if I don’t have an espresso machine?
Yes, you can use a Moka pot or an AeroPress to create a highly concentrated coffee concentrate that mimics the intensity of espresso. Simply brew using a higher coffee-to-water ratio and pour the resulting concentrate over ice.
How many shots of espresso should I use for a standard iced coffee?
A standard 12-ounce iced coffee typically uses two shots of espresso (a double shot) to ensure the coffee flavor remains strong once ice and mixers are added. For a larger 16-ounce or 20-ounce drink, three or four shots may be necessary to maintain the desired strength.
Conclusion
Mastering iced coffee with espresso is a simple yet rewarding skill that elevates your daily caffeine routine. By focusing on quality beans, cooling your shots quickly, and experimenting with syrups or milks, you can achieve a professional-grade beverage at home. Don’t be afraid to adjust the ratios to suit your personal taste. Now that you have the techniques, it is time to grab your machine, get creative, and enjoy your perfectly chilled, refreshing creation.