How To Remove Coffee Stain From Mug
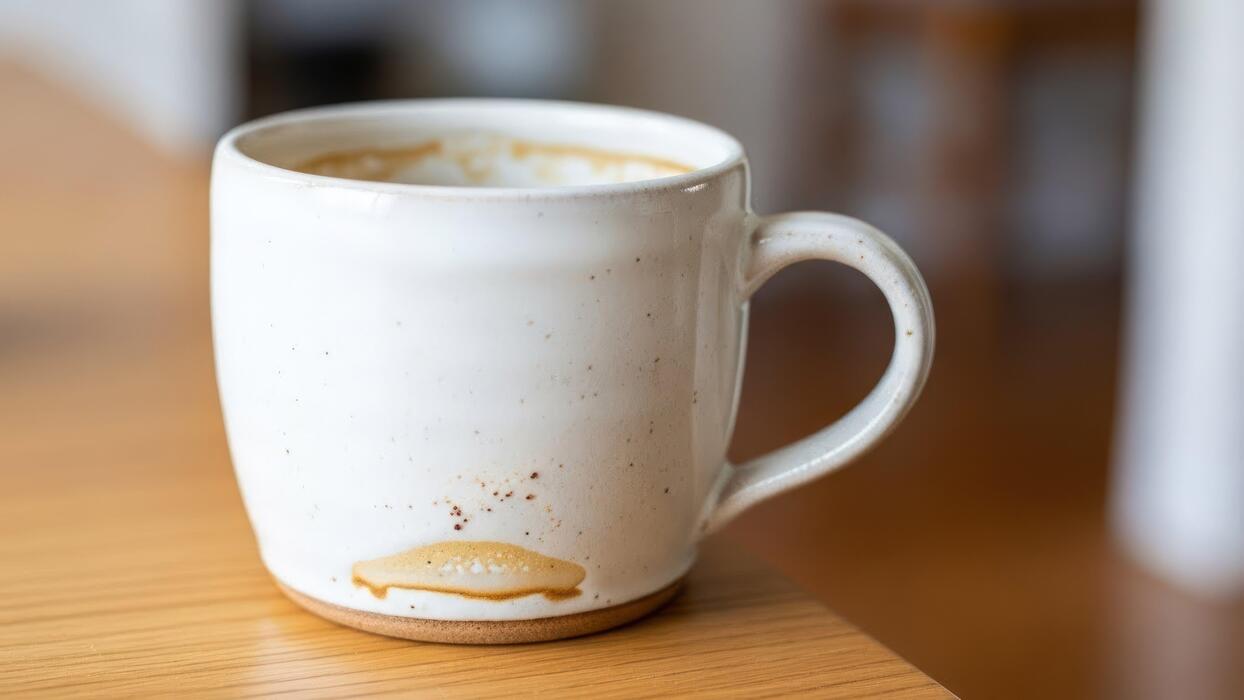
If you’ve been searching for how to remove coffee stain from mug, you’re likely tired of scrubbing stubborn brown rings without results. The real culprit is tannin buildup, which bonds to porous ceramic. You’ve come to the right place—this guide cuts through the noise with simple, effective methods using common household ingredients.
Why Coffee Stains Form on Mugs
Tannins in coffee cause discoloration
Coffee contains natural compounds called tannins, which are responsible for the deep brown stains that form on your mug. When coffee is brewed, these tannins are released and can bind to the surface of your cup, especially if left to sit.
The discoloration appears because tannins are highly pigmented and sticky, clinging to the mug even after you drink the coffee. To prevent this, rinse your mug immediately after use to remove leftover coffee residue before it dries.
If a stain has already formed, use a paste of baking soda and water—apply it with a sponge, scrub gently, and rinse. The mild abrasiveness lifts the tannins without scratching.
For stubborn stains, soak the mug in a solution of equal parts white vinegar and hot water for 15–30 minutes, then wash as usual. This breaks down the tannins, making removal easy.
Porous mug materials trap stains
Many mugs, especially those made of ceramic, stoneware, or porcelain, have microscopic pores that trap coffee particles. Over time, these pores absorb the dark pigments, leading to persistent stains that seem impossible to remove.
The key is to clean your mug while it’s still warm—heat opens the pores, allowing easier stain removal. For effective cleaning, mix baking soda with a little water to form a thick paste, then rub it into the stained areas with a soft cloth or sponge.
Let it sit for 10 minutes to penetrate the pores before rinsing. Alternatively, use hydrogen peroxide (3% solution) by pouring a small amount into the mug and letting it soak for 20 minutes. This oxidizes the stains without damaging the mug.
Avoid harsh scrubbing pads that can create more pores over time, worsening the problem.
Repeated use without thorough cleaning
When you drink coffee daily but only give your mug a quick rinse, residue builds up layer by layer. This repeated use without deep cleaning allows tannins and oils to bond firmly to the mug’s surface, creating a dark ring that becomes harder to remove.
To break this cycle, clean your mug thoroughly after every use—not just with water but with a mild dish soap and a non-abrasive sponge. For existing stains, try denture cleaning tablets: drop one into a mug filled with hot water, let it fizz for 15 minutes, then rinse.
The effervescence lifts stubborn deposits. Another effective method is using a lemon slice with salt—rub it directly on the stain, let it sit for 5 minutes, and wash. This natural acid cuts through built-up residue. Consistency is key: a quick scrub after each use prevents stains from setting in permanently.
How to Remove Coffee Stains with Baking Soda

Make a baking soda paste
To effectively lift coffee stains from your mug, start by creating a simple yet powerful paste. In a small bowl, combine two to three tablespoons of baking soda with just enough water to form a thick, spreadable consistency.
The mixture should be similar to toothpaste—not too runny, as it needs to cling to the vertical sides of the mug. For stubborn, set-in stains, you can substitute the water with white vinegar for an extra cleaning boost; the fizzing reaction helps loosen the discoloration.
This paste works because baking soda is a mild abrasive that gently scrubs away residue without scratching ceramic, glass, or stainless steel. Avoid using metal spoons for mixing if your mug is delicate; instead, use a plastic or silicone utensil.
Ensure the paste is smooth and free of dry clumps, which could leave scratches. If your mug has a narrow base, prepare a bit more paste to coat the entire stained area evenly. This simple, non-toxic solution is safe for daily use and costs pennies compared to specialized cleaners.
Scrub the stain with a sponge
Once your baking soda paste is ready, apply it generously to the stained interior of the mug. Using a damp, non-abrasive sponge or soft cloth, gently scrub the affected areas in circular motions. Focus on the bottom and sides where coffee oils tend to cling and create brown rings.
The paste acts as a gentle grit that lifts the stain without scratching the mug’s surface. For tougher, older stains, let the paste sit on the mug for 5 to 10 minutes before scrubbing to allow the baking soda to penetrate and break down the residue.
Apply light to medium pressure—scrubbing too hard can damage decorative prints or glossy finishes. If you’re cleaning a travel mug or thermos with a narrow opening, use a bottle brush or a sponge attached to a long handle to reach all areas.
For extra stubborn spots, sprinkle a tiny bit of dry baking soda onto the wet sponge to boost abrasiveness. Always rinse the sponge frequently to avoid reapplying loosened stain particles back onto the mug.
Rinse and repeat if needed
After scrubbing, thoroughly rinse the mug under warm running water to remove all traces of the baking soda paste. Use your fingers or a clean sponge to feel for any remaining grittiness. Inspect the mug under good lighting—if any brownish residue or ring remains, don’t worry.
Simply repeat the paste application and scrubbing process as needed. Stubborn stains, especially those from multiple uses without immediate rinsing, may require two or three rounds. For a final boost, try adding a drop of liquid dish soap to the paste on the second attempt.
If the stain persists after several tries, consider letting the paste sit for 15–20 minutes before scrubbing again. Once satisfied, dry the mug with a clean towel to reveal a spotless surface. This method works on all mug materials, including porcelain, stoneware, and glass.
For daily maintenance, a quick baking soda scrub once a week prevents stains from setting in, keeping your mugs looking like new.
Best Ways to Use White Vinegar for Stubborn Stains
Soak the mug in vinegar solution
For a simple yet effective first step, fill the stained mug with equal parts white vinegar and hot water. Let the solution sit for at least 30 minutes, or up to an hour for set-in stains.
The acetic acid in vinegar breaks down the coffee tannins that cling to the ceramic or glass surface. After soaking, pour out the mixture and scrub the mug with a soft sponge or bottle brush. Focus on the bottom and sides where residue often hides.
Rinse thoroughly with warm water to remove any vinegar smell. This method works best for light to moderate stains and is gentle on your mugs. For a quicker fix, you can microwave the vinegar-water solution for one minute (if the mug is microwave-safe) to boost the cleaning action.
Always let it cool before handling. This soak is a non-toxic, budget-friendly alternative to harsh chemical cleaners, leaving your mug fresh and stain-free.
Add baking soda for extra fizz action
When a simple soak isn’t enough, combine white vinegar with baking soda for a powerful fizzing reaction. Start by sprinkling a tablespoon of baking soda directly into the stained mug. Then, pour in enough white vinegar to cover the stain—about a quarter cup.
The bubbling action helps lift stubborn coffee residue from the porous surface. Let it fizz for 5 to 10 minutes, then scrub vigorously with a non-abrasive sponge or a dedicated mug brush. The baking soda acts as a mild abrasive while the vinegar dissolves oils and tannins.
Rinse well with hot water. For extra stubborn rings, make a paste of baking soda and a few drops of vinegar, apply it to the stain, and let it sit for 15 minutes before scrubbing.
This combination is safe for most mugs and eliminates the need for bleach or harsh chemicals. Repeat if necessary, and your mug will look like new.
Boil vinegar for deep cleaning
For deeply set or old coffee stains that resist other methods, boiling white vinegar in the mug provides intense deep cleaning. Fill the mug with undiluted white vinegar and place it in a small saucepan filled with water (to avoid direct heat on the mug).
Alternatively, if the mug is stovetop-safe, you can heat the vinegar directly on low heat. Bring the vinegar to a gentle boil for 2–3 minutes, then turn off the heat and let it cool completely. The heat activates the vinegar’s acidity, breaking down the toughest tannin deposits.
After cooling, scrub the mug with a sponge; the stain should lift easily. Rinse thoroughly with hot soapy water to remove any vinegar residue. This method is highly effective for ceramic, glass, and stainless steel mugs.
Be cautious with delicate materials like hand-painted or metallic-trimmed mugs, as boiling may damage them. Always ventilate the area, as boiling vinegar produces strong fumes. Your mug will emerge sparkling clean and odor-free.
Tips for Removing Coffee Stains with Lemon Juice
Apply lemon juice directly to the stain
To effectively lift a coffee stain from your mug, start by applying fresh lemon juice directly onto the affected area. Squeeze a lemon or use bottled lemon juice, ensuring the stain is fully saturated.
The citric acid in lemon juice acts as a natural bleaching agent, breaking down the tannins in coffee that cause discoloration. For best results, use a sponge or soft cloth to dab the juice into the stain, avoiding harsh scrubbing that could scratch delicate surfaces like ceramic or porcelain.
If the stain is stubborn, consider warming the lemon juice slightly (not boiling) to enhance its cleaning power. This method is especially effective for white or light-colored mugs, as the acid gently lifts the stain without harsh chemicals.
Remember to rinse the mug thoroughly with water after treatment to remove any residual acid, which could affect the taste of your next drink. This simple, eco-friendly step is a great first move in your coffee stain removal routine.
Use salt as a gentle abrasive
After applying lemon juice, enhance its stain-fighting power by using salt as a gentle abrasive. Sprinkle a small amount of table salt or coarse salt directly onto the lemon juice-coated stain. The salt granules provide mild scrubbing action that helps dislodge coffee residue without scratching the mug’s surface.
Use your fingers or a soft sponge to gently rub the salt in circular motions over the stain. The combination of lemon juice’s acidity and salt’s abrasiveness creates a powerful yet safe cleaning paste. For tougher stains, add a bit more lemon juice to form a thicker paste.
This method works well on ceramic, glass, and stainless steel mugs, but avoid using on non-stick or painted surfaces. After scrubbing for about 30 seconds, let the mixture sit for a minute before rinsing. The salt not only aids in removal but also neutralizes odors, leaving your mug fresh.
This step is a cost-effective alternative to commercial cleaners.
Let it sit before scrubbing
Patience is key when using lemon juice to remove coffee stains. After applying the juice and salt, let the mixture sit for 10–15 minutes before scrubbing. This waiting period allows the citric acid to penetrate the stain, breaking down the coffee residue more effectively.
Cover the stained area with a small piece of plastic wrap or a damp paper towel to keep the mixture from drying out, which can reduce its effectiveness. During this time, the acid works to dissolve the tannins that cause discoloration, making the stain easier to lift.
Avoid the temptation to scrub immediately, as this can spread the stain or push it deeper into the mug’s pores. After the sitting period, use a soft sponge or brush to gently scrub the area in circular motions.
Rinse thoroughly with warm water to remove all traces of lemon and salt. This step ensures a thorough, deep clean without damaging your mug, restoring its original shine.
How to Clean Coffee Stains with Denture Tablets

Drop a tablet into warm water
Begin by filling your stained mug with warm water — not boiling, as extreme heat can crack ceramics or affect some glazes. The water level should be high enough to fully submerge the coffee stain, typically just below the rim.
Take one denture cleaning tablet (effervescent type works best) and drop it directly into the water. You’ll immediately see fizzing action as the tablet dissolves, releasing active oxygen-based cleaning agents that target organic stains like coffee.
Let the tablet fully dissolve for about 30 seconds; do not stir or agitate the water. These tablets are designed to break down tough residues without scrubbing, making them ideal for delicate mug surfaces.
For heavily stained mugs, consider using two tablets or a slightly warmer water temperature (not exceeding 120°F) to enhance the cleaning power. The fizzing process lifts stains from porous ceramic and glass, reaching areas a sponge can’t.
This method is especially effective for white or light-colored mugs where coffee discoloration is most visible. Always ensure the mug is empty before starting and check that the tablet is completely dissolved before proceeding to the next step.
Soak the mug for 15-30 minutes
Once the tablet has fully dissolved, allow the mug to soak undisturbed for 15 to 30 minutes. This duration gives the oxygenating solution enough time to penetrate and break down coffee tannins that have bonded to the mug’s surface.
For stubborn, set-in stains, extend the soak to 45 minutes, but avoid exceeding one hour to prevent any potential dulling of glossy finishes. During this time, you may notice the water turning a brownish hue — that’s the dissolved coffee residue being lifted away.
The effervescent action continues to work on micro-pores in ceramic or glass, releasing trapped particles. For best results, position the mug so the stained area is fully submerged; if the stain is on the rim or handle, rotate the mug halfway through the soak.
This method is chemical-free and gentle, making it safe for daily-use mugs. The soak process is passive, so you can multitask — just set a timer. For extra tough stains, you can gently swirl the mug every 10 minutes to redistribute the solution.
After the soak, you’ll see a visible difference as the stain loosens or disappears entirely.
Rinse thoroughly after cleaning
After soaking, discard the used solution and rinse the mug under warm running water for at least 15-20 seconds. Use a soft sponge or cloth to gently wipe the interior, removing any lingering residue or dissolved stain particles.
Pay extra attention to the bottom and rim where coffee buildup often hides. For stubborn spots, a quick scrub with baking soda on a damp sponge can polish the surface without scratching. Avoid harsh abrasives that might damage the glaze.
Finally, wash the mug with mild dish soap and warm water to eliminate any remaining cleaning agents or odors. Dry the mug with a clean towel or let it air dry upside down.
This step ensures no chemical taste or smell remains, making the mug safe for your next cup of coffee. If any faint stain persists, repeat the process with a fresh tablet — denture tablets are non-toxic and safe for repeated use.
The result is a sparkling, stain-free mug that looks like new, saving you from buying replacements. This method is also effective for tea stains and hard water marks.
What to Do for Stains on Ceramic vs. Glass Mugs
Use non-abrasive cleaners for ceramic
For ceramic mugs, which are porous and can absorb stains, baking soda is your best friend. Create a paste by mixing three parts baking soda with one part water, then apply it to the dampened stain using a soft cloth or sponge.
Let it sit for 15-20 minutes to lift the coffee residue without scratching the glossy finish. For stubborn stains, add a few drops of white vinegar to the paste—the fizzing action helps break down tannins.
Avoid bleach or abrasive powders, as they can damage the ceramic glaze over time, making future stains harder to remove. After scrubbing gently in circular motions, rinse thoroughly with warm water.
For daily maintenance, fill the mug with warm water and drop in a denture-cleaning tablet or a teaspoon of baking soda; let it soak for an hour. This routine prevents stains from setting in, keeping your ceramic mugs looking bright.
Remember, the glaze is a protective layer—treat it gently to preserve its shine.
Avoid harsh scrubbing on glass
Glass mugs are non-porous but prone to scratching, which can create tiny grooves where coffee stains cling. Never use steel wool, scouring pads, or gritty powders on glass, as they leave micro-scratches that dull the surface and trap residue.
Instead, fill the mug with hot water and add a few drops of dish soap or a splash of white vinegar; let it soak for 30 minutes to loosen the stain.
For persistent rings, rub the inside with a dampened paper towel dipped in baking soda or a small amount of non-gel toothpaste—both are mild abrasives that won’t scratch. Rinse with hot water and dry with a lint-free cloth to avoid water spots.
If stains remain, try a half lemon dipped in salt; the acid cuts through coffee oils, while the salt provides gentle friction. Avoid sudden temperature changes, like pouring boiling water into a cold glass mug, as this can cause cracking. With proper care, glass mugs stay crystal clear and stain-free.
Test methods on a small area first
Before applying any cleaning method to the entire stain, always test it on a small, inconspicuous area of the mug—such as the bottom rim or inside near the handle.
This precaution is crucial for both ceramic and glass mugs, as some cleaners may react with decorative paints, metallic finishes, or etched designs. For ceramic mugs, apply a dab of your chosen paste (like baking soda and water) to the test spot, let it sit for five minutes, then rinse.
Check for discoloration, fading, or a dulled sheen. For glass mugs, test with a diluted vinegar solution or mild abrasive on a hidden spot to ensure it doesn’t etch the surface. If the test area looks unchanged, proceed with confidence.
If you notice any damage, switch to a gentler method, such as a longer soak in warm, soapy water. This simple step saves you from ruining a favorite mug and ensures your cleaning approach is safe for the specific material and finish.
How to Prevent Coffee Stains from Returning
Rinse mugs immediately after use
The most effective way to prevent coffee stains from returning is to rinse your mug immediately after finishing your drink. Coffee contains tannins that bond to ceramic surfaces as they dry, creating stubborn brown rings.
By quickly swishing hot water around the mug within minutes of use, you wash away these residue particles before they have a chance to set. This simple habit eliminates the need for harsh scrubbing later.
For best results, use very hot water and a soft sponge to gently wipe the interior, focusing on the bottom and rim where stains typically form. If you cannot rinse right away, at least fill the mug with water to dilute the remaining coffee.
Over time, this practice keeps your mugs looking new and reduces buildup. Make it a routine: after your last sip, head to the sink immediately. Even a quick 10-second rinse significantly cuts down on stain recurrence, saving you effort and preserving the appearance of your favorite cups.
Use a dishwasher with high heat
Leveraging a dishwasher with a high-heat drying cycle is a powerful strategy to keep coffee stains at bay. The intense heat, typically around 140-160°F, helps break down and flush away coffee oils and tannins that manual washing might miss.
Place mugs on the top rack, angled downward to prevent water pooling, which can lead to spots. Choose a cycle that includes a sanitize or high-temperature rinse to maximize stain removal and prevention. The hot water and detergent work synergistically to dissolve residue before it bakes onto the surface.
Additionally, ensure your dishwasher’s filter is clean to avoid redepositing grime onto mugs. For best results, run a load with mugs every few days rather than letting them sit. This consistent high-heat cleaning not only removes existing stains but also creates a smooth surface that resists future adhesion.
Avoid overcrowding to allow proper water circulation, and always use a rinse aid to prevent mineral deposits that can mimic stains.
Apply a protective coating to porous mugs
For porous ceramic or stoneware mugs, applying a food-safe protective coating can create a barrier that repels coffee stains. These mugs often have microscopic cracks where tannins lodge, making stains persistent.
Start by thoroughly cleaning and drying the mug, then use a clear, non-toxic sealant designed for dishware, such as a ceramic sealer or beeswax-based product. Apply a thin, even layer to the interior, following manufacturer instructions, and let it cure fully. This coating fills pores, preventing coffee from penetrating deeply.
Reapply every few months, as wear from washing diminishes effectiveness. Alternatively, consider seasoning the mug by rubbing it with a thin layer of vegetable oil and baking it at 300°F for 30 minutes to create a natural non-stick surface. Always test a small area first to ensure compatibility.
This proactive measure is ideal for handmade or textured mugs, keeping them stain-free longer and simplifying future cleaning. It’s a small investment of time that pays off in lasting mug beauty.
Frequently Asked Questions
What is the fastest way to remove coffee stains from a mug?
The fastest method is to sprinkle baking soda directly onto a damp sponge or cloth, then scrub the stained mug in circular motions. Rinse thoroughly with warm water. This works because baking soda is a mild abrasive that lifts the stain without scratching most mug surfaces.
How do I remove stubborn, old coffee stains from inside a ceramic mug?
For stubborn stains, make a paste of equal parts baking soda and white vinegar (about 1 tablespoon each). Apply the paste to the stain, let it sit for 5–10 minutes, then scrub with a sponge or soft brush. Rinse well. The chemical reaction helps break down the tannins in the coffee.
Can I use bleach to remove coffee stains from a mug?
Yes, but only on white or dishwasher-safe ceramic mugs. Mix 1 part bleach with 10 parts water, soak the mug for 15–30 minutes, then scrub and rinse thoroughly. Never use bleach on colored or decorative mugs, as it can damage the finish or pattern.
Does lemon juice or salt work for coffee stain removal?
Yes, both are effective. Sprinkle salt on the stain, then rub with a cut lemon half. The acid in the lemon helps dissolve the stain, while the salt acts as a gentle abrasive. Rinse well afterward. This is a natural and safe method for most mugs.
How do I remove coffee stains from a stainless steel mug?
Avoid abrasive cleaners that can scratch the metal. Instead, fill the mug with hot water and add a denture cleaning tablet (like Efferdent). Let it fizz for 15–20 minutes, then rinse. Alternatively, scrub with a paste of baking soda and water using a soft cloth.
Can I put a stained mug in the dishwasher to remove coffee stains?
The dishwasher may not fully remove set-in stains, especially on plastic or ceramic mugs. For best results, pre-treat the stain with a baking soda paste or vinegar soak before running the mug through a normal dishwasher cycle. Avoid high heat if the mug is plastic.
How do I prevent coffee stains from forming on mugs?
Rinse your mug immediately after use with warm water to remove coffee residue. For daily use, occasionally soak mugs in a solution of water and white vinegar (1:4 ratio) for 30 minutes to prevent buildup. Avoid letting coffee dry inside the mug.
What should I avoid when trying to remove coffee stains from a mug?
Avoid using harsh metal scrubbers or steel wool on ceramic or glass mugs, as they can scratch the surface. Also, do not use bleach on colored, hand-painted, or metallic-trimmed mugs, as it can damage the design. Always test a small area first with any new method.
Conclusion
Removing coffee stains from your favorite mug is simple using everyday items like baking soda, vinegar, or lemon juice. Remember to scrub gently with a non-abrasive sponge and rinse thoroughly. For stubborn rings, let a paste sit for a few minutes before cleaning. With these quick, eco-friendly methods, your mugs will stay bright and inviting. Don’t let stains keep you from enjoying your morning brew—restore your mug’s shine today